
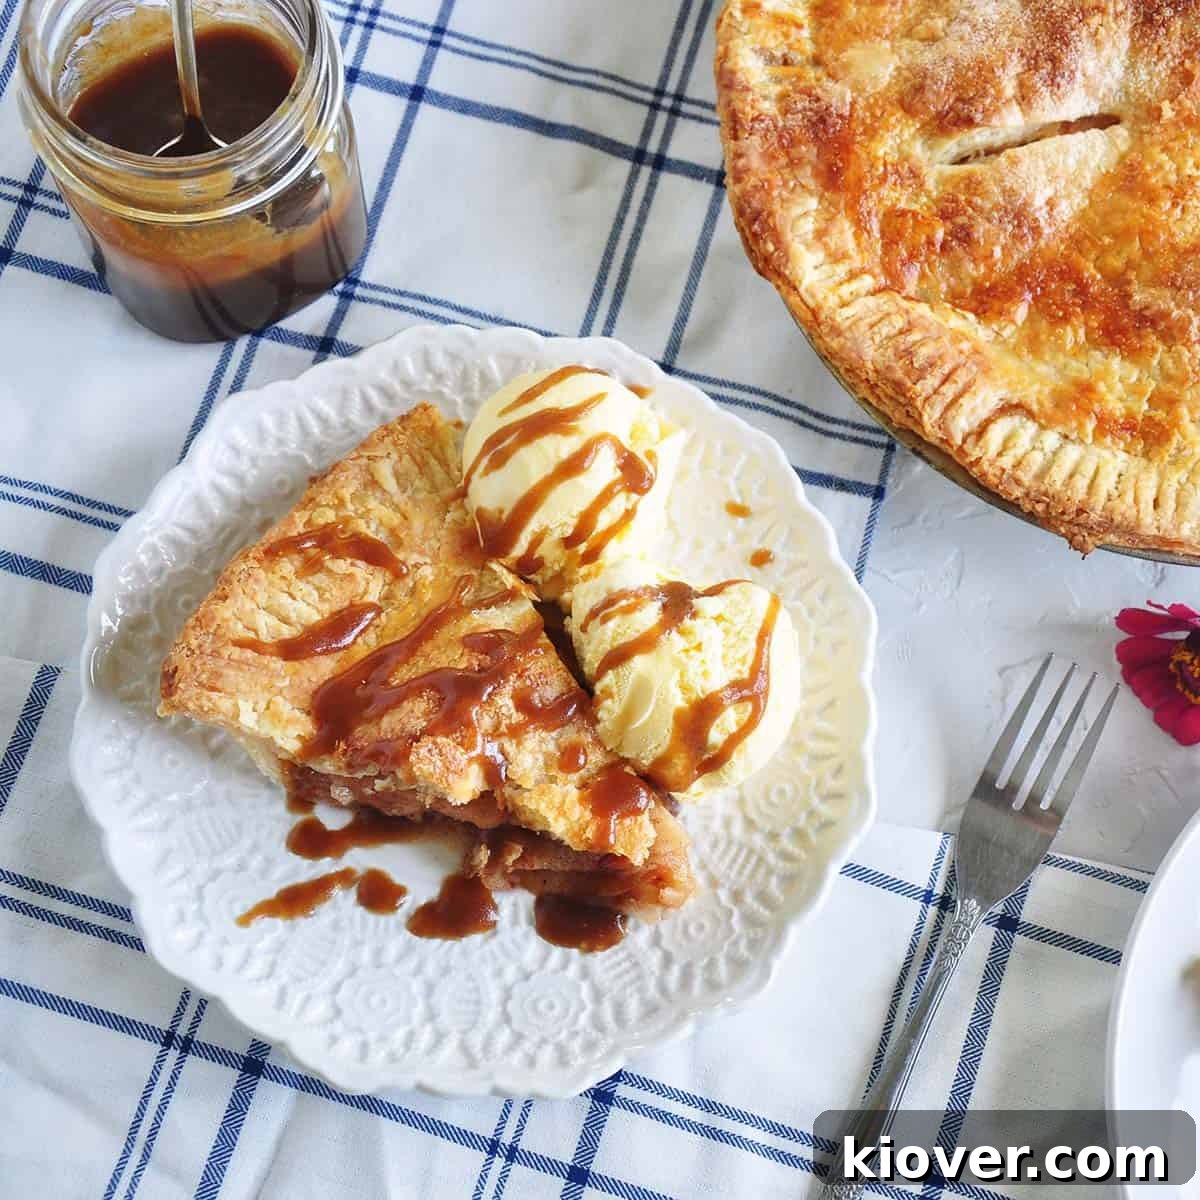
There are few desserts as universally beloved and quintessentially American as a classic apple pie. This All-American Apple Pie recipe isn’t just about tradition; it’s about elevating that comfort to new heights with a luxurious, homemade caramel sauce. Imagine the warm, spiced apples nestled in a flaky, golden crust, crowned with a rich, buttery caramel that cascades over every slice. This isn’t just a dessert; it’s an experience, a celebration of flavor and texture that brings smiles to every face. It’s the perfect sweet ending for any meal, from a casual family dinner to a festive holiday gathering. Get ready to bake a truly unforgettable apple pie that will have everyone asking for seconds.
🍎 What Makes This Apple Pie Recipe So Special?
When you hear “America” and “Apple Pie,” you think of comfort, tradition, and pure deliciousness. Our mission today is to guide you through crafting what we genuinely believe will be the best American Apple Pie you’ve ever baked, or even tasted. What sets this particular recipe apart from others? It’s a combination of time-honored techniques and a special touch that transforms a good pie into an extraordinary one: our simple, yet absolutely divine, caramel sauce.
While many apple pie recipes focus solely on the filling and crust, we emphasize the complete dessert experience. The perfect balance of sweet and tart apples, a hint of warming spices, and a golden, flaky crust lay the foundation. But it’s the addition of that rich, gooey caramel sauce that truly elevates this pie into a culinary masterpiece. It adds another layer of sweetness and a depth of flavor that complements the apples beautifully, making each bite an indulgent delight.
This recipe provides comprehensive, easy-to-follow steps to create a truly fantastic homemade apple pie. Whether you prefer the convenience of store-bought pie crusts or wish to embark on the rewarding journey of making your own, this recipe is adaptable. For those seeking to truly “level up” their baking, we highly recommend trying it with a homemade pie crust. A flaky butter pie crust adds an unparalleled richness and texture that perfectly cradles the flavorful apple filling.
This versatile pie is ideal for any occasion. Planning your Thanksgiving dessert menu? This All-American Apple Pie will be the star of the show. Craving a comforting treat on a quiet Sunday afternoon? Look no further. It’s also a wonderful alternative to other fruit pies like our vibrant blueberry pie or the equally delicious Dutch apple pie, offering a classic taste that never goes out of style. And let’s not forget the ultimate accompaniment: a scoop of creamy homemade vanilla ice cream. No matter the dessert, remember to treat yourself to something truly special. This apple pie with caramel sauce is that special treat.
Table of Contents
- 🍎 What Makes This Apple Pie Recipe So Special?
- 🍏 Key Ingredients for the Perfect Apple Pie
- 🥧 Step-by-Step Baking Instructions
- 🍯 Serving and Caramel Sauce Perfection
- ✨ Substitutions and Variations for Your Apple Pie
- ❄️ Storage Tips for Lasting Freshness
- 📜 The Rich History of American Apple Pie
- ❓ Frequently Asked Questions About Apple Pie
- 💡 Expert Tips and Tricks for a Flawless Pie
- 🛍️ Recommended Products for Baking Success
- 🌟 Share Your Apple Pie Creation!
- All American Apple Pie Recipe With Caramel Sauce
🍏 Key Ingredients for the Perfect Apple Pie
Crafting an exceptional apple pie begins with selecting the right ingredients. While we often recommend making your own pie crust for the ultimate flavor and texture, this recipe is designed to be flexible, allowing you to use either a meticulously homemade crust or high-quality store-bought alternatives. Below is a comprehensive list of what you’ll need to create this delightful dessert, along with insights into choosing the best components.
- Pie Crusts: You’ll need two 9-inch pie crusts, either homemade or store-bought. A good crust is the foundation of any great pie, providing that satisfying flakiness and buttery flavor. If opting for homemade, consider a butter-based crust for superior taste and texture.
- Apples: The true star of the show. We recommend 5 medium-sized Braeburn apples for their ideal balance of sweetness, tartness, and firm texture that holds up beautifully during baking. More on apple selection below.
- All-Purpose Flour: Essential for thickening the apple filling, ensuring it’s luscious and not watery. It also helps to bind the other ingredients.
- Granulated Sugar: To sweeten the apples and balance their tartness. The amount can be adjusted slightly based on the sweetness of your chosen apples and your personal preference.
- Cinnamon: A classic pairing with apples, providing warmth and aromatic spice that defines apple pie.
- Nutmeg: A subtle hint of nutmeg enhances the cinnamon, adding depth and complexity to the spice profile.
- Unsalted Butter: Cubed butter pieces dotted over the filling add richness, moisture, and help create that bubbly, flavorful interior.
- Egg: For an egg wash, beaten to brush over the top crust, giving it a beautiful golden-brown color and a lovely sheen.
- Extra Granulated Sugar (for topping): A final sprinkle of sugar on the crust before baking creates a delightful sparkly, crunchy finish.
Each ingredient plays a crucial role in the overall success of your apple pie. Pay attention to the quality of your apples, as they will define the pie’s character. For precise measurements, please refer to the detailed recipe card at the end of this article.
🥧 Step-by-Step Baking Instructions
The filling is undoubtedly the heart and soul of this recipe. Assuming you have your pie crusts prepared and ready – whether they are the result of your diligent homemade efforts or a convenient store-bought option – we can now focus on the remarkably easy and incredibly flavorful filling. Preparing the filling is, fortunately, one of the simplest and most rewarding parts of making a pie.
Choosing and Preparing Your Apples
The selection and preparation of your apples are paramount. Thinly slicing the apples is crucial; it ensures they cook evenly and become tender without turning to mush, allowing for a consistent bake of the filling. When it comes to apple varieties, I firmly believe that Granny Smith and Braeburn are among the best widely available options for apple pie. Both possess a desirable crispness that holds up well under the heat of baking, preventing a soggy, indistinct filling.
Granny Smith apples, while excellent for pie, are known for their distinct tartness. This tartness, however, is perfectly complemented by the generous amount of sugar we incorporate into the filling. Braeburn apples offer a wonderful balance, providing a good level of sweetness alongside their crisp texture. For this particular recipe, I chose Braeburn for its balanced profile, but either variety would yield a delicious result. If you’re feeling adventurous, a combination of both Granny Smith for tartness and Braeburn for sweetness and firmness can create an even more complex and delightful flavor profile. Don’t be afraid to experiment!
Assembling Your Pie
Once your apples are chosen and thinly sliced, the assembly process is straightforward:
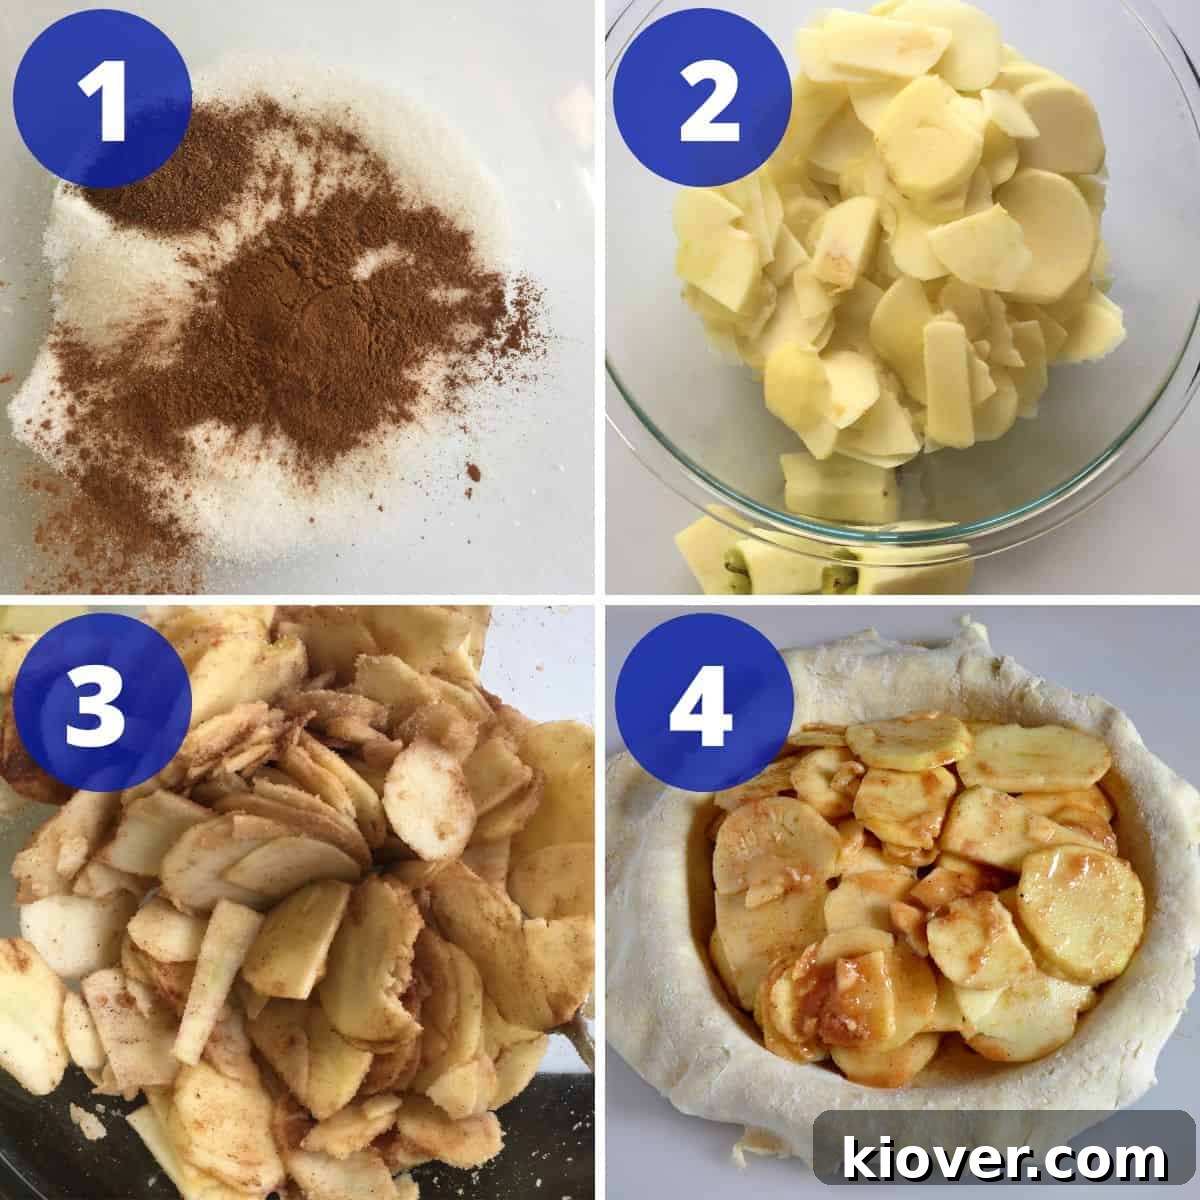
- Prepare the Apples: Start by peeling and finely slicing approximately 5 medium to large apples. Aim for uniform slices, about ⅛ to ¼ inch thick, to ensure even cooking.
- Mix the Filling: In a large mixing bowl, combine the sliced apples with the granulated sugar, all-purpose flour, ground cinnamon, and ground nutmeg. Toss gently until the apples are thoroughly coated with the spice and sugar mixture. The flour helps to thicken the juices released by the apples during baking, preventing a watery pie.
- Prepare the Pie Crust: Carefully place one of your pie crusts into the bottom of a standard 9-inch pie tin. Gently press it against the bottom and sides, ensuring it fits snugly without tearing.
- Add the Filling: Spoon the apple mixture evenly into the prepared pie crust, mounding it slightly in the center.
- Dot with Butter: Distribute the cubed butter pieces over the top of the apple filling. This butter will melt during baking, adding richness and a beautiful sheen to the cooked apples.
- Add the Top Crust: Carefully place the second pie crust over the filling. If you’re using a lattice top, now is the time to weave it.
- Seal the Pie: Use your fingers to gently pinch the edges of the top and bottom crusts together.
- Trim and Crimp: Trim any excess dough from around the edges, leaving about ½ inch overhang. Remember that dough can shrink a bit during baking, so a generous overhang is beneficial for a beautiful crust lip. Then, use a fork or your fingers to crimp the two doughs together, creating a decorative and secure seal.
- Vent the Pie: Using a sharp knife, make four small slits in the top crust. These vents are essential for allowing steam to escape during baking, preventing the crust from puffing up or cracking excessively.
The Final Touches Before Baking
You’ve masterfully rolled out your perfect pie crust, filled it with fragrant apples, and sealed your pie with a beautiful crimped edge. You’ve also remembered to add those crucial slices atop your crust for air to escape, ensuring a beautifully baked pie. But we’re not quite done with the preparation!
Egg Wash for a Golden Glow: Before your pie goes into the oven, brush a light, even coating of beaten egg over the entire top crust. This simple step is vital for achieving that desirable deep, golden-brown color and a lovely, slightly glossy finish. I also find it contributes a subtle crispness to the crust’s texture, making it even more appealing. Immediately after applying the egg wash, sprinkle a bit of granulated sugar evenly over the top. This creates a sparkling, slightly caramelized crust that adds an extra layer of sweetness and crunch.
Crust Protection: To prevent the edges of your pie crust from browning too quickly or burning during the initial phase of baking, loosely wrap the crust edges with aluminum foil. This technique acts as a barrier, shielding the delicate edges from direct heat. While specialized crust guards are available for purchase, a simple strip of aluminum foil works just as effectively and is a common household item. Apply the foil shield for the first 35 minutes of baking at 425°F (220°C). I typically remove the foil during the last 5-10 minutes of baking, allowing the edges to catch up in color and achieve a perfect golden hue.
🍯 Serving and Caramel Sauce Perfection
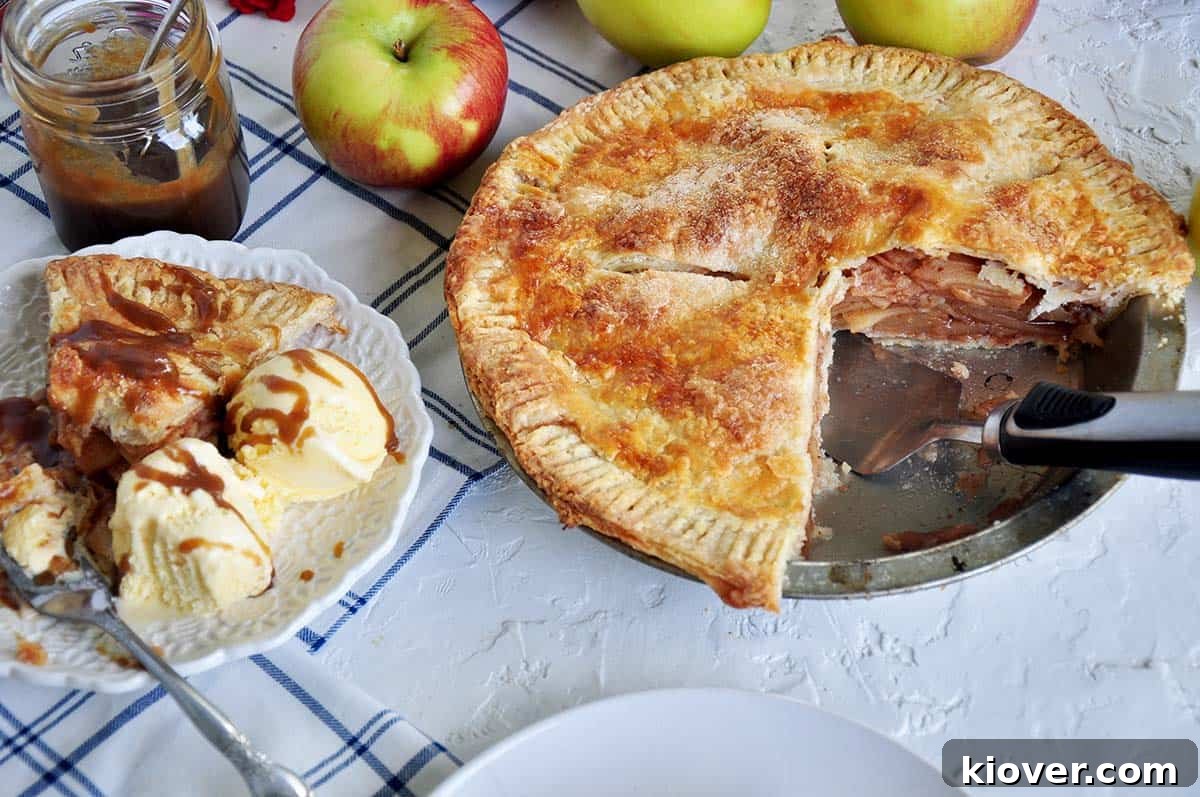
Once your beautifully baked pie emerges from the oven, its aroma filling your kitchen with an irresistible fragrance, the hardest part begins: waiting! Place the hot pie on a wire rack to cool. It is absolutely critical to let your American Apple Pie rest for at least 2 hours, though allowing it to cool even longer, ideally to room temperature, is preferential. This resting period is not just for cooling; it allows the filling to properly set, preventing a runny pie when sliced and ensuring each piece holds its shape perfectly. Let that perfect American Apple Pie rest, solidify, and fill your house with the awesome smells of a truly nummy pie.
Now, for the glorious grand finale: the caramel sauce. While our apple pie is undeniably delicious on its own, adding a decadent caramel sauce elevates it to an entirely new level of indulgence. You might think, “Do we really need more sugar?” And the answer, when it comes to this pairing, is a resounding yes! The rich, buttery sweetness of the caramel beautifully complements the spiced apples and flaky crust.
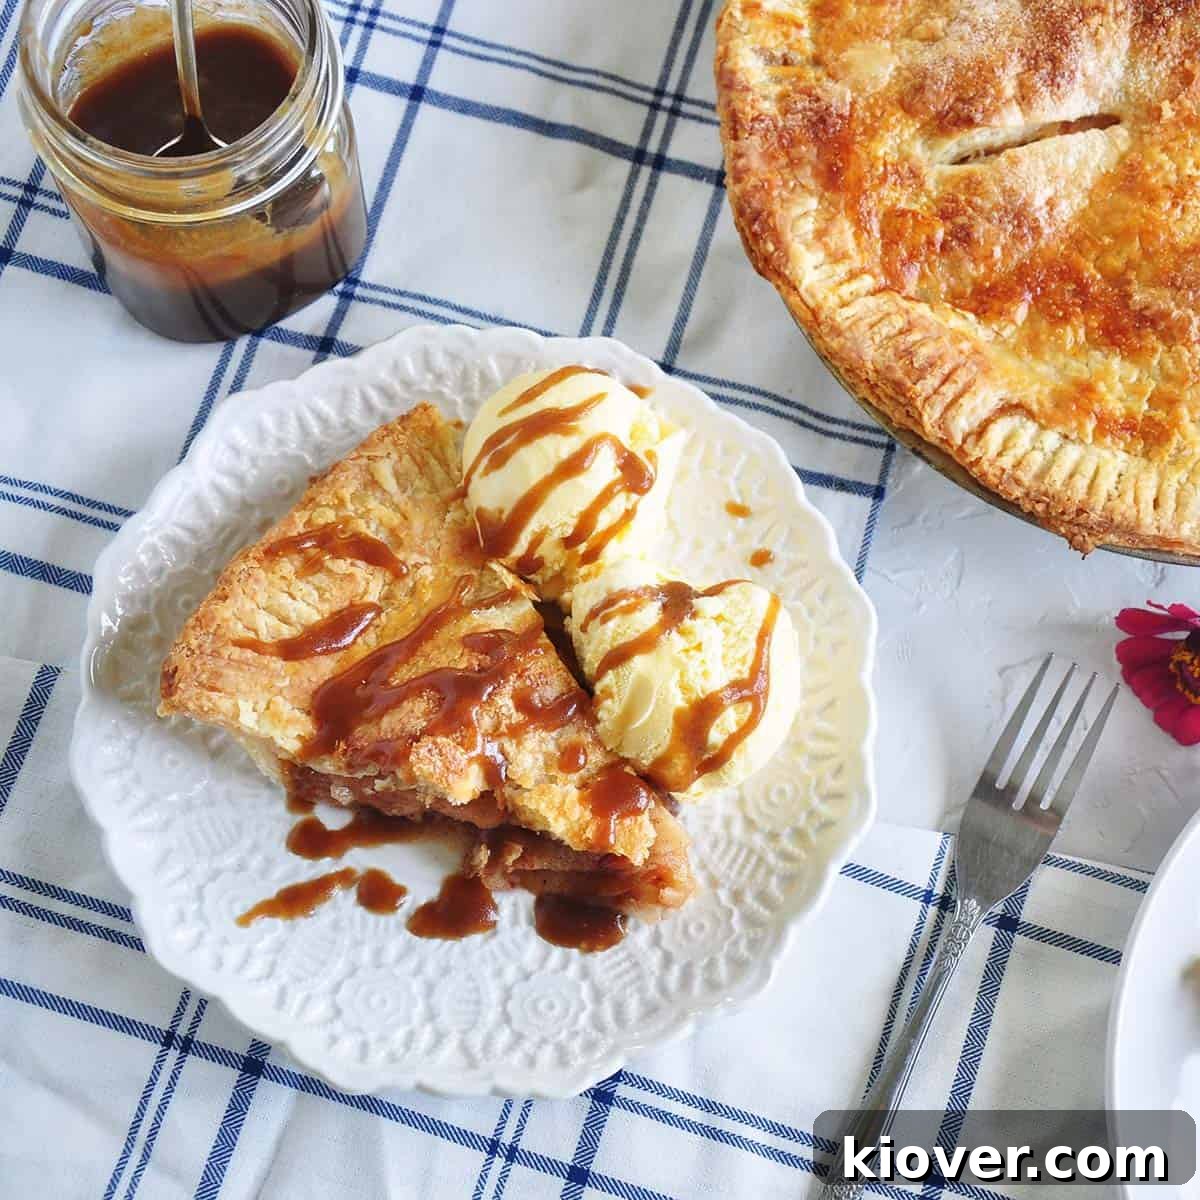
For convenience and incredible flavor, we highly recommend making a half batch of Pioneer Woman’s Easy Caramel Sauce. This recipe is simple to follow and yields a caramel that is absolutely divine over this apple pie. Drizzle generously over warm slices of pie, and for the ultimate experience, serve it alongside a generous scoop of creamy vanilla ice cream. The combination of warm pie, cold ice cream, and luscious caramel creates a symphony of temperatures, textures, and flavors that is truly unforgettable.
✨ Substitutions and Variations for Your Apple Pie
While this recipe provides a blueprint for a fantastic All-American Apple Pie, don’t hesitate to personalize it! Baking is an art, and making a recipe your own is part of the joy. Here are a few different ways you can adapt this recipe to suit your preferences and palate:
- Apple Varieties: We suggest Braeburn apples for their excellent balance of sweetness, tartness, and firm texture. However, the world of apples is vast! Feel free to experiment with other pie-friendly varieties such as Granny Smith (for a tarter pie), Honeycrisp (crisp and sweet), Fuji (sweet and firm), Gala (mildly sweet), or Rome Beauty (holds shape well). A combination of two or three different apple types can add wonderful complexity to the filling’s flavor and texture. For example, mixing tart Granny Smiths with sweet Honeycrisps creates a dynamic taste.
- Pie Crust Options: Our recipe yields fantastic results with a homemade butter pie crust, which offers unparalleled flakiness and rich flavor. However, if time is a constraint, a good quality purchased pie crust works perfectly fine. For a slightly different twist, consider a crumb topping (Dutch apple pie style) instead of a full top crust, or a beautiful lattice top for visual appeal and extra crunch. You can even try a puff pastry top for a lighter, more delicate crust.
- Spice Blend: While cinnamon and nutmeg are the classic apple pie spices, you can adjust them or add others. A pinch of allspice, ground cloves, or even a tiny amount of ginger can add extra warmth and aroma. Adjust quantities to your liking, but start with small additions.
- Sweetener Adjustments: The amount of sugar can be varied based on the natural sweetness of your chosen apples and your personal taste. If using very tart apples like Granny Smiths exclusively, you might increase the sugar slightly. Conversely, if your apples are very sweet, you might reduce it.
- Thickeners: While all-purpose flour works well as a thickener, you can also use cornstarch or tapioca starch (instant tapioca). Cornstarch tends to give a clearer, glossier filling, while tapioca creates a slightly fruitier, more gel-like texture.
- Citrus Boost: A squeeze of lemon juice (about 1-2 tablespoons) tossed with the apples can brighten the flavors and prevent browning, especially if you’re preparing the filling in advance.
- Extra Flavor: Consider adding a tablespoon of brandy, rum, or bourbon to the apple filling for an adult twist and an extra layer of warmth.
Don’t be afraid to experiment with these variations to truly make this apple pie recipe your signature dish!
❄️ Storage Tips for Lasting Freshness
Proper storage is key to enjoying your homemade apple pie for as long as possible. Follow these guidelines to maintain its deliciousness and freshness:
- Room Temperature: A freshly baked apple pie can typically be left at room temperature for up to 2 days, especially if it contains mostly sugar and fruit (low moisture content). Ensure it’s covered loosely with foil or plastic wrap to protect it from drying out or absorbing odors.
- Refrigeration: For longer storage, or if your kitchen is particularly warm, transfer the apple pie to the refrigerator. Wrap it tightly in plastic wrap or aluminum foil. Stored in the fridge, your apple pie will remain fresh and delicious for 3-5 days. While refrigeration can sometimes slightly alter the texture of the crust (making it less crisp), it’s the safest option for extended keeping.
- Freezing: Apple pie freezes exceptionally well, making it a perfect make-ahead dessert!
- To Freeze a Whole Baked Pie: Allow the pie to cool completely to room temperature. Wrap it tightly in several layers of plastic wrap, then an additional layer of aluminum foil. This double wrapping helps prevent freezer burn. Label with the date. It can be frozen for up to 3-4 months.
- To Freeze Unbaked Pie: Assemble the pie completely, but do not egg wash or bake. Wrap it very tightly in plastic wrap and then foil. Freeze for up to 2-3 months. When ready to bake, thaw overnight in the refrigerator, then proceed with the egg wash and baking instructions, adding about 15-20 minutes to the baking time.
- Thawing and Reheating:
- Thawed from frozen: If frozen and then thawed, you can enjoy it at room temperature, or reheat for a warm pie.
- Reheating Baked Pie: For best results, reheat slices or the whole pie in an oven or toaster oven at 350°F (175°C) until warmed through and the crust regains some crispness. This usually takes about 15-25 minutes for a whole pie or 10-15 minutes for a slice. Avoid microwaving if possible, as it can make the crust soggy.
Remember that the caramel sauce should be stored separately in an airtight container in the refrigerator and warmed gently before serving over slices of pie.
📜 The Rich History of American Apple Pie
While often declared “as American as apple pie,” the truth is that apple pie, in its earliest forms, actually originated in Europe long before the United States was founded. The concept of baking fruit in a pastry shell can be traced back to medieval England, where pies were more about holding the filling than being eaten as a delicate dessert. These early versions often contained meat and were less sweet, with the crust serving as a storage vessel.
Apples themselves are not native to North America, with the only indigenous apple being the crab apple, which is quite different from the dessert apples we know today. The sweet, culinary apples used in pies were brought to the continent by European settlers, primarily from England. As the colonies developed, apples became a staple crop, not just for eating but also for making cider and preserves. Pioneer families often grew their own apple trees, making apples readily available.
The phrase “as American as apple pie” gained popularity in the early 20th century, particularly during World War I, when American soldiers proudly declared they were fighting “for mom and apple pie.” This sentiment cemented apple pie’s status as a symbol of American values, home, and prosperity. It became synonymous with comfort food and traditional American cuisine, especially as sugar became more accessible and baking techniques evolved.
Over the decades, countless variations of apple pie have emerged across different regions of the United States, reflecting local produce and culinary traditions. From deep-dish to crumb-top, with various spice blends and apple combinations, the apple pie has truly become a canvas for American creativity in the kitchen. Today, it remains a beloved dessert, representing not just a dish, but a cherished part of the American cultural identity, enjoyed at family gatherings, holidays, and simple weeknight dinners.
❓ Frequently Asked Questions About Apple Pie
For the best apple pie, you need apples that will hold their shape during baking and offer a good balance of sweetness and tartness. Braeburn apples are a fantastic choice, providing both great flavor and firmness. Other excellent options include Granny Smith (for tartness), Honeycrisp (crisp and sweet), Fuji, Gala, and Rome Beauty. Often, a blend of two or three varieties can create a more complex and balanced flavor profile.
No, for most traditional apple pie recipes, you do not need to pre-cook the apples. Adding them fresh ensures the best texture, allowing them to soften slightly while retaining some bite during baking. Pre-cooking can lead to an overly mushy filling. However, slicing them thinly (about ⅛ to ¼ inch) is crucial for even cooking.
A soggy bottom crust is a common pie problem, but it’s preventable! Here are a few tips: 1) Use a good quality, firm pie dough. 2) Blind bake your bottom crust: Partially bake the bottom crust alone before adding the filling. This creates a barrier against moisture. 3) Add a thin layer of dry breadcrumbs, crushed cornflakes, or even finely ground nuts to the bottom crust before adding the apple filling to absorb excess moisture. 4) Ensure your oven is properly preheated to a high temperature, as a hot oven quickly sets the crust.
Your apple pie is typically done when the crust is beautifully golden brown, and the filling is bubbling thickly through the vents. To be absolutely sure, you can gently insert a thin, sharp knife or a skewer into one of the vent holes; if it goes in with minimal resistance, the apples are tender. The internal temperature of the filling should also reach around 200-205°F (93-96°C).
While fresh apples are preferred for their texture, you can use frozen apples. If using frozen, do not thaw them completely before mixing with the other filling ingredients, as they will release too much water. Add them to the filling while still partially frozen, and be prepared for a slightly longer baking time and potentially a softer texture in the finished pie. You may also need to increase the amount of thickener slightly.
💡 Expert Tips and Tricks for a Flawless Pie
Achieving a perfect apple pie involves a few key techniques and considerations. These tips and tricks, gleaned from years of baking experience, will help you avoid common pitfalls and ensure your pie turns out beautifully every time:
- Be Generous with the Crust Overhang: When you’re trimming your pie dough, resist the urge to trim too close to the pie plate. Dough tends to shrink a bit during baking, which can result in a crust that pulls away from the edge or an unsightly gap. Leaving a slightly more generous overhang (about ½ to ¾ inch) will give you plenty of room to crimp and create a beautiful, full lip that stays intact.
- Protect Your Crust Edges: The edges of pie crusts are particularly susceptible to over-browning or burning because they are thinner and more exposed than the center. To prevent this, loosely wrap the crust edges with strips of aluminum foil for the first 35-40 minutes of baking. While specialized pie crust shields are available, plain aluminum foil works perfectly and is often more flexible. Remove the foil for the final 5-10 minutes of baking to allow the edges to achieve a beautiful golden-brown color.
- Prioritize Resting Time: This might be the most challenging tip for eager bakers, but it’s absolutely crucial: let your pie rest for a significant amount of time after baking. A minimum of 2 hours is essential, but letting it cool completely to room temperature (3-4 hours or even overnight) is ideal. During this resting period, the hot, liquid filling cools and thickens, allowing the pie to set properly. Slicing into a hot pie will almost always result in a runny, messy filling. Patience is truly a virtue when it comes to pie!
- Slice Apples Uniformly: Consistency in apple slice thickness (around ⅛ to ¼ inch) ensures that all the apples cook evenly. Irregular slices can lead to some apples being mushy while others are still firm.
- Avoid a Soggy Bottom: If you’re prone to soggy bottom crusts, consider blind baking your bottom crust for about 10-15 minutes before adding the filling. You can also sprinkle a thin layer of fine breadcrumbs or crushed cornflakes on the bottom crust before adding the apples to absorb excess moisture.
- Ventilation is Key: Don’t skip making those slits in the top crust. They allow steam to escape, which prevents the top crust from puffing up excessively and helps to ensure the apples cook properly.
- Know Your Oven: Every oven is different. Keep an eye on your pie, especially towards the end of the baking time. If you notice the crust browning too quickly, even with foil, you might need to slightly reduce your oven temperature or move the pie to a lower rack.
By following these expert tips, you’ll be well on your way to baking a truly exceptional All-American Apple Pie that’s perfectly crisp, beautifully golden, and bursting with flavor.
🛍️ Recommended Products for Baking Success
Having the right tools can make all the difference in your baking experience. While many kitchen staples will suffice, a few specific items can elevate your pie-making process. Here are some products that we find particularly useful for this All-American Apple Pie recipe:
- 9-inch Pie Pan: A sturdy, reliable pie pan is essential. Ceramic, glass, or metal pie pans all work well, but many bakers prefer glass for even heat distribution and the ability to see when the bottom crust is perfectly browned.
- Mixing Bowls: A set of good quality mixing bowls in various sizes is indispensable for combining ingredients, especially for the apple filling and egg wash.
- Apple Peeler, Corer, Slicer: While a sharp knife and a steady hand work perfectly fine, a specialized apple peeler, corer, and slicer can significantly speed up the apple preparation process, ensuring uniform slices and saving you valuable time.
- Pastry Blender or Food Processor (for homemade crusts): If you choose to make your own pie crust, a pastry blender or a food processor is invaluable for cutting cold butter into the flour, which is key to a flaky crust.
- Rolling Pin: A good quality rolling pin is essential for rolling out your pie dough to an even thickness.
- Pastry Brush: For applying the egg wash evenly over the top crust, a silicone or natural bristle pastry brush is very helpful.
- Wire Cooling Rack: Crucial for allowing your freshly baked pie to cool evenly and prevent a soggy bottom crust.
Investing in these basic tools will not only make baking this apple pie easier but will also enhance your overall baking endeavors. Happy baking!
🌟 Share Your Apple Pie Creation!
We are absolutely thrilled that you decided to give this All-American Apple Pie recipe a try! There’s nothing more rewarding than seeing our recipes come to life in your kitchen. Your feedback and creations mean the world to us and help our community of home bakers.
If you made this delicious pie, please consider leaving a rating and sharing your experience in the comment section below. Your ratings let us know how we’re doing and provide valuable insights for other aspiring bakers deciding whether to embark on this culinary journey. Did you use a homemade crust? Did you try a different apple variety? We’d love to hear all about it!
Also, don’t forget to sign up for our newsletter to receive updates, new recipes, and more baking inspiration directly to your inbox. And if you loved this recipe as much as we do, please share it with your friends and family on Pinterest! Tag us in your photos – we love seeing your beautiful creations.
Most of all, thank you for visiting Ramshackle Pantry. Your support makes it all possible. Happy baking, and we look forward to hearing from you!
Print

All American Apple Pie Recipe With Caramel Sauce
5 from 1 review
- Author: Ben Myhre
- Prep Time: 30 minutes
- Cooling time: 2 hours
- Cook Time: 50 minutes
- Total Time: 3 hours 20 minutes
- Yield: 6 slices
- Category: Dessert
- Method: Baking
- Cuisine: American
Description
This All-American Apple Pie features a remarkably flaky crust, a perfectly spiced apple filling, and is crowned with a decadent homemade caramel sauce. It’s the quintessential American dessert, perfect for any occasion. Treat yourself and your loved ones to this ultimate apple pie experience today.
Ingredients
Units
Scale
- 2 pre-made pie crusts (makes one whole pie)
- 5 Medium Braeburn Apples, peeled, cored, and thinly sliced
- ⅔ cups granulated sugar
- ¼ cup all-purpose flour
- 1 teaspoon ground cinnamon
- 1 teaspoon ground nutmeg
- 2 tablespoons unsalted butter, cubed
- 1 large egg, beaten (for egg wash)
- 1 teaspoon granulated sugar (for sprinkling)
- Optional: Half batch of Easy Caramel Sauce (e.g., Pioneer Woman’s recipe)
Instructions
- Prepare Apples: Peel, core, and thinly slice 5 medium to large apples. Aim for uniform slices, about ⅛ to ¼ inch thick.
- Mix Filling: In a large bowl, combine the sliced apples with ⅔ cup sugar, ¼ cup flour, 1 teaspoon cinnamon, and 1 teaspoon nutmeg. Toss until apples are evenly coated.
- Preheat Oven: Preheat your oven to 425° Fahrenheit (220°C).
- Bottom Crust: Carefully place one pie crust into the bottom of a 9-inch pie tin, pressing gently to fit the contours.
- Add Filling: Spoon the apple filling mixture evenly into the prepared pie crust, mounding it slightly in the center.
- Add Butter: Dot the top of the apple filling with the 2 tablespoons of cubed butter.
- Top Crust: Place the second pie crust over the filling.
- Seal Edges: Use your fingers to gently pinch the edges of the top and bottom crusts together to seal.
- Trim Dough: Trim any excess dough around the rim, leaving about a ½ inch overhang. The crust will shrink slightly during baking, so a little extra helps.
- Crimp Crust: Using a fork or your fingers, crimp the sealed edges to create a decorative and secure border.
- Egg Wash: Brush a light coating of beaten egg over the entire top crust. This will give it a beautiful golden sheen.
- Sprinkle Sugar: Sprinkle 1 teaspoon of granulated sugar evenly over the egg-washed crust.
- Vent Pie: Using a sharp knife, make four small slits in the top crust to allow steam to escape during baking.
- Protect Crust: Loosely wrap the crust edges with aluminum foil to help prevent them from over-browning.
- Initial Bake: Place the pie in the preheated oven and bake for 35 minutes.
- Remove Foil: Carefully remove the aluminum foil from the crust edges.
- Continue Baking: Reduce the oven temperature to 375° Fahrenheit (190°C) and continue baking for another 15-20 minutes, or until the crust is golden brown and the filling is bubbly and tender (check by inserting a thin knife into a vent slit). Total baking time will be approximately 50-55 minutes.
- Cool Completely: Remove the pie from the oven and place it on a wire rack to cool for at least 2 hours. Longer cooling to room temperature is preferred for the filling to fully set.
- Serve: Slice and serve warm or at room temperature. Drizzle generously with homemade caramel sauce and a scoop of vanilla ice cream, if desired.
Notes
- When trimming your pie dough, leave a generous overhang of about ½ to ¾ inch. The dough can shrink a bit during baking, and this extra margin helps maintain a beautiful, full crust edge.
- To prevent the edges of your pie crust from burning, loosely wrap them with strips of aluminum foil for the first 35-40 minutes of baking. Remove the foil for the last 5-10 minutes to allow the edges to brown perfectly.
- Patience is key! Allow your pie to rest for at least 2 hours after baking. This crucial cooling time allows the filling to properly set, ensuring clean, firm slices and a perfect texture.