
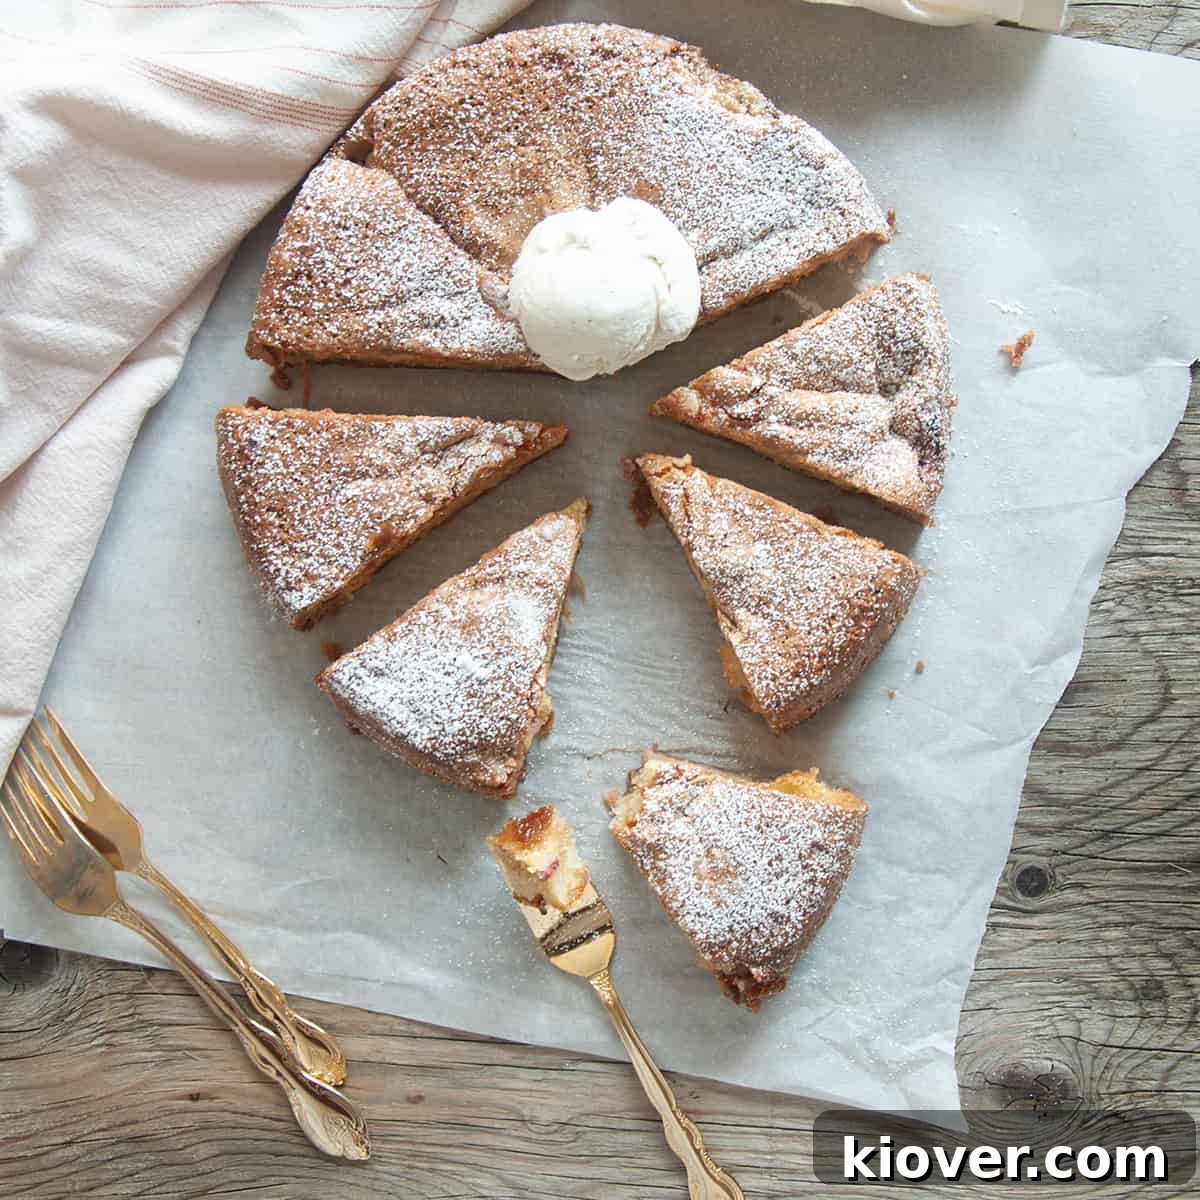
Discover the Delight of Norwegian Rhubarb Cake (Rabarbrakake)
As spring awakens in the upper Midwest, a beloved garden staple begins to emerge: rhubarb. For many, the sight of its vibrant red stalks signals the start of rhubarb season—and, perhaps more excitingly, rhubarb dessert season! Among the many cherished recipes featuring this versatile ingredient, the traditional Norwegian Rhubarb Cake, known locally as Rabarbrakake, stands out as a true culinary gem. This delightful treat offers a perfect balance of sweet and tangy flavors, making it an ideal dessert for any occasion and a wonderful way to celebrate the bounty of spring.
This simple yet incredibly flavorful cake is more than just a dessert; it’s a testament to heritage and the joy of seasonal baking. Each moist bite delivers a burst of fresh rhubarb, perfectly complemented by a sweet cake base that ensures the tartness is just right. Preparing our Rabarbrakake is straightforward, making it accessible even for novice bakers. What truly sets this cake apart is its harmonious blend of exquisite taste, the freshness of seasonal rhubarb, and the opportunity to connect with a timeless Norwegian culinary tradition. This recipe transforms humble rhubarb into an extraordinary dessert, inviting everyone around the globe to savor its unique charm.
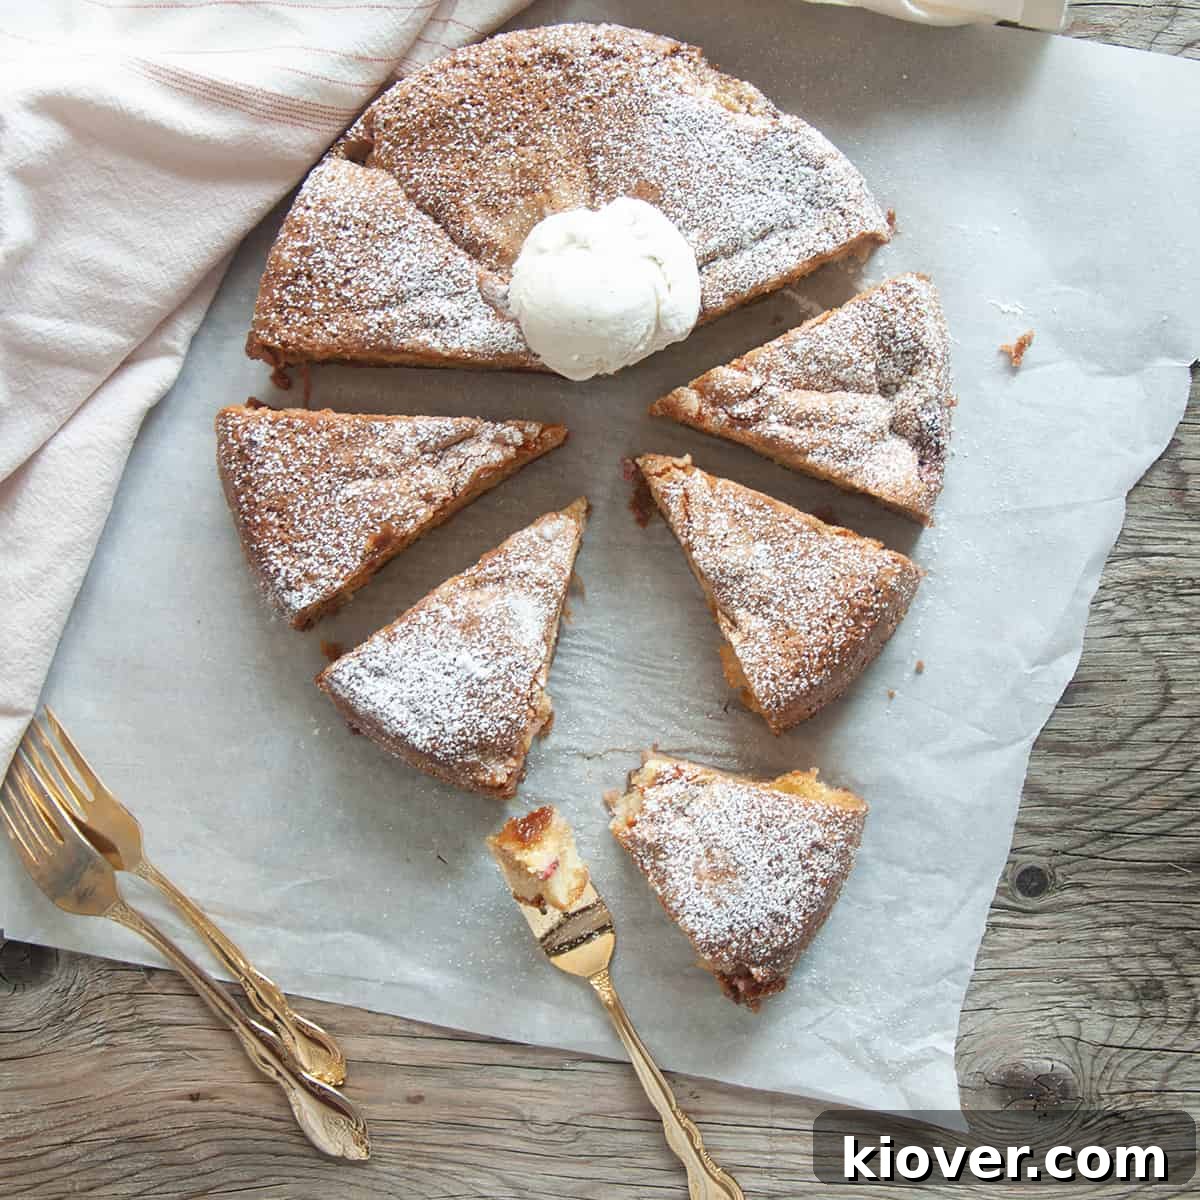
Imagine serving this exquisite Rabarbrakake at a spring cookout, perfectly paired with savory main courses such as Grilled Bacon Wrapped Shrimp, Grilled Chicken Legs with Yogurt Mint Marinade, or BBQ Spatchcock Grilled Chicken. Its refreshing tang and comforting sweetness provide a delightful contrast to smoky, grilled flavors. If you’re exploring other ways to enjoy rhubarb, our perfect Rhubarb Pie recipe is another fantastic option. No matter how you choose to prepare it, ensure you treat yourself to the incredible taste of this seasonal favorite!
Table of Contents
- 🍰 Key Ingredients for Norwegian Rhubarb Cake
- 🍲 Step-by-Step Baking Instructions
- 🤷 Substitutions and Variations to Customize Your Cake
- 📦 How to Store Your Rabarbrakake
- 🎓 The Fascinating History of Rhubarb in Norway
- ❓ Frequently Asked Questions About Rhubarb Cake
- 📝 Expert Tips and Tricks for a Perfect Cake
- 🛠 Recommended Products for This Recipe
- 😋 Did You Make This Norwegian Rhubarb Cake?
- Norwegian Rhubarb Cake Recipe Card
🍰 Key Ingredients for Norwegian Rhubarb Cake
While fresh rhubarb is undeniably the star of this delectable cake, a carefully selected array of other ingredients works in concert to create its rich texture and irresistible flavor. Here’s a comprehensive list of what you’ll need to gather to bring this Rabarbrakake to life:
- Sugar: Provides the essential sweetness to balance rhubarb’s tartness and contributes to the cake’s moist texture.
- Eggs: Crucial for structure, binding, and leavening. Separating them allows for whipped egg whites, which introduce air and a tender crumb.
- Vegetable Oil or Neutral Oil: Adds moisture and richness without imparting a strong flavor, keeping the focus on the rhubarb.
- Milk: Contributes to the overall liquid content, ensuring a soft and tender cake crumb. Whole milk is recommended for richer results.
- Rhubarb: The star ingredient, offering its distinctive tangy flavor and beautiful color. Freshly chopped stalks are best.
- Baking Powder: A leavening agent that helps the cake rise and achieve a light, airy texture.
- Salt: Enhances all the other flavors in the cake, bringing out the sweetness and tang.
- All-Purpose Flour: Forms the structural foundation of the cake, providing body and texture.
- Shortening: Used to prepare the cake pan, ensuring easy release and preventing sticking.
- Butter: Dotted on top of the cake before baking, it creates a rich, caramelized crust and infuses flavor.
- Powdered Sugar (optional): A lovely finishing touch for dusting the cooled cake, adding a delicate sweetness and elegant appearance.
For precise measurements and detailed quantities, please refer to the recipe card provided below.
🍲 Step-by-Step Baking Instructions
Baking this Norwegian Rhubarb Cake is a rewarding experience, yielding a dessert that’s both comforting and elegant. The process, while simple, involves a few key steps to ensure a perfect result:
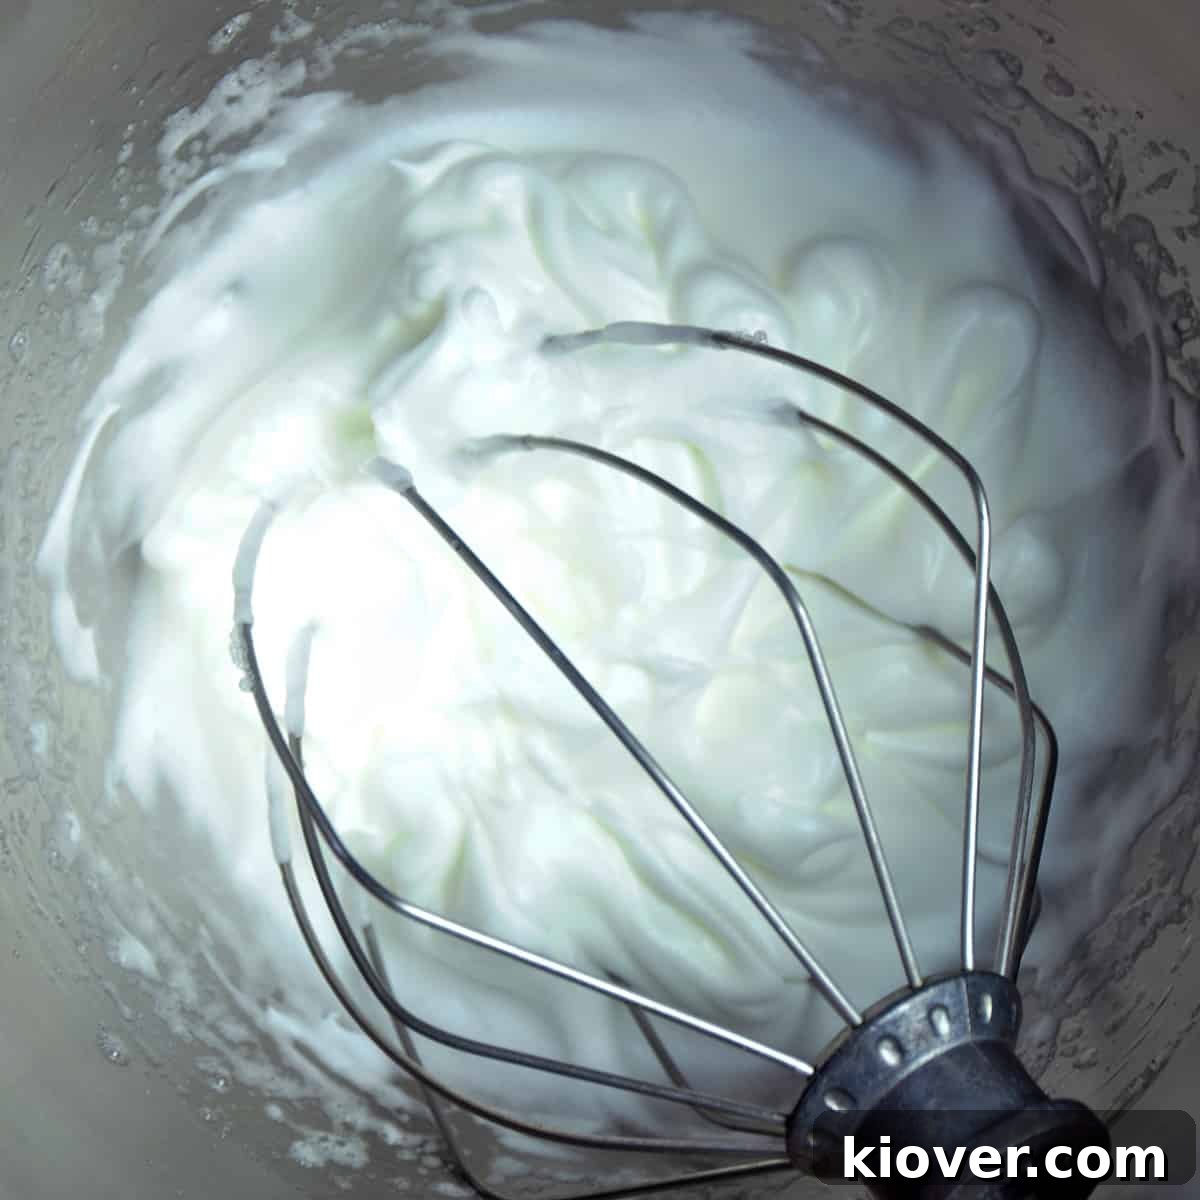
Our journey begins with whipping the egg whites. This crucial step is not just about adding volume; it incorporates air into the batter, which is essential for giving our cake its characteristic light and fluffy texture, helping it to rise beautifully during baking. It’s truly a delight to watch a stand mixer transform humble egg whites into glossy, firm peaks, a small act of food science magic in your own kitchen.
While the egg whites are diligently whipping, you can prepare the rest of the cake batter. This involves combining the wet ingredients – egg yolks, oil, and milk – in a separate bowl and whisking them until thoroughly blended. Once this base is ready, gently fold in half of the chopped rhubarb, allowing its vibrant flavor to infuse the batter from within. Next, gradually incorporate the dry ingredients, mixing just until a smooth, cohesive batter forms. Overmixing can lead to a tough cake, so aim for a gentle hand.
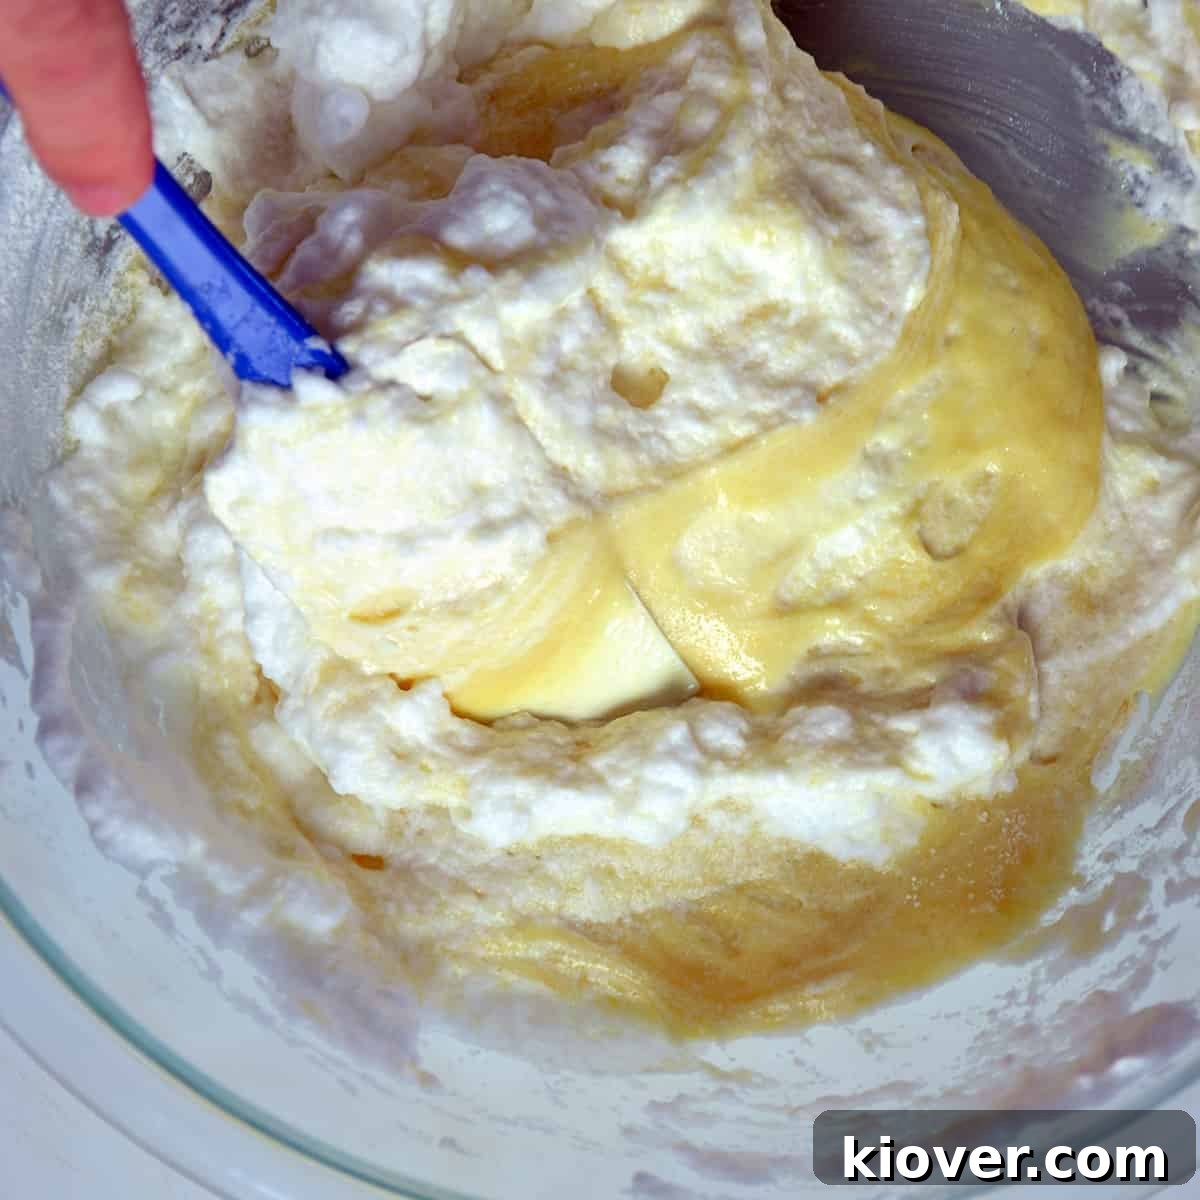
The moment your egg whites achieve firm, glossy peaks, it’s time to carefully fold them into the prepared batter. This step requires a delicate touch to preserve the air you’ve worked so hard to incorporate. Gently mix until the mixture is homogenous, ensuring no streaks of white egg whites remain visible. This may take a minute or two of patient folding.
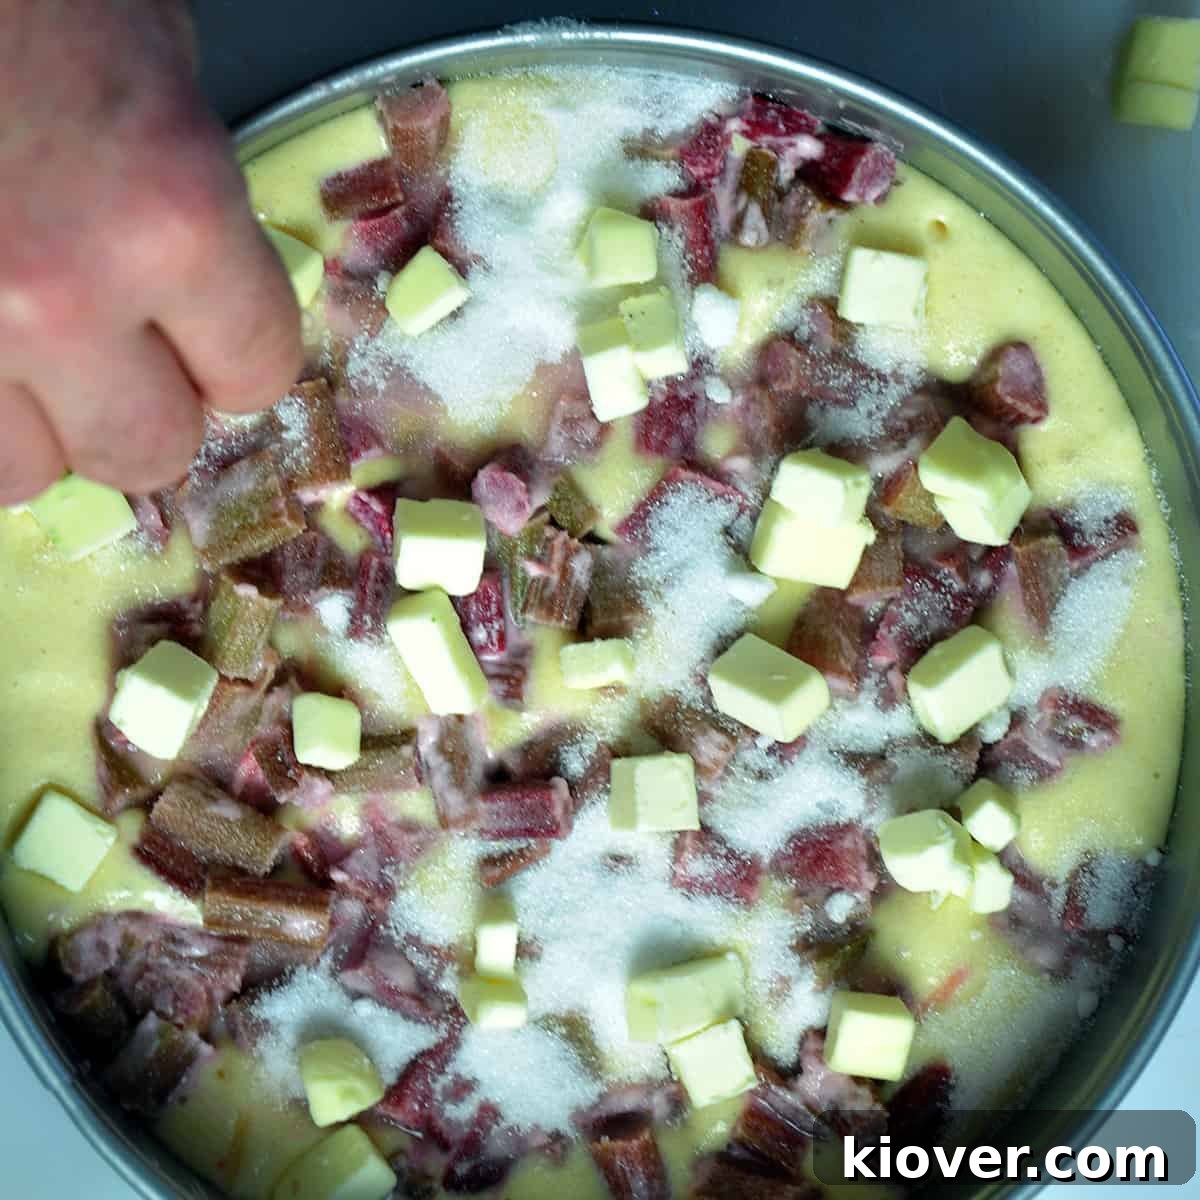
Once your batter is perfectly mixed, transfer it to your prepared cake pan. For an extra touch of flavor and texture, sprinkle the remaining chopped rhubarb over the top, followed by a generous dusting of sugar and small dots of butter. These toppings will caramelize beautifully, creating an enticing crust. Then, it’s off to the oven! As far as baking goes, this recipe truly is a testament to simplicity – primarily a matter of combining ingredients, gently mixing, topping, and baking to perfection. Beyond the initial egg white preparation, you’ll find this Rabarbrakake to be an incredibly forgiving and enjoyable bake.
We deeply appreciate traditional Norwegian recipes here at Ramshackle Pantry. We invite you to explore our extensive collection on our Classic Norwegian page, where you’ll discover a variety of desserts, sides, and main meals, each steeped in Norwegian culinary heritage.
Mastering the Art of Whipping Egg Whites
If you’re new to whipping egg whites, rest assured, it’s an accessible and visually rewarding process that showcases the wonders of food science. The simplest approach involves using a stand mixer set to high speed for just a few minutes. You’ll observe the clear liquid transform into a voluminous, opaque foam right before your eyes.
For a detailed visual guide, this egg-whipping video explains the technique exceptionally well. Our goal is to achieve “firm peaks,” which means when you lift the whisk, the peaks hold their shape but still have a slight curl at the tip, indicating they are not overly stiff or dry. This consistency ensures optimal air incorporation and a tender cake texture.
Can Egg Whites Be Whipped By Hand?
While I am fortunate to have a reliable KitchenAid stand mixer [Affiliate Link], which I wholeheartedly recommend for its efficiency, whipping egg whites by hand is absolutely achievable. Bakers accomplished this long before the advent of electricity and modern kitchen appliances! The primary difference lies in the time and physical effort required. What takes only a few swift minutes in a stand mixer might demand 10 to 15 minutes of vigorous and continuous whisking by hand. It’s a fantastic arm workout, if nothing else! Again, I highly suggest watching the video linked above to visually understand what “firm peaks” look like, as reaching the correct consistency is key regardless of your method.
Knowing When Your Rhubarb Cake Is Perfectly Baked
Determining when a cake is fully baked is crucial for optimal texture and flavor. For this Norwegian Rhubarb Cake, I recommend an initial baking time of 45 minutes, followed by the classic “toothpick test.” If you’re unfamiliar with this simple yet effective method, it’s an excellent way to ensure your delicious cake is cooked through to perfection.
To perform the toothpick test, carefully open your oven door and, using a clean, dry wooden toothpick, gently insert it straight into the very center of the cake. Once inserted, carefully pull the toothpick back out. Examine the toothpick: if it emerges clean, free from any wet batter, crumbs, or sticky remnants, your cake is done and ready to be removed from the oven.
However, if the toothpick comes out with moist batter or crumbs clinging to it, it indicates that your cake requires additional baking time. In this scenario, I suggest returning the cake to the oven for another 5 minutes. After this brief interval, repeat the toothpick test. Continue this process of baking in 5-minute increments and re-testing until the toothpick comes out perfectly clean. Patience at this stage ensures a beautifully cooked, moist interior without being underbaked or overly dry.
Is a Springform Pan Essential for This Recipe?
While a springform pan offers several advantages, it is not strictly necessary to bake this delightful Norwegian Rhubarb Cake. You can certainly achieve wonderful results using a standard 9-inch round cake pan. The primary benefit of a springform pan, such as this 9-inch springform pan [Affiliate Link], is the ease with which you can release the cake from its mold. With a simple click, the sides detach, allowing you to admire your beautifully baked cake in its full glory, presenting perfectly formed slices. Using a regular cake pan might make it a little more challenging to remove the cake intact or to achieve those pristine, well-defined pieces.
If you don’t currently own a springform pan, now might indeed be an opportune moment to invest in one, especially if you enjoy baking various cakes and cheesecakes. However, please do not let the absence of a springform pan deter you from making this recipe! This Rabarbrakake is exceptionally delicious, and its flavor will not be diminished by baking it in a conventional pan. While a springform might enhance its visual appeal (and that’s a big “maybe” depending on your careful handling), the taste remains paramount. After all, a truly good cake tastes fantastic regardless of the pan it’s baked in!
🤷 Substitutions and Variations to Customize Your Cake
As baking is a precise science, I generally advise against making extensive alterations to the core recipe for this cake. However, there are a few thoughtful adjustments and delightful variations you can consider to personalize your Norwegian Rhubarb Cake:
- Rhubarb: The beauty of this recipe lies in its flexibility with the star ingredient. Feel free to adjust the quantity of rhubarb slightly to your preference. If you love a stronger tart flavor and more texture, add a little extra. For a milder rhubarb presence, use slightly less. Frozen rhubarb can also be used; simply thaw it completely and drain any excess liquid before chopping and adding it to the batter.
- Milk: My recipe calls for whole milk, which contributes to a rich, moist crumb. However, you can experiment with other dairy options. 2% milk will yield a slightly lighter cake, while heavy cream will result in a denser, more luxurious texture with a richer flavor profile. Be aware that these substitutions may subtly alter the final consistency and richness.
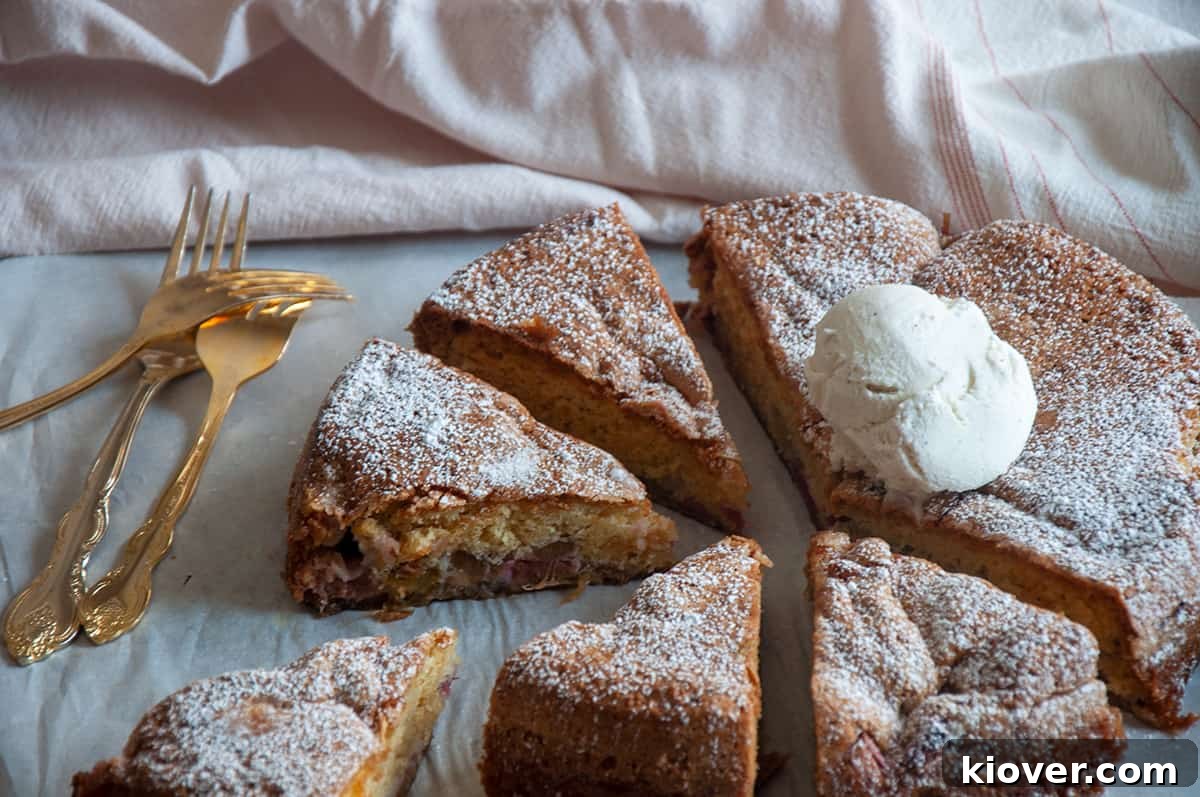
- Topping: A simple dusting of powdered sugar over the cooled cake is a classic and elegant finish. However, don’t hesitate to elevate your Rabarbrakake with other delicious toppings. A scoop of creamy vanilla ice cream, particularly when the cake is still warm, creates a wonderful hot-and-cold contrast. Alternatively, a dollop of freshly whipped cream adds a light and airy counterpoint to the cake’s richness. For an even more decadent treat, consider a light drizzle of homemade caramel sauce or a sprinkle of toasted almonds for added crunch.
📦 How to Store Your Rabarbrakake
Proper storage is key to maintaining the freshness and deliciousness of your Norwegian Rhubarb Cake. Once the cake has completely cooled to room temperature, which is essential to prevent condensation, you can cover it tightly with plastic wrap or aluminum foil. Stored this way, it will remain fresh and flavorful in the refrigerator for up to three days. This allows you to enjoy slices over several days without compromising quality.
If you wish to preserve your cake for a longer period, freezing is an excellent option. To freeze the Rabarbrakake, first ensure it is entirely cool. Then, wrap the entire cake (or individual slices, if preferred) securely in a layer of plastic wrap, followed by a layer of heavy-duty aluminum foil. This double-layer wrapping helps prevent freezer burn and preserves moisture. Properly wrapped, the cake can be stored in the freezer for up to three months.
When you’re ready to enjoy your frozen cake, simply transfer it to the refrigerator and allow it to thaw overnight. For the best flavor and texture, bring the thawed cake to room temperature before serving. You can also gently warm individual slices in the microwave for a few seconds to enhance their moistness and aroma, especially if serving with ice cream.
🎓 The Fascinating History of Rhubarb in Norway
Rhubarb, with its striking appearance and distinct tart flavor, boasts a long and intriguing history of cultivation, particularly in Europe, where it rapidly gained popularity in culinary circles. Its journey from a medicinal plant to a cherished ingredient in both savory dishes and, more famously, sweet desserts is a testament to its versatility and appeal.
While rhubarb is not indigenous to Norway, its introduction to the country likely occurred through intrepid traders who facilitated its spread from its native China across the Eurasian landmass to Europe. From its initial foothold in various European regions, rhubarb gradually made its way northward, eventually reaching the fertile grounds of Norway. Here, it found a welcoming home, thriving in the cool, temperate climate and becoming an integral part of Norwegian home gardens and traditional cuisine. It quickly became a seasonal favorite, celebrated for its robust flavor and its ability to signal the arrival of spring after long, cold winters. The development of recipes like Rabarbrakake showcases how Norwegians embraced this introduced plant, incorporating it into their unique culinary identity and creating beloved dishes that continue to be enjoyed across generations.
❓ Frequently Asked Questions About Rhubarb Cake
Yes, rhubarb is generally safe and delicious to eat, but it’s crucial to remember that only the stalks of the plant are edible. The leaves of rhubarb contain high concentrations of oxalic acid, a toxic compound that can be harmful if consumed. Always trim off and discard the leaves before preparing rhubarb for any recipe.
To minimize stringiness in rhubarb, it’s best to slice it against the grain. This means cutting the stalks perpendicular to the long, fibrous strands that run down their length. Using a sharp knife will also help ensure clean cuts and prevent tearing the fibers, resulting in more appealing and less stringy pieces for your cake or other dishes.
Absolutely, freezing rhubarb is an excellent way to extend its season and enjoy it year-round. To freeze rhubarb, begin by thoroughly washing the stalks and trimming off both ends, as well as any leaves. Next, slice the stalks into uniform 1/2-inch pieces. For best results, spread these pieces in a single layer on a baking sheet and place them in the freezer until they are completely solid. Once frozen solid, transfer the rhubarb pieces to a freezer-safe bag or container, removing as much air as possible, and store them in the freezer for up to six months. You can use frozen rhubarb directly in recipes; just note it may release more liquid, so adjust accordingly.
Any variety of garden rhubarb works well for baking. Younger, more tender stalks harvested early in the season tend to be less fibrous and have a slightly milder flavor. Older, thicker stalks might require a little more sugar to balance their increased tartness. Look for firm, crisp stalks with a vibrant red or pink color, though green rhubarb is also perfectly fine to use and tastes just as good.
While this recipe uses all-purpose flour, you can often adapt it to be gluten-free by substituting a high-quality gluten-free all-purpose baking blend (one that includes xanthan gum) in equal measure. Keep in mind that gluten-free flours can sometimes absorb more liquid, so the batter’s consistency might be slightly different. You may also want to let the batter rest for a few minutes before baking to allow the flours to hydrate properly.
📝 Expert Tips and Tricks for a Perfect Cake
Achieving a perfect Norwegian Rhubarb Cake is easy with a few insider tips:
- Enhanced Serving Experience: While delicious on its own, this cake truly shines when served warm with a scoop of premium vanilla ice cream. The warmth of the cake melts the ice cream slightly, creating a luscious sauce that complements the tart rhubarb beautifully. Alternatively, a generous dollop of freshly whipped cream provides a lighter, equally delightful accompaniment. Don’t underestimate the power of these simple additions to transform a great cake into an unforgettable dessert!
- The Springform Advantage: Utilizing a springform pan [Affiliate Link] for this recipe is highly recommended. While not absolutely essential, it significantly simplifies the cake-making and serving process. The removable sides allow for effortless demolding, ensuring your beautifully baked cake remains intact and presentable, making slicing a breeze. It’s a small investment that pays off in convenience and presentation.
- Master the Toothpick Test: This classic baking technique is your best friend for ensuring a perfectly cooked cake. To perform it, insert a dry wooden toothpick straight into the very center of the cake. If it emerges clean, without any wet batter or crumbs, your cake is done. If there are still sticky bits, return the cake to the oven for an additional 5 minutes, then retest. Repeat this process until the toothpick comes out pristine – patience here prevents an underbaked center or an overbaked, dry exterior.
- Effortless Egg Whipping: While it is entirely possible to whip egg whites by hand, employing a stand mixer or even a handheld electric mixer will make the process considerably easier and faster. The consistent speed and power of a machine ensure beautifully firm peaks in just a fraction of the time and effort, leaving your arms free for other preparations.
- Choosing the Best Rhubarb: When selecting rhubarb, look for firm, crisp stalks that are free from blemishes or soft spots. The color can range from deep red to pale green, and both are equally delicious; the color mainly depends on the variety. Freshly harvested rhubarb will yield the best flavor and texture for your cake.
🛠 Recommended Products for This Recipe
To help you achieve the best results with your Norwegian Rhubarb Cake, here are some useful kitchen tools that I personally recommend:
- 9″ Springform Pan: Essential for easy cake release and beautiful presentation.
- KitchenAid Mixer: A powerful and reliable stand mixer for effortlessly whipping egg whites and mixing batter.
- Immersion Blender: Handy for achieving a smooth, incorporated rhubarb and batter mixture.
😋 Did You Make This Norwegian Rhubarb Cake?
We’re thrilled if you’ve tried your hand at this wonderful Norwegian Rhubarb Cake recipe! Your feedback is invaluable to us and the wider community. Please consider leaving a rating and sharing your experience in the comment section below. Your insights not only help us improve but also guide other home bakers in their culinary adventures. Thank you for visiting Ramshackle Pantry and making our recipes a part of your kitchen!

Norwegian Rhubarb Cake (Rabarbrakake)
4.7 from 19 reviews
- Author: Ben Myhre
Prep Time: 15 minutes
Cook Time: 50 minutes
Total Time: 1 hour 5 minutes
Yield: 1 cake, 8 slices
Category: Dessert
Method: Bake
Cuisine: Norwegian
Description
A Traditional Norwegian Rhubarb Cake (Rabarbrakake) that celebrates the vibrant flavors of springtime rhubarb. This simple yet elegant dessert is a fantastic way to utilize fresh rhubarb, offering a perfect balance of sweet and tangy notes. It’s not just a cake, but a delightful culinary experience steeped in heritage.
Ingredients
Units
Scale
- 2/3 cup sugar
- 3 eggs, separated
- 1/2 cup vegetable or neutral oil
- 1/4 cup milk
- 3 cups rhubarb, chopped
- 1 teaspoon baking powder
- 1 teaspoon salt
- 1 cup all-purpose flour
- 1 teaspoon shortening
- 1/3 cup sugar (for topping)
- 1/3 cup butter, chopped (for topping)
- powdered sugar to top (optional)
Instructions
-
Preheat oven to 350° F (175° C). Prepare your springform pan by coating the bottom with a thin layer of shortening. If your pan tends to leak, place a sheet of parchment paper at the bottom before securing the springform sides; this helps create a seal.
- Whip egg whites: In the bowl of a stand mixer (or a large clean bowl with a hand mixer), whip the separated egg whites until they form firm, glossy peaks. Set aside carefully.
- Prepare wet ingredients: In a separate large mixing bowl, combine the egg yolks, vegetable or neutral oil, and milk. Whisk these ingredients together thoroughly until well combined and smooth.
- Add rhubarb to batter: Gently fold 1 ½ cups of the chopped rhubarb into the wet ingredient mixture. This will ensure rhubarb flavor is distributed throughout the cake.
- Blend rhubarb into liquid (optional but recommended for smooth batter): If you prefer a very smooth batter with incorporated rhubarb flavor, use an immersion blender to gently blend the rhubarb and batter mixture until the rhubarb pieces are mostly incorporated into the liquid. Be careful not to over-blend if you desire some small pieces of rhubarb texture.
- Whisk in dry ingredients (part 1): Add 2/3 cup of sugar, baking powder, and salt to the wet mixture. Whisk until these dry ingredients are fully incorporated.
- Add flour gradually: Gradually add the all-purpose flour, about ¼ cup at a time, mixing well after each addition. Mix just until the flour is incorporated and the batter is smooth. Avoid overmixing.
- Fold in egg whites: Gently fold the whipped egg whites into the cake batter. Use a spatula to carefully incorporate the whites, taking care not to deflate them. Continue folding until no white streaks of egg white are visible and the mixture is homogenous. This delicate step ensures a light and airy cake.
- Pour into pan: Pour the prepared cake batter evenly into your lightly coated springform pan.
- Add rhubarb topping: Arrange the remaining 1 ½ cups of chopped rhubarb evenly over the top of the batter. Do not press the rhubarb down; allow it to sit on top.
- Sprinkle with sugar: Evenly sprinkle the remaining 1/3 cup of sugar over the rhubarb and batter. This sugar will caramelize during baking, adding a delicious crust.
- Dot with butter: Evenly spread the chopped butter pieces over the top of the cake. The butter will melt into the rhubarb and sugar, enhancing flavor and moisture.
- Bake: Place the cake in the preheated oven and bake for 45 minutes.
- Check for doneness: After 45 minutes, perform the toothpick test. Insert a clean, dry toothpick directly into the center of the cake. If it comes out clean, the cake is done. If it has wet batter or moist crumbs, bake for an additional 5 minutes and test again. Repeat until the toothpick comes out clean.
- Cooling: Once baked, remove the cake from the oven and let it cool in the pan on a wire rack for at least two hours before attempting to release the springform sides. This allows the cake to set properly and prevents it from collapsing.
- Serve: Once cooled, gently release the springform sides. Dust generously with powdered sugar (optional) and serve. Enjoy your homemade Rabarbrakake!
Notes
- Use a springform pan. While not 100% essential for baking the cake, a springform pan makes the removal and presentation much easier, allowing for beautifully intact slices.
- Employ the toothpick test. To ensure your cake is perfectly baked, insert a dry toothpick into the center. If it comes out clean, your cake is ready. If not, bake for another 5 minutes and retest. This prevents both undercooked batter and dry, overbaked cake.
- Whip eggs with a mixer. While you can whip egg whites by hand, a stand mixer or handheld electric mixer will significantly reduce the effort and time required, ensuring consistent, firm peaks for a light and airy cake.
- Don’t overmix the batter. Once the dry ingredients are added, mix just until combined. Overmixing can develop the gluten in the flour, leading to a tougher, less tender cake.
- Cool completely before slicing. Allowing the cake to cool fully allows its structure to set, making it easier to slice cleanly and preventing it from falling apart.
Nutrition
- Serving Size: 1/8 of cake
- Calories: 385
- Sugar: 26 g
- Sodium: 384 mg
- Fat: 25 g
- Saturated Fat: 8 g
- Unsaturated Fat: 15 g
- Trans Fat: 0 g
- Carbohydrates: 39 g
- Fiber: 1 g
- Protein: 4 g
- Cholesterol: 90 mg