
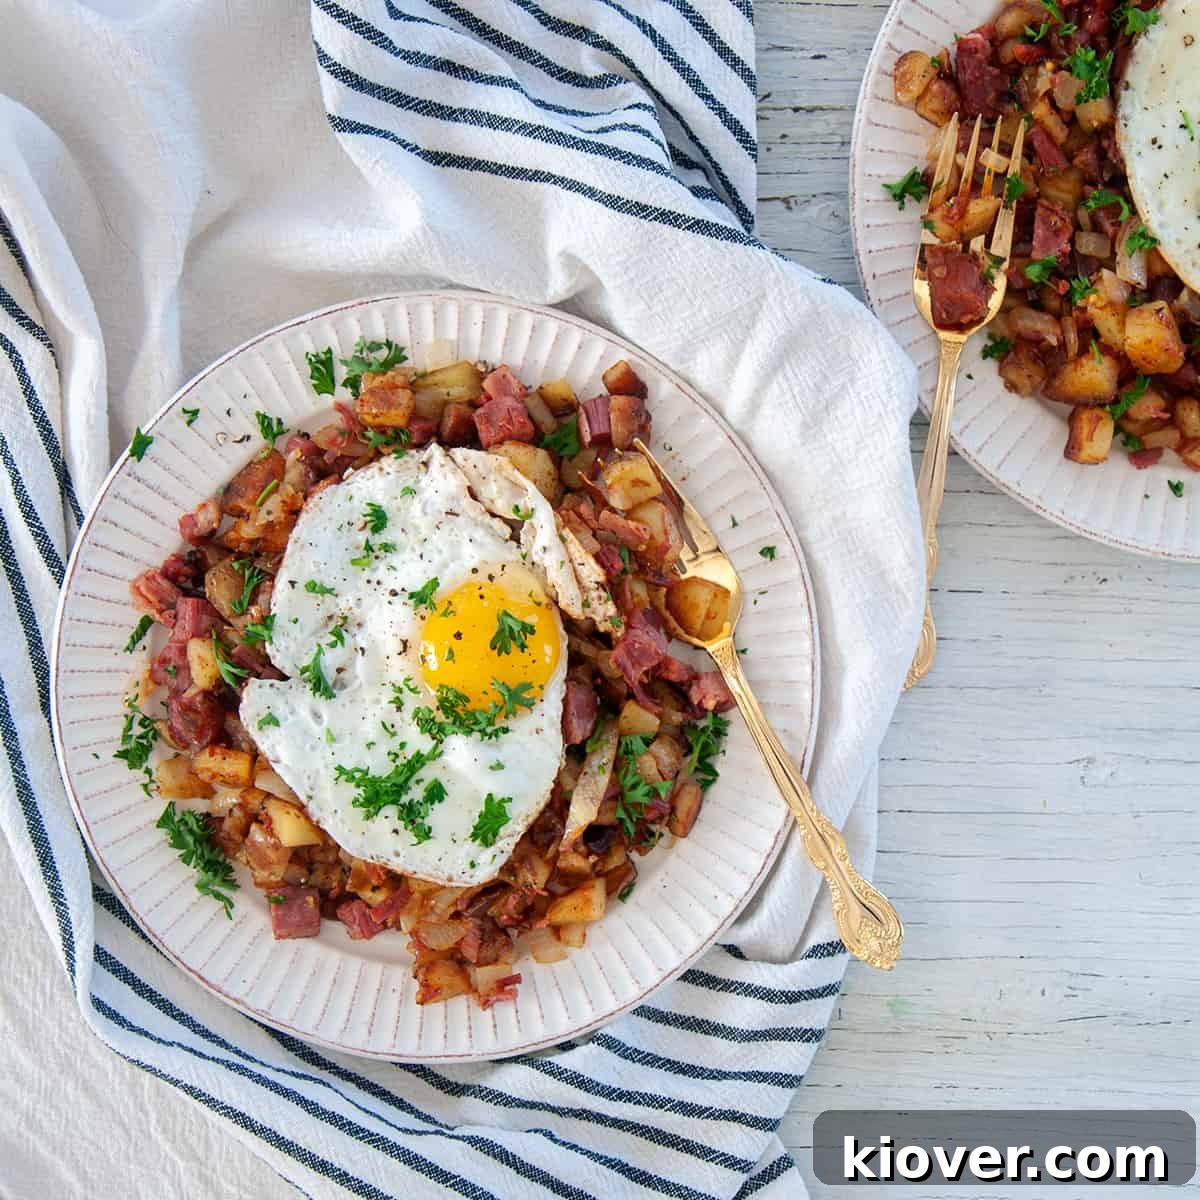
Delicious Homemade Corned Beef Hash: Your Ultimate Guide to a Crispy Breakfast Classic
Corned Beef Hash isn’t just a meal; it’s a culinary experience, a cornerstone of American breakfast traditions that promises a satisfying start to any day. Today, we’re diving deep into crafting this beloved dish, ensuring every bite is packed with flavor and perfect texture.
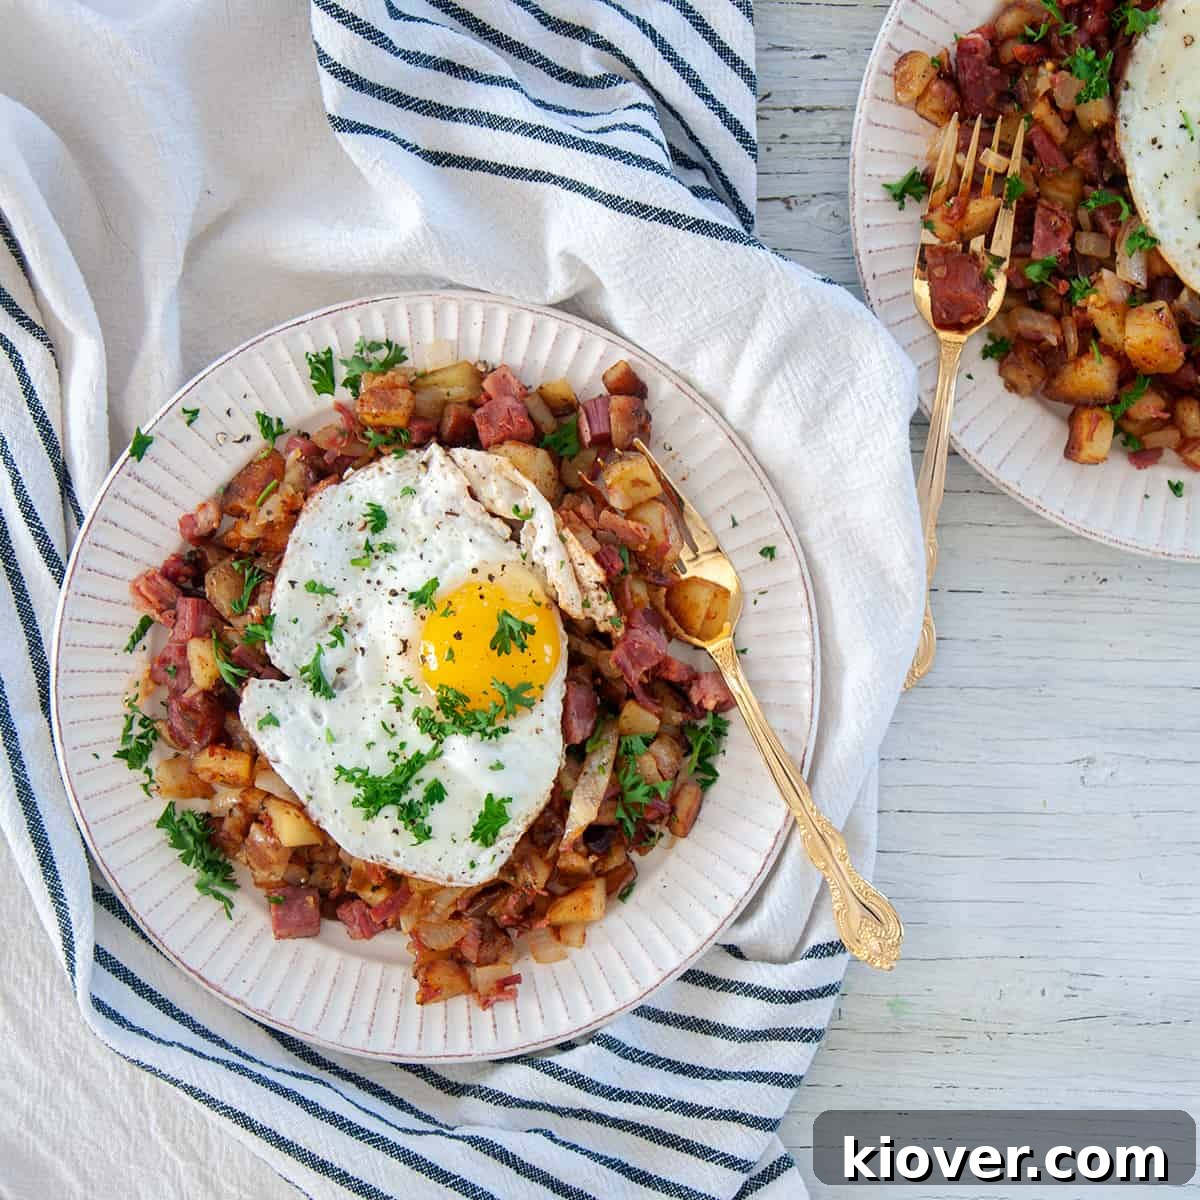
Imagine a symphony of **crispy golden potatoes**, savory **chopped corned beef**, sweet caramelized **onions**, all mingling together in a single skillet. And what’s our secret weapon for unlocking unparalleled depth of flavor? A touch of glorious bacon grease! While bacon fat elevates this dish to new heights, don’t worry, we’ll also explore wonderful alternatives to ensure everyone can enjoy this classic. Get ready to impress your taste buds with this unforgettable Corned Beef Hash recipe!
🍳 What Makes This Recipe Special?
There’s a reason Corned Beef Hash has stood the test of time, becoming a cherished dish in countless homes and diners. But what truly sets *this* recipe apart from the rest? It’s more than just a combination of ingredients; it’s a method, a philosophy, and a celebration of flavor.
Perhaps you find yourself with a bounty of leftover corned beef from a festive St. Patrick’s Day celebration, or maybe you’ve mastered the art of my Sous Vide Corned Beef recipe. Regardless of its origin, corned beef hash offers an exquisite opportunity to transform these savory leftovers into something truly spectacular. It’s also an excellent excuse to simply treat yourself to a magnificent breakfast, even if you’re starting with fresh corned beef.
This recipe isn’t just about mixing ingredients; it’s about building layers of flavor. We guide you through specific techniques to achieve that coveted crispy texture in your potatoes, a hallmark of truly exceptional hash. But the real game-changer here is our choice of cooking fat: rich, smoky bacon fat. This humble ingredient infuses every component of the hash with an incredible depth and a nuanced smokiness that butter or oil simply can’t replicate. It transforms a simple dish into an indulgent experience, making it much more than just a way to use up leftovers.
While you’re here, why not explore some of our other fantastic breakfast creations, like the light and airy Dutch Baby Pancake Recipe or the delicate Swedish Pancakes recipe (Pannkakor)? No matter what you choose to make, remember that breakfast should always be a moment to savor and treat yourself!
Table of Contents
- 🍳 What Makes This Recipe Special?
- 🥩 Essential Ingredients for Perfect Hash
- The Magic of Bacon Fat and Alternatives
- Choosing the Right Potatoes for Hash
- 🍲 Step-by-Step Instructions
- The Vinegar Trick for Crispy Potatoes
- Patience is Key to Perfectly Crisp Potatoes
- 🤷 Customizing Your Corned Beef Hash
- 📦 Storage and Reheating Tips
- 🎓 A Taste of History: The Story of Hash
- Corned Beef Hash in America
- ❓ Frequently Asked Questions
- 📝 Expert Tips and Tricks
- 🛠 Recommended Kitchen Tools
- 😋 Share Your Creation!
🥩 Essential Ingredients for Perfect Hash
Crafting the perfect corned beef hash begins with selecting the right components. Each ingredient plays a crucial role in building the layered flavors and textures that make this dish so irresistible. Here’s a breakdown of what you’ll need to create this amazing corned beef hash:
- Yukon Gold Potatoes: These are our top choice for their creamy interior and ability to crisp beautifully.
- White Vinegar: A secret weapon for achieving that extra crispy potato texture.
- Salt & Freshly Ground Black Pepper: Essential seasonings to enhance all the flavors.
- Bacon Fat, Lard, or Butter: The fat used is critical for flavor and crispiness.
- Yellow Onion: Diced and caramelized, adding a sweet and aromatic counterpoint to the savory beef and potatoes.
- Cooked Corned Beef: The star of the show, whether fresh or leftover.
- Smoked Paprika: Adds a subtle smoky depth and a beautiful color.
- Cayenne Powder: (Optional) For those who enjoy a touch of heat and a gentle kick.
- Fresh Parsley: For garnish, providing a pop of color and freshness.
For precise measurements, always refer to the detailed recipe card below.
The Magic of Bacon Fat and Alternatives
An indulgent recipe often calls for indulgent ingredients, and for our corned beef hash, that means glorious bacon fat. If you’re a regular bacon cook, you know the savory drippings left in the pan are liquid gold. I make it a habit to store this precious grease in a jar in my fridge, ready to deploy whenever a dish needs an extra layer of rich, smoky flavor. This hash, already brimming with savory notes, truly benefits from the unique essence that bacon fat imparts.
While the corned beef, potatoes, and onions form the hearty core of this breakfast, the bacon fat elevates it from good to extraordinary. It might not be the most visible component, but its contribution to the overall taste and crispiness is undeniable. It provides an unmatched richness and a subtle smokiness that permeates every morsel. If you don’t have a stash of bacon grease readily available, fear not! High-quality butter is an excellent alternative, offering a rich, creamy flavor that will still produce fantastic results.
Other viable options include good quality lard, which offers a neutral yet substantial fat for crisping, or even a robust cooking oil like avocado or grapeseed oil. The key is to use a fat that can withstand medium-high heat and contribute to the browning process. While I firmly believe bacon fat delivers the absolute best flavor profile for this dish, always use what you have on hand and what suits your preferences. The goal is deliciousness, however you achieve it!
Choosing the Right Potatoes for Hash
While it might seem like any potato will do for a hash, choosing the right variety can significantly impact the final texture and flavor of your dish. Rest assured, you can certainly use whatever potatoes you have in your pantry – I’ve successfully made delicious hash with Russet, red potatoes, and Yukon Golds. However, for a hash that strikes the perfect balance between crispy exterior and creamy, tender interior, Yukon Gold potatoes are my unequivocal recommendation.
Russet potatoes, with their high starch content, tend to become wonderfully fluffy and absorbent, making them great for frying, but they can sometimes break down a bit too much if not handled carefully. Red potatoes, on the other hand, are waxier and hold their shape beautifully, but might not achieve the same level of internal creaminess. Yukon Golds offer the best of both worlds: a medium starch content that allows them to get incredibly crisp on the outside while maintaining a buttery, tender, and flavorful texture inside. This unique combination makes them ideal for the specific parboiling and frying technique used in this recipe, ensuring every potato piece contributes to a delightful culinary experience. So, while versatility is a virtue, if you’re aiming for hash perfection, reach for those Yukon Golds.
🍲 Step-by-Step Instructions for Perfect Corned Beef Hash
Achieving truly perfect corned beef hash requires a few simple yet crucial techniques. Follow these steps closely, and you’ll be rewarded with a breakfast masterpiece that’s crispy, flavorful, and incredibly satisfying:
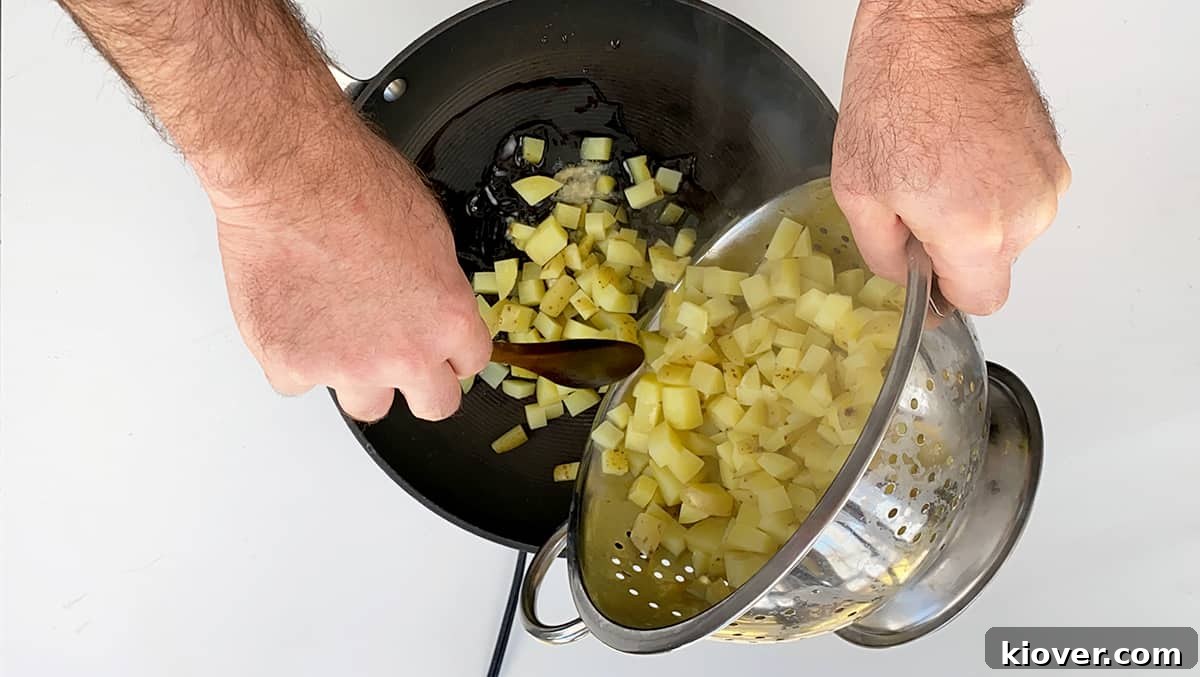
- Prepare the Potatoes for Crispiness: Begin by chopping your Yukon Gold potatoes into small, uniform pieces (about ½-inch cubes). This ensures even cooking. Place the chopped potatoes in a pot, cover them with water, and add about 2 tablespoons of white vinegar along with a generous pinch of salt. Bring to a boil and cook for approximately 10 minutes, or until the potatoes are just slightly tender when pierced with a fork but still firm. This parboiling step, aided by the vinegar, is key to preventing them from becoming mushy and instead encouraging a beautiful crispiness later on. Drain the potatoes thoroughly and set aside.
- Render the Corned Beef: In a large, heavy-bottomed skillet (cast iron works wonderfully here), add your chopped corned beef. Cook over medium heat for a few minutes, stirring occasionally, until some of the fat begins to render and the beef starts to get a little crispy. This step infuses the pan with incredible flavor.
- Set Aside the Corned Beef: Once the corned beef has browned slightly and released some of its savory oils, remove it from the skillet and set it aside in a bowl. You’ll reintroduce it later.
- Prepare the Frying Fat: If you’re using bacon fat (highly recommended!), add about 3 tablespoons to the skillet where you cooked the corned beef. If using butter or lard, add the equivalent amount. Heat the fat over medium to medium-high heat until shimmering.
- Add the Parboiled Potatoes: Carefully add your thoroughly drained, parboiled potatoes to the hot skillet, spreading them into an even layer.
- Cook for Crispiness: Cook the potatoes for approximately 15-20 minutes, stirring occasionally to ensure even browning. The goal here is to develop a beautiful golden-brown crust and a satisfying crispness. Don’t rush this step; patience is crucial for perfect results. If they seem to be browning too quickly, slightly reduce the heat.
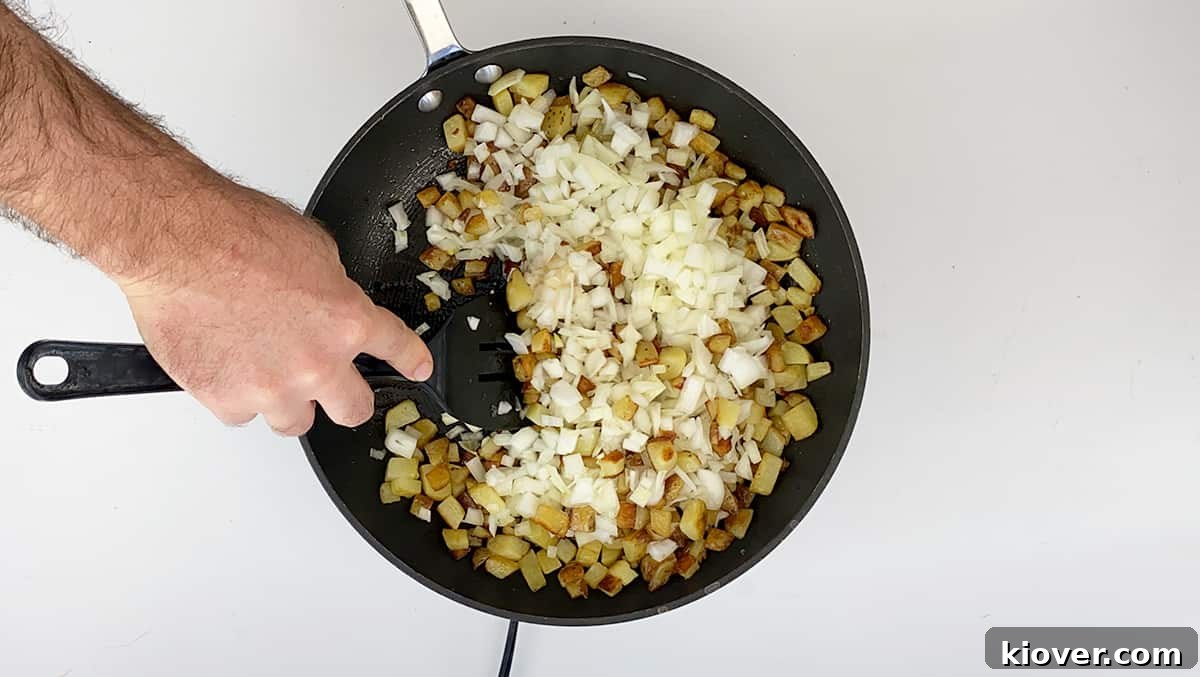
- Introduce Onions and More Fat: Once the potatoes are wonderfully crispy, push them to one side of the skillet. Add the remaining 1 tablespoon of bacon fat (or alternative) to the empty side, along with your diced onions.
- Sauté the Onions: Sauté the onions, stirring frequently, until they become translucent and slightly caramelized, typically about 5-7 minutes. Their sweetness will complement the savory hash beautifully.
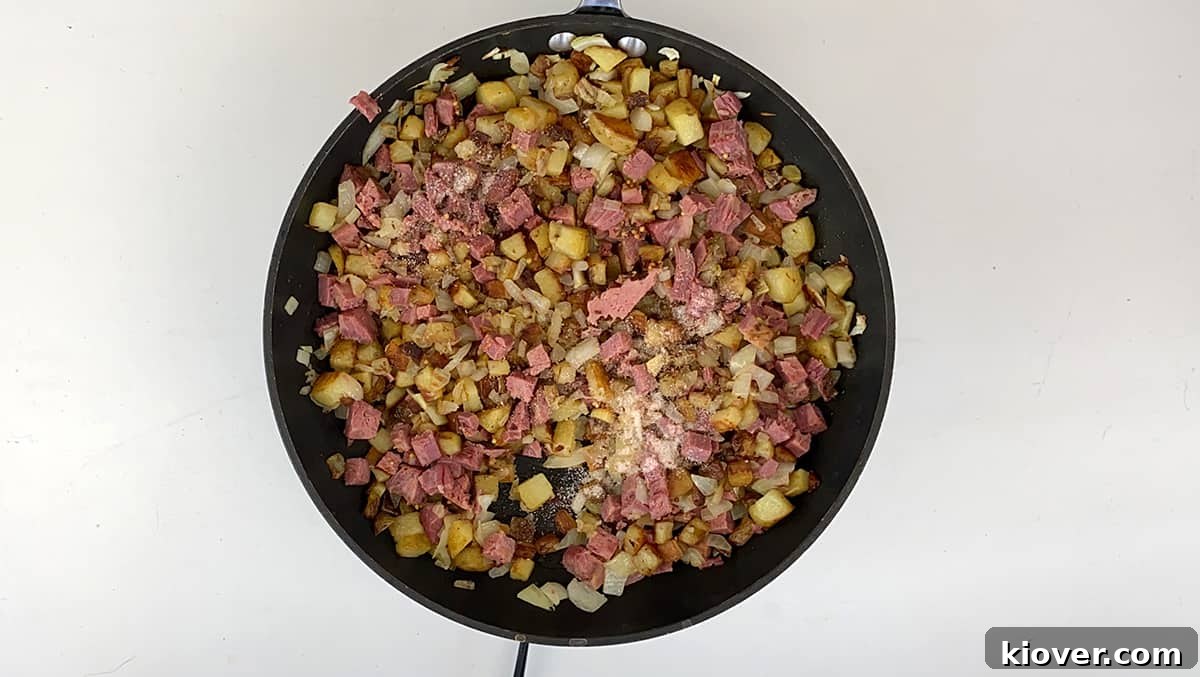
- Combine and Season: Re-add the cooked corned beef to the skillet with the potatoes and onions. Stir everything together gently to combine. Season generously with paprika, salt, and black pepper to taste. If you enjoy a little heat, add a dash or two of cayenne powder now.
- Final Heat Through: Continue to cook for another 3-5 minutes, stirring, to ensure all the ingredients are heated through and the flavors have melded together perfectly.
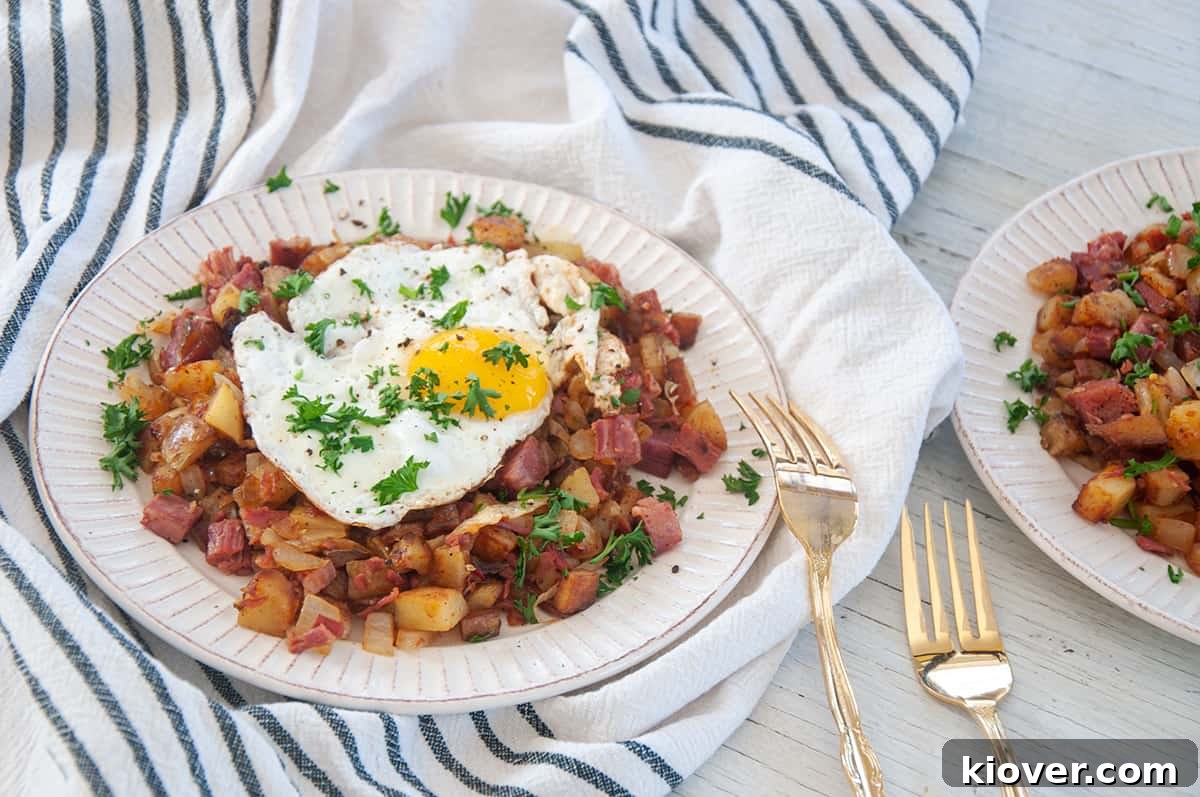
- Serve with Eggs: While the hash is finishing, I highly recommend cooking a few sunny-side-up or over-easy eggs in a separate pan. Their runny yolks are the perfect complement to the savory hash. Some chefs cook eggs directly in the hash, but I prefer a separate pan to maintain control and prevent breakage.
- Garnish and Enjoy: Transfer your glorious corned beef hash to plates, top with your perfectly cooked eggs, and sprinkle generously with fresh chopped parsley for a vibrant finish. Serve immediately and savor every delicious bite! This entire process takes about 45-50 minutes, and the incredible flavor makes every minute worthwhile.
The Vinegar Trick for Crispy Potatoes
One of the most common challenges when making potato-based dishes, especially hash, is achieving that desired crispy texture without the potatoes turning to mush. My secret? A simple, yet incredibly effective technique: parboiling the potatoes with a splash of white vinegar.
Parboiling, which means partially boiling an ingredient, is crucial here. By boiling the diced potatoes for about 10 minutes until they’re just tender-crisp, you pre-cook them enough to ensure quick frying later, but not so much that they lose their structure. This partial cooking also helps to prevent a raw center once they’re fried. Now, for the vinegar: have you ever fried potatoes only to find them breaking apart in the pan, losing their shape and becoming a bit soft or mushy? This is where vinegar comes to the rescue!
The acetic acid in white vinegar helps to firm up the cell walls of the potatoes. This means they are far less likely to fall apart during the subsequent frying process. Instead, they maintain their shape beautifully, resulting in distinct, crispy potato pieces rather than a shapeless mash. The vinegar also creates a slightly acidic environment that can aid in browning, giving you that perfect golden crisp. Don’t worry, you won’t taste the vinegar in the final dish; its magic is all about texture. For every quart of water used for parboiling, a tablespoon of vinegar is all you need.
While parboiling is a highly recommended step for a superior end product, I understand that sometimes time is of the essence. If you’re truly in a pinch, you can skip this step and fry raw potatoes directly, though you’ll need to cook them for longer and stir less frequently to avoid breaking them apart. But for the best, restaurant-quality crispiness, embrace the parboil! We also add salt to the parboiling water to season the potatoes from the inside out, building flavor from the very beginning.
Patience is Key to Perfectly Crisp Potatoes
I know the aroma of cooking hash can be incredibly enticing, and the temptation to speed up the process is strong. However, when it comes to achieving that coveted crispy texture in your hash potatoes, patience is not just a virtue, it’s an absolute necessity. While we’ve already given our potatoes a head start with parboiling, the skillet is where they truly transform, developing that irresistible golden-brown crust.
Once your bacon grease (or chosen fat) is shimmering in the pan, add your parboiled potatoes and spread them out in an even layer. Resist the urge to constantly stir them. Instead, allow them to cook undisturbed for several minutes at a time over medium-high heat. This gives them a chance to form a crust on one side before being flipped. You’re looking for a beautiful, deep golden-brown color and a distinct crispiness. This process typically takes about twenty minutes, and it’s essential to let it happen naturally. Stir them occasionally, just enough to ensure even cooking and prevent sticking or burning, but not so much that you interrupt the browning process. If you notice any pieces getting a bit too dark too quickly, simply reduce your heat slightly. This mindful approach ensures your potatoes are perfectly cooked through, tender on the inside, and wonderfully crisp on the outside, creating the ultimate foundation for your delicious corned beef hash.
🤷 Customizing Your Corned Beef Hash: Substitutions and Variations
One of the beautiful aspects of hash is its versatility. While the classic combination of corned beef, potatoes, and onions is undeniably delicious, there are plenty of ways to adapt this recipe to suit your preferences or what you have on hand. Don’t be afraid to get creative and make it your own!
- Type of Potato: As mentioned, Yukon Gold potatoes are ideal for their balance of creaminess and crispiness. However, if you have other varieties, they can certainly work! Russets will yield a fluffier interior and are excellent for crisping, while red potatoes offer a firmer texture that holds its shape well. Experiment to find your favorite!
- Cooking Fat: While bacon fat is truly exceptional for its rich, smoky flavor, you have great alternatives. Butter provides a classic, rich taste, while lard offers excellent crisping power. Various cooking oils like avocado, grapeseed, or even olive oil (though olive oil has a lower smoke point and distinct flavor) can also be used. The key is to use enough fat to ensure proper browning and flavor.
- Add an Egg (or Two!): A fried egg is almost non-negotiable for many hash enthusiasts. The runny yolk cascades over the crispy hash, creating an incredibly satisfying and luxurious experience. Serve it sunny-side up, over-easy, or poached – whatever your preference!
- Spice It Up: Don’t limit yourself to just paprika and cayenne. Consider a pinch of smoked paprika for extra depth, a dash of garlic powder, onion powder, or even a subtle hint of dried thyme or rosemary to complement the savory beef. For more heat, a sprinkle of red pepper flakes can be a wonderful addition.
- Vegetable Additions: While onions are traditional, finely diced bell peppers (any color), shredded carrots, or even leftover roasted root vegetables can be folded into the hash for added nutrition and flavor. Add them when the onions go in, or a bit earlier if they need more time to soften.
- Cheesy Delight: For a truly decadent twist, sprinkle a handful of shredded sharp cheddar or Swiss cheese over the hash during the last few minutes of cooking, allowing it to melt and get gooey.
- Herbal Freshness: Beyond parsley, fresh chives or even a touch of cilantro can add a bright, herbaceous note to finish the dish.
📦 Storage and Reheating Tips
One of the joys of corned beef hash is that it often tastes even better the next day, making it a fantastic dish for meal prep or enjoying leftovers. Proper storage and reheating are key to maintaining its deliciousness.
Storing Leftover Corned Beef Hash
To ensure your leftover corned beef hash remains safe and delicious, allow it to cool completely to room temperature first. Spreading it out on a plate or baking sheet can help it cool faster. Once cooled, transfer the hash to an airtight container or a heavy-duty freezer bag. Store the container or bag in the refrigerator, and make sure to consume the corned beef hash within 3-4 days for optimal quality and safety.
Freezing for Longer Storage
If you wish to store your corned beef hash for a longer period, it freezes exceptionally well. Follow the same cooling procedure, then transfer the cooled hash into an airtight, freezer-safe container or a freezer bag, pressing out as much air as possible to prevent freezer burn. Label the container or bag clearly with the date, and it can be safely frozen for up to 2-3 months. For individual portions, consider freezing it in smaller batches so you can thaw only what you need.
Reheating Corned Beef Hash
When you’re ready to enjoy your frozen corned beef hash, thaw it overnight in the refrigerator. For both refrigerated and thawed frozen hash, the best way to reheat is in a skillet on the stovetop. Heat a tablespoon of your preferred cooking fat (bacon grease, butter, or oil) in a non-stick skillet over medium-high heat. Add the hash, breaking it up slightly, and cook, stirring occasionally, until it’s heated through and the edges become crispy again. This usually takes about 5-10 minutes for refrigerated leftovers. You can also reheat it in the oven at 350°F (175°C) for 15-20 minutes, spreading it on a baking sheet, until heated through and crispy. While freezing and reheating might cause a slight change in the texture of the potatoes, it will still be incredibly flavorful and safe to consume, especially if you get those edges nice and crispy again!
🎓 A Taste of History: The Story of Hash
Before it became the beloved breakfast staple featuring corned beef, hash itself has a rich and surprisingly long history, dating back centuries. The very word “hash” originates from the Old French word “hacher,” meaning “to chop” or “to hack.” This etymology perfectly encapsulates the essence of the dish: a medley of finely chopped or diced ingredients, typically leftovers, cooked together in a pan.
Historical records indicate that rudimentary forms of hash existed as far back as the 14th century, demonstrating its enduring appeal as a practical and delicious meal. It makes perfect sense, doesn’t it? In times when food waste was unthinkable, and culinary resourcefulness was paramount, combining whatever ingredients were available – usually cooked meats, potatoes, and vegetables – chopping them up, and frying them together was an ingenious way to create a hearty and satisfying dish. Hash, in its original form, was a true testament to the philosophy of using every last scrap.
Over time, hash evolved and adapted to regional ingredients and preferences, becoming a versatile canvas for different flavors. While it’s now predominantly associated with breakfast in many cultures, its origins were not limited to any specific mealtime. It was a flexible dish that could be served for breakfast, lunch, or dinner, depending on the ingredients and the household. The association with breakfast, particularly corned beef hash, became more prominent as culinary traditions shifted and certain ingredients became more readily available and popular for morning meals. This timeless dish continues to be a comforting reminder of culinary practicality and the enduring deliciousness of cleverly combined leftovers.
Corned Beef Hash in America
The journey of hash to America saw it transform and cement its place in the nation’s culinary landscape. By the 19th century, particularly the 1860s, hash had become so commonplace and popular that inexpensive restaurants and eateries, catering to the working class, were affectionately known as “Hash Houses” or “Hasheries.” These establishments specialized in serving quick, affordable, and filling meals, often centered around various forms of hash. It was a dish that epitomized comfort food and economic practicality.
The marriage of hash with corned beef, while now quintessential, was a natural evolution. As large numbers of Irish immigrants arrived in America, especially during the 19th century, their culinary traditions, including a strong preference for corned beef, significantly influenced American cuisine. Corned beef was often served with staple vegetables like potatoes and cabbage, forming a robust and nourishing meal. It was only logical that any leftovers from such a meal would find their way into a convenient and flavorful hash.
The popularity of corned beef, and consequently corned beef hash, soared even further during and after World War II. During wartime rationing, fresh meat was scarce, and canned corned beef became a widely available and economical source of protein. This accessibility solidified corned beef hash as a household staple, cherished for its affordability, versatility, and hearty nature. Today, beyond its historical roots and practical uses, corned beef hash is celebrated simply as a delicious and satisfying breakfast, particularly when made with the rich, savory corned beef prepared just the day before. It’s a dish that transcends its origins, appealing to palates worldwide, proving that great food knows no boundaries.
❓ Frequently Asked Questions (FAQ)
Corned beef hash is a classic savory dish typically composed of finely chopped or diced cooked corned beef, potatoes (often diced), and onions. These ingredients are combined and then fried in a skillet until they are crispy and beautifully browned, creating a harmonious blend of textures and flavors.
While versatile enough for any meal, corned beef hash is most commonly served as a hearty breakfast or brunch dish. It’s often crowned with a perfectly fried or poached egg, allowing the runny yolk to mix with the crispy hash. It can also be enjoyed as a flavorful side dish alongside other breakfast items, or even as a simple, satisfying main course for lunch or dinner.
Absolutely! While this recipe truly shines with homemade or leftover corned beef, canned corned beef can be a convenient and perfectly acceptable substitute. Just be aware that canned varieties often have a softer texture and can be saltier, so adjust your added salt accordingly.
Yes, corned beef hash is an excellent dish for making ahead! Once cooked and cooled, it stores well in the refrigerator for up to 3-4 days. For reheating, the best method is in a hot skillet with a little fat to crisp it up again. You can also reheat it in the oven for a hands-off approach. It even freezes well for up to 2-3 months.
Beyond the classic fried egg, corned beef hash pairs wonderfully with a variety of breakfast sides. Consider serving it with a side of buttered toast, English muffins, fresh fruit, or a simple green salad for a balanced meal. A dollop of hot sauce or ketchup is also a common and tasty addition for many!
📝 Expert Tips and Tricks for Perfect Corned Beef Hash
To ensure your corned beef hash turns out flawlessly every time, keep these expert tips and tricks in mind:
- Choose Yukon Gold Potatoes: While other potatoes can work, Yukon Golds offer the ideal balance of creamy interior and crispy exterior, making them the best choice for hash.
- Embrace the Vinegar Trick: Don’t skip adding a tablespoon of white vinegar to the parboiling water for your potatoes. This simple step is a game-changer for achieving truly crispy, non-mushy potatoes.
- Patience with Potatoes: The key to golden, crispy potatoes is patience. Allow them to cook undisturbed in the hot fat for several minutes at a time before stirring. Resist the urge to constantly flip them.
- Utilize Bacon Fat: For unparalleled flavor and crispiness, bacon fat is king. Save your bacon drippings! If you don’t have any, butter or lard are excellent alternatives that provide richness and aid in browning.
- Even Chopping is Key: Ensure your potatoes and corned beef are chopped into roughly uniform, small pieces. This guarantees even cooking and a consistent texture throughout the hash.
- Season Generously: Don’t be shy with your seasonings. Taste as you go and adjust salt, pepper, and paprika. A dash of cayenne pepper adds a delightful, subtle zing if you like a hint of heat.
- Don’t Overcrowd the Pan: Cook the hash in a large enough skillet to avoid overcrowding. Overcrowding lowers the pan temperature, steaming the ingredients instead of frying them, which prevents crispiness. If necessary, cook in batches.
- High Heat Start, Medium Finish: Begin with medium-high heat to get a good sear and initial crisp on the potatoes, then you can slightly reduce it to medium to ensure they cook through without burning.
- Serve with a Runny Egg: A fried or poached egg with a runny yolk is the ultimate accompaniment, adding a rich sauce that complements the savory hash beautifully.
🛠 Recommended Kitchen Tools for This Recipe
Having the right tools can make all the difference in the kitchen, especially when striving for culinary perfection. Here are a few essential items that will help you prepare this delicious corned beef hash with ease:
- Heavy-Bottomed Skillet (Cast Iron Recommended): A good quality skillet is crucial for even heat distribution and achieving that perfect crispy crust on your hash. Cast iron is particularly excellent.
- Colander: Essential for thoroughly draining your parboiled potatoes, ensuring they’re dry enough to crisp up beautifully in the skillet.
- Sturdy Spatula: A good, heat-resistant spatula is necessary for stirring and flipping the hash without breaking up the potato pieces too much.
- Sharp Chef’s Knife: For efficiently chopping the corned beef, potatoes, and onions into uniform pieces.
- Cutting Board: A stable surface for all your chopping needs.
😋 Share Your Creation!
It’s incredibly rewarding to know that you’ve given this Homemade Corned Beef Hash recipe a try! Your culinary adventures are what make cooking so enjoyable. If you loved this recipe and found it a delightful addition to your breakfast repertoire, we would be absolutely thrilled if you could leave a rating and share your thoughts in the comment section below. Your feedback helps us improve and guides other home cooks in their decision to try this delicious dish.
Thank you so much for visiting Ramshackle Pantry and for being a part of our cooking community. We love seeing your creations, so feel free to share photos of your finished hash on social media and tag us! Happy cooking!
Print Recipe

Corned Beef Hash Recipe
5 Stars
4 Stars
3 Stars
2 Stars
1 Star
5 from 2 reviews
- Author: Ben Myhre
- Prep Time: 10 minutes
- Cook Time: 40 minutes
- Total Time: 50 minutes
- Yield: 4 Servings
- Category: Breakfast
- Method: Frying
- Cuisine: American
Description
Corned Beef Hash is a truly classic breakfast dish, offering a hearty and flavorful way to kickstart your day. Whether you’re skillfully utilizing delicious leftover corned beef or starting fresh with ingredients specifically for this recipe, you’re guaranteed a deeply satisfying experience. This recipe delivers a crispy, savory, and incredibly comforting dish that will leave you fully nourished and delighted.
Ingredients
- 1 1/2 pounds Yukon potatoes, chopped fairly small
- 2 tablespoons white vinegar (for boiling potatoes)
- 2 tablespoons Salt (for boiling potatoes)
- 4 tablespoons bacon fat (optionally substitute 4 tablespoons butter or lard)
- 1 medium onion, diced
- 1/2 pound corned beef, chopped
- 1/2 teaspoon paprika
- Salt, to taste
- Pepper, to taste
- Dash of cayenne powder (optional)
- Parsley, for garnish.
Instructions
- Parboil potatoes with vinegar and salt until slightly tender, approximately 10 minutes.
- In a skillet, heat chopped corned beef until fat renders and it becomes somewhat crispy.
- Remove corned beef from skillet and set aside.
- Add 3 Tablespoons of bacon fat (or chosen alternative) to the skillet and heat on medium to medium-high.
- Add parboiled potatoes to the hot skillet, spreading them evenly.
- Cook for 20 minutes on medium-high, stirring occasionally, until potatoes are crispy and golden brown to your taste.
- Add the last Tablespoon of bacon fat and diced onions to the skillet.
- Cook until onions are clear and softened, possibly with a slight crispness at the edges.
- Re-add the cooked corned beef to the skillet with the potatoes and onions.
- Add paprika, salt, pepper, and cayenne (if using) to taste, mixing well.
- Heat until everything is thoroughly hot and all ingredients are wonderfully crispy.
- Garnish with fresh parsley and serve immediately, ideally topped with a fried egg.
Notes
- For the best textural results, always opt for Yukon Gold potatoes, though other varieties can also be used.
- Adding a small amount of white vinegar to the potato parboiling water is crucial for achieving exceptionally crispy potatoes.
- Patience is key during the potato frying stage; allow ample time for them to crisp up beautifully.
- While bacon fat imparts the most incredible flavor, butter, lard, or a neutral cooking oil are all suitable substitutes.
- If you appreciate a subtle kick, a dash of cayenne pepper will add a pleasant warmth to your hash.
Nutrition
- Serving Size: 1/4 of skillet
- Calories: 460
- Sugar: 3 g
- Sodium: 4681 mg
- Fat: 28 g
- Saturated Fat: 10 g
- Unsaturated Fat: 18 g
- Carbohydrates: 34 g
- Fiber: 3 g
- Protein: 19 g
- Cholesterol: 67 mg