

Mastering Scandinavian Rosette Cookies: A Festive Holiday Baking Guide
Step into a cherished Scandinavian tradition with Rosette Cookies, also known as Rosettbakkels. These exquisite, delicate, and irresistibly crispy treats are a staple during the Christmas season for countless families across Scandinavia and beyond. If you’re looking to infuse your holiday celebrations with a touch of Nordic charm and a truly unique dessert, you’ve found your next culinary adventure. While they require a dash of patience and a special tool, the reward of these sweet, intricate cookies is immeasurable, often becoming a treasured annual baking ritual that brings families together in the warmth of the kitchen.
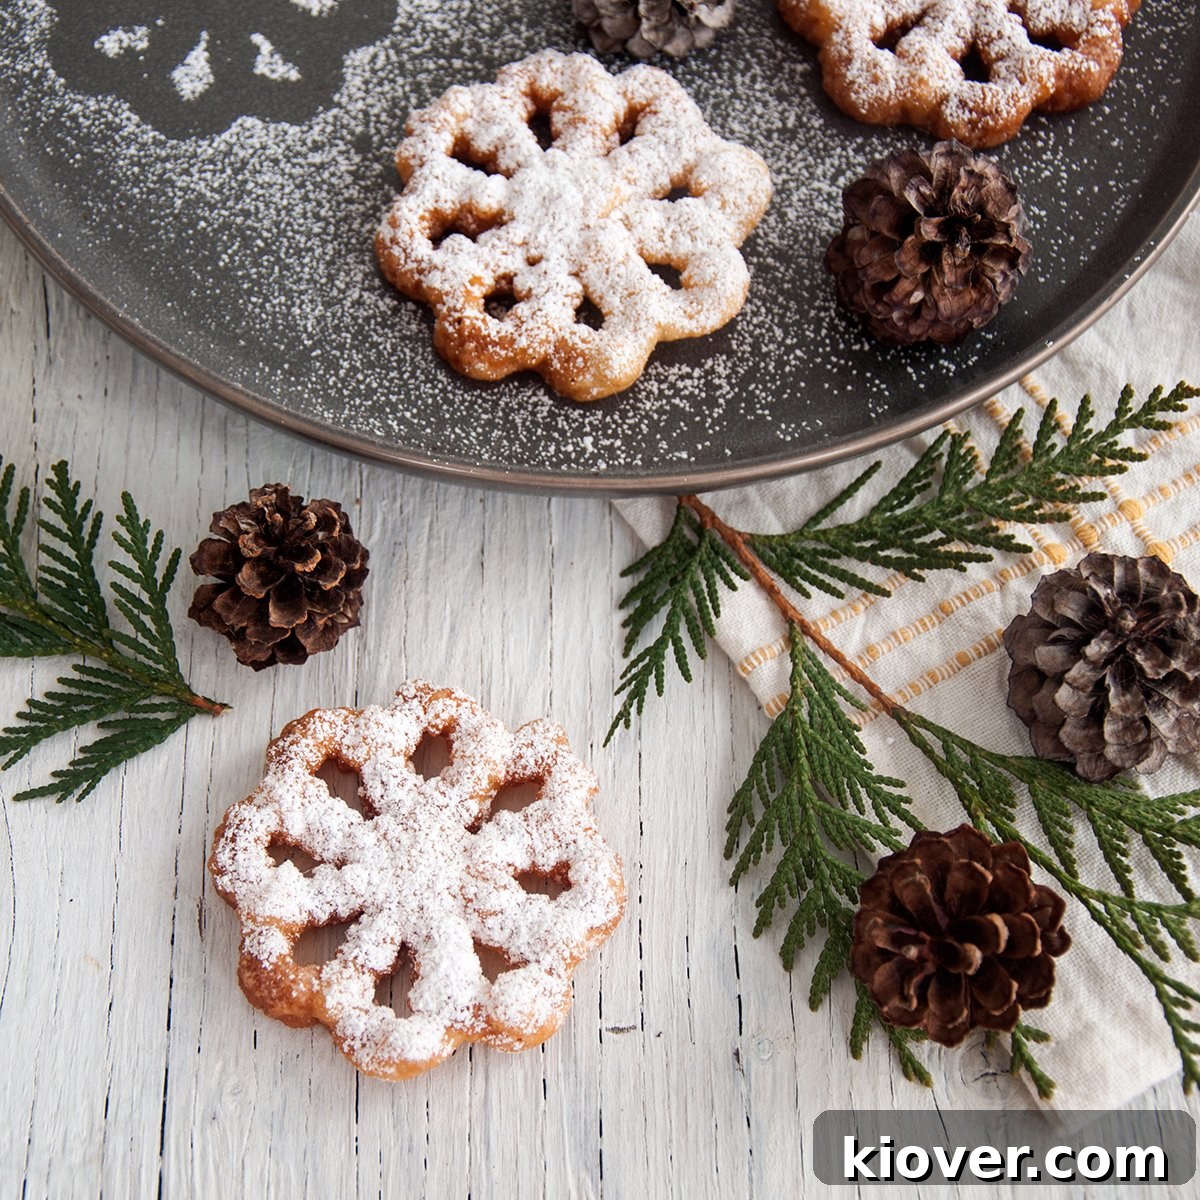
What Are Rosette Cookies? A Culinary Delight
For those unfamiliar with these wonders, imagine a dessert that gracefully bridges the gap between a thin, delicate cookie, the light crispiness of a donut, and the sweet appeal of a churro. Rosette Cookies are exactly that – a truly unique confection. They are characterized by their intricate, beautiful shapes, often resembling flowers, snowflakes, or other traditional Nordic designs. Unlike a cinnamon-sugar coated churro, rosettes typically feature a delicate dusting of powdered sugar, a sprinkle of granulated sugar, or a light glaze, allowing their unique texture and subtle flavor to shine. Today, we’ll focus on the classic powdered sugar finish as we embark on this delightful baking journey together.
Embracing a Cherished Holiday Tradition: Our Rosette Journey
Rosette Cookies have been a part of my holiday memories for as long as I can recall, an unmistakable scent and taste of Christmas. This year marks a special milestone for my wife and me, as it’s our inaugural experience making them ourselves. We decided last year that crafting these beautiful cookies would become one of ‘our’ cherished holiday activities, a shared tradition to look forward to each season. Much like our beloved Lefse recipe, Rosette Cookies are now firmly etched into our family’s collection of special traditional recipes, promising many more years of joyful baking and delicious memories.
The fundamental process of creating a Rosette Cookie is fascinatingly simple yet precise. It involves heating a specialized iron, a literal piece of metal intricately shaped with a festive design, in hot cooking oil. Once perfectly heated, the iron is swiftly dipped into a cold, delicate batter, allowing just enough to adhere to its surface. The batter-coated iron is then plunged back into the hot oil, where it fries quickly until it turns beautifully crispy and golden brown. After a brief cooling period, these exquisite cookies are traditionally dusted with a generous layer of powdered sugar, ready to be enjoyed.
The Meditative Art of Rosette Making: A Mindful Holiday Activity
There’s a unique sense of peace and mindfulness that comes with making Rosette Cookies. Because each cookie is fried individually, the process demands a certain level of patience and focused attention. It transforms baking into a process-oriented task, encouraging us to slow down, be present in the moment, and appreciate the craft. This deliberate pace makes it an ideal activity for shared family time during the bustling holidays.
When my family makes rosettes, we often divide the labor, with each person having a designated role. One person typically handles the delicate frying, meticulously tending to each cookie as it transforms into a golden masterpiece. The other is then responsible for gently transferring the warm cookies to a cooling rack, dusting them with powdered sugar, and ensuring they are properly stored. This collaborative effort not only speeds up the process but also creates wonderful shared memories and a deeper connection to the tradition.
For first-time Rosette Cookie makers, it’s important to remember that mistakes are a natural part of the learning process, and they are absolutely okay. If a cookie doesn’t turn out perfectly, simply wipe the batter off your iron and start fresh. Each attempt is an opportunity for improvement, and with a recipe yielding around five dozen cookies, there are plenty of chances to refine your technique. There’s no need for frustration; embrace the journey, and the next rosette is bound to be even better. Having made a substantial batch of these myself for the first time this year, I’ve encountered various minor challenges, and I’m eager to share insights into potential issues and how to overcome them, ensuring your experience is as smooth and enjoyable as possible.
Essential Equipment: The Rosette Iron
To embark on your rosette-making adventure, a dedicated rosette iron is absolutely indispensable. These unique tools are surprisingly affordable and readily available. You can easily find them online, often sold as a handle with interchangeable iron shapes. For instance, a quality rosette iron handle and various actual iron shapes are widely accessible. While some kits combine the handle and multiple irons, I personally prefer standalone pieces for their perceived quality and durability. Brands like Honey-Can-Do often offer robust and authentic rosette iron products.
Beyond online retailers, if you’re fortunate enough to have a Scandinavian specialty store nearby, you’ll likely find a selection of rosette irons there. Even larger retail chains like Target sometimes stock them, particularly during the holiday season. A resourceful tip: in areas with a significant Scandinavian population, like ours, thrift stores can be a treasure trove for these irons, especially after the holiday rush. Keeping an eye out can land you a great, authentic iron for a bargain.
Crafting the Perfect Rosette Batter
The beauty of rosette cookies lies not only in their appearance but also in their simple, yet crucial, batter. Preparing it is straightforward: simply mix the ingredients until smooth. However, there’s one critical step I cannot stress enough: you must chill the batter for at least two hours before you begin frying. Do not skip this essential step!
I’ve learned through experience that cooling the batter significantly contributes to the crispiness of the final product. It creates an optimal temperature differential between the scorching hot iron and the cold batter, which is key for the batter to adhere properly and fry into a delicate, crisp shell rather than a soft, cake-like texture. When I initially experimented without adequately cooling the batter, I observed that it began to warm up as I continued cooking. This often led to the batter sliding off the iron, especially after a few successful rosettes, resulting in softer cookies that resembled miniature donuts rather than the desired crispy treats. The difference in quality between the first few cookies (while the batter was still relatively cool) and the later ones was noticeable.
To combat this, I highly recommend a two-container system for your batter. Prepare your large batch, chill it thoroughly in the refrigerator for the full two hours. Then, pour a smaller, manageable amount into a separate container—one that your rosette iron comfortably fits into. Keep the main batch in the fridge, replenishing your smaller working container as needed. This ensures your batter remains consistently cold throughout the entire frying process, minimizing waste and maximizing crispness. A wider base on your working container, though tempting for dipping ease, might lead to more batter clinging to the sides and less actual cookies from your batch.
The Art of Frying: Achieving Golden Perfection
Maintaining the correct oil temperature is paramount to achieving perfectly crispy rosette cookies. I aim to keep my frying oil consistently between 370°F and 375°F (188°C – 190°C). Since I use a stovetop, which isn’t always precise with temperature control, I keep a reliable point thermometer by my side and check the oil temperature before each new cookie. This allows me to adjust the burner promptly, ensuring the oil remains within that crucial 370°-375°F range. Drifting below 360°F (182°C) can lead to greasy, soggy cookies, while exceeding 400°F (204°C) can burn them quickly before they fully cook through. Within the optimal range, a consistent cooking time is achievable. However, if your temperature fluctuates slightly (e.g., between 360°F and 400°F), you’ll need to pay closer attention to visual cues and adjust frying times accordingly: slightly longer for lower temperatures and quicker for higher ones.
While factors like the iron’s preheating time, batter temperature, and the size of your rosette iron can all influence the precise cooking duration, I’ve found that a sweet spot of approximately 50 seconds yields beautifully golden-brown and crispy cookies when the oil is held between 370°-375°F. Always trust your judgment; when the cookie reaches a rich, golden hue, it’s ready to be removed.
Oil Safety First!
Working with hot oil demands extreme caution. Always prioritize safety to prevent accidents. I strongly recommend reviewing the USDA page on Frying Safety and taking all precautions seriously. No delicious cookie is worth an injury!
Common Challenges and Expert Solutions
Even with the best preparation, you might encounter a few minor hiccups. Here are some common issues and how to easily overcome them:
Dipping Depth: Avoiding Common Pitfalls
It’s easy to accidentally dip your rosette iron a little too deep, allowing the batter to cover the very top of the iron’s design. Don’t worry, this isn’t a disaster! While it will make the cookie slightly harder to remove from the iron, it’s easily remedied. I find that a small, thin knife can be gently used to scrape along the top edge of the iron once it’s cooked, creating a clean break and making the cookie much easier to loosen and slide off.
Mastering the Release: Getting Cookies Off the Iron
Sometimes, a perfectly cooked rosette cookie will gracefully slide off the iron into the oil at precisely the right moment. Other times, it might stick stubbornly, or loosen only partially. I always keep a fry skimmer handy to retrieve any cookies that detach prematurely into the hot oil. If the batter is still sticking to the iron and looks soft or doughy, it likely needs more time to cook. Simply dip it back into the oil for another few seconds until it’s crispy and golden brown.
However, if your cookie is beautifully golden and appears fully cooked but refuses to release, a fork is your best friend. Since the cookie forms a delicate crust around the iron’s shape, it can sometimes cling tightly. With a fork, gently work around the edges, carefully loosening the cookie from the iron’s perimeter. You might also need to use the fork’s tines on the inner edges of the rosette design. It requires a delicate, shimmying motion to coax these beauties off, but with a bit of finesse, they’ll release. Once removed from the iron, place them on a paper towel-lined plate to cool and absorb any residual oil.
Elevating the Flavor: Toppings and Decorations
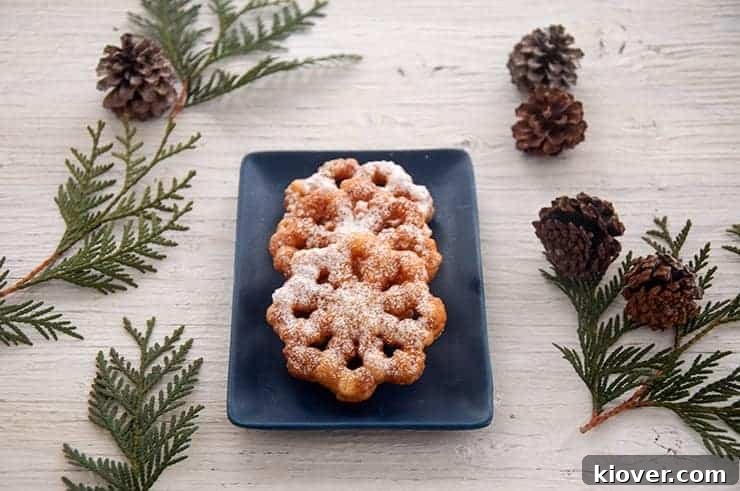
Once your exquisite rosette cookies have cooled for a few minutes, they’re ready for their final touch. Sifting powdered sugar over the top not only provides a beautiful, snowy Christmas-time aesthetic but also adds a delightful sweetness that perfectly complements their crisp texture. You can be as generous as you like with the sugar; I typically account for about half a teaspoon per cookie of the size I make. This step is also a fantastic opportunity to involve younger family members or a significant other in the baking process, making it even more of a shared experience.
Exploring Different Topping Options
While powdered sugar is the traditional choice for this recipe, the versatility of rosette cookies allows for creative experimentation with other toppings. Many people opt for a simple dusting of granulated sugar, which offers a slightly coarser texture and a different sheen. A popular variation involves a blend of sugar and cinnamon, providing a warm, spiced aroma and flavor that’s particularly inviting during the holidays. I’ve also seen rosettes delicately dipped on one side into a simple glaze made from powdered sugar and a touch of milk or lemon juice, adding another layer of sweetness and visual appeal. With this recipe yielding about 50 cookies, you’ll have ample opportunity to try a variety of toppings and discover your family’s favorite!
The Rhythmic Process of Rosette Making: A Step-by-Step Guide
Given that this recipe produces a generous batch of around 50 cookies, fried one at a time, you’ll quickly settle into a rhythm and find numerous opportunities to refine your technique. Once all your tools are in place and the oil is perfectly heated, here’s an efficient process that works wonderfully:
- Preheat the Iron: Immerse the clean rosette iron (without batter) into the hot oil for approximately 1 minute and 30 seconds. Start a timer. This crucial step ensures the iron is hot enough for the batter to adhere correctly. During this brief waiting period, with both hands free, take care of any auxiliary tasks: sifting powdered sugar onto previous batches, ensuring your batter container is full, or topping up oil if necessary.
- Dip into Batter: Carefully lift the super-hot iron from the oil and swiftly dip it into the cold batter for a few seconds. Ensure the batter sticks evenly but does not cover the very top edge of the iron’s design.
- Fry to Golden Perfection: Immediately transfer the batter-coated iron back into the hot oil. Fry for 40-50 seconds, or until the cookie turns a beautiful, even golden brown and is visibly crispy.
- Monitor Oil Temperature: Lift the iron, allowing initial oil drips to fall back into the pot. At this precise moment, take a quick temperature reading of your oil. Adjust your burner as needed to maintain the ideal 370°-375°F range.
- Release and Cool: Gently remove the cooked cookie from the iron (refer to troubleshooting tips if it sticks) and place it on a plate lined with paper towels to cool and drain excess oil.
- Repeat: Return to step one, ensuring the iron is reheated between each cookie.
Understanding Rosette Cookie Yield and Oil Absorption
When preparing a large batch of deep-fried cookies like rosettes, it’s natural to wonder about oil usage and calorie counts. I typically start with about 4 cups of vegetable oil for frying. After completing all 50 cookies, I usually find approximately 3 cups remaining. While it’s difficult to ascertain precisely how much oil is absorbed by the cookies versus what simply evaporates during the frying process, it’s safe to assume a portion contributes to the cookies’ fat content. Keep in mind that the size and thickness of your specific rosette iron will also directly impact the amount of batter used per cookie and, consequently, its final calorie count.
Too Many Cookies? Adjusting the Recipe!
If a yield of 50 cookies seems daunting, don’t hesitate to cut the recipe in half! Rosette cookies, despite their delicate appearance, are surprisingly light and airy. They have a tendency to disappear remarkably quickly once they’re made, precisely because they taste so incredibly good! So whether you make a full batch or a smaller one, you’ll likely find them devoured in no time.
Visual Guide to Rosette Cookie Frying: A Four-Step Process
To further illustrate the key stages of creating these delectable treats, here’s a visual breakdown of the frying process:
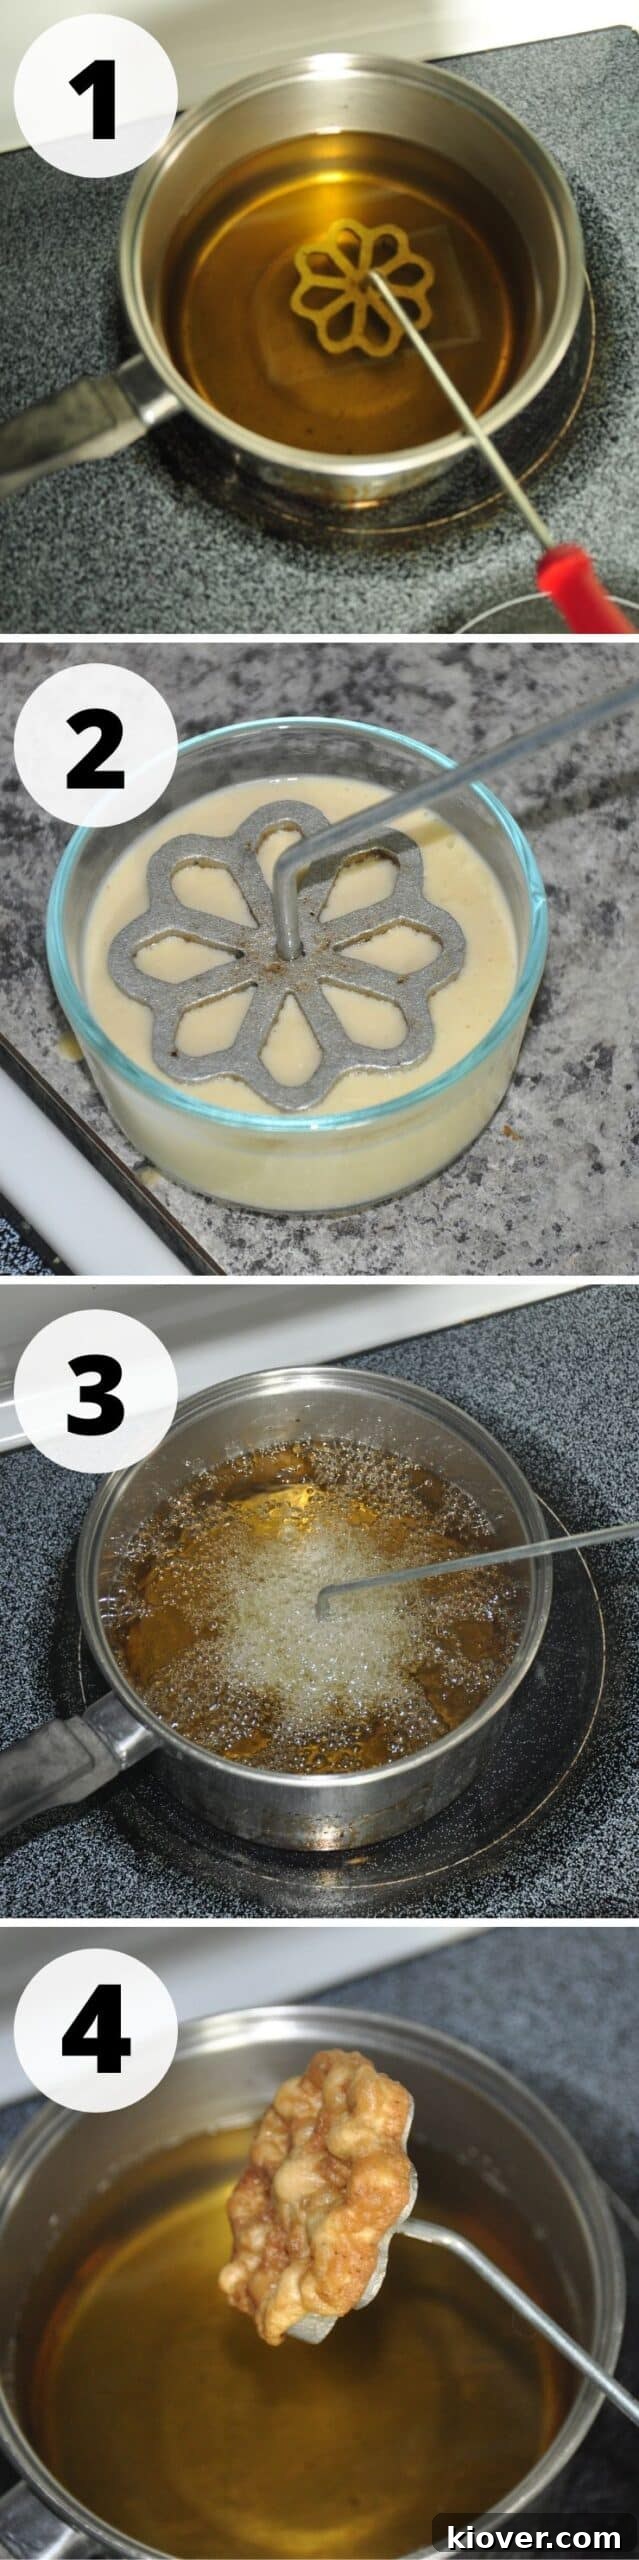
- Iron Preheating: Begin by thoroughly preheating your oil, then immerse the rosette iron. This ensures that when the iron meets the batter, it creates an instant, thin, and perfect layer, ready for frying. You should hear a slight sizzle when the hot iron enters the batter.
- Batter Dip: Quickly and confidently dip the hot iron into the cold batter. The heat from the iron will instantly adhere a thin layer of batter.
- Frying: Immediately transfer the batter-coated iron back into the hot oil. Cook for the recommended 40-50 seconds, or until the cookie achieves a beautiful, uniform golden-brown color.
- Removal & Temperature Check: Carefully lift the finished Rosette Cookie from the oil. As you do, allow any excess oil to drip back into the pot. This is the ideal moment to check and adjust your fryer oil temperature, ensuring it remains within the optimal 370°-375°F range for the next cookie.
Top Tips for Flawless Rosette Cookies
- Cultivate Patience: Remember, rosette cookies are a labor of love. While the batter itself is simple, mastering the frying technique takes a little practice. Embrace the process, and don’t rush!
- Optimize Batter Temperature: Always use two containers for your batter. Keep the main batch refrigerated to maintain its coolness, and pour smaller portions into a separate, narrow container that perfectly fits your iron. Replenish the small container from the cold main batch as needed.
- Cook for Crispness: If a cookie is sticking to the iron and still appears light or doughy, it’s undercooked. Return it to the oil for additional frying time until it turns a rich golden brown.
- Gentle Release: For cookies that are perfectly golden but stubbornly cling to the iron, gently use a fork to “shimmy” them off. Work around the edges with care to avoid breaking the delicate cookie.
- Perfect Powdered Sugar Dusting: Use a sifter for an even coating of powdered sugar. Allow your cookies to cool for a few minutes before dusting, but don’t let them get completely cold. Dusting too early on hot cookies can cause the sugar to melt and clump with residual oil, affecting the delicate finish.
Recommended Tools for Rosette Cookie Success
Having the right tools can make your rosette cookie-making experience even more enjoyable and successful. Here are some of the key items I use:
- Rosette Iron and Handle
- Fine Mesh Sifter (essential for a smooth powdered sugar finish)
- Instant-Read Thermometer (crucial for maintaining optimal oil temperature)
- Deep Fryer Skimmer (perfect for retrieving cookies from the oil safely)
Share Your Rosette Cookie Creations!
I genuinely hope you enjoy making these delightful Scandinavian Rosette Cookies as much as my family and I do! They are truly a special treat that brings warmth and joy to the holiday season. If you give this recipe a try, I would absolutely love to hear about your experience! Please consider leaving a comment below to share how they turned out for you. Your feedback is incredibly valuable. Additionally, if you found this guide helpful, please spread the holiday cheer by sharing this recipe on Pinterest or Facebook – it truly helps support my work. And of course, for more delicious recipes delivered straight to your inbox, don’t forget to sign up for my newsletter via the sidebar!
Print Recipe

Scandinavian Rosette Cookies – Rosettbakkels
- Author: Ben Myhre
- Prep Time: 2 hours 15 minutes
- Cook Time: 2 hours 30 minutes
- Total Time: 4 hours 45 minutes
- Yield: 50 Cookies
- Category: Dessert
- Method: Fry
- Cuisine: Scandinavian
Description
A tasty traditional Scandinavian cookie that is sweet, crispy, and special. Whether you are making them for you, your family, or a big event, these Rosette Cookies are visually stunning and show the care you put into your cooking. A Christmas favorite in our house and I am happy to share it with you!
Ingredients
- 1 teaspoon vanilla
- 1 teaspoon salt
- 1 tablespoon sugar
- 2 eggs
- 1 cup whole milk
- 1 cup all-purpose flour
- Vegetable Oil, for frying (I used 4 cups)
Instructions
- Add all ingredients except oil and flour to mixing bowl and beat until well combined.
- Slowly add flour to the mixture, continuing to beat until your batter is completely smooth and free of lumps.
- Refrigerate the batter for at least 2 hours. This crucial step helps create crispier cookies.
- Once the chilling time has passed, heat oil in a deep, heavy-bottomed pot to a stable temperature of 370° – 375° Fahrenheit. Refer to notes on oil safety.
- Preheat your rosette iron by immersing it (without batter) in the hot oil for approximately 1 minute 30 seconds. Use this time to prepare your workstation or sift powdered sugar onto finished batches.
- Carefully dip the hot iron into the cold batter for a few seconds. Ensure the batter adheres to the iron but does not fully cover the top edge of the iron’s design.
- Immediately transfer the batter-coated iron back into the hot oil and cook for 40-50 seconds, or until the cookie achieves a beautiful golden-brown color and is crispy.
- Lift the iron from the oil, allowing initial drips to fall back into the pot. Take this opportunity to check the oil temperature and adjust your burner as necessary to maintain the ideal range.
- Gently remove the cooked cookie onto a plate lined with paper towels to absorb excess oil and cool. (See notes for tips on releasing stubborn cookies).
- Repeat steps 5-9 until all the batter is used, always ensuring the iron is reheated between dips.
- Once cooled slightly, sift powdered sugar generously over the Rosette Cookies for that classic, sweet finish.
Notes
- Patience is key! These cookies require a bit of time and practice. Don’t be discouraged by initial imperfections; the next one will be better.
- Hot oil safety: Always exercise extreme caution when deep-frying. Consult resources like the USDA page on Frying Safety to ensure a safe cooking environment.
- Batter management: Keep your main batter bowl in the refrigerator and pour smaller portions into a separate container just large enough for your iron. This ensures the batter remains consistently cold.
- Troubleshooting sticking: If a cookie sticks to the iron but isn’t golden brown, return it to the oil for a bit longer. If it’s golden brown but still stuck, gently use a fork to ‘shimmy’ it off.
- Sugar application: Sift powdered sugar over the cookies after they’ve cooled for a few minutes, but before they are completely cold. Applying sugar too early on hot cookies can cause it to melt or clump with residual oil.
Nutrition
- Serving Size: 1 cookie
- Calories: 60
- Sugar: 2 g
- Sodium: 52 mg
- Fat: 5 g
- Saturated Fat: 1 g
- Unsaturated Fat: 4 g
- Trans Fat: 0 g
- Carbohydrates: 4 g
- Fiber: 0
- Protein: 1 g
- Cholesterol: 8 mg