
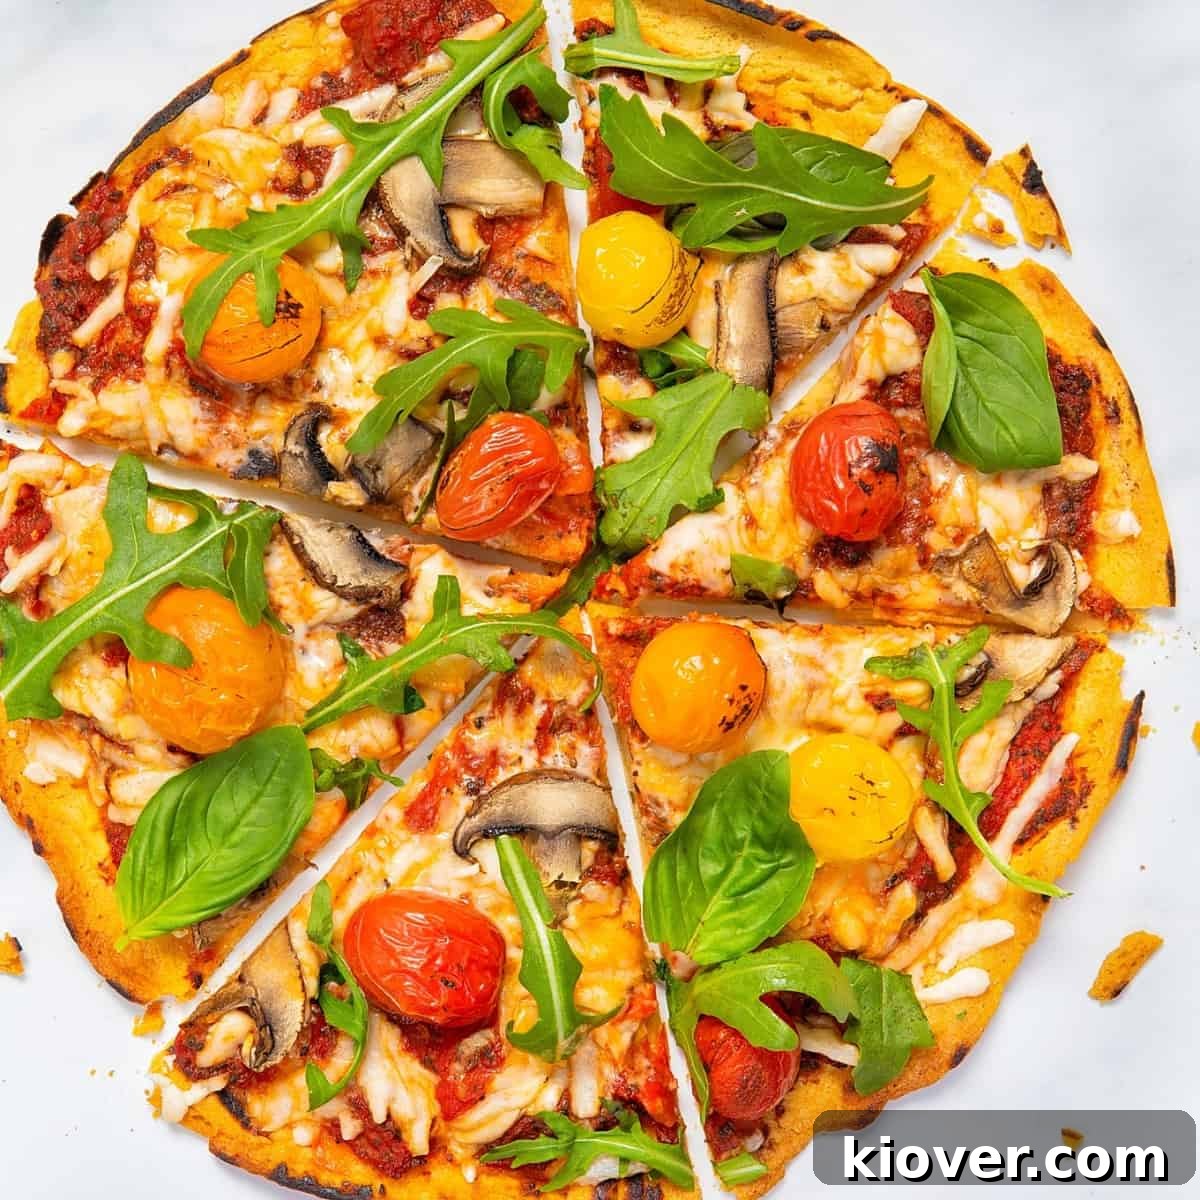
Effortless 3-Ingredient Gluten-Free & Dairy-Free Pizza Base: Your Quick & High-Protein Meal Solution!
Craving delicious pizza but avoiding gluten and dairy? Look no further! This incredibly easy-to-make Gluten Free Pizza Base recipe is a game-changer. Our Gluten Free Dairy Free Pizza Crust couldn’t be simpler to prepare, requiring absolutely zero kneading and minimal fuss. In just 10 minutes, you’ll have a perfectly cooked base, boasting an impressive 25g of protein per base, ready for your favorite toppings. The best part? It uses only 3 simple, wholesome ingredients. Get ready to revolutionize your pizza nights!
Recipe Difficulty – Very Easy
Table of Contents
- Why This Simple Gluten-Free Pizza Recipe Works Wonders
- Essential 3 Ingredients for Your Gluten-Free Pizza Base
- Smart Substitutions for Your Gluten-Free Pizza Crust
- Creative Variations to Elevate Your Pizza Experience
- Step-by-Step Guide: How to Make This Easy Gluten-Free Pizza Base
- Storage and Enjoying Leftovers
- Frequently Asked Questions About Gluten-Free Pizza
- Gluten Free Pizza Base Recipe Card
Why This Simple Gluten-Free Pizza Recipe Works Wonders
This gluten-free pizza crust isn’t just a recipe; it’s a staple in our kitchen, often appearing on our weekly meal plan. Its unparalleled ease and speed make it our ultimate go-to for quick pizza cravings. There’s something undeniably comforting about a freshly baked pizza, no matter the season, and this recipe delivers every time. As it bakes, your kitchen will fill with an aroma that promises pure delight. But the true test of any pizza base? Its structural integrity. You’ll be thrilled to discover that this base holds together beautifully, meaning no more frustrating, crumbly slices!
Beyond its incredible taste and texture, this recipe also offers significant nutritional benefits. Each pizza base packs a powerful punch with 25g of protein, making it a fantastic high-protein meal option that’s both quick and satisfying. For those seeking other protein-rich breakfast ideas, my Protein Overnight Oats are another excellent choice to fuel your day.
This recipe stands out as a superior alternative to many store-bought gluten-free options or even homemade cauliflower crusts, which often demand more time and effort to prepare. Forget complicated steps; this simple approach focuses on efficiency without compromising on flavor or quality.
The inspiration for this phenomenal pizza base comes from my beloved Easy Gluten Free Focaccia, sharing its simplicity and delightful texture. It also pairs perfectly with my incredible Homemade Pizza Sauce recipe, creating a harmonious culinary experience. If you’re a fan of quick bread, you’ll also adore my 3 Ingredient Gluten Free Flatbread recipe.
What truly sets this recipe apart is its unique combination of convenience, health benefits, and delicious results. It’s designed for busy individuals who refuse to compromise on taste or dietary needs. You can enjoy a homemade pizza experience that rivals your favorite pizzeria, all while staying true to your gluten-free and dairy-free lifestyle. It’s not just pizza; it’s smart, wholesome eating.
Essential 3 Ingredients for Your Gluten-Free Pizza Base
The beauty of this recipe lies in its simplicity. With just three core ingredients, you can create a perfectly textured and flavorful gluten-free pizza base. Let’s explore what makes each component so essential:
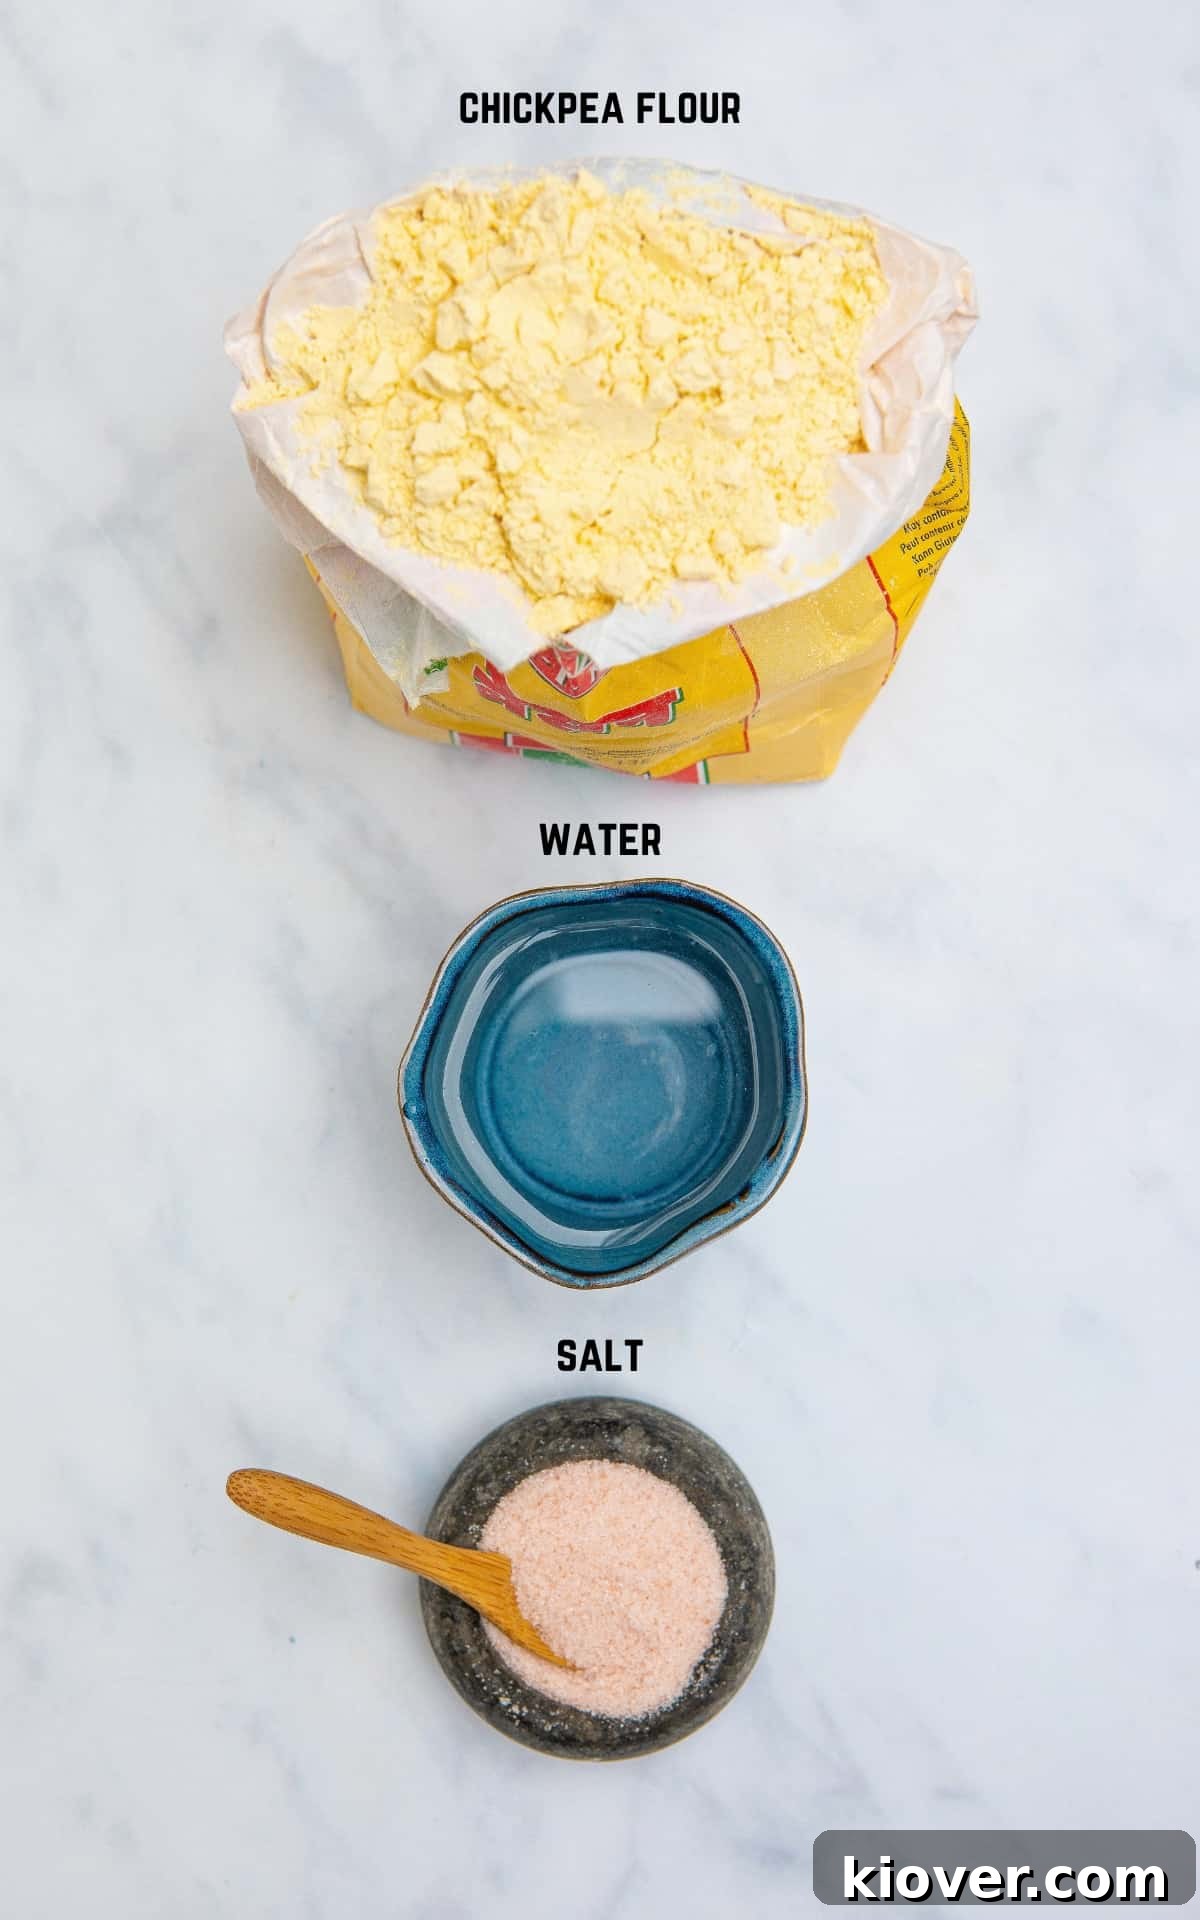
- Chickpea Flour (Gram Flour / Besan Flour) – This is the star of our high-protein pizza base, contributing a fantastic 25g of protein per serving. You might be less familiar with chickpea flour than traditional wheat flours, but it’s becoming increasingly popular and is typically found in the “world foods” or “specialty flours” section of most major supermarkets. It’s also known by its other names, “Gram Flour” or “Besan Flour,” particularly in Indian and Middle Eastern cooking. This flour is naturally gluten-free, making it an ideal choice for this recipe. Beyond pizza, its excellent binding properties make it versatile; I also use it to help bind my Vegan Fishcakes, showcasing its versatility and ability to create structured, delicious dishes. Its slightly nutty flavor also adds depth to the pizza base.
- Water – The humble yet crucial ingredient that transforms the chickpea flour into a smooth, pourable batter. The right ratio of water to flour is key to achieving that perfect crepe-like consistency, ensuring your pizza base is neither too thick nor too thin. It helps hydrate the flour, allowing it to bind and form a cohesive dough without any kneading.
- Salt – A pinch of salt is vital for enhancing the natural flavors of the chickpea flour and bringing balance to the overall taste of your pizza base. It’s a simple addition that makes a significant difference, preventing the base from tasting bland and complementing whatever delicious toppings you choose to add.
Together, these three ingredients create a robust, flavorful, and incredibly easy gluten-free pizza crust that you’ll want to make again and again. For a complete understanding of quantities and precise measurements, please refer to the detailed recipe card below.
Smart Substitutions for Your Gluten-Free Pizza Crust
While chickpea flour is highly recommended for its unique binding properties, high protein content, and fantastic flavor profile, we understand that sometimes you need alternatives. If chickpea flour isn’t available or you’re experimenting with different tastes, here are some considerations for substitutions:
Chickpea Flour Alternatives – Buckwheat flour is a viable alternative that can work well in this recipe. Like chickpea flour, it’s naturally gluten-free and has a distinct, earthy flavor. However, it’s important to note that the absorption properties of flours can vary significantly. If you opt for buckwheat flour, you may need to adjust the water-to-flour ratio slightly to achieve the desired consistency. Start by adding water slowly, just as you would with chickpea flour, aiming for a batter that resembles a thin pancake or crepe mix. You might find you need a little more or a little less water depending on the brand and grind of buckwheat flour you use. Experimentation is key to success when making flour substitutions in gluten-free baking.
Another option could be a general gluten-free all-purpose flour blend, but be aware that these blends often contain gums (like xanthan gum) to aid binding, and the texture might differ. Always check the ingredient list for hidden dairy or gluten if you have severe allergies. For the best results and the distinct high-protein benefit, chickpea flour truly shines in this particular recipe.
Creative Variations to Elevate Your Pizza Experience
This versatile gluten-free pizza base serves as the perfect canvas for a myriad of flavor combinations. Don’t be afraid to get creative and customize your pizza to suit any mood or occasion. Here are some inspiring variations to spark your culinary imagination:
- Spicy Sensation – For those who love a kick, transform your pizza into a fiery feast. Top your base with thinly sliced fresh or pickled jalapenos, spicy vegan sausage crumbles, zesty pepperoncini, and a generous sprinkle of red pepper flakes for an extra burst of heat. A drizzle of hot honey after baking can also add a delightful sweet-spicy contrast.
- Gourmet Deluxe – The possibilities are truly endless when it comes to crafting a deluxe pizza. Think about your favorite vegetables, premium dairy-free cheeses, rich sauces, and plant-based meat substitutes. Consider caramelized onions, roasted red peppers, sun-dried tomatoes, artichoke hearts, olives, or even a handful of fresh spinach or arugula added after baking. Experiment with different dairy-free mozzarella or cheddar alternatives, or even a creamy cashew-based sauce for a unique twist. For an umami bomb, add sautéed mushrooms and a sprinkle of nutritional yeast.
- Kid-Friendly Fun – Pizza is almost universally loved by children, and this gluten-free base is perfect for everyone in the family. For younger palates, a classic, simple dairy-free cheese pizza is usually a winner. To make it an interactive and memorable experience, let your kids take charge! Set out bowls of their favorite toppings – maybe some mini dairy-free pepperoni, bell pepper strips, corn, or small broccoli florets – and let them decorate their own pizzas before baking. It’s a fantastic way to encourage healthy eating and culinary exploration.
Beyond these topping ideas, don’t forget the sauce! While our Homemade Pizza Sauce recipe is a go-to, for a delicious and creamy alternative to traditional tomato-based sauces, be sure to check out my Vegan White Sauce recipe on my website! It’s an excellent option to put on your Chickpea Pizza Crust, offering a rich and comforting flavor profile that complements many vegetable and plant-based protein toppings.
Step-by-Step Guide: How to Make This Easy Gluten-Free Pizza Base
Creating this delicious gluten-free and dairy-free pizza base is remarkably simple and quick. Follow these straightforward steps to achieve a perfectly cooked crust every time.

Step 1: Prepare the Batter. Begin by heating a large non-stick pan over medium-high heat with a little oil. While the pan is heating, take a spacious mixing bowl and add your chickpea flour along with a pinch of salt. It’s crucial to mix these dry ingredients thoroughly first. Then, gradually incorporate the water, whisking continuously to prevent lumps. The key here is to add the water slowly, allowing the flour to fully absorb it, ensuring you achieve a smooth, pourable batter without any dry pockets. Aim for a consistency similar to that of a thin pancake or crepe batter—it should be fluid enough to spread but not watery.
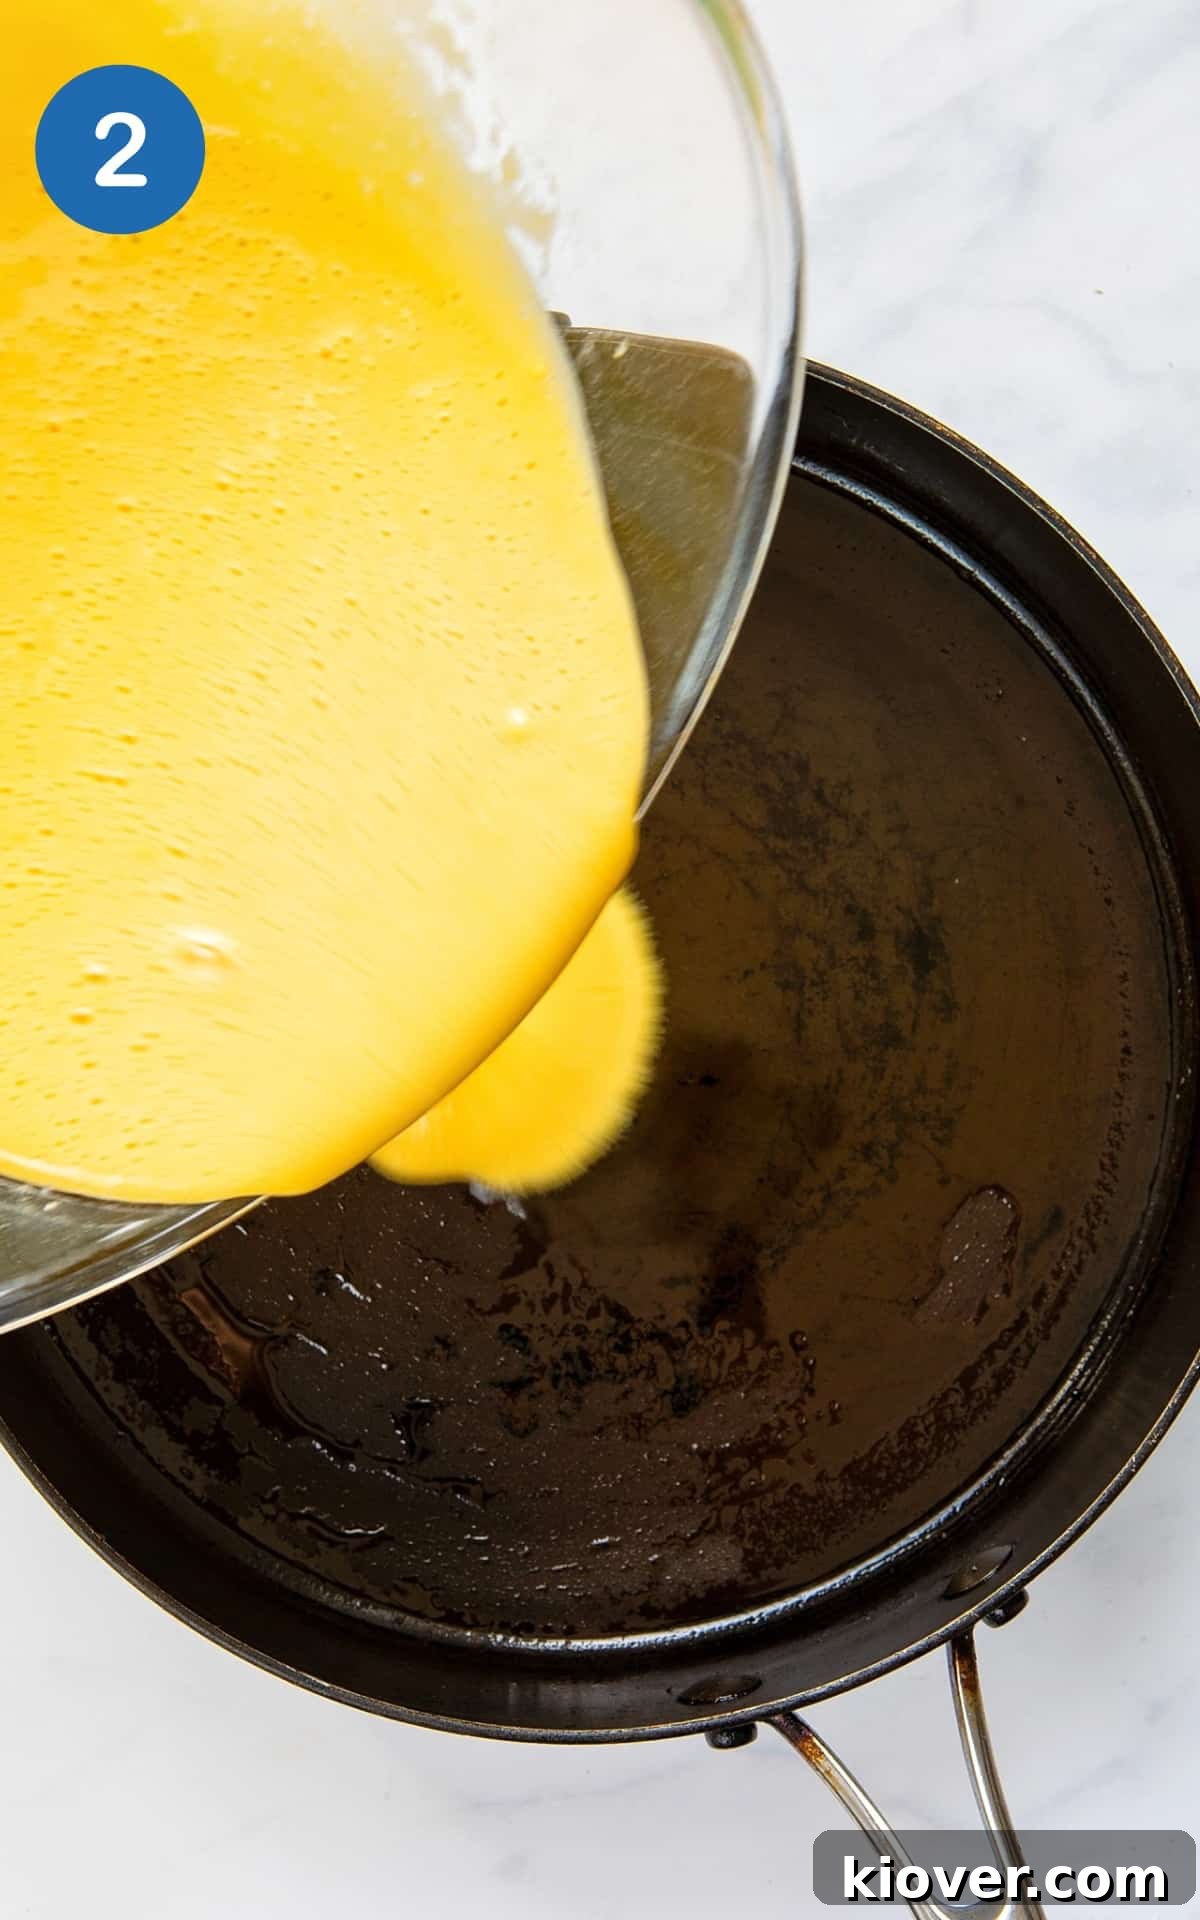
Step 2: Cook the First Side. Once your pan is very hot and the oil is shimmering (indicating it’s ready), pour approximately half of your prepared batter into the center of the pan. Immediately tilt and rotate the pan gently to allow the batter to spread evenly across the entire surface, forming a thin, round crust. This step is critical for achieving a uniformly thin base, much like making a large crepe. Let it cook undisturbed for a few minutes. You’ll know it’s ready to flip when the edges begin to crisp and lift slightly, and the top surface starts to look dry and set.
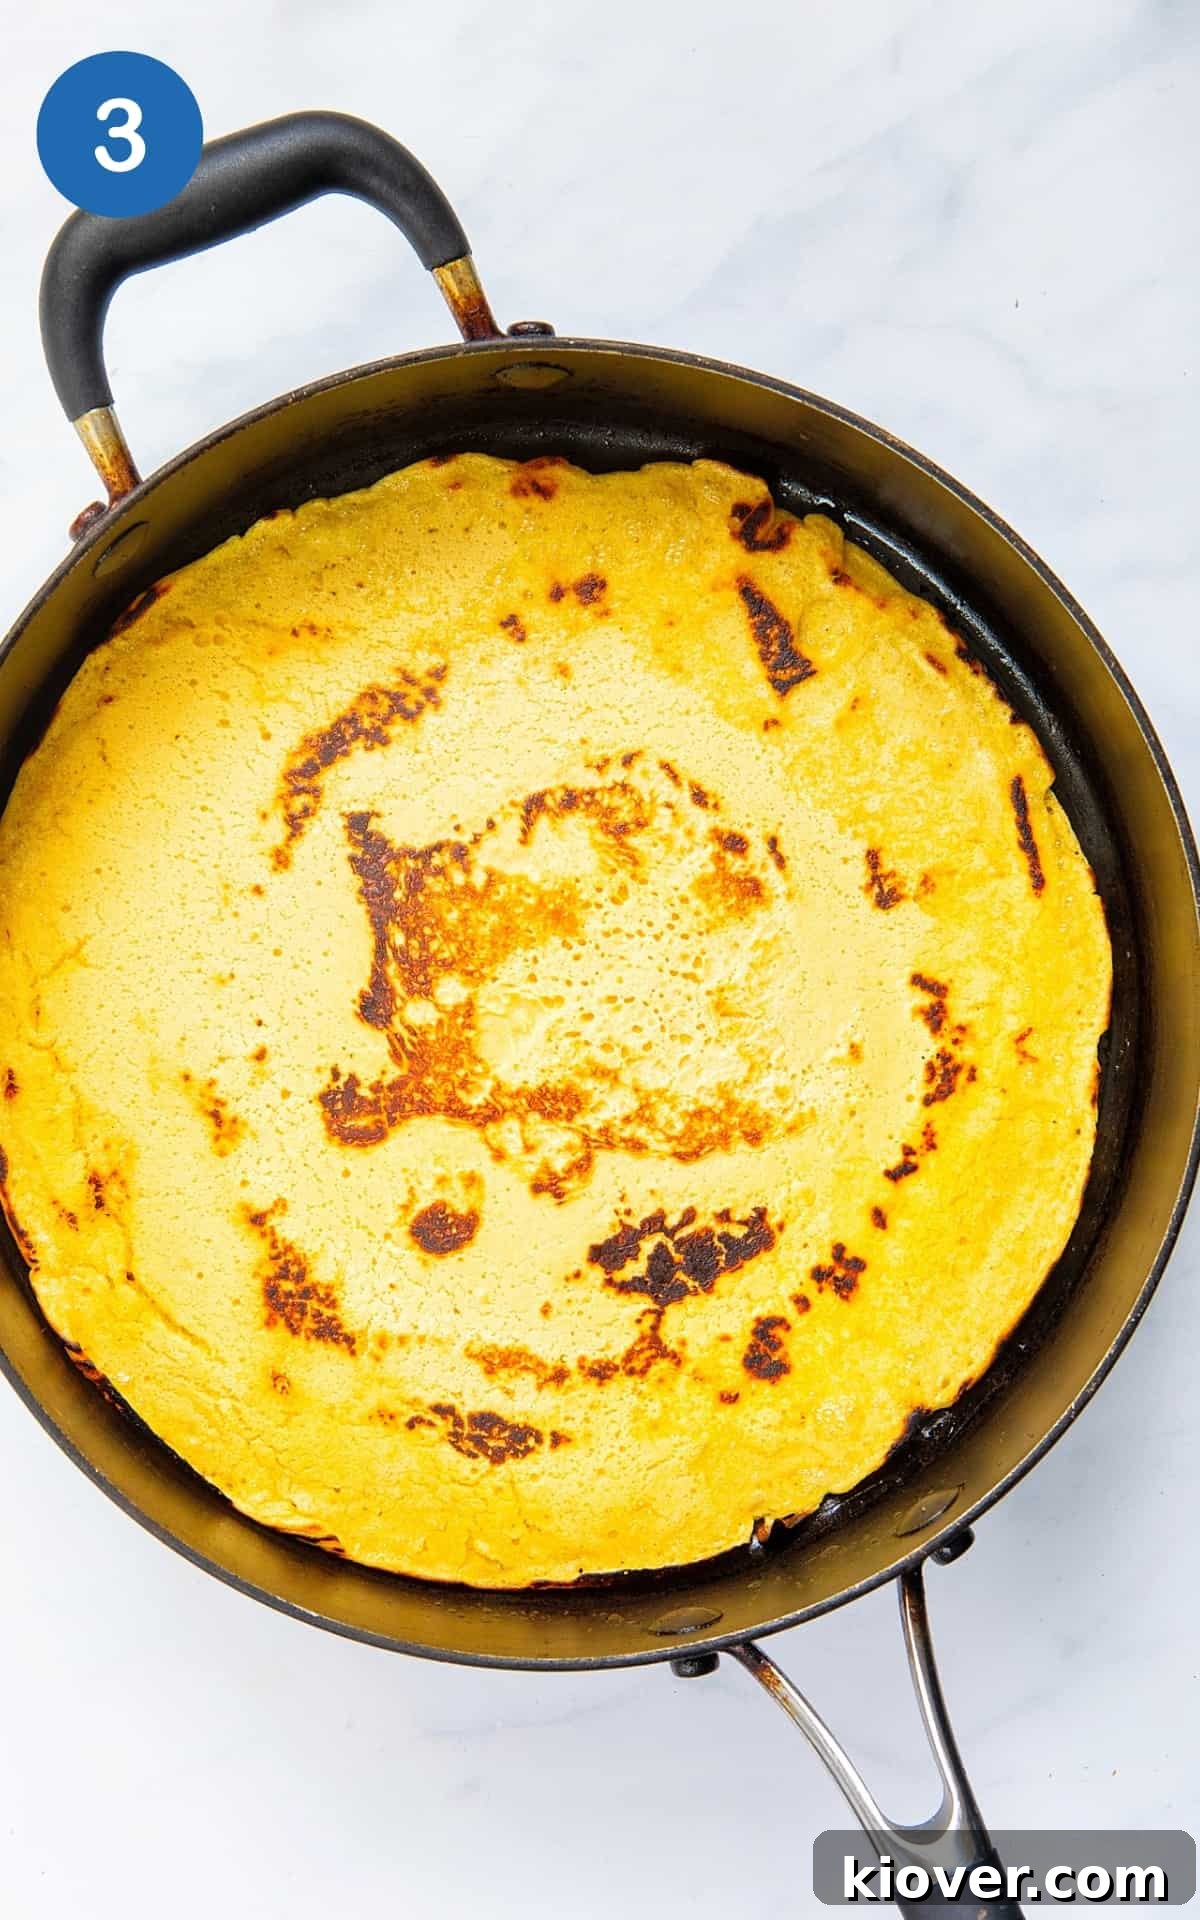
Step 3: Flip and Finish. With care and using a wide, flat spatula, gently turn over the base to cook the other side. This step requires a steady hand to avoid tearing the delicate crust. Allow it to fry for another few minutes, until both sides are golden brown and slightly crisp. The base should be firm and cooked through. Repeat this process with the remaining half of your batter to create a second pizza base.
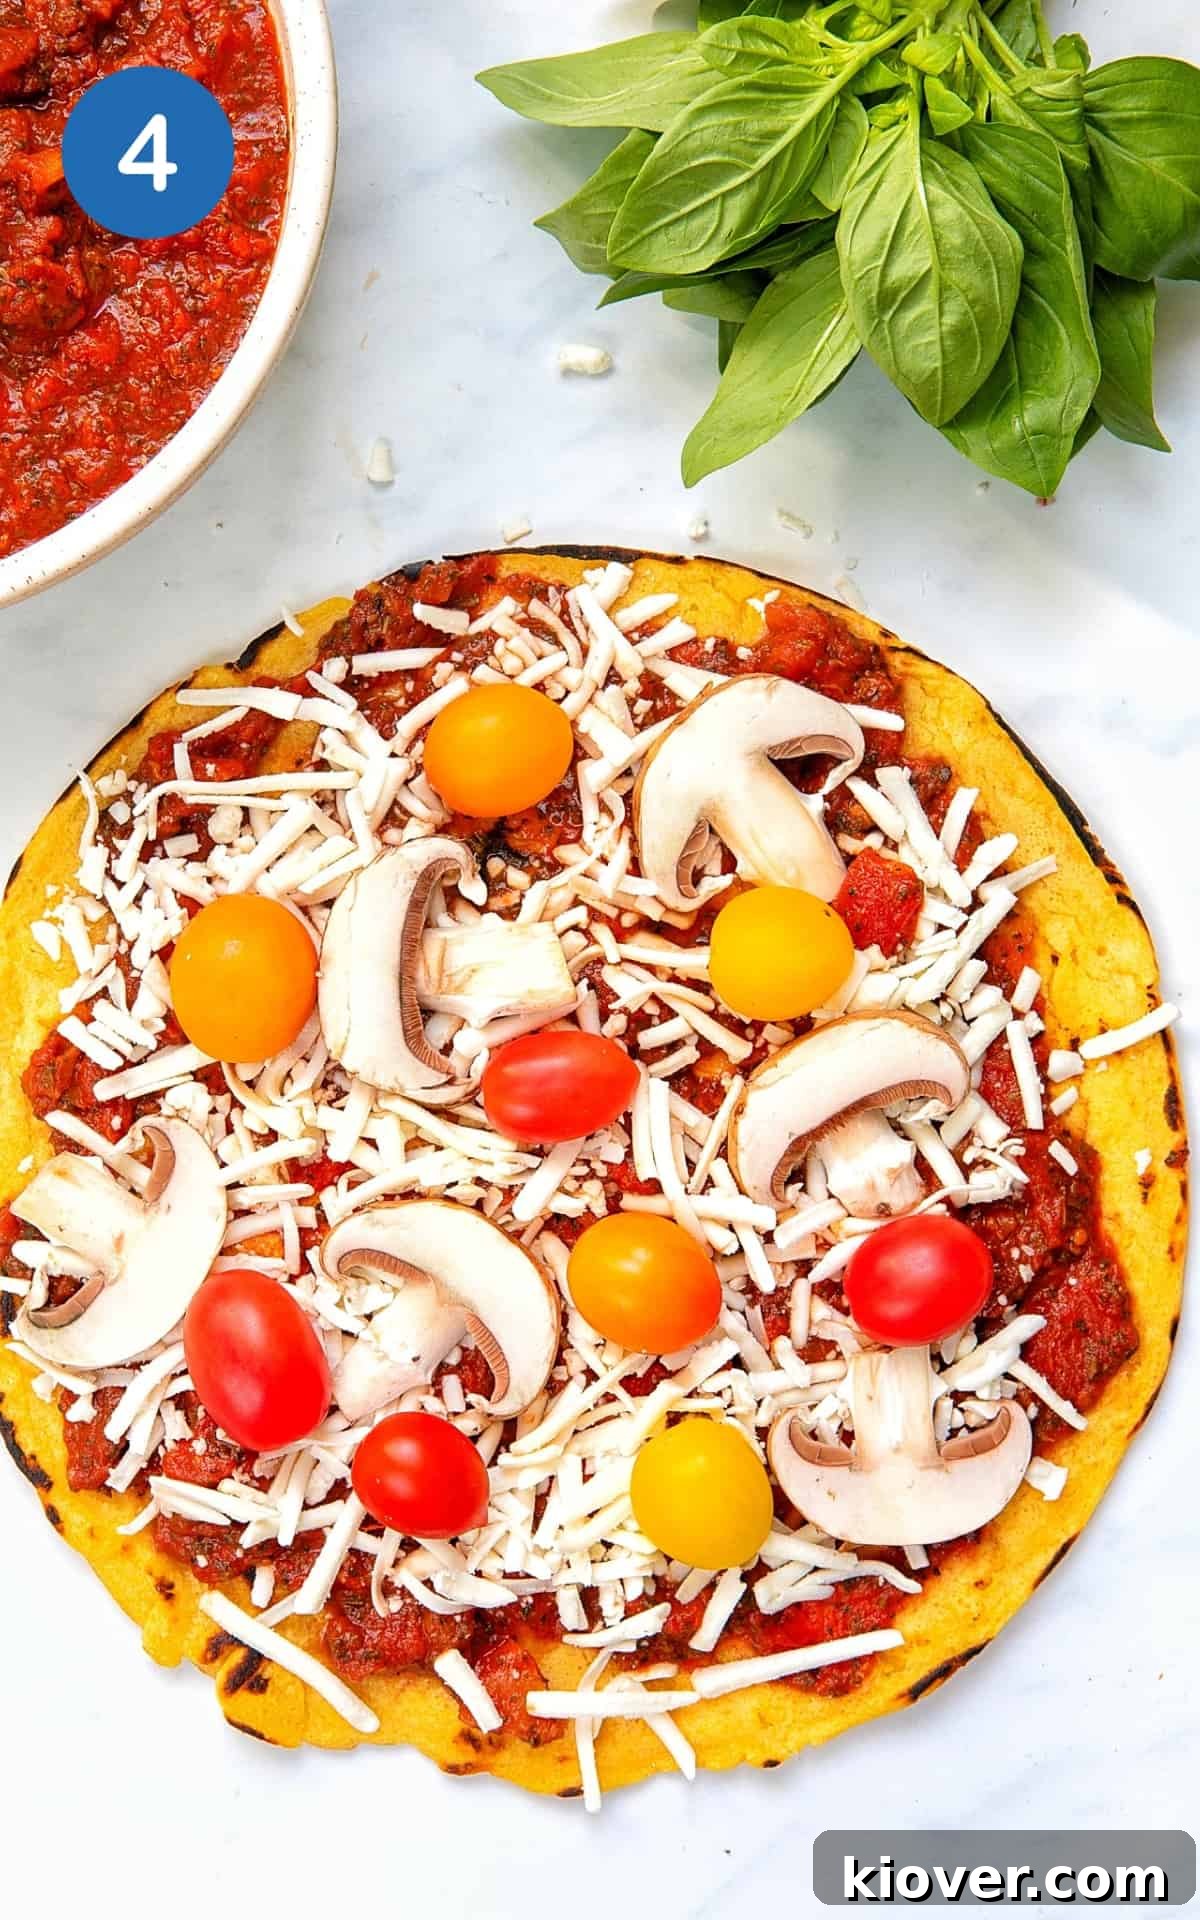
Step 4: Top and Bake. Your perfectly cooked gluten-free pizza base is now ready for your creative touch! Transfer the base to a baking sheet. Preheat your oven to 200°C (400°F). Spread your favorite pizza sauce (such as our simple homemade pizza sauce) evenly over the base, leaving a small border for the crust. Pile on your desired toppings—vegan cheese, fresh vegetables, plant-based proteins, or anything else your heart desires. Bake in the preheated oven for 12-15 minutes, or until the cheese is melted and bubbly, and the toppings are heated through. Keep an eye on it to prevent over-browning. Enjoy your freshly made, wholesome pizza!
Hint: The mixture should be about the thickness of a crepe or a very thin pancake batter. This ensures a thin, crispy crust that holds together well and cooks quickly.
Storage and Enjoying Leftovers
One of the great advantages of this gluten-free pizza base is its versatility, not just in preparation but also in storage. Whether you’ve got extra bases or some fully topped slices, here’s how to properly store and enjoy them later, ensuring they remain delicious.
For Leftover Cooked Pizza Slices: If you have fully assembled and baked pizza slices left over, allow them to cool completely before storing. Place them in an airtight container and refrigerate for 2-3 days. To reheat for best results, avoid the microwave, which can make the crust soggy. Instead, warm slices in a pan over medium-low heat for a few minutes until the crust is crispy again and the toppings are hot, or pop them into a preheated oven (around 180°C / 350°F) for 5-7 minutes. This will revive the crust’s crispness beautifully.
For Storing Un-topped Bases: You can prepare the bases in advance and store them, which is perfect for meal prepping! Allow the freshly fried bases to cool completely to room temperature. You can then store them in an airtight container in the fridge for up to 2-3 days. When you’re ready to use them, simply add your toppings and bake as instructed. For longer storage, this recipe is also fantastic for freezing.
To Freeze Un-topped Bases: Once the bases are completely cool, separate them with parchment paper to prevent sticking. Freeze them flat on a baking sheet until solid, then transfer them to a freezer-safe bag or container. They can be stored in the freezer for up to 2-3 months. When you’re ready to make pizza, simply defrost the frozen bases at room temperature for about 30-60 minutes, or until pliable. Once defrosted, you can proceed with topping them and baking them in the oven as if they were freshly made. This method allows for spontaneous pizza nights without the need for immediate preparation.
Always ensure that bases are fully cooled before refrigeration or freezing to prevent condensation and maintain optimal texture. Proper storage ensures you can enjoy delicious, homemade gluten-free pizza whenever the craving strikes!
Frequently Asked Questions About Gluten-Free Pizza
Many popular pizza restaurants, including chains like Domino’s, Pizza Hut, and California Pizza Kitchen, now offer gluten-free crusts. However, if you have Celiac Disease or a severe gluten sensitivity, it is absolutely crucial to inquire about their preparation methods. The primary concern is cross-contamination in the kitchen, where gluten-containing flours and ingredients are handled. Shared ovens, utensils, and prep surfaces can pose a risk. While some restaurants have strict protocols to prevent this, others may not. For absolute peace of mind, buying a certified gluten-free frozen pizza, such as the Oggi brand, or making your own no-knead pizza dough at home with this easy recipe, is often the safest and most economical choice. Homemade options give you complete control over ingredients and preparation, offering a much better value than dining out.
Gluten-free pizza crusts come in various forms. Most commonly, they either utilize a blend of substituted flours (such as rice flour, tapioca starch, potato starch, or sorghum flour, often with binders like xanthan gum) or feature a vegetable base like cauliflower crust. While cauliflower crusts are popular, they can be more time-consuming to prepare and sometimes lack the traditional pizza texture. Our preferred method, and the one used in this recipe, is a simple and effective Chickpea Flour Pizza Crust. It’s incredibly straightforward, requiring just 3 ingredients, and delivers a fantastic texture and flavor without the complexity or need for extensive flour blends.
Absolutely, it can! The taste and texture of gluten-free pizza have come a long way. This particular chickpea flour crust mix is super easy to make and yields a delightfully delicious result. It creates a nice, thin crust that becomes wonderfully crispy when fried and then baked with toppings. This thin, sturdy base is the perfect foundation for any pizza, ensuring every bite is enjoyable and satisfying. Many people find they prefer the unique nutty flavor and firm texture of chickpea flour over traditional wheat crusts, especially when seeking a healthier and lighter option.
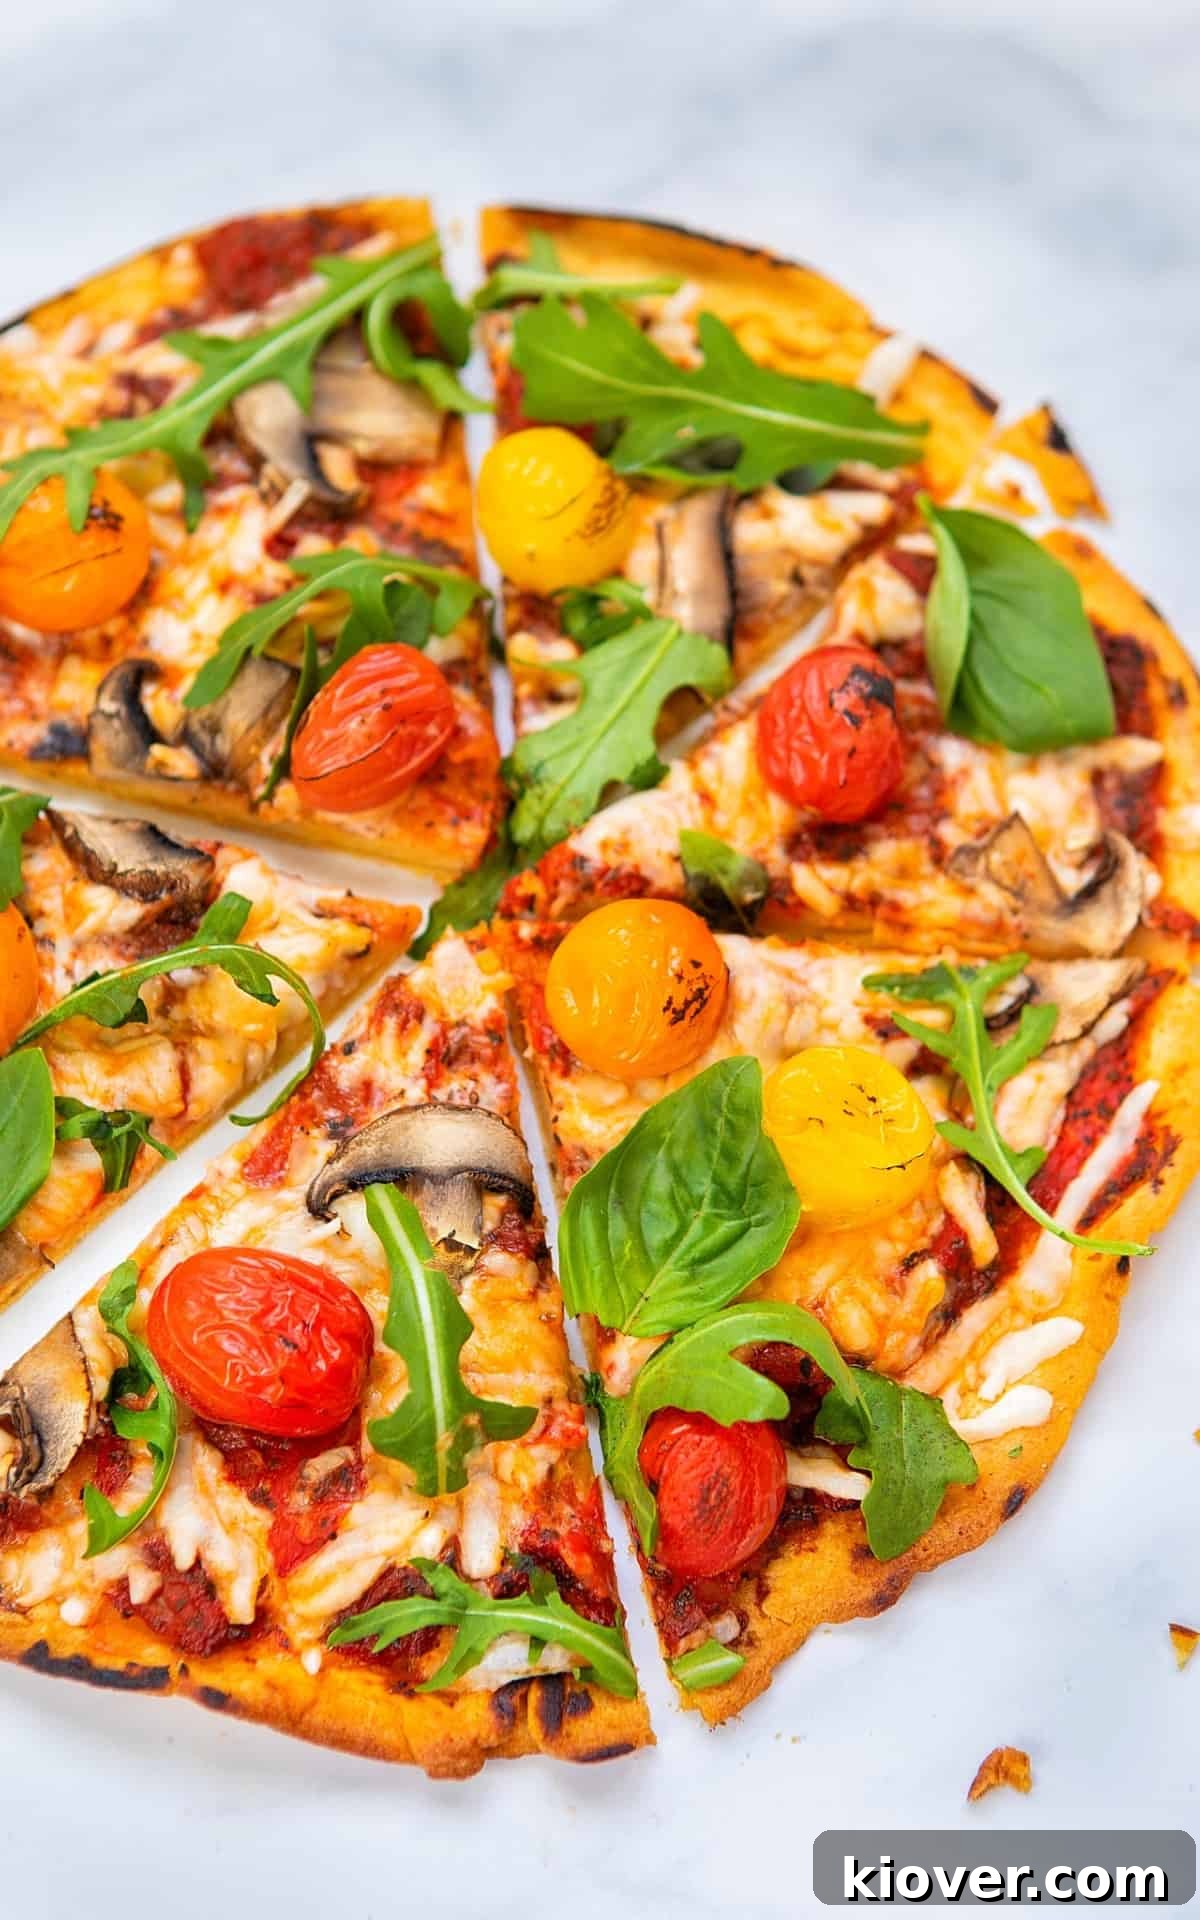
The sky truly is the limit when it comes to topping your gluten-free pizza! This base is robust enough to handle a variety of ingredients. I personally love starting with my homemade pizza sauce, then adding a generous layer of high-quality vegan cheese. For fresh, vibrant flavors, I often include sliced tomatoes, sautéed mushrooms, fresh rocket (arugula) added after baking, and fragrant basil leaves. Other fantastic ideas include caramelized onions, roasted bell peppers, spinach, olives, artichoke hearts, sun-dried tomatoes, or even plant-based pepperoni or sausage crumbles. Don’t hesitate to experiment with different flavor profiles, from Mediterranean-inspired toppings to a BBQ-style vegan chicken pizza. The beauty of homemade pizza is making it exactly how you love it!
Yes, you can prepare the chickpea flour batter a few hours in advance. Simply mix all the ingredients as directed and store the batter in an airtight container in the refrigerator. Give it a good whisk or stir just before pouring it into the hot pan, as the flour might settle at the bottom. This can be a great time-saver for busy weeknights!
A good quality non-stick pan is highly recommended for cooking these pizza bases. This will ensure the batter spreads easily and, most importantly, that the base can be flipped and removed without sticking or tearing. A pan with a diameter of about 8-10 inches (20-25 cm) is ideal for creating individual, personal-sized pizzas. Make sure the pan is thoroughly heated before adding the batter.
YOU MIGHT ALSO LIKE…
Dips/Sauces
Pizza Base Sauce
Sides
Easy Gluten Free Focaccia
Lunch
Vegan Quiche
Dinner
Vegan Lasagne
Tried this Gluten Free Pizza recipe? We would love to hear about your experience! Please leave a star rating ⭐️⭐️⭐️⭐️⭐️ below and share your feedback in the comments. Your positive reviews are incredibly motivating and one of the best parts of creating recipes like this. So please review it below and leave a comment!
P.S. Don’t miss out on any new recipes! Get more healthy and delicious recipes sent straight to your inbox weekly – Subscribe now and receive a free recipe eBook as our thank you!

Print Recipe
Easy 3-Ingredient Gluten-Free Pizza Base
Ingredients
- 225 g Chickpea Flour, (also known as gram or besan flour)
- 310 ml Water
- Pinch Salt
Optional: Pizza Sauce
- 2 servings Homemade Pizza Sauce, (for topping)
Instructions
-
In a large mixing bowl, combine the 225g chickpea flour and a pinch of salt. Gradually whisk in the 310ml water until the mixture is smooth and well combined. The batter should have a consistency similar to a thin pancake or crepe.
-
Heat a large non-stick pan over medium-high heat with a little oil until very hot. Pour approximately half of the prepared batter into the pan and immediately tilt the pan in all directions to ensure the batter spreads evenly and thinly across the entire surface.
-
Cook for a few minutes until the edges begin to crisp and the surface looks set. Carefully turn the base over using a wide spatula and fry for another few minutes until golden brown and cooked through.
-
Repeat the process with the remaining batter to create your second pizza base. Your bases are now ready for topping! We recommend topping with our simple homemade pizza sauce and your favorite ingredients, then baking in a preheated oven at 200°C (400°F) for 12-15 minutes, or until toppings are cooked and cheese is melted.
Notes
Substitutions & Variations: A comprehensive list of ingredient substitutions and creative topping variations can be found in the sections above, allowing you to customize your pizza to your taste and dietary needs.
To Store Cooked Pizza: Store any leftover cooked pizza slices in an airtight container in the fridge for 2-3 days. Reheat gently in a pan over a low heat until piping hot and crispy, or warm in the oven.
To Store Un-topped Bases: Cooled, un-topped bases can be stored in an airtight container in the fridge for 2-3 days.
To Freeze Un-topped Bases: Allow the cooked bases to cool completely. Freeze them flat, separated by parchment paper, then transfer to a freezer-safe bag. Defrost at room temperature before adding toppings and baking.
Tip 1: Slow Water Addition: Always add the water slowly to the chickpea flour while whisking. This allows you to control the consistency and ensure the batter is perfectly smooth and free of lumps.
Tip 2: Gentle Flipping: When flipping the base in the pan, be careful and use a wide spatula to support it fully. This will prevent the base from tearing, ensuring a perfectly intact crust.
Tip 3: Oven Baking with Toppings: After adding your desired toppings, transfer the pizza to a preheated oven and bake for 12-15 minutes at 200°C (400°F). This step allows the toppings to cook through and the crust to become beautifully crisp.