
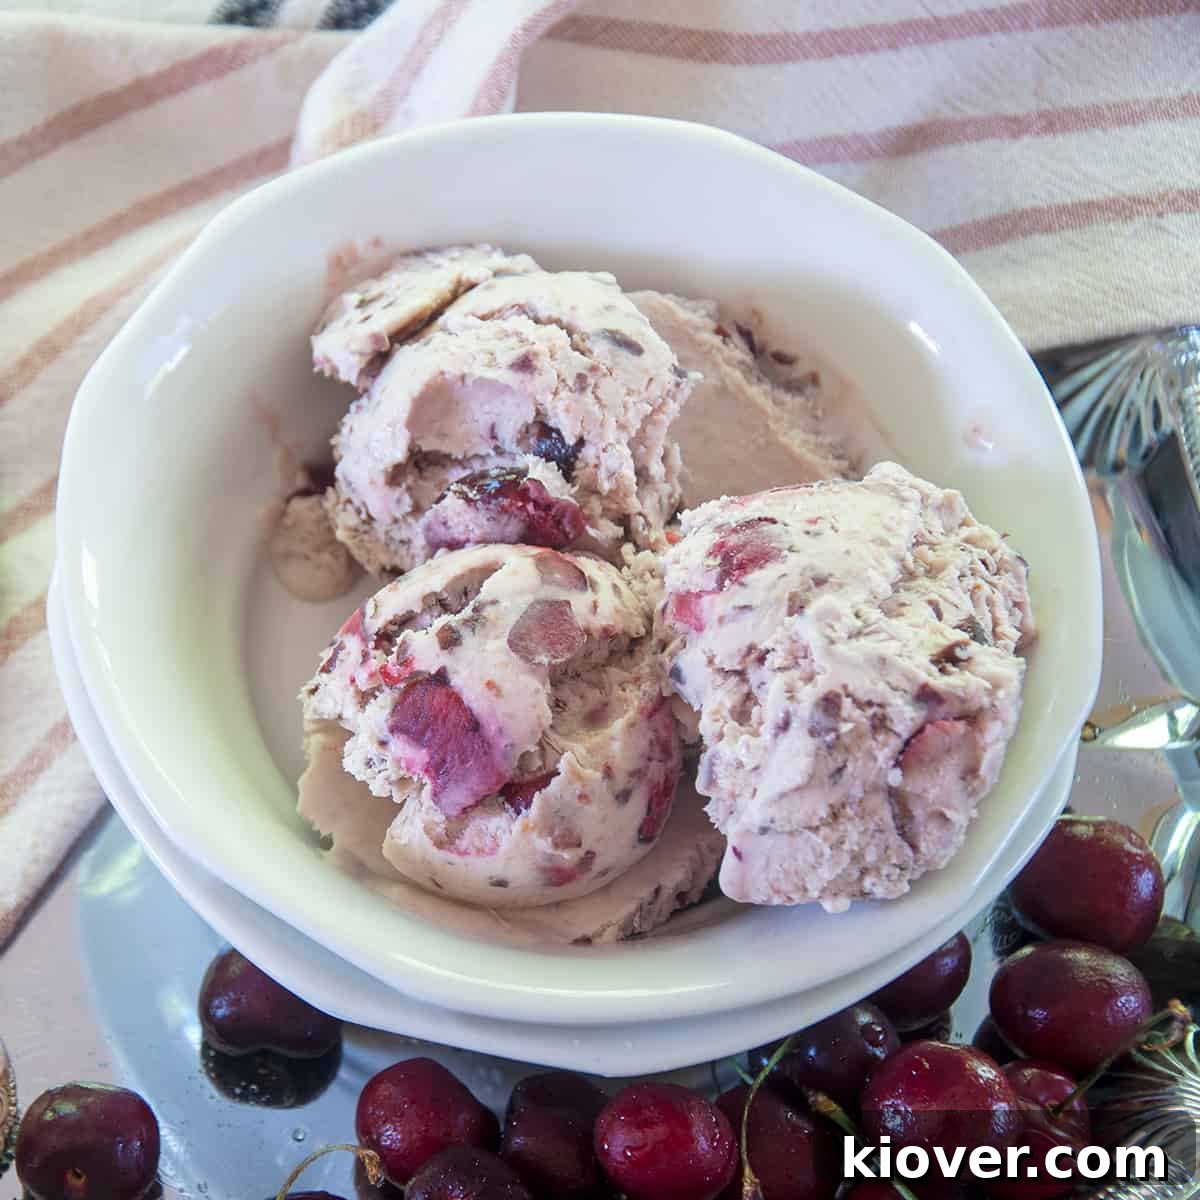
The arrival of fresh cherries in grocery stores heralds the true essence of summer, offering a delightful bounty from nature. And what better way to celebrate this seasonal gift than by transforming those plump, ruby-red fruits into a luxurious, cool, and incredibly delicious **No-Churn Black Cherry Ice Cream**? This recipe stands as a testament to simplicity, bringing the joy of homemade ice cream within reach of anyone with a freezer and a desire for something extraordinary. Forget the fancy equipment; this simple, no-churn method delivers a velvety, flavor-packed dessert that will impress both your taste buds and your guests. Get ready to indulge in the vibrant sweetness and creamy texture of this exceptional treat.
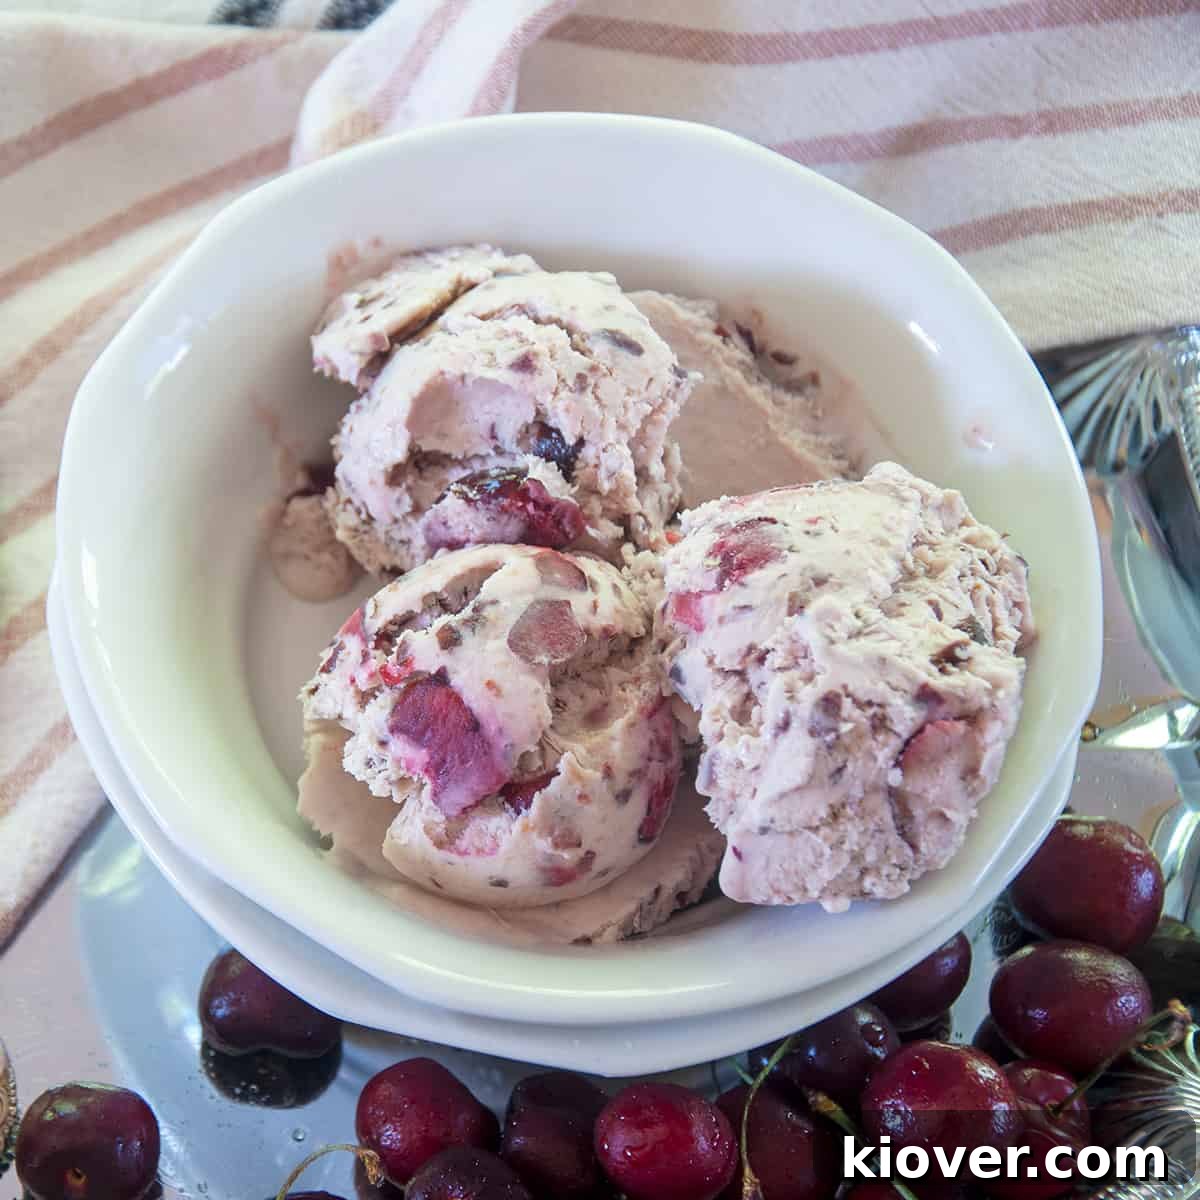
Table of Contents
- Unveiling the Magic of No-Churn Ice Cream
- Selecting Your Ingredients: The Heart of the Flavor
- Black Cherries vs. Other Cherries: Choosing the Perfect Fruit
- Can I Use Frozen Cherries? Absolutely!
- Crafting Your Dream Dessert: Step-by-Step Instructions
- Mastering Cherry Pitting for Perfect Ice Cream
- Troubleshooting: Preventing Icy No-Churn Ice Cream
- Flavor Variations & Serving Suggestions
- Expert Tips for Your No-Churn Black Cherry Ice Cream
- Essential Tools for This Recipe
- Your Feedback Matters!
- No-Churn Black Cherry Ice Cream Recipe
Unveiling the Magic of No-Churn Ice Cream
For many, the idea of making homemade ice cream often conjures images of bulky ice cream makers, pre-freezing bowls, and a lengthy churning process. However, the revolutionary no-churn method has completely transformed this perception, making artisanal quality ice cream accessible to every home cook. The secret lies in a brilliant combination of just a few key ingredients: heavy whipping cream and sweetened condensed milk. This approach liberates you from specialized equipment, allowing anyone to whip up a batch of velvety smooth ice cream with minimal fuss.
When heavy cream is whipped to stiff peaks, it incorporates a significant amount of air, creating a light and airy base. This trapped air is crucial for preventing the ice cream from becoming a solid block of ice, instead yielding a soft, delightful texture. Sweetened condensed milk, on the other hand, is a thick, syrupy mixture of milk and sugar, which not only provides intense sweetness but also acts as a stabilizer. Its high sugar content naturally lowers the freezing point of the mixture and its thick consistency helps prevent large, gritty ice crystals from forming. This unique duo, when gently folded together, creates an incredibly rich, creamy, and smooth ice cream texture without the need for an ice cream machine. It’s an effortless way to enjoy gourmet frozen treats, saving you time and counter space, all while delivering a dessert that rivals its churned counterparts in flavor and consistency. The simplicity of the method belies the sophisticated results, making it a go-to for quick, impressive desserts.
Selecting Your Ingredients: The Heart of the Flavor
While the no-churn method simplifies the process, the quality of your ingredients is paramount to the outstanding flavor of your Black Cherry Ice Cream. Each component plays a vital role in creating the perfect balance of sweetness, creaminess, and fruity zest. The cherries themselves are undoubtedly the star of this sweet symphony, so choosing them wisely is the first step towards an exceptional dessert.
Black Cherries vs. Other Cherries: Choosing the Perfect Fruit
The term “black cherry” often refers to sweet cherry varieties that develop a deep, almost black hue when fully ripe. These aren’t necessarily a distinct species but rather a description of their intensely dark color and rich, concentrated flavor profile. Varieties like Bing, Lambert, Chelan, or Sweetheart are excellent choices that will impart a beautiful deep purple color and robust sweetness to your ice cream. Their naturally sweet, slightly tart notes perfectly complement the creamy base, creating a harmonious and balanced taste.
While this recipe specifically highlights sweet, dark cherries for their intense flavor and striking color, most flavorful, ripe sweet cherries will yield a delicious result. However, my personal experiments have consistently pointed towards the superior outcome achieved with sweeter, darker varieties. They offer a depth of flavor that truly elevates the ice cream from merely good to absolutely sublime. When selecting fresh cherries, look for plump, firm fruits with bright green stems (if present) and a rich, uniform color. Avoid any cherries that are soft, bruised, or show signs of mold, as these will compromise the flavor and texture of your ice cream.
Can I Use Frozen Cherries? Absolutely!
The beauty of this recipe extends to its versatility, allowing you to enjoy this delightful dessert even outside of peak cherry season. Frozen cherries are a perfectly viable and often excellent alternative to fresh ones. In fact, many commercially frozen cherries are picked at their optimal ripeness and then flash-frozen, locking in their peak flavor and nutritional value. This means you can often find high-quality frozen cherries that are just as flavorful, if not more so, than out-of-season fresh options.
If you opt for frozen cherries, I highly recommend allowing them to thaw completely before incorporating them into the recipe. This prevents excess moisture from diluting your ice cream base or creating large, unwanted ice pockets. Once thawed, you might gently pat them dry with a paper towel, especially if they seem particularly watery. Excess water can lead to a more icy, less creamy final product. While I adore the seasonal charm and vibrant freshness of freshly picked cherries, knowing that a delicious batch of black cherry ice cream is possible year-round makes this recipe even more appealing and convenient for spontaneous dessert cravings.
Beyond the cherries, the other two essential ingredients, heavy whipping cream and sweetened condensed milk, also deserve a note. For the heavy cream, ensure it has a high-fat content (typically 36% or more) as this is what allows it to whip into stable peaks and contributes to the rich, smooth mouthfeel of the final ice cream. Lower fat creams will not hold air as well and will result in a less creamy, potentially icier texture. Sweetened condensed milk provides the necessary sugar and prevents crystallization, making your no-churn ice cream incredibly creamy and scoopable. Using a good quality brand will ensure the best flavor foundation.
Crafting Your Dream Dessert: Step-by-Step Instructions
Embarking on your first no-churn ice cream adventure is remarkably straightforward, and this Black Cherry Ice Cream recipe is designed for maximum ease and enjoyment. You’ll be surprised at how quickly these simple ingredients transform into a decadent frozen treat that tastes like it came from a gourmet ice cream parlor. Gather your main components: one pound of pitted cherries (ideally fresh black cherries for the best flavor and color), one 14-ounce can of sweetened condensed milk, and about 2 cups of heavy whipping cream. Ensure your heavy cream is very cold, as this will help it whip up more easily and maintain its structure.
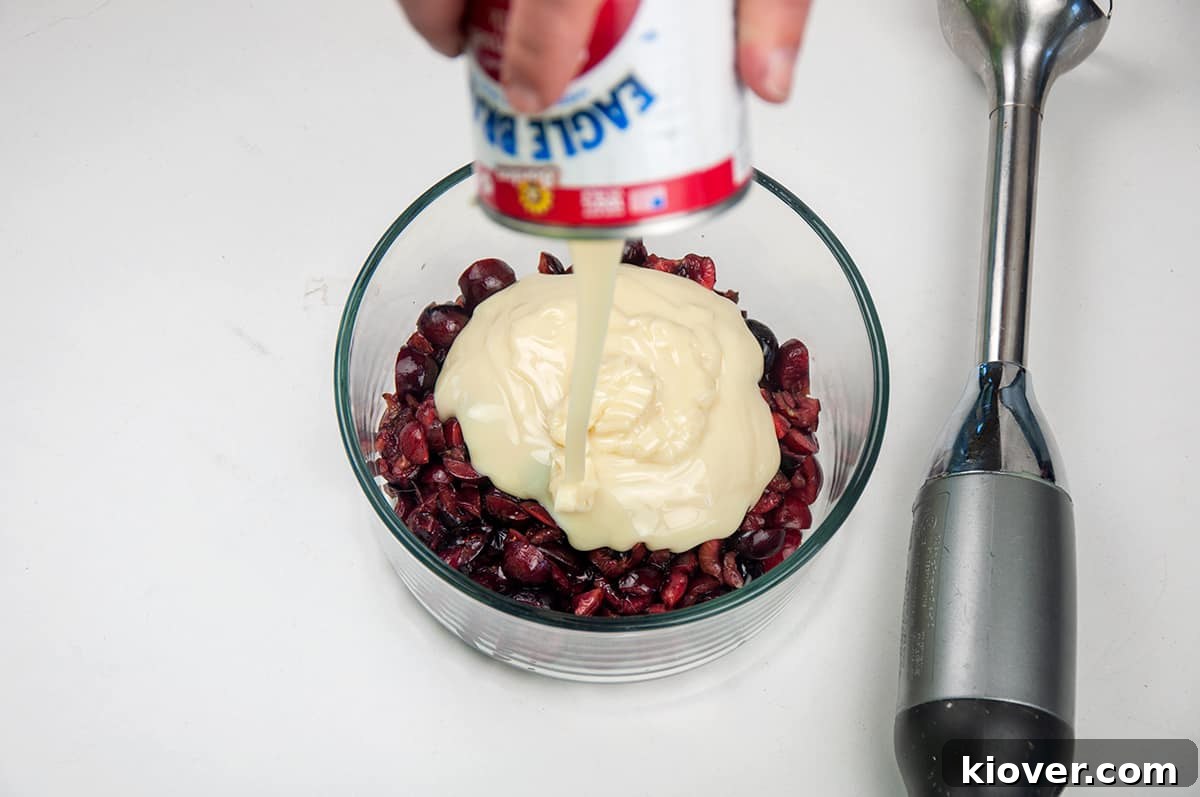
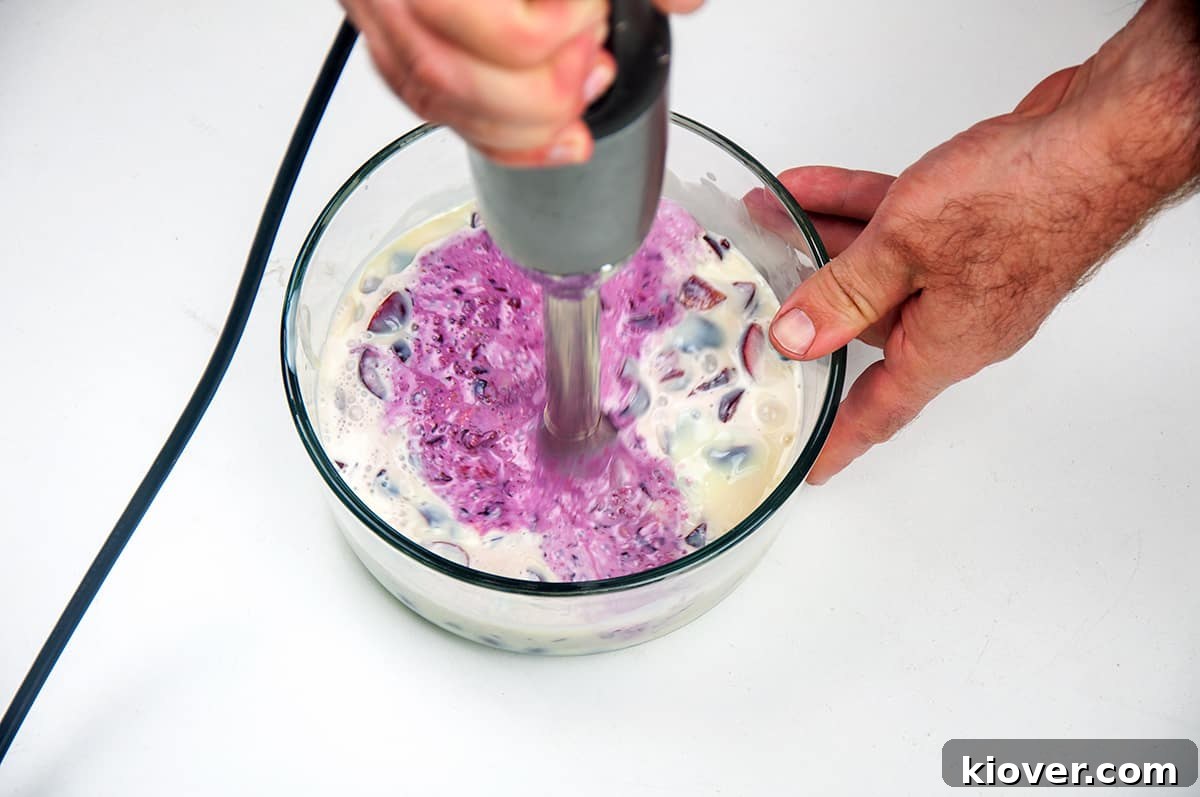
The initial step involves creating a vibrant cherry-infused base that will color and flavor the entire ice cream. To achieve this, take approximately three-quarters (¾) of your pitted, chopped cherries and combine them in a medium-sized bowl with the entire can of sweetened condensed milk, along with a small portion (about ¼ cup) of the heavy cream. This strategic blending serves a dual purpose: it deeply infuses the rich flavor and stunning deep-red color of the cherries throughout the entire ice cream mixture, creating a uniform and appealing base. Meanwhile, reserving the remaining quarter (¼) of the cherries to be folded in later as delightful, chewy fruit chunks provides a wonderful textural contrast to the smooth creaminess, enhancing the overall experience of the ice cream with bursts of fresh fruit.
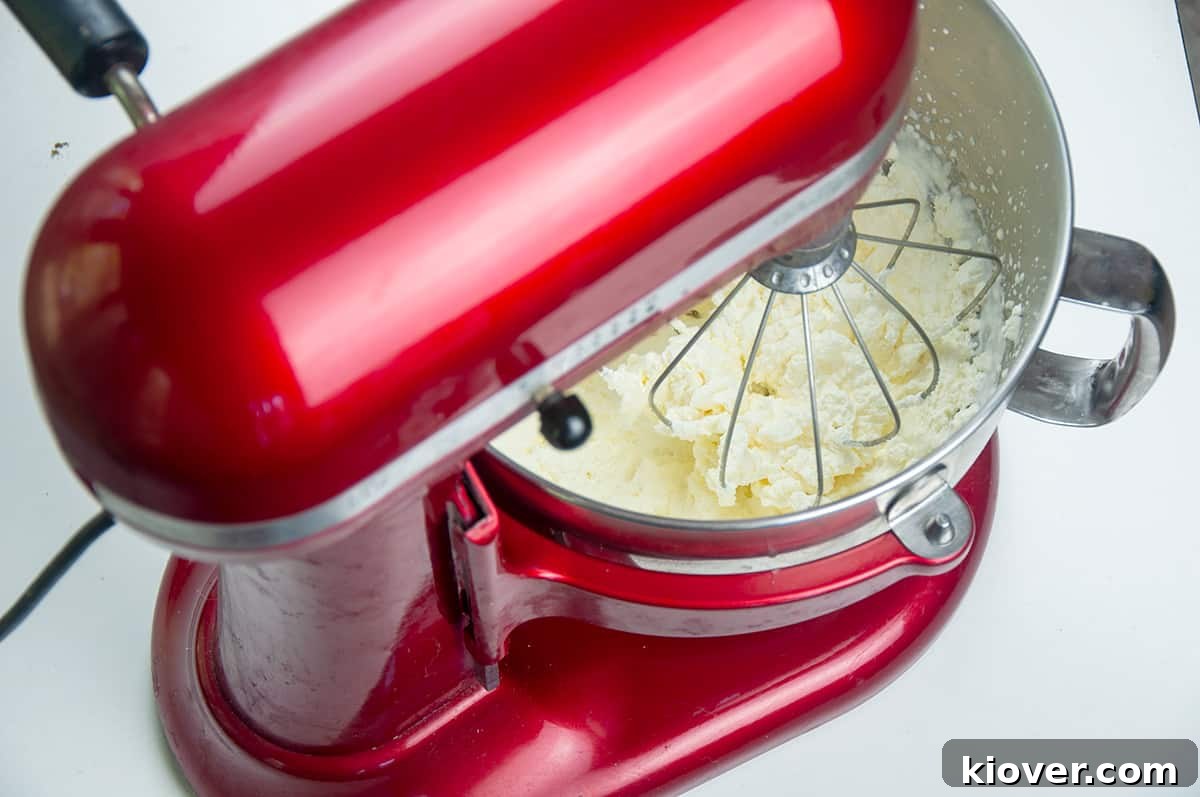
Once your cherry mixture is beautifully blended and set aside, turn your attention to the remaining heavy cream (approximately 1¾ cups). This is where the magic of the no-churn method truly comes alive. Using a stand mixer fitted with a whisk attachment, or a hand mixer, whip the cream vigorously on high speed until it forms stiff peaks. This means the cream will hold its shape firmly when the beaters are lifted, resembling fluffy clouds. The air incorporated during this whipping process is crucial for the light and airy texture of your no-churn ice cream, preventing it from becoming overly dense or icy. Next, carefully fold a small amount (about ¼ cup) of your cherry and condensed milk mixture into the whipped cream using a spatula. This initial gentle incorporation helps lighten the whipped cream slightly, making it easier to fully combine the rest of the mixture without deflating all the precious air you’ve just whipped in. After this initial fold, add the remaining cherry-condensed milk mixture and whip on medium speed for just about one minute more. This short additional whip ensures everything is thoroughly combined and emulsified but still airy, creating a smooth and consistent base.
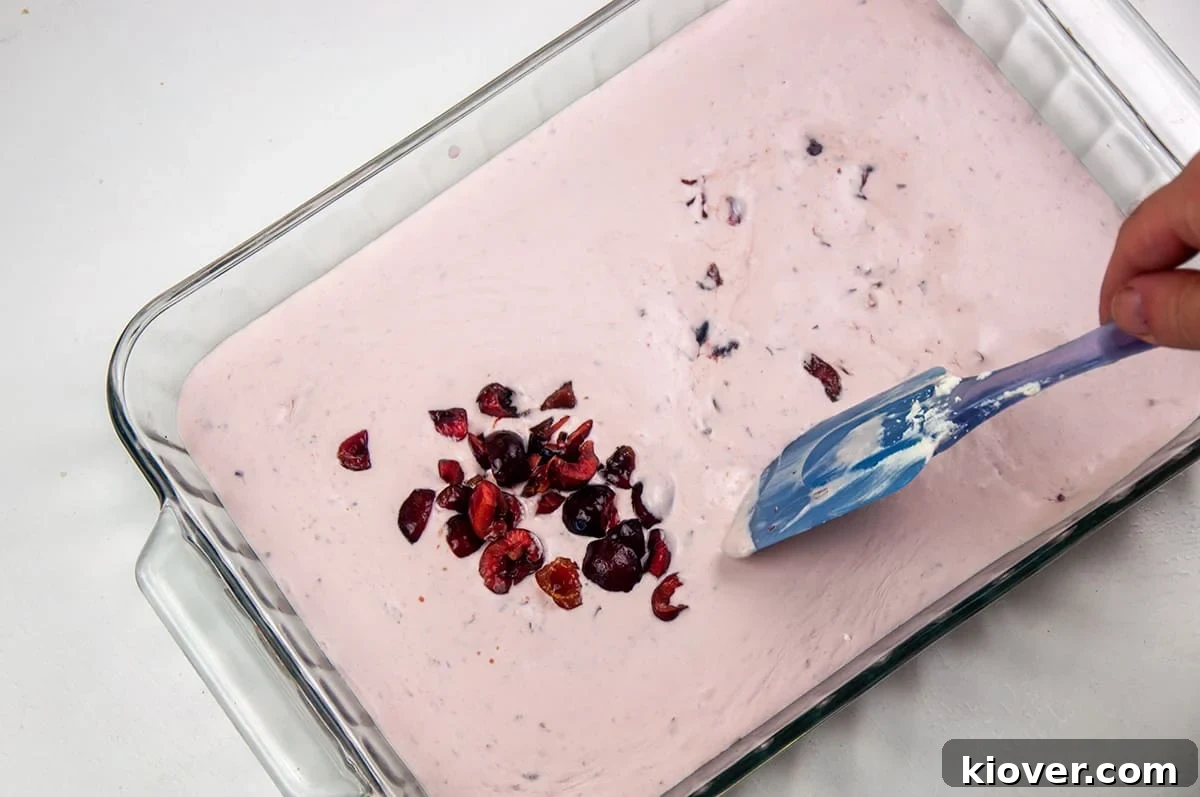
With your creamy, cherry-infused base ready, it’s time for the final assembly before freezing. Gently spread the mixture into a 9×13 inch baking dish or a similar shallow, freezer-safe container. Using a dish with a larger surface area helps the ice cream freeze more evenly and quickly, which can contribute to a smoother texture. Now, evenly distribute the reserved cherry chunks throughout the mixture, ensuring every scoop will have delightful pieces of fruit. You can gently swirl them in with a spatula for an attractive marbled effect. Cover the dish tightly with plastic wrap, pressing the wrap directly onto the surface of the ice cream to prevent any air from reaching it, which is key to preventing ice crystals and freezer burn. Then, add a lid or another layer of plastic wrap for extra protection. Freeze overnight, or for at least 12 hours, until solid and firm. Patience during this freezing stage is essential for optimal texture.
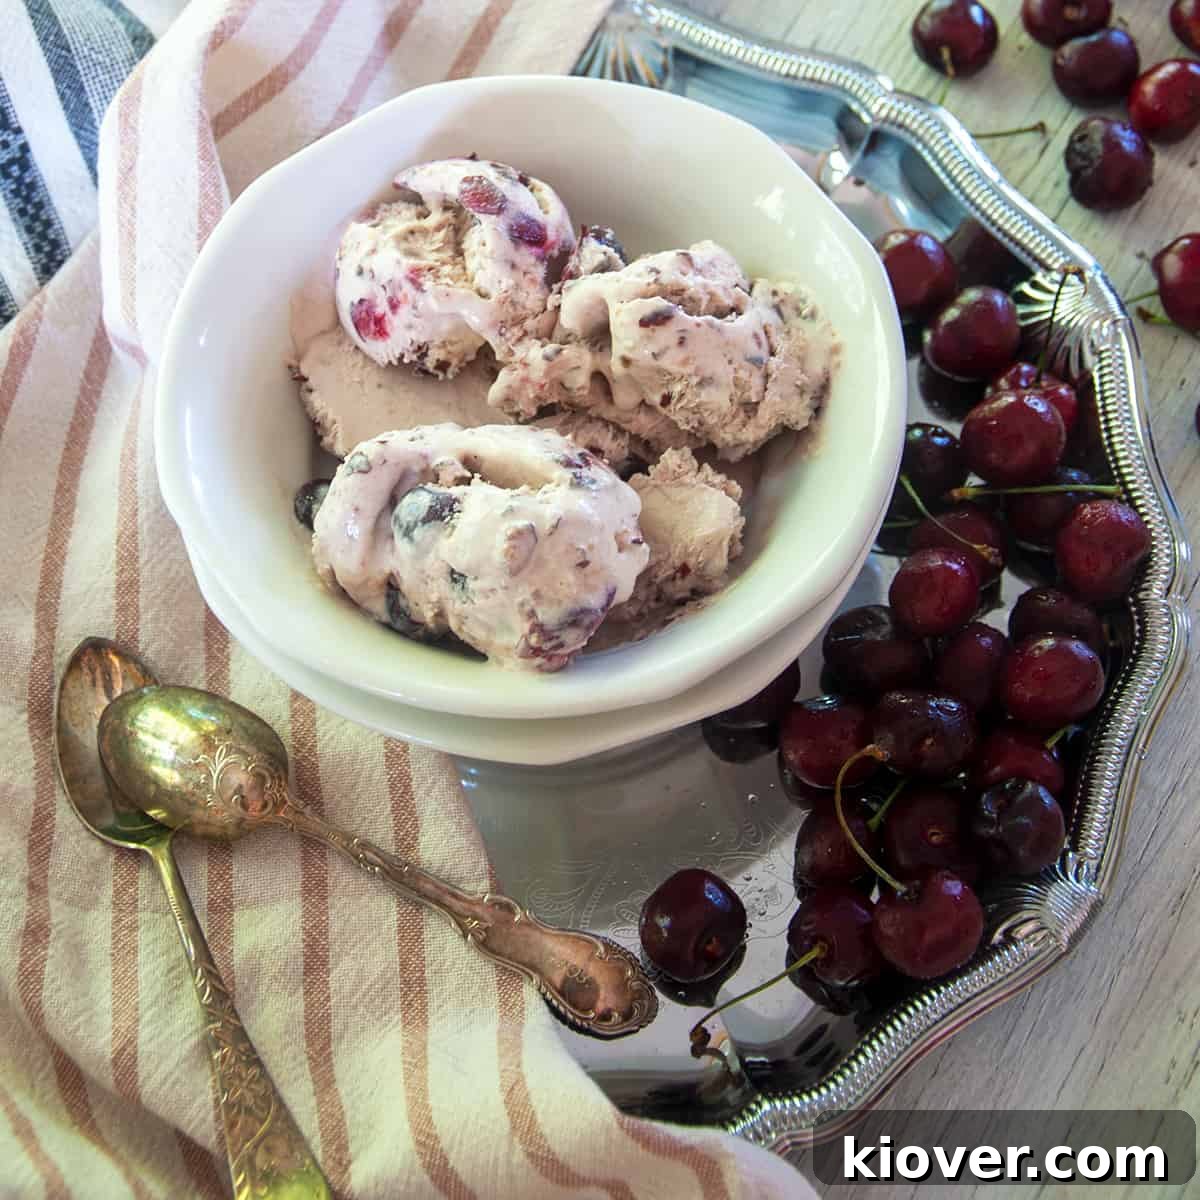
The next day, your patience will be richly rewarded! To achieve the perfect scoopable consistency that’s neither rock-hard nor too soft, remove the ice cream from the freezer and place it in your refrigerator for about 20-30 minutes before serving. This brief softening period, often referred to as “tempering,” allows the ice cream to reach its ideal texture, making it easier to scoop and enhancing its creamy, melt-in-your-mouth feel. Serve chilled and enjoy this homemade masterpiece, knowing you created something truly special with minimal effort!
Mastering Cherry Pitting for Perfect Ice Cream
While the taste of fresh cherries is undeniably worth the effort, pitting them can sometimes feel like a tedious task that deters many from fresh cherry recipes. However, a little preparation goes a long way in ensuring your ice cream is free of unexpected pits, which can be an unpleasant surprise. There are several methods you can employ, depending on your tools and preference, each with its own advantages for speed and cleanliness.
- **The Paring Knife Method:** A simple paring knife can be used to carefully cut around the cherry pit and then remove it. This method offers precision, allowing you to salvage the most flesh, but it can be quite time-consuming, especially for a large batch of cherries, and can get a bit messy.
- **The Cherry Pitter:** For those who frequently work with cherries, a dedicated cherry pitter is a fantastic investment. These gadgets are designed to quickly and cleanly eject the pit with minimal mess, significantly speeding up the process. They come in various designs, from single-cherry pitters to multi-cherry versions, making quick work of a pound of fruit.
- **The Chopstick/Straw Method:** A clever and common hack involves using a sturdy chopstick, a thick plastic straw, or even a sturdy piping tip. Simply push the chopstick through the stem end of the cherry, aiming for the pit, and it will pop out the other side. This method is surprisingly effective, often less messy than a knife, and requires no special tools beyond what you might already have in your kitchen.
Regardless of the method you choose, remember that the small amount of effort invested in pitting your cherries will result in a much more enjoyable and safe ice cream experience. No one wants to bite into a hidden pit while savoring a spoonful of delicious homemade ice cream! If using frozen cherries, many varieties come pre-pitted, saving you this step entirely.
Troubleshooting: Preventing Icy No-Churn Ice Cream
One of the most common challenges in making any homemade ice cream, especially the no-churn variety, is the formation of ice crystals, which can lead to an “icy” or grainy rather than luxuriously creamy texture. This might seem counterintuitive for something that’s supposed to be frozen, but the ultimate goal is always a smooth, scoopable consistency that melts pleasantly in the mouth.
Traditional ice cream makers continuously churn the mixture as it freezes, constantly breaking up ice crystals as they form, preventing them from growing large. Since we’re skipping that mechanical step with a no-churn recipe, we rely heavily on the properties of our ingredients and careful technique to achieve that luxurious creaminess. The combination of vigorously whipping the heavy cream to incorporate ample air is your primary defense. The more air trapped in the cream, the lighter and less dense the final product will be, making it harder for large ice crystals to form. The high sugar content of the sweetened condensed milk also plays a critical role, as sugar naturally lowers the freezing point of water and inhibits large crystal formation. Additionally, the fat in the heavy cream and the thick texture of the condensed milk contribute to a smoother mouthfeel.
When combining the cherry mixture with the whipped cream, folding gently helps maintain the airy structure of the cream. Overmixing at this stage can deflate the cream, leading to a denser, potentially icier result. Freezing the mixture in a relatively shallow 9×13 inch dish ensures more uniform freezing, reducing the likelihood of large ice crystal development compared to a deeper container. Finally, the recommendation to allow the ice cream to soften in the refrigerator for 20-30 minutes before serving is crucial. This slight thaw, or tempering, allows any small ice crystals that might have formed to re-distribute and melt slightly, resulting in a much smoother, more palatable, and easier-to-scoop texture. Following these steps diligently will significantly reduce the chances of icy ice cream, ensuring a perfectly creamy treat every time.
Flavor Variations & Serving Suggestions
While this No-Churn Black Cherry Ice Cream is a masterpiece on its own, with its rich fruit flavor and creamy texture, it also serves as a fantastic canvas for culinary creativity. Don’t hesitate to experiment with these variations to customize your next batch and discover new favorite combinations:
- **Chocolate Cherry Swirl:** For a truly decadent treat, gently fold in about ½ cup of melted dark chocolate or a generous handful of mini chocolate chips or shavings during the final mixing step with the cherry chunks. The combination of dark chocolate and sweet cherries is a classic for a reason!
- **Almond Kiss:** A subtle touch of almond extract (¼ to ½ teaspoon) can enhance the natural cherry flavor beautifully, adding a sophisticated depth. Add it to the cherry-condensed milk mixture before blending.
- **Spiked Cherry:** For an adult twist, add a tablespoon or two of Kirsch (cherry brandy) or a complementary liqueur like Amaretto to the cherry mixture before blending. The alcohol also helps prevent ice crystal formation, contributing to a smoother texture.
- **Nutty Crunch:** Sprinkle in toasted chopped almonds, pistachios, or walnuts with the cherry chunks for added texture and a nutty flavor contrast.
- **Vanilla Bean Infusion:** For an extra layer of gourmet flavor, scrape the seeds from half a vanilla bean into your heavy cream before whipping, or add a teaspoon of high-quality vanilla bean paste.
- **Mixed Berry Medley:** Don’t limit yourself to just cherries! Experiment with a combination of cherries and other berries like raspberries, blueberries, or blackberries for a delightful fruit fusion. Ensure all fruits are pitted and chopped appropriately.
- **Lemon Zest Brightness:** A teaspoon of fresh lemon zest added to the cherry mixture can brighten the overall flavor profile, adding a subtle tang that complements the sweetness.
As for serving, this ice cream is incredibly versatile and pairs well with numerous desserts. Enjoy it simply in a bowl, perhaps garnished with a fresh cherry and a sprig of mint for a refreshing touch. It’s also sensational alongside warm brownies, a slice of rich chocolate cake, or as a vibrant, fruity topping for a plain cheesecake. For a more casual treat, scoop it into crispy waffle cones or serve it over a warm fruit crumble. A drizzle of chocolate sauce or a dollop of extra whipped cream can elevate it further. No matter how you choose to serve it, this homemade black cherry ice cream is sure to be a crowd-pleaser and a perfect representation of summer’s bounty.
📝 Expert Tips for Your No-Churn Black Cherry Ice Cream
To ensure your homemade no-churn black cherry ice cream turns out perfectly creamy, flavorful, and irresistible every single time, keep these expert tips in mind. These small details can make a significant difference in the final quality of your frozen treat.
- **Choose Wisely:** Always opt for fresh, dark, and sweet cherries when they are in season for the most robust flavor, natural sweetness, and vibrant color. High-quality fruit is the foundation of a delicious dessert.
- **Frozen is Fine:** If fresh cherries aren’t available, high-quality frozen cherries are an excellent substitute. Just remember to thaw them completely and gently drain any excess liquid before use to prevent an icy texture.
- **Optimal Freezing Container:** A shallow 9×13 inch container is highly recommended for freezing. Its larger surface area promotes faster and more even freezing, which significantly helps in achieving a smoother, creamier texture and minimizing ice crystal formation.
- **Patience for Perfection:** Allow the ice cream to soften in the refrigerator for 20-30 minutes before serving. This crucial tempering step allows it to reach its ideal scoopable consistency and enhances its creamy mouthfeel, making for a much more enjoyable experience.
- **Don’t Overmix:** When folding the cherry mixture into the whipped cream, do so gently and with a light hand. The goal is to incorporate the ingredients without deflating the air you’ve whipped into the cream, as this air is essential for the light and airy consistency of no-churn ice cream.
- **Seal It Tight:** Always cover your ice cream container tightly. Place plastic wrap directly onto the surface of the ice cream to create an airtight seal, and then add a lid or another layer of wrap. This dual protection is vital for preventing freezer burn and inhibiting the growth of ice crystals during storage.
- **Cold Cream is Key:** Ensure your heavy whipping cream is very cold before you begin whipping. Cold cream whips up faster, incorporates more air, and holds its stiff peaks much better than room-temperature cream, leading to a superior ice cream base.
- **Storage:** For best quality, consume homemade no-churn ice cream within one to two weeks. Beyond that, its texture may begin to degrade, even with proper storage.
🛠 Essential Tools for This Recipe
While the beauty of no-churn ice cream lies in its minimal equipment requirements, having a few key tools can make the process even smoother, more efficient, and ultimately more enjoyable. These items are commonly found in most kitchens or are worthwhile investments for any home baker:
- Cherry Pitter: A game-changer for speeding up the tedious pitting process, especially when working with a large quantity of fresh cherries. It makes preparing your fruit quick and mess-free.
- Immersion Blender: Perfect for blending the cherry and condensed milk mixture directly in a bowl. This minimizes cleanup compared to a traditional blender and allows for easy control over the consistency of your cherry base.
- KitchenAid Stand Mixer: An invaluable tool for effortlessly whipping heavy cream to stiff peaks. Its powerful motor and large bowl make this step quick and hands-free. A good quality hand mixer also works beautifully for this task.
- 9 by 13 Pyrex Container: An excellent, durable, and freezer-safe dish ideal for freezing your ice cream evenly. Its shallow depth helps in achieving the perfect texture by promoting consistent freezing throughout the mixture.
- **A Sturdy Spatula:** Essential for gently folding the ingredients together without deflating the whipped cream, ensuring your ice cream remains light and airy.
- **Airtight Container:** While the 9×13 dish is great for initial freezing, transferring the ice cream to an airtight, narrower container for long-term storage can further help prevent freezer burn and maintain freshness.
😋 Your Feedback Matters!
We are incredibly grateful that you’ve chosen to try our No-Churn Black Cherry Ice Cream recipe! Your culinary adventures inspire us, and we would love to hear all about your experience. Please take a moment to share your thoughts and a rating in the comments section below. Did you try a new variation? What did your family think? Your feedback not only helps other home cooks discover this delightful recipe but also encourages us to keep creating and sharing delicious and easy-to-follow recipes. Thank you for visiting Ramshackle Pantry; we truly appreciate your support and hope this sweet, creamy treat brings a big smile to your face and those you share it with!
Print

No-Churn Black Cherry Ice Cream
5 Stars 4 Stars 3 Stars 2 Stars 1 Star
5 from 1 review
Author: Ben Myhre
Prep Time: 13 hours
Total Time: 13 hours
Yield: 8 servings
Category: Dessert
Method: No-Churn
Cuisine: American
Description
Do yourself a favor and make this easy, creamy, and sweet No-Churn Black Cherry Ice Cream recipe. Fresh cherries and a creamy dessert that is perfect for a hot day or just a weeknight treat.
Ingredients
Units
Scale
- 2 cups heavy cream
- 14 ounces sweetened condensed milk
- 1 pound pitted, destemmed cherries, chopped
Instructions
- Prepare the Cherry Base: In a medium bowl, combine the sweetened condensed milk with three-quarters (¾ lb) of your pitted, chopped cherries and ¼ cup of heavy cream. Using an immersion blender (or regular blender), blend until the mixture is well combined and the cherries are mostly smooth, infusing their color and flavor into the base. Reserve the remaining ¼ lb of chopped cherries for later.
- Whip the Cream: In a separate, large mixing bowl, take the remaining 1¾ cups of very cold heavy cream. Using a stand mixer or a hand mixer, whip the cream on high speed until stiff peaks form, typically about 3 minutes. The cream should hold its shape firmly when the beaters are lifted.
- Combine Mixtures (Initial Fold): Gently fold about ¼ cup of the cherry-condensed milk mixture into the whipped cream using a spatula. This helps to lighten the whipped cream, making it easier to incorporate the rest without deflating the air.
- Final Fold & Mix: Add the remaining cherry-condensed milk mixture to the whipped cream. Gently fold until just combined. Then, whip on medium speed for just one minute more to ensure everything is thoroughly incorporated while maintaining the airy texture.
- Freeze: Pour the ice cream mixture into a 9×13 inch freezer-safe dish. Evenly scatter the reserved ¼ pound of cherry chunks over the top and gently swirl them in. Cover the dish tightly with plastic wrap, pressing it directly onto the surface of the ice cream to prevent ice crystals, then add a lid or another layer of wrap. Freeze for a minimum of 12 hours, preferably overnight, until firm.
- Soften and Serve: Approximately 20-30 minutes before you plan to serve, remove the ice cream from the freezer and place it in the refrigerator. This allows it to soften slightly, achieving a perfectly scoopable and creamy consistency.
Notes
- For the best results, always use fresh, dark, and sweet cherries when they are in season.
- Frozen cherries are a good alternative if fresh ones are unavailable. Ensure they are fully thawed and drained before use.
- A 9×13 inch container is highly recommended for freezing, as its shallow depth helps achieve a smoother texture.
- Allowing the ice cream to thaw in the refrigerator for 20-30 minutes before serving significantly improves its scoopability and creaminess.