
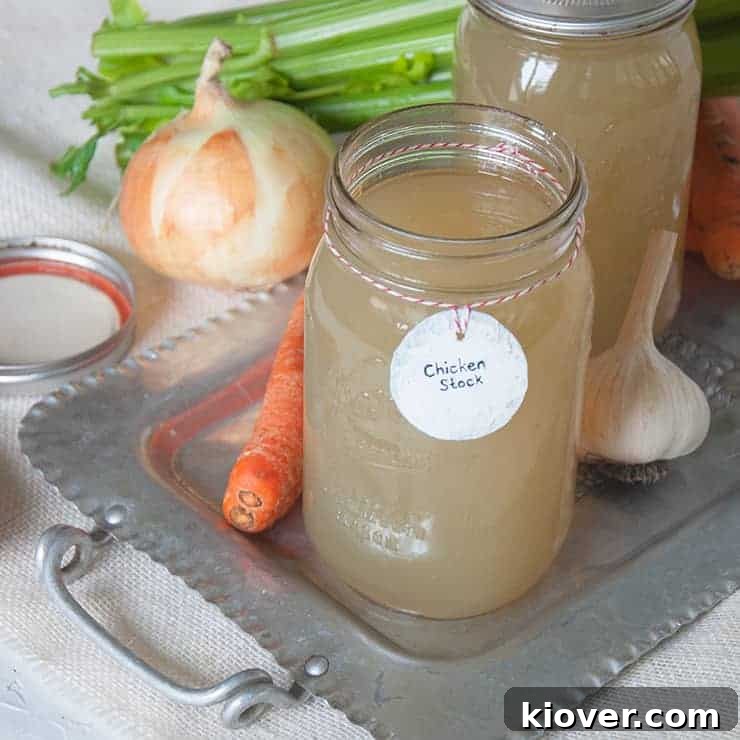
Homemade chicken stock is an indispensable staple for any aspiring home cook. Far from being just a basic ingredient, a deeply flavorful chicken stock possesses the remarkable ability to transform an ordinary recipe into a truly magnificent culinary creation. If you’re skeptical, we challenge you to experience the difference firsthand by preparing this delicious chicken stock yourself. The richness, depth, and comforting aroma it brings to your kitchen are simply unparalleled.
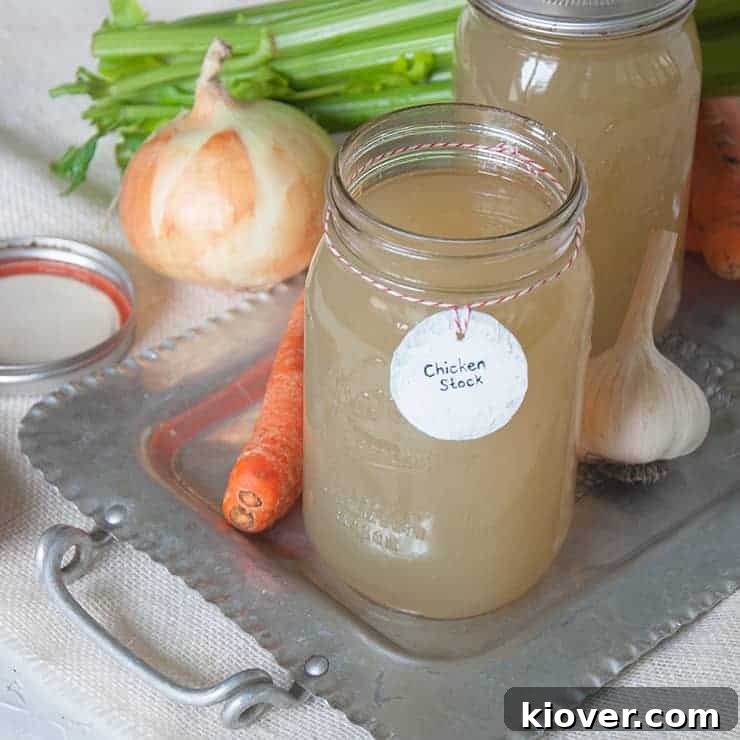
While this homemade chicken stock recipe isn’t a quick fix, the reward is an absolutely exquisite flavor that will permeate your home with a wonderful aroma throughout the day. It evokes a sense of nostalgia, reminiscent of the cherished recipes grandmothers used to make, connecting us to a rich culinary heritage. Today, we delve into crafting a fundamental chicken stock recipe, which serves as a cornerstone for our Knoephla Soup series. However, its versatility extends far beyond, allowing it to be savored on its own as a comforting broth or used as a robust base for countless other dishes, such as a traditional Knoephla Soup, a classic Chicken Noodle Soup, or even enriching gravies and risottos. Embrace the art of slow cooking and learn how to infuse your home with this incredible fragrance and flavor through this comprehensive homemade chicken stock guide.
Unlocking Flavor: The Basics of Homemade Chicken Stock
The foundation of an exceptional chicken stock lies in a simple yet profound technique: slowly simmering chicken bones in water. This gentle, prolonged cooking process is designed to meticulously extract as much collagen, fat, and deeply embedded flavor from the bones as possible. It’s not merely about boiling; it’s about coaxing every bit of goodness out of the ingredients over several hours. To further enhance this liquid gold, we introduce a selection of aromatic vegetables and herbs, chosen specifically for their ability to impart subtle yet complex flavors that marry perfectly with the chicken. These essential additions typically include onions, celery, and carrots, forming the classic “mirepoix” foundation. Beyond these, the gentle spice of peppercorns and the earthy notes of thyme contribute to a rich, well-rounded profile. The goal is to create a savory, nutrient-rich liquid that serves as the perfect backdrop for countless dishes, elevating their taste to new heights.
Chicken Stock vs. Chicken Broth: Understanding the Key Differences
The terms “chicken stock” and “chicken broth” are often used interchangeably, but there are distinct differences that impact their flavor, texture, and ideal culinary applications. Understanding these nuances is crucial for achieving the best results in your cooking. Chicken stock is traditionally made by simmering raw or roasted chicken bones, often including some cartilage and connective tissue, for an extended period. This long cooking time allows the collagen from the bones to break down into gelatin, resulting in a liquid that, once cooled, becomes gelatinous and rich in body. This gelatin provides a fuller mouthfeel and a more concentrated, robust flavor. It’s ideal for sauces, gravies, and recipes where a deep, savory foundation is desired.
Chicken broth, on the other hand, is typically made by simmering chicken meat (with or without bones) and vegetables for a shorter duration. The focus is more on extracting the flavor from the meat and vegetables directly into the water, rather than breaking down collagen. As a result, broth is generally lighter in body and flavor, less gelatinous when cooled, and often seasoned before serving. It’s excellent for sipping on its own, for lighter soups, or as a cooking liquid where a less intense flavor is preferred. While they can often substitute for one another in a pinch, stock consistently offers a richer, more profound flavor and a superior texture dueating to its higher gelatin content. Today, our focus is squarely on creating that superior, luscious homemade chicken stock.
Selecting Your Chicken: How Much and What Parts to Use
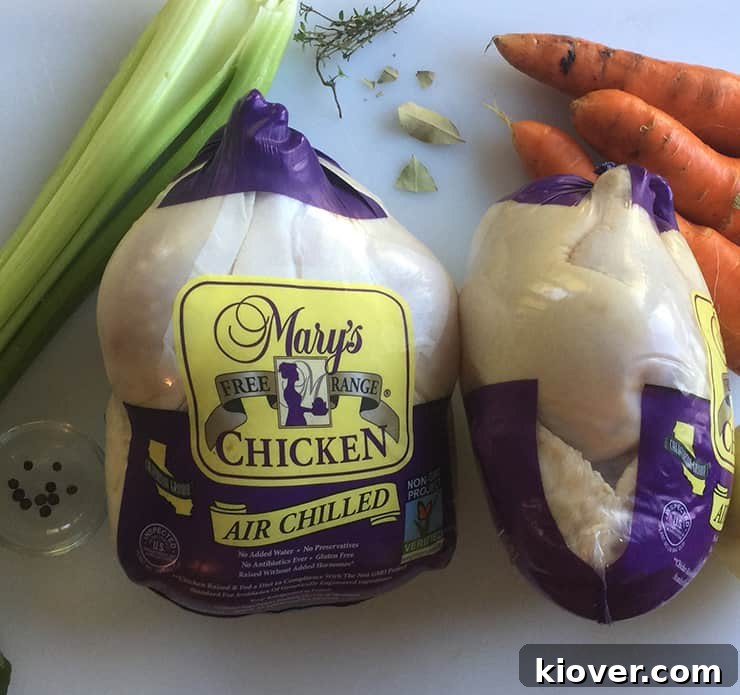
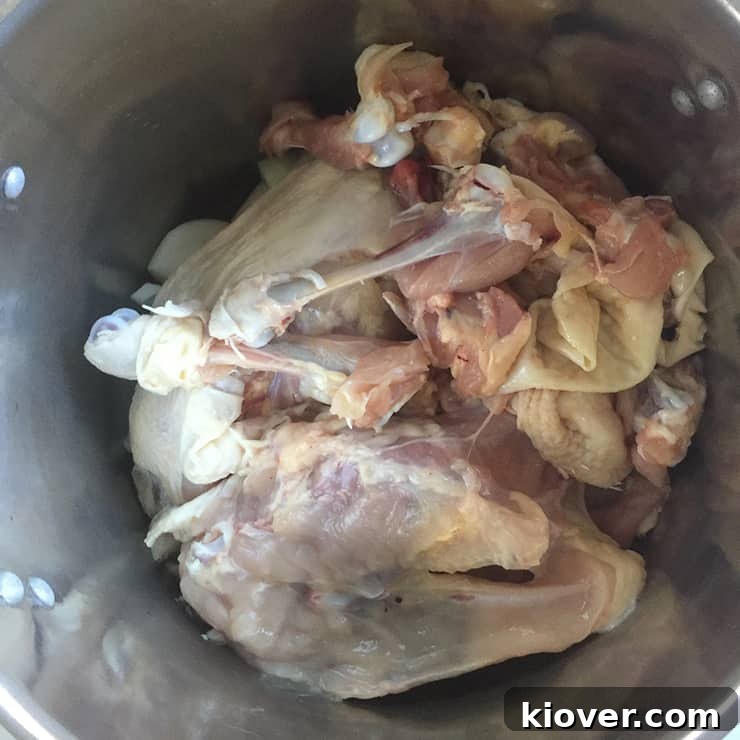
For a truly exceptional homemade chicken stock, the quantity and type of chicken bones you use are paramount. I typically opt for approximately 5 pounds of chicken bones. A practical and economical way to acquire these is by starting with two nice whole chickens, ideally with the necks still attached if available. From these, I carefully remove the breasts for other meals, often freezing them for future use. Similarly, the meat from the thighs and legs is removed and bagged separately, ready to be incorporated into various dishes as needed. This methodical approach leaves the main carcass and wings, which are perfectly suited for stock-making.
It’s important not to be overly concerned about leaving small bits of meat on the bones; these will only contribute to the depth of flavor. However, I prioritize removing the more substantial, valuable pieces of meat for their distinct culinary purposes. Beyond whole carcasses, you can also enhance your stock with additional components like chicken backs, necks, and feet. Chicken feet, in particular, are rich in collagen and will yield an incredibly gelatinous and nourishing stock, a true mark of quality. When sourcing, look for fresh, high-quality chicken; opting for organic or free-range can indeed make a noticeable difference in the final taste and clarity of your stock. If you roast your chicken first, the bones can be used to make a darker, richer “brown” chicken stock, which adds another dimension of flavor.
Essential Veggies and Aromatics for a Perfect Chicken Stock
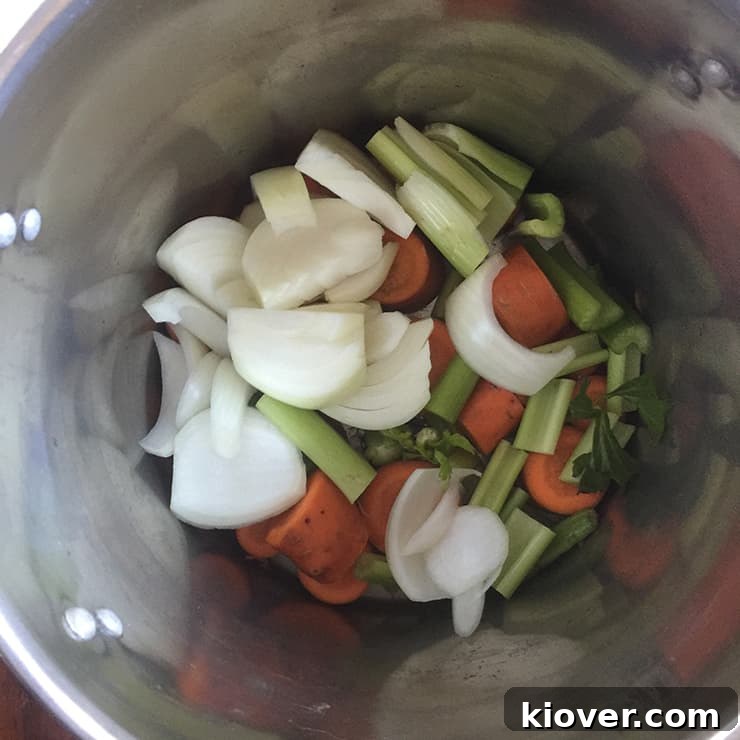
The beauty of homemade chicken stock lies in its foundational simplicity, yet it offers endless opportunities for subtle flavor customization. While you can certainly experiment, I prefer to keep my aromatic base minimal and classic. The bare essentials for a fantastic chicken stock include one large onion, a few carrots, some celery stalks, about ten peppercorns, a few sprigs of fresh thyme, and two bay leaves. This combination creates a balanced and savory profile that is versatile enough for almost any application. You can certainly add more herbs or even a head of garlic, quartered, for an extra layer of flavor, but these core ingredients are all you truly need for a deeply flavorful base.
A crucial consideration when adding vegetables is to avoid those that can impart strong, often undesirable flavors or cloudiness to your stock. For instance, vegetables like Brussels sprouts, cabbage, broccoli, cauliflower, turnips, and artichokes are best avoided. Their sulfurous compounds or assertive tastes can easily overpower the delicate chicken flavor and result in a bitter or murky stock. My go-to combination for a consistently great chicken stock remains the classic trio of onion, carrots, and celery, often augmented with garlic for an extra savory kick. Another important tip: I choose to leave salt out of the stock-making process entirely. This allows you complete control over the seasoning when you incorporate the stock into individual dishes, preventing any unintentional over-salting and ensuring the stock remains adaptable to various recipes.
The Gentle Art of Simmering: Starting with Cold Water
The journey to a perfect chicken stock begins not with a furious boil, but with a gentle approach. Once all your meticulously prepared ingredients – the chicken bones, chopped vegetables, and aromatics – are nestled comfortably in your stockpot, add enough cold water to just barely cover them. The choice of cold water is not arbitrary; it’s a critical step that significantly impacts the clarity and flavor of your finished stock. Starting with cold water allows the impurities and proteins from the bones and vegetables to slowly release and rise to the surface as the water gradually heats. This makes them easier to skim off, resulting in a much clearer, purer stock. In contrast, starting with hot water can “shock” the proteins, causing them to coagulate quickly and trap impurities within the liquid, leading to a cloudy stock.
After adding the cold water, place your pot over medium heat and slowly bring it to a bare simmer. What exactly constitutes a “bare simmer”? It’s characterized by very small, infrequent bubbles that gently break through the surface of the liquid every 2 to 3 seconds in various spots, indicating a temperature just below boiling. This is a crucial stage; you want to avoid a rolling boil at all costs. A vigorous boil will agitate the ingredients, emulsify fats and impurities back into the liquid, and result in a cloudy, potentially greasy stock. Adjust the heat as needed, lowering it or slightly increasing it, to maintain this delicate bare simmer. This slow, steady heat is what gently coaxes the flavors and gelatin from the bones, allowing our cauldron of deliciousness to cook slowly and develop its full potential over many hours. To ensure all ingredients remain fully submerged and continuously release their flavors, I often place a heavy ceramic bowl or a small plate directly on top of the ingredients in the pot to weigh them down, preventing any parts from drying out or not contributing to the stock.
The Essential Step: Skimming the Scum
As your homemade chicken stock gradually reaches that perfect bare simmer, you’ll inevitably notice a layer of foamy scum beginning to accumulate on the surface of the liquid. This “scum” consists of coagulated proteins and other impurities that are slowly rising from the bones and vegetables as they heat. This is a perfectly natural part of the stock-making process, but removing it is absolutely essential for achieving a clear, clean-tasting stock. Using a metal slotted spoon or a fine-mesh skimmer, gently and carefully remove this foam from the surface about once every half hour during the initial stages of simmering. Be patient and thorough; the more diligently you skim, the clearer and more pure your final stock will be. Neglecting this step will result in a murky, less appealing stock that lacks the vibrant clarity characteristic of a high-quality homemade product. As the simmering continues, the amount of scum will decrease, but it’s important to keep an eye on it throughout the cooking process.
Knowing When Your Chicken Stock is Perfectly Done
Determining the ideal cooking time for homemade chicken stock often sparks spirited debate among culinary enthusiasts, with opinions ranging from a mere few hours to an entire day. While personal preference plays a role, there are reliable indicators that signal when your stock has reached its peak. When I first embarked on my journey to master proper stock-making, I learned a clever trick: the stock is likely done when the largest bones in the pot, typically the leg bones, can be easily broken apart with minimal effort. This physical breakdown indicates that the vast majority of their flavorful goodness, including valuable collagen and minerals, has been successfully extracted and transferred into the liquid. Achieving this can indeed take a considerable amount of time, sometimes extending beyond 8 hours. I even experimented with a two-day cooking process, separating the simmering into two sessions, but found it to be a bit excessive for practical home cooking.
Over time, I’ve found a happy medium. After the initial 3 hours of simmering, I begin tasting the stock hourly. Each subsequent taste should ideally reveal a more developed, richer, and more profound flavor than the last. The homemade chicken stock is considered done when the flavor stops improving or if it has been cooking for a maximum of 10 hours. Beyond this point, the flavors can sometimes become less vibrant or even slightly bitter. For an even more accurate assessment of the flavor, I recommend stepping outside for a few minutes to clear your palate. Upon returning to your kitchen, the intensified aroma and taste of your stock will be even more apparent, allowing for a more objective evaluation of its depth and complexity. Trust your senses – your nose and your taste buds are the ultimate guides.
The Final Step: Straining and Clarifying Your Stock
Once your chicken stock has simmered to perfection and passed the taste test, it’s time for the crucial straining process. First, remove the pot from the heat and allow the stock to cool down slightly, making it safer and easier to handle. Next, carefully strain the stock to separate the liquid from the cooked bones, vegetables, and aromatics. The finer your chosen colander or straining tool, the clearer and more pristine your finished product will be. For optimal clarity, I recommend starting by pouring the stock through a large colander to catch the big pieces. Then, for an even finer strain, pass the liquid through a fine-mesh sieve lined with cheesecloth. This two-step process ensures that as many of the little tidbits, sediment, and small impurities are removed, leaving you with a beautifully clear and refined stock. Discard the solids; their work is done. What remains is a pure, golden liquid brimming with flavor.
Overnight Chill: Refrigerate and Harvest Schmaltz
After straining, transfer your cooled chicken stock into appropriate containers and place them in the refrigerator, allowing them to cool completely overnight. This slow cooling process is vital for several reasons. Primarily, it allows any remaining fat to rise to the surface and solidify, creating a distinct layer. In the morning, you should be greeted by a somewhat gelatinous liquid beneath a solid cap of golden fat. This solid fat is what we call “schmaltz,” and it’s a culinary treasure! Using a spoon, carefully remove this layer of schmaltz. If you’re feeling adventurous and appreciate traditional flavors, save the schmaltz. It’s an incredibly flavorful rendered chicken fat that can be used in other recipes for sautéing vegetables, roasting potatoes, or even making flaky pie crusts. Its rich, savory notes add a unique depth that butter or other oils can’t replicate. Once the schmaltz is removed, you’ll be left with your beautiful, incredibly flavorful, and perfectly gelatinous homemade chicken stock, ready to elevate your cooking to extraordinary levels. The gelatinous consistency is a hallmark of a well-made stock, indicating a rich extraction of collagen from the bones.
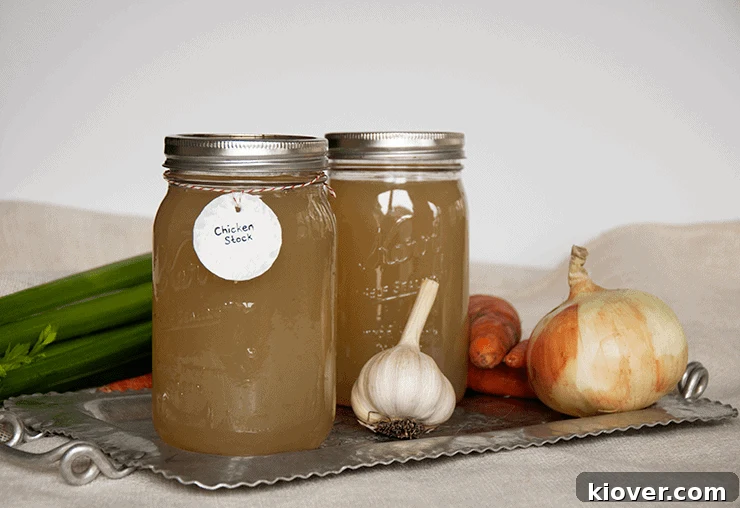
Your freshly made stock is a versatile ingredient. Use it up within a few days in dishes like comforting noodle soups, hearty casseroles, rich gravies, or any other recipe that benefits from a robust chicken base. While you can add a bit of water to extend the volume of your stock, it’s truly at its absolute best in its concentrated, unadulterated form. For longer storage, homemade chicken stock freezes exceptionally well. Portion it into freezer-safe containers or ice cube trays for convenient individual servings, and it will keep beautifully for a few months. When ready to use, thaw it in the refrigerator and always ensure to bring it to a rolling boil for a few minutes prior to consumption to ensure it reaches safe temperatures.
Homemade Chicken Stock: Essential Tips for Success
- Quality Matters: Always prioritize good quality chicken for the best results. Opting for organic or free-range chicken can significantly enhance the flavor and nutritional value of your stock, yielding a cleaner and more profound taste.
- The Power of Time: Allow your chicken stock to simmer for a very long time, ideally between 6 to 10 hours, to ensure maximum flavor and gelatin extraction. A key indicator that all the goodness has been drawn from the bones is when the largest bones, particularly the leg bones, can be easily snapped.
- Bare Simmer is Best: Maintain a gentle “bare simmer” throughout the cooking process. This means small, infrequent bubbles breaking the surface, avoiding a rolling boil that can emulsify fats and lead to a cloudy stock.
- Don’t Skip Skimming: Regularly skim the scum that rises to the surface during the initial stages of simmering. This crucial step prevents impurities from being reabsorbed, contributing to a wonderfully clear and clean-tasting stock.
- Harvest the Schmaltz: After refrigerating your stock overnight, a solid layer of chicken fat, known as schmaltz, will form on top. Don’t discard it! This flavorful fat can be saved and used for cooking, adding a rich, savory depth to many dishes.
- Gelatinous Gold: If your finished stock, once cooled, resembles more of a jelly than a liquid soup, rejoice! This gelatinous consistency is a strong indicator of a high-quality stock, rich in collagen, which provides exceptional body and mouthfeel to your recipes.
- Flavor Control: Avoid adding salt to your stock during cooking. This allows you to season your finished dishes precisely, ensuring versatility and preventing over-salting.
- Storage Savvy: Store your stock in airtight containers in the refrigerator for up to 3-4 days, or freeze it in portions for up to 3 months. Always bring frozen stock to a boil for at least two minutes before using it to ensure food safety.
Recommended Products for Your Kitchen
To help you in your homemade chicken stock journey, here are some essential tools that can make the process smoother and more enjoyable:
- High-Quality Stock Pot: A large, heavy-bottomed stock pot is crucial for simmering your ingredients evenly and safely for extended periods. Look for one with a thick base to prevent scorching.
- Quart Jars for Storage: Glass quart jars are perfect for storing your finished stock in the refrigerator or freezer. They are reusable, durable, and allow you to easily see the rich color of your homemade creation.
- Durable Colander: A sturdy colander with a wide rim is essential for the initial straining of your stock, separating the large solids from the liquid.
- Fine-Mesh Strainer: For an exceptionally clear stock, a fine-mesh strainer (ideally lined with cheesecloth) is invaluable for removing smaller impurities after the initial colander strain.
Share Your Homemade Chicken Stock Journey!
Making your own homemade chicken stock is not just a cooking task; it’s a deeply rewarding experience that fills your home with an inviting, comforting aroma. We truly believe that you, too, can enjoy the incredible benefits of a rich, flavorful chicken stock made right in your own kitchen! We sincerely hope you enjoyed our detailed recipe and comprehensive guide. If you appreciate the culinary insights and recipes we share, please consider signing up for our email updates to receive more delicious content directly in your inbox. Don’t forget to save this recipe on Pinterest to easily find it later, and we’d love to hear about your experience in the comment section below. Share your tips, triumphs, and questions!
Print Recipe Card
Homemade Chicken Stock Recipe Card
5 Stars 4 Stars 3 Stars 2 Stars 1 Star
5 from 1 review
Author: Ben Myhre
Prep Time: 20 minutes
Cook Time: 8 Hours
Total Time: 8 Hours 20 Minutes
Yield: 4 Quarts
Category: Soup
Method: Simmer
Cuisine: Fundamentals
Description
Create a truly exceptional homemade chicken stock that will not only fill your kitchen with an enticing aroma but also serve as a deeply flavorful base for countless dishes. This traditional recipe, though requiring time, yields a rich, gelatinous stock that is profoundly worth the effort, promising comfort and culinary excellence.
Ingredients
- Approximately 5 lbs of chicken bones (from 2 whole chickens, debreasted with thigh and leg meat removed for other uses; necks and wings ideal)
- 3 large carrots, roughly chopped into 2-inch sections
- 4 celery stalks, roughly chopped into 2-inch sections
- 1 large yellow onion, quartered (skin on is fine)
- 3-4 sprigs fresh thyme
- 10 black peppercorns
- 2 dried bay leaves
Instructions
- Place all chicken bones, including necks and wings, into a large stock pot.
- Add the chopped carrots, celery, quartered onion, fresh thyme sprigs, peppercorns, and bay leaves to the pot with the chicken bones.
- Pour in enough cold water to barely cover all of the ingredients in the pot. This is essential for a clear stock.
- Place the pot over medium heat and slowly bring the water to a bare simmer. Watch for small, infrequent bubbles breaking the surface.
- Once a bare simmer is achieved, immediately reduce the heat to low, ensuring the stock maintains this gentle simmer without coming to a rolling boil.
- To ensure all ingredients remain submerged and contribute to the flavor, place a heavy ceramic bowl or a small heatproof plate directly on top of the ingredients.
- Every 30 minutes during the first few hours, use a slotted spoon to carefully skim off any foam or scum that accumulates on the surface of the stock.
- If the water level drops significantly during the long simmer, add additional hot water to keep the ingredients barely submerged.
- Allow the stock to simmer for 6-8 hours (or up to 10 hours for maximum flavor). When done, remove from heat and let cool slightly before straining. For quicker cooling, you can place the pot in an ice bath.
- Once cooled to a safe temperature, carefully strain the stock through a fine-mesh sieve, ideally lined with cheesecloth, to remove all solids.
- Transfer the strained stock into airtight containers and refrigerate overnight. In the morning, a solid layer of fat (schmaltz) will have formed on top.
- Carefully remove the schmaltz from the surface. You can save this flavorful chicken fat for other cooking uses if desired.
- Use the homemade chicken stock within 3-4 days when stored in the refrigerator, or freeze it in portions for up to 3 months for longer preservation. Always bring to a boil for at least 2 minutes before use to ensure food safety.