
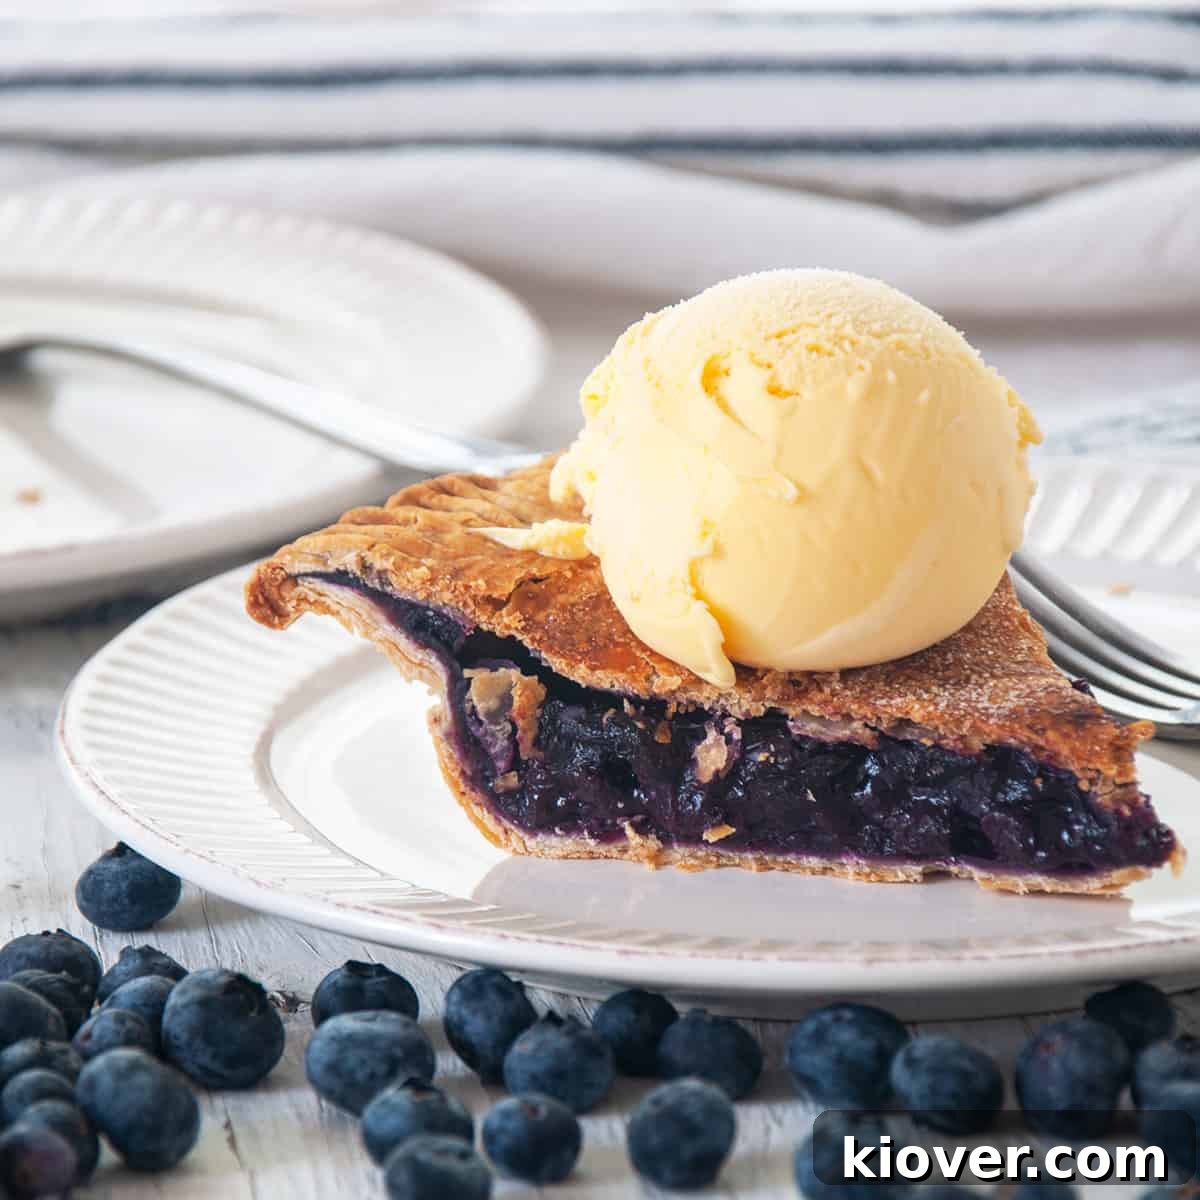
Welcome to the ultimate guide for crafting a truly unforgettable blueberry pie! Few desserts evoke the comforting warmth and sweet nostalgia quite like a homemade blueberry pie. This recipe for Homemade Blueberry Pie Filling is not just a component; it’s the heart of your next culinary masterpiece. Whether nestled in a flaky crust, spooned over creamy vanilla ice cream, or serving as a vibrant base for other baked goods, this filling promises to elevate your dessert experience to pure baking bliss. Dive in and discover the simple steps to create this delicious, versatile treat today.
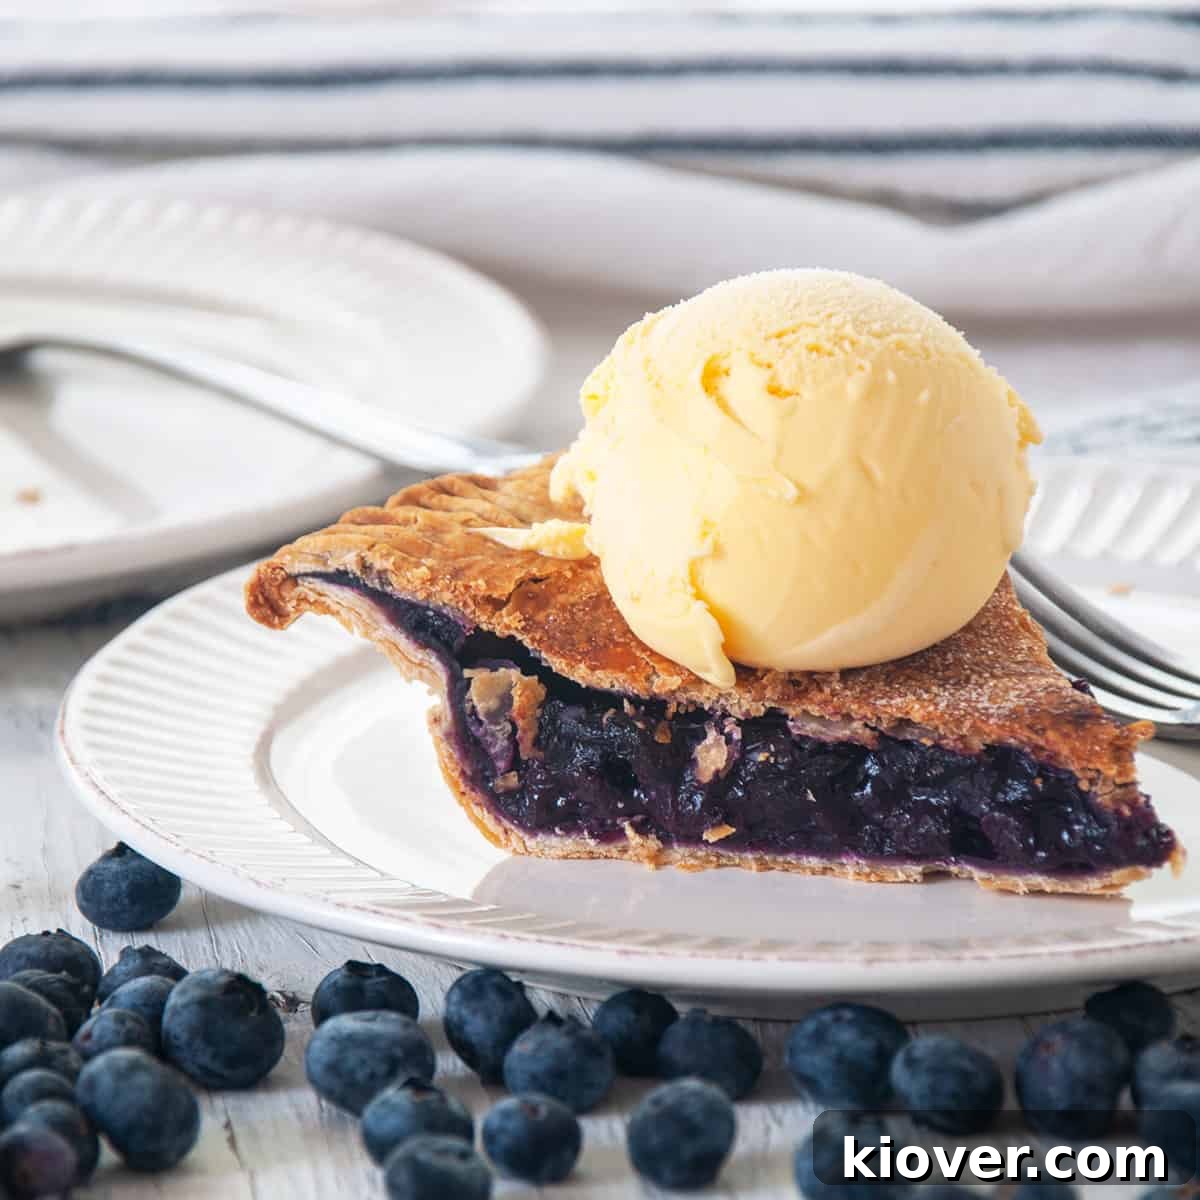
🥧 What Makes This Blueberry Pie Filling Recipe Special?
From the first signs of spring to the festive cheer of the Christmas holiday season, pies are a beloved indulgence. And when you can incorporate fresh fruit into your baking, the results are simply unparalleled. While some bakers are fortunate enough to gather blueberries from their own bushes or visit local farms for the freshest pickings, both fresh and frozen blueberries perform wonderfully in this recipe, making it accessible year-round.
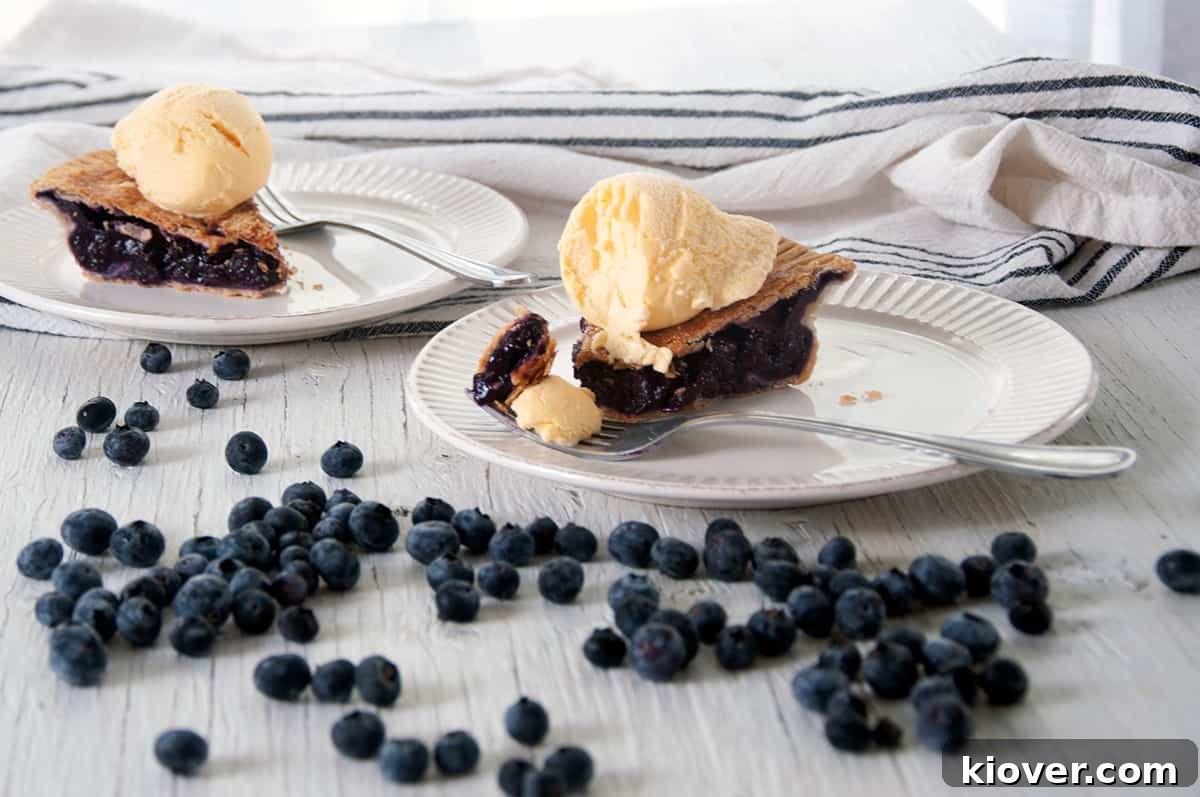
What truly sets this homemade blueberry pie filling apart is its incredible versatility. Beyond its primary role in a show-stopping pie, this filling transcends expectations. Imagine it as a simple yet exquisite dessert topping, generously poured over a scoop of artisanal vanilla ice cream. But its potential doesn’t stop there. It can be elegantly incorporated into cakes, giving them a burst of fruity flavor and moisture, or used as the star in delightful tarts. For those spontaneous sweet cravings, simply add a dollop of whipped cream on top, and you have an instant, satisfying dessert all by itself.
The beauty of making your filling from scratch lies in the control you have over the ingredients and the depth of flavor. Unlike store-bought options that often contain artificial flavors and excessive sweeteners, this homemade version uses natural goodness to shine through. The balanced sweetness, combined with a hint of lemon, perfectly complements the blueberries, creating a filling that is both bright and comforting. It’s a recipe designed to bring out the very best in your blueberries, whether they are plump, juicy fresh berries or carefully preserved frozen ones. This filling isn’t just an ingredient; it’s a foundation for countless delicious possibilities.
If you’re looking to expand your pie repertoire, we also have delightful recipes for Classic Rhubarb Pie and an All-American Apple Pie. To truly elevate your baking, consider pairing this sensational blueberry filling with our acclaimed Best Butter Pie Crust recipe – the combination will undoubtedly create a dessert that will be remembered and requested for years to come.
Table of Contents
- 🥧 What Makes This Recipe Special?
- 🫐 Essential Ingredients
- 🍲 Step-by-Step Instructions
- 📦 Storage Tips
- 🎓 A Tidbit on Blueberry History
- ❓ Frequently Asked Questions (FAQ)
- 📝 Pro Tips and Tricks
- 🛠 Recommended Baking Tools
- 😋 Did You Make This Recipe?
- Blueberry Pie Filling Recipe Card
🫐 Essential Ingredients for Your Blueberry Pie Filling
At the heart of this luscious recipe, blueberries naturally take center stage! You have the flexibility to use either vibrant fresh blueberries, ideally when they are in season, or high-quality frozen blueberries that have been thawed. Both options yield equally fantastic results, making this recipe a year-round delight.
When selecting your blueberries, look for plump, firm berries with a deep blue color. If using frozen, ensure they are good quality, as this will directly impact the flavor of your filling. The remaining ingredients are simple pantry staples that come together to create a perfectly balanced and beautifully thickened filling.
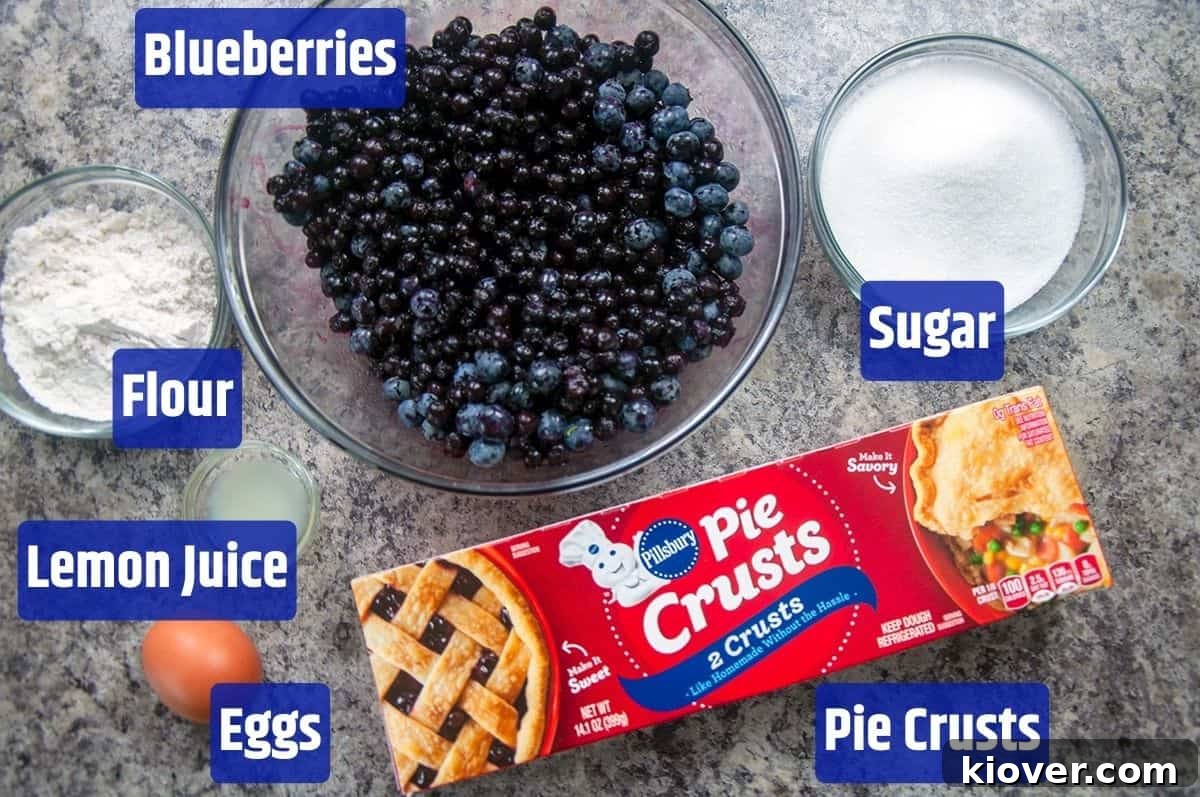
For the Blueberry Pie Filling:
- Blueberries: The star of the show. Use fresh for optimal flavor when in season, or thawed frozen blueberries for convenience.
- Granulated Sugar: Provides sweetness and helps create a syrupy texture as it cooks down with the blueberries. Adjust to your sweetness preference.
- All-Purpose Flour: Acts as the primary thickener for the filling, ensuring it sets perfectly and isn’t too runny.
- Lemon Juice: A crucial ingredient that brightens the flavor of the blueberries and balances their sweetness, adding a delightful tart note.
Optional Ingredients (For a Full Pie):
- Pie Crusts: Two store-bought or homemade pie crusts are needed for a classic double-crust blueberry pie. Our Best Butter Pie Crust is highly recommended!
- Egg: Beaten, for an egg wash that gives the top crust a beautiful golden sheen and helps sugar adhere.
- Extra Sugar: A tablespoon sprinkled on the top crust adds sparkle and a touch more sweetness.
Refer to the full recipe card below for precise quantities and detailed measurements to achieve the perfect balance of flavors and consistency.
🍲 Step-by-Step Instructions: Crafting Your Perfect Blueberry Pie Filling
One of the many joys of this blueberry pie filling recipe is its simplicity. You don’t need to be an experienced baker to achieve fantastic results. The process is straightforward: combine your filling ingredients in a pot and gently heat them to perfection. Here’s how to do it, with some key tips to ensure success:
Preparing the Blueberry Filling:
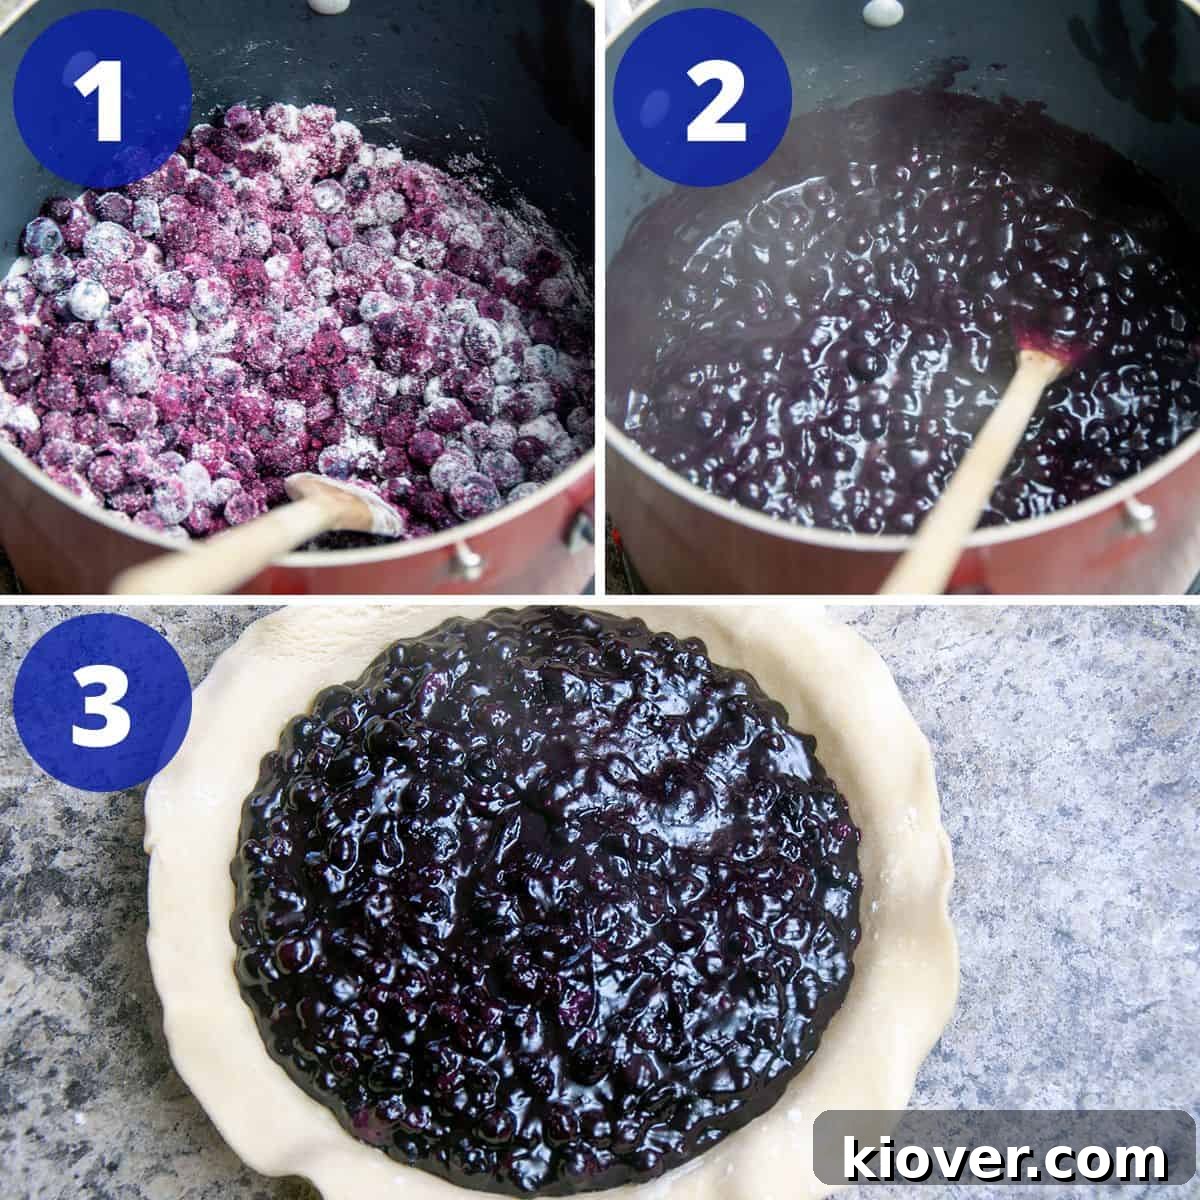
- Combine Ingredients: In a medium-sized, heavy-bottomed pot, add your blueberries (fresh or thawed frozen), granulated sugar, all-purpose flour, and fresh lemon juice. Give everything a good stir to ensure the flour and sugar are evenly distributed among the berries.
- Begin Heating and Stirring: Place the pot over medium-high heat. As the mixture begins to warm, you’ll notice the blueberries starting to release their juices. It’s crucial to continue stirring constantly during this phase. This active stirring helps prevent the filling from scorching or sticking to the bottom of the pan, ensuring a smooth, evenly cooked product.
- Encourage Berry Breakdown: Don’t be shy about gently mashing some of the berries with your wooden spoon as they heat. The heat will naturally cause many of the berries to burst open, releasing their delicious pulp and juices. However, a little extra help from your spoon will create a more uniform consistency, with some whole berries remaining for texture and visual appeal. This step is key to a rich, deeply flavored filling.
- Observe Thickening: Continue to stir and cook the mixture until it reaches a gentle simmer and visibly thickens. This usually takes about 10-15 minutes, depending on your heat and the type of blueberries used. The flour will absorb the liquids and swell, transforming the runny blueberry juice into a glossy, thick filling that will hold its shape beautifully in a pie. Once it has reached your desired consistency, remove the pot from the stovetop.
Assembling and Baking Your Homemade Blueberry Pie:
Once your delectable blueberry filling is ready, transforming it into a magnificent pie is the next exciting step. Follow these instructions to bake a beautiful, golden-brown pie with a perfectly set filling.
- Preheat Your Oven: Begin by preheating your oven to 425° Fahrenheit (220° Celsius). This initial high heat helps to set the crust quickly and achieve that desired flaky texture.
- Prepare the Bottom Crust: Lightly grease a 9-inch pie pan. Carefully unroll or place your first pie crust into the pan, gently pressing it against the bottom and sides without stretching it. Trim any excess crust that hangs over the edge.
- Fill with Blueberries: Pour your freshly made blueberry pie filling into the prepared bottom crust. Distribute it evenly using a spatula.
- Add Top Crust and Crimp: Place the second pie crust over the filling. Trim the edges to match the bottom crust, leaving a slight overhang. Then, crimp the edges of both crusts together to seal the pie. You can do this by hand, pressing with a fork, or using a decorative crimping tool.
- Apply Egg Wash: Using a pastry brush, lightly coat the entire top crust (and crimped edges) with the beaten egg wash. This will contribute to a beautiful golden-brown color and a slightly crisp finish.
- Create Ventilation: With a sharp knife, make four small slits or a decorative pattern in the center of the top pie crust. These vents are crucial for allowing steam to escape during baking, preventing the crust from bubbling up and ensuring the filling cooks evenly.
- Sprinkle Sugar: Generously sprinkle 1 tablespoon of granulated sugar over the egg-washed top crust. This adds an extra layer of sweetness and a lovely sparkle.
- Protect the Edges (Initial Bake): Using aluminum foil or a reusable pie crust shield, carefully cover the crimped edges of the pie crust. This step is vital to prevent the edges from burning or becoming overly dark during the initial baking phase. Bake the pie in the preheated oven for 35 minutes.
- Remove Crust Guard: After 35 minutes, carefully remove the foil or pie crust guard from the edges.
- Continue Baking: Return the pie to the oven and bake for an additional 10-15 minutes, or until the entire crust is golden brown and the filling is bubbling thickly. Keep a close eye on it during this stage to prevent over-browning.
- Allow to Rest: This is perhaps the most critical step for a perfect slice! Once baked, remove the pie from the oven and let it cool completely on a wire rack for at least 4 hours, or preferably longer. This extended resting time allows the filling to fully set, preventing a runny slice when cut. Patience truly pays off here!
📦 Storage Tips for Your Homemade Blueberry Pie Filling and Pie
While this homemade blueberry pie filling is often destined for immediate enjoyment within a pie, it’s also incredibly convenient to prepare ahead of time or store leftovers for future use. Proper storage ensures its delicious quality and extends its shelf life for various culinary applications.
Immediate Use: Straight off the stovetop, the warm filling is perfect for pouring into your pie crust or serving as a delightful topping. If using it right away, ensure it has cooled slightly (around 15-20 minutes) if you are adding it to a pie crust, to prevent the crust from becoming soggy.
Refrigeration: If you’re not using the filling immediately, or if you have leftovers, allow it to cool completely to room temperature first. Then, transfer the blueberry pie filling to an airtight container. It can be stored in the refrigerator for up to one week. When you’re ready to use it, simply scoop it out and enjoy! It’s fantastic cold as a yogurt mix-in or gently warmed for ice cream or pancakes.
Freezing for Long-Term Storage: This blueberry pie filling freezes beautifully, making it an excellent candidate for meal prep or preserving a bountiful harvest of blueberries. To freeze:
- Ensure the filling is completely cooled to room temperature.
- Portion the filling into freezer-safe containers or heavy-duty freezer bags. If using bags, lay them flat to freeze, which saves space.
- Leave about an inch of headspace if using rigid containers to allow for expansion.
- Label the containers or bags with the date.
The filling can be stored in the freezer for up to 3-4 months. When ready to use, thaw it overnight in the refrigerator. You can gently reheat it on the stovetop over low heat, stirring occasionally, or use it chilled depending on your recipe. Frozen and thawed filling is perfect for making pies later, or for quick dessert toppings and breakfast additions.
Storing a Baked Blueberry Pie: A freshly baked blueberry pie can be left at room temperature for up to 2 days, loosely covered. For longer storage, or if your kitchen is particularly warm, it’s best to refrigerate the pie. Cover it loosely with plastic wrap or foil and store it in the refrigerator for up to 4-5 days. While it can be enjoyed cold, reheating slices gently in the oven can bring back some of that freshly baked aroma and texture.
🎓 A Delightful Tidbit on Blueberry History
Beyond their irresistible taste and vibrant color, blueberries boast a rich and fascinating history, deeply rooted in the soils of North America. These small, nutrient-packed berries are not just a modern culinary delight; they have been an integral part of the North American landscape and diet for an astonishing 13,000 years.
Long before European settlers arrived, Native American tribes cherished blueberries, recognizing their value as both a food source and a medicinal plant. They used blueberries fresh, dried them for winter provisions, and incorporated them into various dishes like pemmican, a concentrated energy food. Beyond sustenance, blueberries were utilized for their purported healing properties, treating ailments and serving as natural dyes for fabrics and baskets. Different tribes held unique legends and beliefs about the blueberry, often referring to it as the “star berry” due to the five-pointed star shape that appears at its blossom end.
Despite their long history of use, blueberries remained largely wild until the early 20th century. It wasn’t until the groundbreaking work of Elizabeth White and botanist Frederick Coville that commercial cultivation of blueberries began. White, a New Jersey farmer, partnered with Coville, a USDA botanist, who had discovered that blueberries needed acidic soil to thrive. Together, they pioneered methods for domesticating the wild highbush blueberry, transforming it from a wild forage into a commercially viable crop. Their efforts in the early 1900s led to the development of cultivated varieties, making blueberries more accessible and abundant.
Today, blueberries are recognized globally for their delicious flavor and numerous health benefits, often lauded as a “superfood.” They are rich in antioxidants, vitamins, and fiber, making them a healthy addition to any diet. From ancient sustenance to modern-day superfood, the humble blueberry has certainly left its mark on history and our plates.
❓ Frequently Asked Questions (FAQ) About Blueberry Pie Filling
While some recipes advocate for cornstarch, my preference, and what I find consistently delivers the best results for a perfectly set filling, is a combination of all-purpose flour and granulated sugar. The flour provides a robust thickening without imparting any undesirable flavor, while the sugar helps draw out moisture from the berries and creates a beautiful, glossy syrup. This pairing ensures a filling that holds its shape without being gummy or overly stiff.
To prevent a runny blueberry pie filling, ensure you have used the correct amount of thickener (all-purpose flour in this recipe). Cooking the filling long enough on the stovetop for it to visibly thicken before baking is also crucial. The mixture should simmer and coat the back of your spoon. Additionally, allowing your baked pie to cool completely for at least 4 hours (or even longer) before slicing is paramount. The filling continues to set as it cools, transforming from a liquid to a firm, sliceable consistency. Refrigerating your pie after it has cooled can further aid in thickening and setting, especially in warmer climates.
The versatility of this homemade blueberry pie filling is truly one of its greatest assets! Beyond classic pie, it makes an exquisite ice cream topping, especially when served warm over vanilla bean ice cream. You can spoon it over pancakes, waffles, or French toast for a decadent breakfast. It’s also fantastic as a layer in trifles, a swirl in cheesecakes, a filling for crepes, or mixed into yogurt or oatmeal. For a quick and easy dessert, simply warm the filling, add a dollop of whipped cream, and enjoy it all by itself. Its uses are limited only by your imagination!
While granulated sugar is recommended for its neutral flavor and ability to create a clear syrup, you can experiment with other sugars. Brown sugar would add a deeper, molasses-like flavor, which can be lovely but might slightly alter the classic blueberry taste. For a healthier option, natural sweeteners like maple syrup or honey could be used, but you might need to adjust the quantity and potentially the thickener, as liquid sweeteners can impact the final consistency more. Always taste and adjust as you go.
Preventing a soggy bottom crust is a common challenge for pie bakers, but there are several effective strategies. Firstly, pre-baking (blind baking) your bottom crust before adding the filling can create a barrier against moisture. Secondly, ensure your filling isn’t too wet; proper thickening with flour is key. You can also sprinkle a thin layer of dry breadcrumbs, crushed cornflakes, or even some ground almonds on the bottom crust before adding the filling. These absorb any excess moisture released by the fruit during baking. Finally, baking the pie at a high initial temperature (as this recipe instructs) helps to quickly set and crisp the bottom crust.
📝 Pro Tips and Tricks for Blueberry Pie Perfection
Achieving the perfect blueberry pie, from its glistening filling to its golden, flaky crust, is an art form made easier with these expert tips:
- Consistent Stirring is Key: While heating your blueberry filling, continuous stirring is paramount. This prevents the sugar and fruit from sticking and scorching at the bottom of the pot, ensuring an even cook and a smooth, consistent texture. It also helps the flour to integrate properly without clumping.
- Fresh vs. Frozen Blueberries: This recipe is incredibly adaptable to both fresh and frozen blueberries. When fresh blueberries are in season, they offer an unparalleled burst of flavor. However, high-quality frozen blueberries are a fantastic alternative, providing convenience and consistent results year-round. If using frozen blueberries, there’s no need to thaw them completely; a slight thaw is fine, but cooking from mostly frozen can help maintain their shape. Just be aware that frozen berries may release more liquid, so you might need to cook the filling a minute or two longer to reach the desired thickness.
- Don’t Skip the Lemon Juice: The lemon juice is not just for flavor; it’s a vital component that brightens the overall taste of the blueberries and provides a necessary acidic balance to the sweetness of the sugar. Without it, the filling can taste flat or overly sweet.
- Patience with Cooling: Resist the urge to cut into your freshly baked pie immediately! Allowing the pie to cool and rest for at least 4 hours (or even overnight) is perhaps the most crucial step for a perfectly set filling. During this time, the thickeners fully activate and the filling solidifies, ensuring clean, beautiful slices rather than a runny mess.
- Mastering the Crust: A good pie begins with a great crust. If making your own, ensure your butter is very cold to achieve maximum flakiness. For store-bought crusts, handle them gently to prevent tearing. Proper crimping not only adds visual appeal but also helps to seal the pie, keeping the juicy filling contained.
- Preventing Burnt Edges: The initial high temperature bake is great for setting the crust, but pie edges can burn easily. Using a pie shield or creating one with aluminum foil to cover the crust edges for the first portion of baking is highly recommended.
- Enhance with Spices: For an extra layer of flavor, consider adding a pinch of ground cinnamon, nutmeg, or a tiny dash of allspice to your blueberry filling. These spices can beautifully complement the fruit without overpowering it.
- Serving Suggestions: While heavenly on its own, a slice of warm blueberry pie is elevated by a scoop of vanilla bean ice cream, a dollop of freshly whipped cream, or a drizzle of crème fraîche.
🛠 Recommended Baking Tools for This Recipe
Having the right tools can make all the difference in your baking experience. Here are a few recommended items that will help you create this delicious blueberry pie filling and assemble your pie with ease:
- Wooden Spoon: Essential for stirring your filling evenly and gently mashing berries without scratching your pot.
- 9-inch Pie Tin: A sturdy pie tin is crucial for even baking and a beautifully shaped pie.
- Pie Server: For effortlessly serving perfect slices of your homemade blueberry pie.
- Heavy-Bottomed Pot: A good quality pot will ensure even heat distribution and prevent the filling from scorching.
- Pastry Brush: Useful for applying the egg wash to your pie crust for that desirable golden finish.
- Measuring Cups and Spoons: Accurate measurements are key for baking success.
- Wire Rack: For cooling your pie completely, allowing the filling to set and the crust to remain crisp.
😋 Did You Make This Recipe?
Thank you so much for choosing to give this Homemade Blueberry Pie Filling recipe a try! We truly hope you enjoyed the process of crafting this delightful dessert. Your feedback is invaluable to us and helps fellow bakers discover new favorites. If you loved it, please consider leaving a review in the comments section below. Let us know how it turned out, what you served it with, or any special twists you added!
We’re passionate about sharing delicious, easy-to-follow recipes, and your reviews help us grow and improve. Most importantly, thank you for visiting Ramshackle Pantry! We appreciate your support and look forward to sharing more culinary adventures with you.

Blueberry Pie Filling Recipe
5 from 1 review
-
Author:
Ben -
Prep Time:
15 minutes -
Cook Time:
45 minutes -
Total Time:
1 hour -
Yield:
1 pie -
Category:
Dessert -
Method:
Baking -
Cuisine:
American
Description
A simple and utterly delicious Homemade Blueberry Pie Filling recipe, perfect for crafting a classic blueberry pie, topping your favorite desserts, or enhancing other baked goods. While this recipe focuses on the versatile filling, it also includes instructions for assembling and baking a spectacular homemade pie, ideal for your next gathering or a comforting treat at home!
Ingredients
- 5 ½ Cups of blueberries (fresh or thawed frozen)
- 1 Cup granulated sugar
- 1/2 Cup All-Purpose Flour
- 1 teaspoon fresh lemon juice
For the Pie (Optional):
- 2 pie crusts (store-bought or homemade)
- 1 egg, beaten (for egg wash)
- 1 Tablespoon granulated sugar (for sprinkling on top)
Instructions
Preparing the Blueberry Filling:
- Combine Ingredients: Add blueberries, 1 cup sugar, flour, and lemon juice to a medium, heavy-bottomed pot. Stir to combine.
- Heat and Stir: Place the pot over medium-high heat. Continue stirring constantly as the mixture heats to a gentle simmer.
- Thicken: The mixture should start to blend together, and the berries will begin to break down, releasing their juices. Continue stirring until the filling visibly thickens. You can gently mash some berries with your spoon for a smoother consistency.
- Remove from Heat: Once thickened (approximately 10-15 minutes), remove the pot from the stovetop.
Assembling and Baking the Pie:
- Preheat Oven: Preheat your oven to 425° Fahrenheit (220° Celsius).
- Prepare Bottom Crust: Place the bottom pie crust in a lightly greased 9-inch pie pan.
- Fill Pie: Pour the prepared blueberry pie filling into the bottom crust, spreading evenly.
- Add Top Crust: Place the second pie crust over the filling and crimp the edges to seal.
- Egg Wash: Using a pastry brush, lightly coat the top crust with the beaten egg.
- Ventilation: Make four small slits in the top pie crust to allow steam to escape during baking.
- Sprinkle Sugar: Sprinkle 1 tablespoon of granulated sugar evenly over the top crust.
- Initial Bake with Crust Guard: Cover the crimped pie crust edges with aluminum foil or a pie shield to prevent burning. Bake for 35 minutes.
- Remove Guard: Carefully remove the crust guard.
- Final Bake: Bake for an additional 10-15 minutes, or until the entire crust is golden brown and the filling is bubbling thickly.
- Cool Completely: This is crucial! Allow the pie to rest and cool completely on a wire rack for at least 4 hours before slicing and serving. This ensures the filling sets properly.
Notes
- Continuous stirring during the heating of the filling helps prevent burning and ensures a smoother, better end product.
- You can use either fresh or high-quality frozen blueberries for this recipe, both yield delicious results.
- Allowing the pie to cool completely for several hours is essential for a properly set filling and clean slices.