
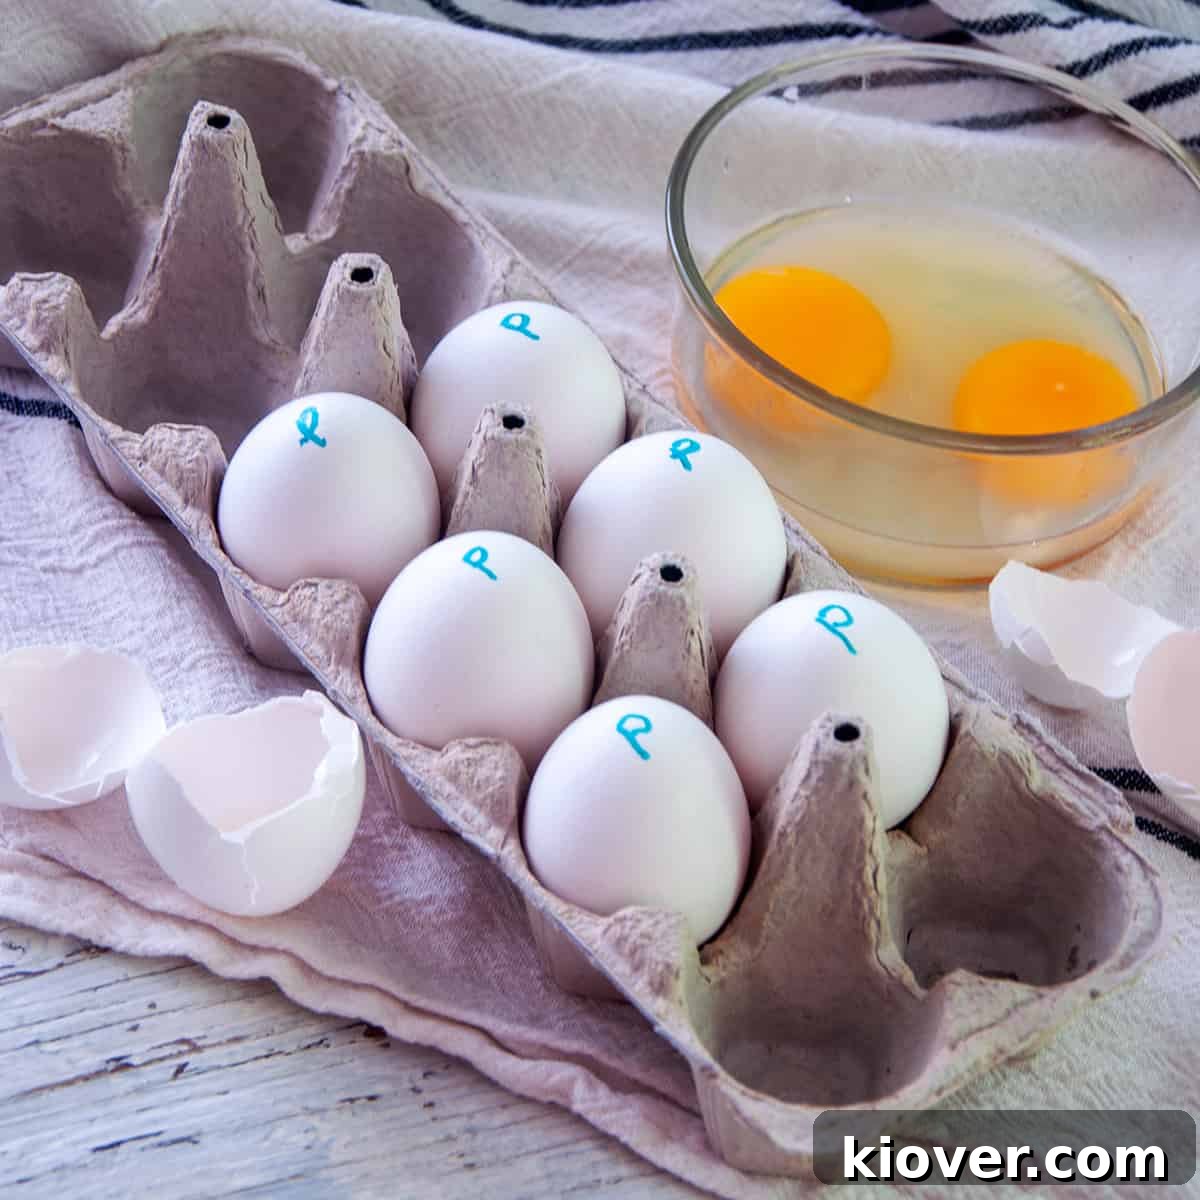
In the culinary world, many exquisite recipes, from creamy homemade mayonnaise to luscious ice cream, call for the unique richness and texture of raw eggs. However, the use of unpasteurized raw eggs comes with inherent food safety risks, primarily from bacteria like Salmonella. This is where pasteurized eggs step in, offering a significantly safer kitchen experience for both adventurous home cooks and seasoned chefs alike. While finding pre-pasteurized eggs can often be a challenge, not to mention a costly one, the landscape of home cooking has been revolutionized by modern technology. Specifically, sous vide cookers have emerged as a game-changer, making in-shell egg pasteurization remarkably accessible and precise. Say goodbye to concerns about foodborne illness when indulging in your favorite raw egg preparations. It’s time to elevate your culinary safety and expertise. Grab your sous vide machine, such as an Anova, and discover the straightforward process of how to pasteurize eggs with a sous vide cooker, bringing professional-level safety to your home kitchen.
🥚 What Makes This Home Pasteurization Method So Special?
This method truly brings the power of DIY egg pasteurization directly into your home kitchen, empowering you to create a safer culinary environment. For years, in-shell pasteurized eggs have been notoriously difficult to locate in regular grocery stores. When you do manage to find them, they often come with a premium price tag, sometimes costing two or three times more than a standard dozen of unpasteurized eggs. This barrier has often deterred home cooks from experimenting with recipes that truly shine with the use of raw, fresh eggs.
Our sous vide process elegantly solves these problems. It allows you to purchase ordinary, fresh eggs and pasteurize them right from the comfort of your home, requiring just 75 minutes of cooking time in your sous vide water bath. The results are eggs that are ready for safe raw consumption. As the USDA explicitly states, many traditionally raw-egg dishes like homemade mayonnaise, Caesar dressing, or even certain custards, can be “safely made if raw, in-shell pasteurized eggs or pasteurized egg products are used.” This underscores the critical importance of proper pasteurization for food safety.
My own journey into sous vide egg pasteurization began out of a desire to explore several delightful recipes that specifically called for raw eggs. Instead of embarking on a frustrating and often fruitless hunt around town for expensive, specialty pasteurized eggs, I decided to master the art of pasteurizing them myself. This not only saved money but also ensured a consistent supply of safe eggs for my culinary adventures.
Just as the FDA strongly recommends, I too advise against consuming raw eggs unless they have been properly pasteurized. While the sous vide method offers a highly effective and reliable means of reducing bacterial risks, it’s always important to understand that no home method can guarantee the same level of sterility as commercially processed products. However, for home cooks, this technique provides an invaluable opportunity to significantly enhance the safety of eggs used in raw preparations, offering peace of mind and expanding your recipe repertoire. It’s a practical and powerful skill for anyone serious about food safety and delicious homemade dishes.
Table of Contents
- 🥚 What Makes This Home Pasteurization Method So Special?
- 🍳 Essential Ingredients & Equipment for Sous Vide Egg Pasteurization
- 🍲 Step-by-Step Sous Vide Egg Pasteurization Instructions
- Key Differences between Pasteurized Eggs and Non-Pasteurized Eggs
- 🤷 Substitutions and Variations for Perfect Pasteurized Eggs
- 📦 Storage Tips for Your Homemade Pasteurized Eggs
- ❓ Frequently Asked Questions About Pasteurizing Eggs at Home
- 📝 Expert Tips and Tricks for Sous Vide Egg Pasteurization
- 🛠 Recommended Products Used in This Recipe
- 😋 Share Your Experience with This Recipe!
- How to Pasteurize Eggs at Home Recipe
🍳 Essential Ingredients & Equipment for Sous Vide Egg Pasteurization
One of the most appealing aspects of this method is its simplicity when it comes to ingredients. You only need one core item: eggs! The rest involves a few common kitchen tools and, of course, your trusty sous vide device. While the process is straightforward, paying attention to the details of your eggs and equipment will ensure the best and safest results.
Ingredients:
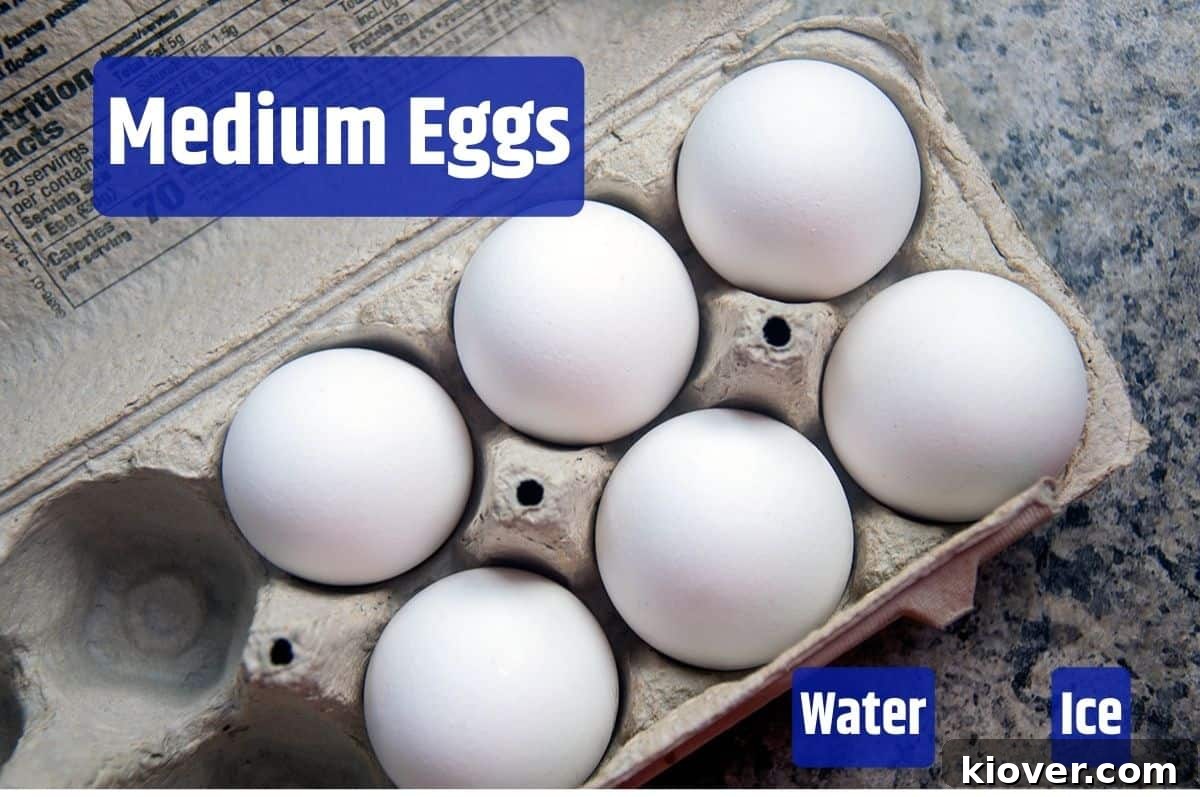
- Eggs: Fresh, uncracked eggs are paramount. Medium to large eggs are ideal for the specified cooking times. Consistency in size will ensure more uniform pasteurization. Avoid any eggs with visible cracks or damage, as these could compromise the safety of the process.
- Water: This is essential for both your sous vide bath and the subsequent ice bath. Ensure you have enough clean water to fully submerge your eggs during both stages of the process.
- Ice: A generous amount of ice is critical for rapidly cooling the eggs after pasteurization, immediately halting the cooking process and ensuring their safety and raw texture.
The water serves two vital roles: first, as the precisely controlled medium for the sous vide bath where pasteurization occurs, and second, as the foundation for the cold ice bath that stops the cooking process and cools the eggs quickly.
Equipment:
- Sous Vide Immersion Circulator: This is the core piece of equipment. An Anova sous vide cooker is an excellent choice known for its reliability and precision, but any reputable brand will work effectively.
- Large Pot or Food-Grade Container: You’ll need a container large enough to hold your eggs fully submerged in water, allowing for good water circulation around each egg. A large stockpot or a dedicated sous vide bath container is suitable.
- Slotted Spoon or Tongs: For gently adding and removing eggs from the hot water bath, minimizing the risk of cracking.
- Timer: To accurately track the 75-minute pasteurization period. Most sous vide circulators have built-in timers.
- Marker (optional but recommended): To clearly label your pasteurized eggs for easy identification in your refrigerator.
🍲 Step-by-Step Sous Vide Egg Pasteurization Instructions
Achieving perfectly pasteurized eggs at home is a simple yet precise process that harnesses the power of sous vide cooking. Follow these instructions carefully to ensure the safety and quality of your eggs for all your raw-egg recipe needs.
Preparation:
- Set Up Your Sous Vide Bath: Fill a large pot or a dedicated sous vide container with enough water to fully submerge your eggs. Attach your sous vide immersion circulator to the side of the container.
- Preheat the Water: Set your sous vide device to precisely 135° Fahrenheit (57.2° Celsius). Allow the water bath to come up to temperature and stabilize. This precise temperature is crucial; too low and pasteurization won’t be effective, too high and your eggs will begin to cook. This temperature and time are based on robust scientific data, including comprehensive egg safety studies and recommendations from highly respected culinary science experts like Douglas Baldwin.
Pasteurization Process:
- Add Eggs to the Bath: Once your sous vide bath has reached and maintained the target temperature of 135°F, carefully and gently add your eggs directly into the water. Use a large slotted spoon or tongs to lower them to prevent cracking. Ensure that the eggs are fully submerged throughout the entire cooking process.
- Sous Vide the Eggs: Allow the eggs to cook in the precisely controlled water bath for a minimum of 1 hour and 15 minutes (75 minutes). This duration at 135°F is the scientifically determined sweet spot for killing harmful bacteria like Salmonella without altering the raw, liquid consistency of the egg yolk and white. You can cook them for up to 2 hours and 30 minutes without adverse effects on texture.
Post-Pasteurization Cool Down and Storage:
- Prepare an Ice Bath: While the eggs are still in the sous vide bath during the last few minutes, prepare a large bowl filled with ice water. This ice bath is a critical step to rapidly cool the eggs and stop any residual cooking that might occur from their internal heat.
- Transfer to Ice Bath: As soon as the 75-minute sous vide time is complete, immediately transfer the eggs from the hot water bath into the prepared ice bath. Again, handle them gently with a slotted spoon to avoid cracking.
- Cool the Eggs: Allow the eggs to rest in the ice bath for at least 20 minutes. This rapid cooling ensures they return to a safe storage temperature quickly and prevents any further thermal changes to their delicate proteins.
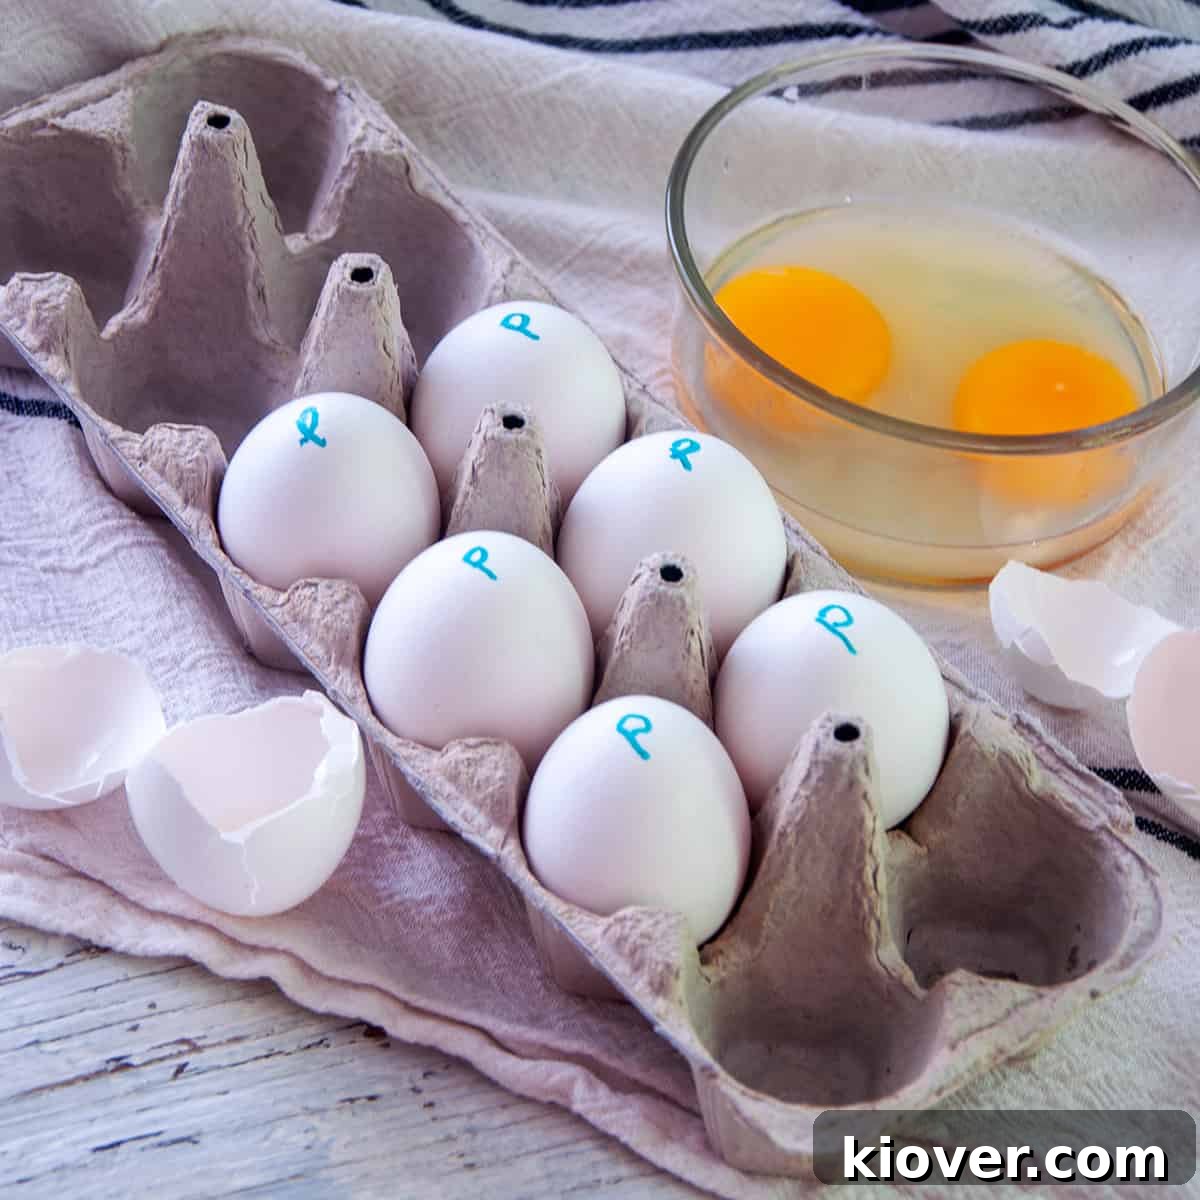
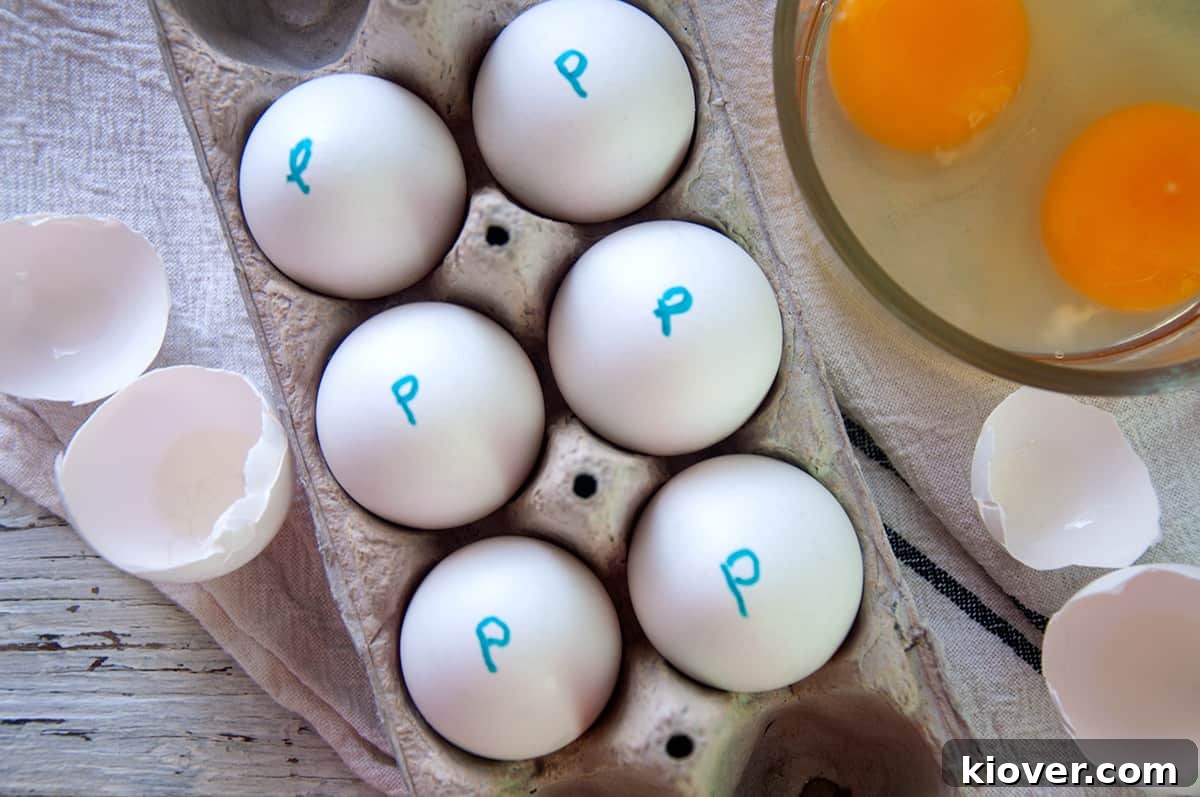
- Dry and Mark Eggs: After the eggs are thoroughly chilled, remove them from the ice bath and carefully dry them with a clean towel. Immediately mark each egg with a permanent marker, perhaps a simple ‘P’ for pasteurized. This simple step is vital for easy identification and prevents any confusion with unpasteurized eggs in your refrigerator.
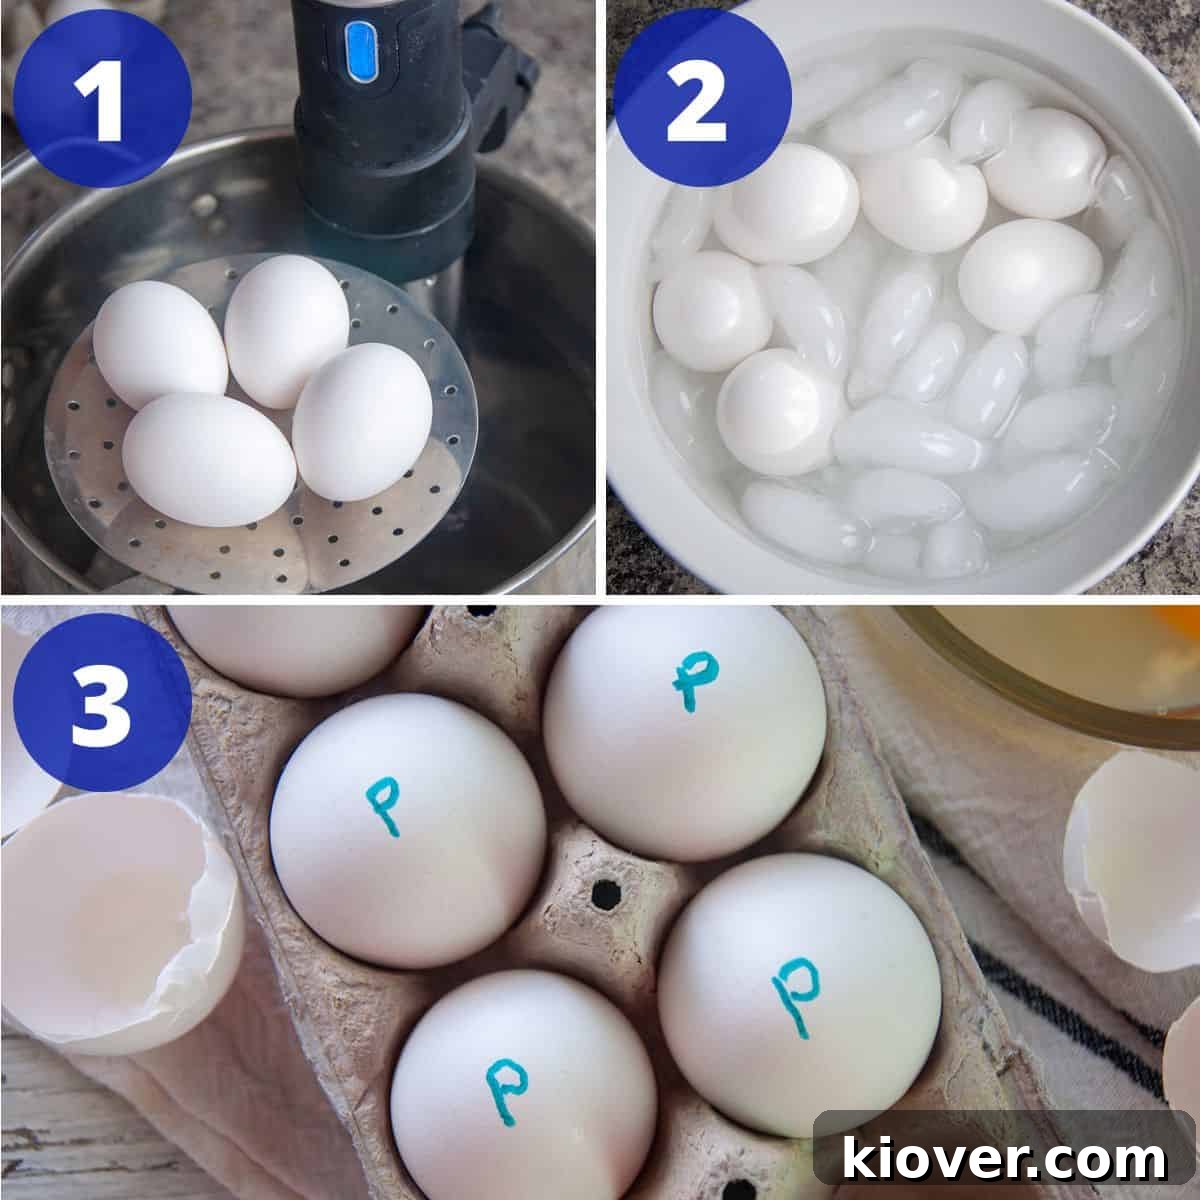
Your homemade pasteurized eggs are now ready to be safely incorporated into any recipe that traditionally calls for raw eggs, offering both peace of mind and delicious results!
Key Differences between Pasteurized Eggs and Non-Pasteurized Eggs
While the goal of pasteurization is to render eggs safer for consumption, particularly in raw applications, it’s important to understand that the heat treatment can introduce subtle differences in their physical properties. These distinctions are generally minor but can be noticeable in certain culinary contexts.
- Enhanced Safety for Raw Use: This is the primary and most significant difference. Pasteurized eggs undergo a controlled heat treatment specifically designed to reduce harmful bacteria, such as Salmonella, to safe levels. This makes them significantly safer for recipes that involve raw or lightly cooked eggs, like homemade mayonnaise, Caesar dressing, hollandaise sauce, meringues, or even eggnog. Non-pasteurized eggs, by contrast, carry a higher risk of bacterial contamination if consumed raw.
- Differences in Egg Whites (Functional Properties): While egg yolks remain largely unchanged in their consistency and functional properties after pasteurization, egg whites can exhibit slight alterations. The delicate proteins in egg whites, responsible for their ability to whip into stable foams, undergo a minor degree of denaturation during the pasteurization process. This means:
- Whipped Egg Whites and Meringues: Pasteurized egg whites may not whip up quite as voluminous or as stiffly as their non-pasteurized counterparts. They might also require a longer whipping time to achieve the desired consistency.
- Mitigating the Difference: To help pasteurized egg whites achieve a structure more similar to non-pasteurized ones, consider adding an acid. A small amount of cream of tartar (approximately ¼ teaspoon per egg white) or a few drops of lemon juice can stabilize the proteins and aid in achieving a better foam. While they will still require more whipping time, these additions can significantly improve their performance in meringues, soufflés, or light mousses.
- Appearance: Visually, you’ll likely notice little to no difference between a pasteurized and an unpasteurized egg when cracked open. The yolk remains perfectly liquid and bright, and the white retains its translucent quality. The sous vide method is specifically chosen because it minimizes visible cooking while achieving the necessary bacterial reduction.
Understanding these subtle differences allows you to adapt your cooking techniques slightly when using pasteurized eggs, ensuring excellent results in all your recipes, especially those where raw eggs play a starring role.
🤷 Substitutions and Variations for Perfect Pasteurized Eggs
The sous vide method for pasteurizing eggs is quite flexible, allowing for minor adjustments while maintaining safety. Understanding the science behind the process will help you make informed decisions.
- Extended Cooking Time: You can safely allow the eggs to remain in the 135°F (57.2°C) water bath for longer than the recommended 75 minutes. I would advise against extending this period beyond 2 hours and 30 minutes, as very prolonged cooking, even at this low temperature, can eventually begin to alter the texture of the egg white, making it slightly more viscous or even subtly firm. The 75-minute minimum is sufficient for safety.
- The Science of Pasteurization (Time and Temperature): It’s important to note why sous vide works so exceptionally well for pasteurization. The effectiveness of pasteurization depends entirely on two critical elements: time and temperature. Bacteria like Salmonella are killed not just by high temperatures, but by exposure to specific temperatures for a sufficient duration. Eggs can technically be pasteurized faster than 75 minutes if subjected to higher temperatures, but controlling those higher temperatures precisely in a home kitchen without accidentally cooking the egg is a major challenge.
- Temperature Precision is Key: This is where sous vide technology excels. The goal is to eliminate pathogens without actually cooking the egg. At approximately 140°F (60°C), the egg white begins to coagulate and turn opaque, signifying that the egg is starting to cook, which is something we want to avoid for “raw” applications. By heating the eggs to a consistent 135°F (57.2°C) for 75 minutes, we hit the optimal balance to significantly reduce bacterial loads while preserving the liquid, raw state of the egg, ensuring a safer raw egg experience.
- Egg Size Considerations: The amount of time needed for eggs to become fully pasteurized is directly influenced by the diameter of the egg. This recipe’s recommended time of 75 minutes is calibrated for regular medium to large-sized eggs. If you are using significantly larger eggs, such as jumbo or extra-large, you may need to increase the sous vide time slightly, perhaps by an additional 10-15 minutes, to ensure the heat adequately penetrates to the center of the larger egg. Conversely, for very small eggs, the time could potentially be reduced, though sticking to the 75-minute standard will still be perfectly safe and effective without overcooking.
- Sous Vide Device Flexibility: While I personally have a strong preference for my Anova brand sous vide cooker due to its consistent performance and user-friendly interface, the beauty of the sous vide method is that any reliable immersion circulator will achieve the same results. The key is its ability to maintain a precise and stable water temperature. Feel free to use whichever sous vide appliance you own and trust.
By understanding these principles, you can confidently adapt this pasteurization method to suit your specific needs and equipment, always prioritizing safety and maintaining the integrity of your eggs.
📦 Storage Tips for Your Homemade Pasteurized Eggs
Proper storage is crucial to maintain the safety and quality of your freshly pasteurized eggs. Once you’ve completed the sous vide process and chilled them in an ice bath, follow these guidelines for optimal storage:
- Refrigeration is Key: Always store your pasteurized eggs in the refrigerator immediately after they have been thoroughly cooled in the ice bath and dried. The consistent cold temperature of the refrigerator is vital for inhibiting bacterial growth and preserving the eggs.
- Original Packaging: It is highly recommended to place your marked pasteurized eggs back into their original carton. The carton provides additional protection from odors and potential cross-contamination with other foods in your fridge. It also typically has an expiration date stamped on it.
- Shelf Life: Continue to use your pasteurized eggs by the date printed on the original egg carton. Pasteurization extends the safety for raw consumption but does not significantly extend the overall shelf life of the egg itself. Treat them as you would any fresh egg in terms of spoilage, but with the added benefit of reduced bacterial risk for raw applications.
- Labeling: The most important step for home pasteurized eggs is clear labeling. Your distinct ‘P’ mark on each egg (or any other system you devise) will prevent accidental mixing with unpasteurized eggs, ensuring that you always reach for the safer option when making raw-egg recipes.
❓ Frequently Asked Questions About Pasteurizing Eggs at Home
Absolutely! When cooked, pasteurized eggs are just as safe, if not safer, than any regular egg. When consumed raw (as in mayonnaise, Caesar dressing, or certain cocktails), they are a significantly safer option than unpasteurized eggs because the pasteurization process drastically reduces the risk of Salmonella contamination.
No, not all eggs are pasteurized. The vast majority of eggs sold in grocery stores are unpasteurized. If you are looking for pasteurized eggs in a store, the package will be specifically and clearly marked as “pasteurized.” If there is no such label, assume they are unpasteurized.
Yes, you can whip pasteurized eggs, particularly the whites for meringues or soufflés. However, due to slight protein denaturation during pasteurization, they may not whip quite as quickly or achieve the same peak volume as unpasteurized egg whites. To improve their whipping ability, add approximately ¼ ounce (about ¼ teaspoon) of cream of tartar or a few drops of lemon juice per egg white. This acidity helps stabilize the proteins, and you should expect them to require quite a bit longer whipping time.
Many larger grocery stores carry pasteurized eggs, but my experience is that their availability can be sporadic and vary by region. They are often found in the specialty or organic egg section. Brands like Eggland’s Best are probably the most well-known producers in many areas, but numerous egg suppliers now offer pasteurized options. However, they are almost always more expensive than standard eggs.
Sous vide (French for “under vacuum”) is a cooking method where food is vacuum-sealed in a bag and then cooked in a precisely temperature-controlled water bath. This technique ensures that food is cooked evenly to the exact desired doneness, and in the case of eggs, allows for precise pasteurization without actually cooking them.
While convenient, store-bought pasteurized eggs are often significantly more expensive than regular eggs. They can also be difficult to find consistently, with stock varying from store to store. Pasteurizing your own eggs at home using sous vide is a cost-effective and reliable way to ensure you always have safe eggs for raw applications, offering the satisfaction of DIY and greater control over your ingredients.
📝 Expert Tips and Tricks for Sous Vide Egg Pasteurization
To ensure the best and safest results when pasteurizing eggs with your sous vide, keep these practical tips and tricks in mind:
- No Bag Needed: Unlike many sous vide recipes that require vacuum-sealing food in bags, there’s no need to place your eggs in a bag before putting them in the sous vide bath. The eggshell acts as a natural protective barrier. Placing them directly in the water allows for optimal heat transfer and simplifies the process.
- Handle with Care: Always use a large slotted spoon or a pair of kitchen tongs to gently place the eggs into and remove them from the sous vide bath and the subsequent ice bath. Eggs can be surprisingly delicate, and dropping them could lead to cracks, compromising their integrity and safety.
- Mark Your Eggs Clearly: This is a crucial step for organization and safety. After the eggs have been thoroughly cooled and dried, use a permanent marker to clearly label each egg as ‘P’ for pasteurized. This simple notation will help you easily distinguish them from unpasteurized eggs in your refrigerator, preventing any confusion, especially when reaching for eggs for raw applications.
- Always Follow General Egg Safety Rules: While pasteurization significantly reduces bacterial risk, it does not eliminate the need for general food safety practices. Always store eggs in their carton in the coldest part of your refrigerator (typically not the door). Avoid leaving eggs out at room temperature for extended periods. Wash your hands thoroughly before and after handling raw eggs. And always discard eggs with visible cracks or a strong, off odor.
- Ensure Full Submersion: For effective and even pasteurization, it’s vital that all eggs are completely submerged in the water bath throughout the entire cooking process. If some eggs float, you might need to use a heavy, food-grade object (like a ceramic plate or a dedicated sous vide rack) to weigh them down.
- Stabilize Water Temperature: Ensure your sous vide device has ample time to bring the water to the exact target temperature of 135°F (57.2°C) and stabilize it before adding the eggs. Fluctuations in temperature can affect the pasteurization efficacy.
🛠 Recommended Products Used in This Recipe
Having the right tools can make your sous vide egg pasteurization experience seamless and efficient:
- Anova Culinary Sous Vide Precision Cooker: A highly reliable and popular choice among home cooks, known for its precise temperature control and user-friendly interface.
- Large Pot or Anova Sous Vide Container: You’ll need a sizable vessel to hold your water bath. A standard large stockpot works perfectly, or for dedicated sous vide enthusiasts, a purpose-built sous vide container offers excellent insulation and a lid to minimize evaporation.
- Slotted Spoon or Tongs: Essential for careful handling of the eggs.
- Permanent Marker: For labeling your pasteurized eggs.
😋 Share Your Experience with This Recipe!
Thank you so much for taking the time to give this incredibly useful recipe a try! I’m thrilled that you now possess the knowledge and skill to pasteurize eggs safely and efficiently right in your own home. This opens up a world of culinary possibilities, allowing you to confidently create delicious raw-egg recipes without worry. Your feedback is invaluable, both for me and for other home cooks who are considering this method. Could you do me a favor by leaving a review and your comments in the section below? Let me know how the process went for you, any tips you discovered, or how you used your freshly pasteurized eggs. Your insights help me understand how I’m doing and guide others in their decision-making. Most of all, thank you for visiting Ramshackle Pantry and for trusting us with your kitchen needs!
Print Recipe

How to Pasteurize Eggs at Home with Sous Vide
5 Stars
4 Stars
3 Stars
2 Stars
1 Star
5 from 3 reviews
- Author: Ben
Prep Time: 20 minutes
Cook Time: 75 minutes
Total Time: 95 minutes
Yield: 6 eggs
Category: Food Preparation
Method: Sous Vide
Cuisine: American
Description
Unlock the secret to safe and delicious raw egg recipes! This comprehensive guide shows you how to pasteurize eggs at home using a sous vide cooker, making them perfectly safe for culinary delights like homemade mayonnaise, light and airy meringue, or rich Caesar dressing. Learn the precise time and temperature settings to confidently prepare your own pasteurized eggs with an Anova or any sous vide machine today.
Ingredients
- 6 medium to large, fresh, uncracked eggs
- Ample water for the sous vide bath and ice bath
- Plenty of ice for an immediate ice bath
Instructions
- Prepare Sous Vide Bath: Fill a large pot or container with water and attach your sous vide circulator. Set the temperature to precisely 135° Fahrenheit (57.2° Celsius) and allow it to preheat and stabilize completely.
- Gently Add Eggs: Once the water bath reaches 135°F, use a slotted spoon to carefully and gently submerge your clean, uncracked eggs directly into the hot water bath. Ensure they are fully immersed.
- Sous Vide for Pasteurization: Allow the eggs to cook undisturbed in the sous vide bath for a minimum of 75 minutes. This precise time and temperature are critical for effective pasteurization without cooking the egg.
- Prepare Ice Bath: While the eggs are sous vide-ing, fill a large bowl with ice and water. This will be used to rapidly cool the eggs immediately after pasteurization.
- Rapid Cooling: After 75 minutes, promptly transfer the eggs from the sous vide bath into the prepared ice bath. Let them cool completely for at least 20 minutes to halt the cooking process and bring their internal temperature down quickly.
- Dry and Mark: Once thoroughly chilled, remove the eggs from the ice bath and dry them well with a clean towel. Use a permanent marker to label each egg with a “P” (for Pasteurized) or any other clear marking system to differentiate them from unpasteurized eggs. Store them in the refrigerator in their original carton.
Notes
- Do not place your eggs in a bag before putting them in the sous vide; they go directly into the water.
- Always use a big slotted spoon or tongs to gently place and remove the eggs to prevent cracking.
- Use a permanent marker to clearly note your eggs as ‘P’asteurized before placing them back in the refrigerator to avoid confusion.
- Always follow general egg safety rules in addition to pasteurization.
- For larger eggs (e.g., jumbo), consider adding an extra 10-15 minutes to the sous vide time to ensure proper heat penetration.