
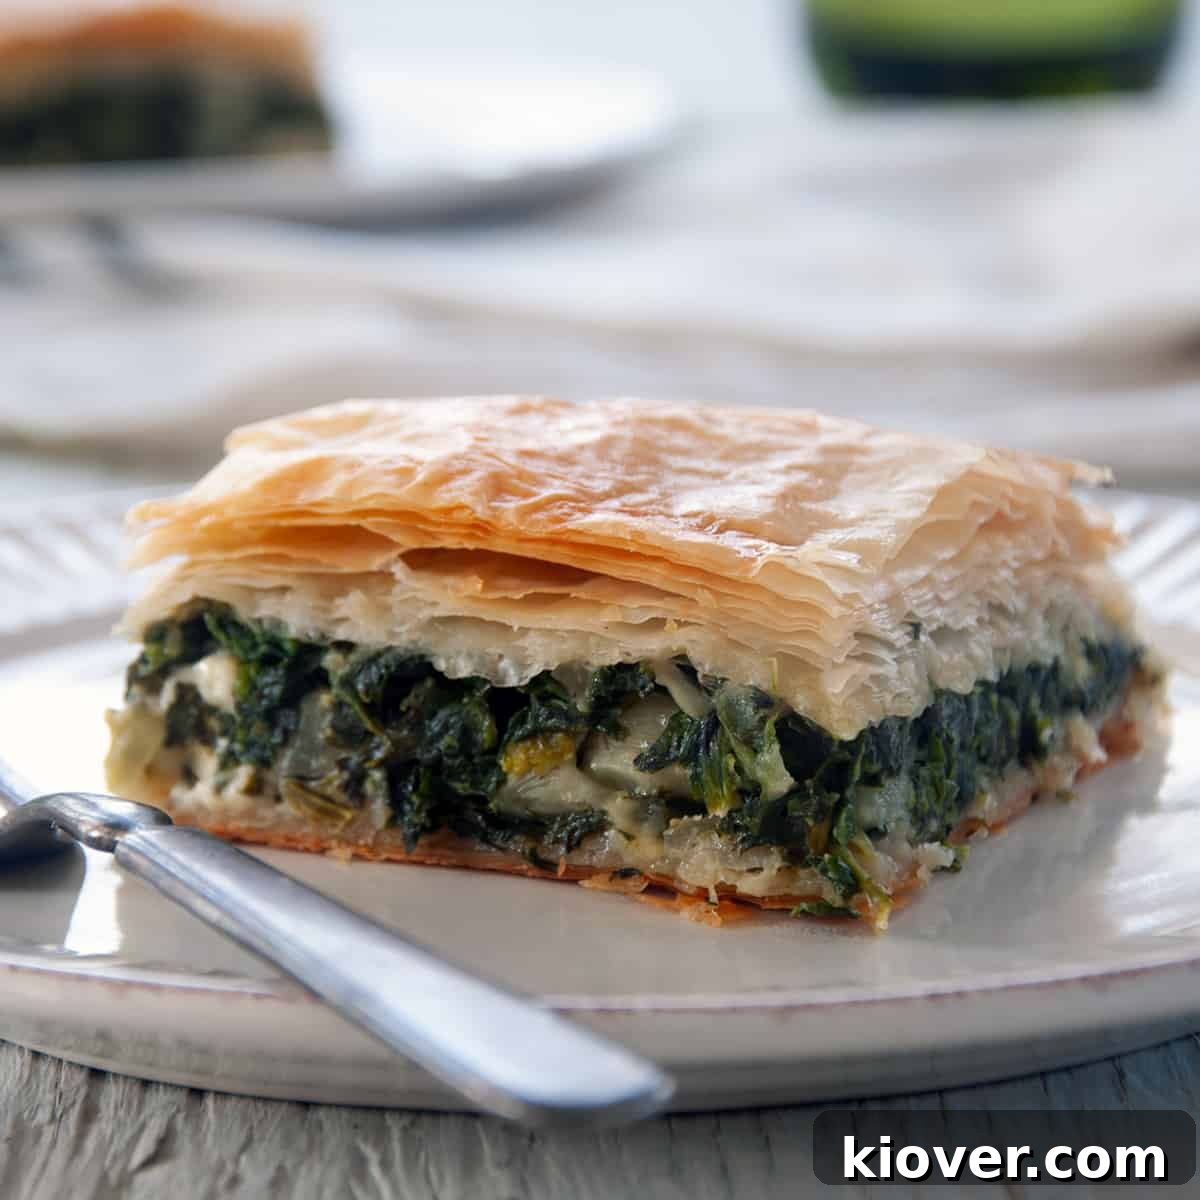
Welcome to the culinary world of Greece, where rich flavors and simple ingredients combine to create timeless dishes. Among these cherished recipes, Spanakopita stands out as a true masterpiece. This iconic Greek feta and spinach pie is more than just a dish; it’s a celebration of textures and tastes, featuring a buttery, impossibly flaky phyllo crust enveloping a savory, aromatic filling. Prepare to embark on a delicious journey that promises to captivate your taste buds and earn a permanent spot in your family’s recipe rotation.
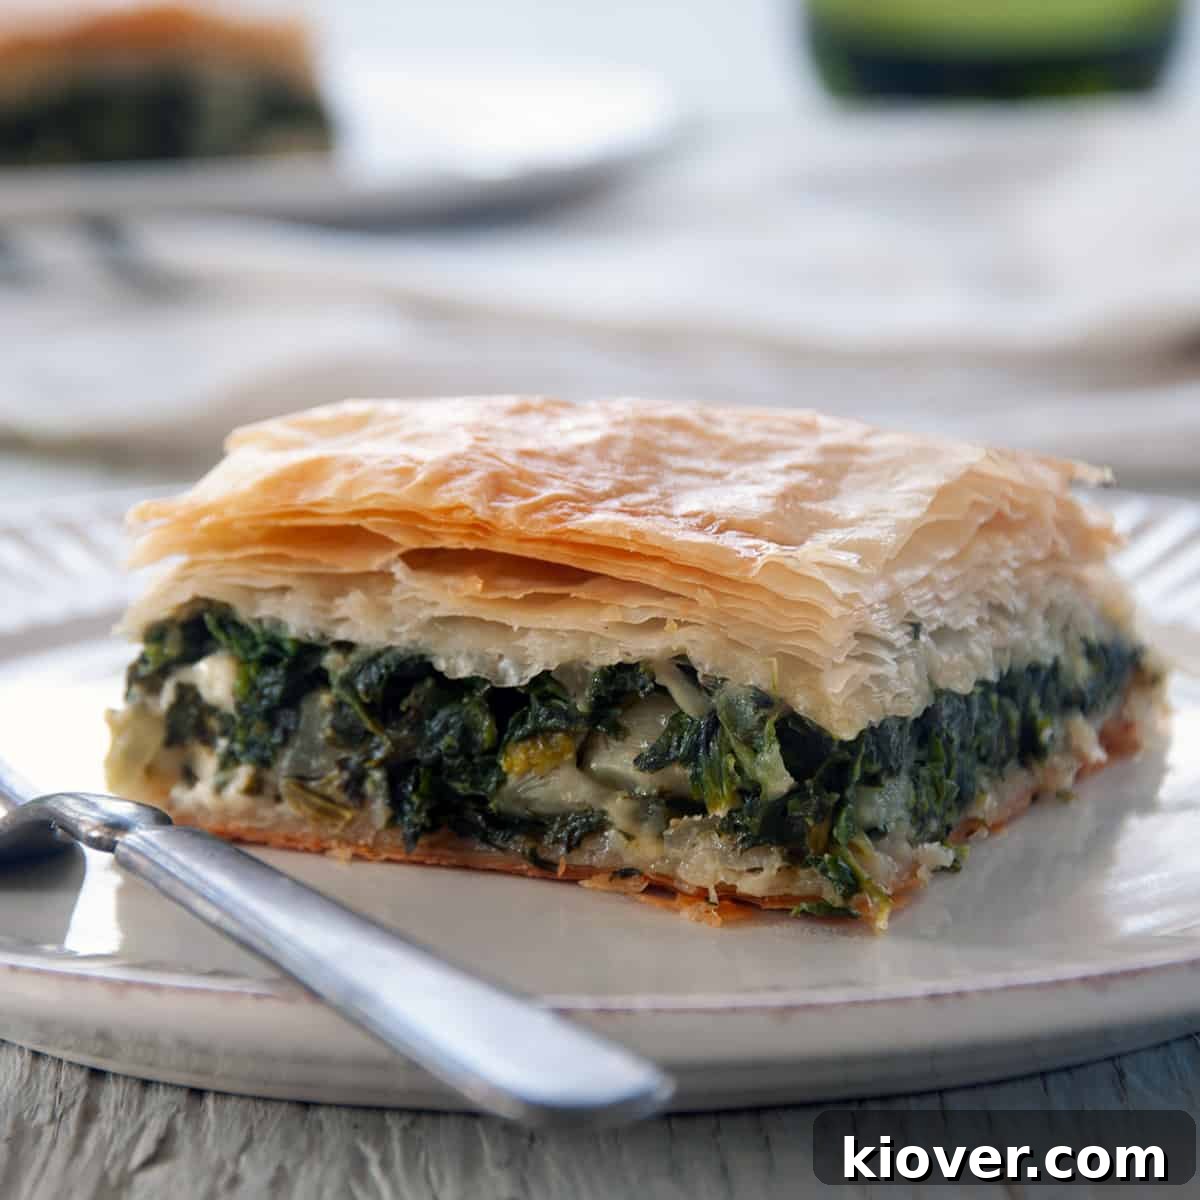
While often enjoyed as a delectable appetizer or a satisfying snack, Spanakopita possesses the versatility to transform into a hearty main course, perfect for a light lunch or an elegant dinner. No matter how you choose to serve it, be ready for an explosion of flavors meticulously encased within delicate, golden-brown phyllo pastry layers. Each bite offers a harmonious blend of creamy feta, earthy spinach, and a hint of fresh herbs, all complemented by the crisp, shatteringly tender crust.
Although my usual culinary explorations venture beyond Greek cuisine, the sheer excellence of Spanakopita is impossible to overlook. It’s a dish that truly embodies the Mediterranean spirit. If you find yourself drawn to similar vibrant, fresh flavors, you might also enjoy exploring my Mint Watermelon Feta Salad, the tender Grilled Chicken Legs with Yogurt Mint Marinade, or the richly spiced Indian-Inspired Lamb Burgers with Mint Yogurt Sauce. Each of these recipes promises a unique taste adventure, but for now, let’s dive deep into the magic of Spanakopita and create something truly special for yourself and your loved ones!
Table of Contents
- Authentic Spanakopita: What Is This Greek Delight?
- Why This Spanakopita Recipe Will Become a Family Favorite
- 🇬🇷 Essential Ingredients for Your Greek Feta and Spinach Pie
- 🍲 Step-by-Step Instructions: Mastering Spanakopita
- Expert Tips for Perfect Spanakopita
- 🤷 Substitutions and Variations: Customize Your Spanakopita
- 📦 Storage and Reheating: Keeping Your Spanakopita Fresh
- 🎓 A Taste of History: The Story of Spanakopita
- ❓ Frequently Asked Questions About Spanakopita
- 🛠 Products and Tools for This Recipe
- 😋 Share Your Spanakopita Creation!
- Spanakopita – Greek Feta and Spinach Pie Recipe
Authentic Spanakopita: What Is This Greek Delight?
Spanakopita, pronounced “spah-nah-KO-pee-tah,” is a beloved savory pastry from Greece, renowned for its simple yet incredibly satisfying components. At its heart, it’s a pie filled with a luscious mixture of spinach and feta cheese, often enriched with onions, garlic, and fresh herbs like dill or parsley, then bound together with eggs. This delightful filling is encased in multiple layers of delicate, tissue-thin phyllo dough, brushed generously with butter or olive oil, which bakes to a glorious golden crispness.
The magic of Spanakopita lies in the contrast: the crunchy, almost ethereal quality of the phyllo dough against the moist, flavorful, and slightly tangy filling. It’s a dish that balances richness with freshness, making it incredibly appealing across different palates. Whether served warm or at room temperature, Spanakopita offers a comforting and authentic taste of Mediterranean cuisine, perfect for sharing with friends and family.
Why This Spanakopita Recipe Will Become a Family Favorite
There are countless reasons why this particular Spanakopita recipe stands out and is destined to be a hit in your home. Firstly, it strikes the perfect balance between traditional Greek flavors and approachable cooking methods, making it accessible even for those new to phyllo dough. The combination of savory feta and fresh spinach creates a deeply satisfying flavor profile that is both hearty and refreshing.
Secondly, the recipe focuses on achieving that quintessential flaky, buttery crust that is the hallmark of an excellent Spanakopita. We emphasize techniques to ensure your phyllo layers are perfectly crisp, creating a delightful textural contrast with the soft, cheesy interior. This dish isn’t just delicious; it’s also remarkably versatile. Serve it as an elegant appetizer at your next gathering, a delightful side dish to grilled meats, or even as a light and wholesome vegetarian main course. Its ability to be prepared ahead of time also makes it incredibly convenient for busy schedules. With this recipe, you’re not just making a meal; you’re creating a memorable culinary experience that celebrates the vibrant tastes of Greece.
🇬🇷 Essential Ingredients for Your Greek Feta and Spinach Pie
While spinach and feta cheese are the stars of the show, a few other key components work in harmony to elevate this classic Greek pie to culinary perfection. Here’s a detailed look at what you’ll need to gather:
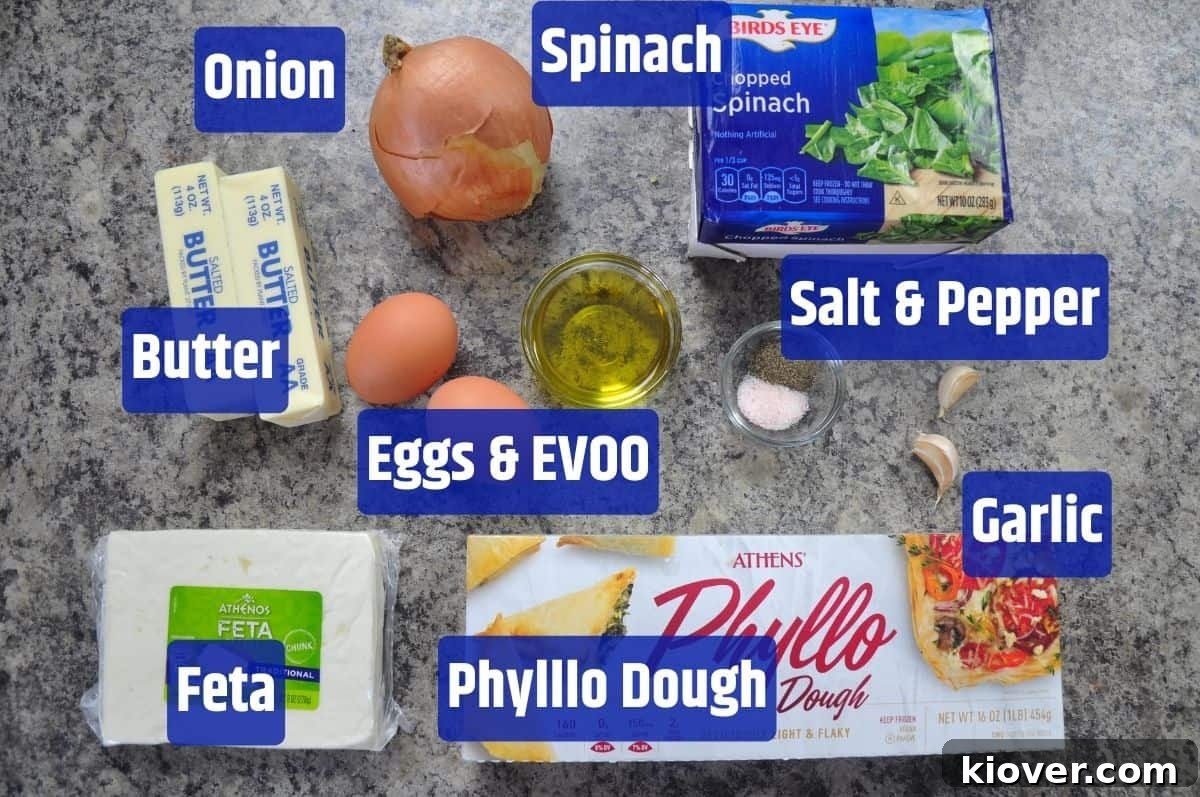
- Spinach (Frozen or Fresh): The cornerstone of the filling. If using frozen, ensure it’s thoroughly thawed and all excess water is squeezed out to prevent a soggy pie. Fresh spinach should be blanched and drained well.
- Onion & Garlic: These aromatics provide a foundational layer of savory flavor, sautéed until soft and fragrant to enhance the overall depth of the pie.
- Butter & Olive Oil: Melted butter is crucial for brushing between the delicate phyllo layers, creating that irresistible golden crispness and rich flavor. A touch of olive oil is used for sautéing the aromatics.
- Feta Cheese: The quintessential Greek cheese, its salty, tangy, and crumbly texture is indispensable for authentic Spanakopita. Opt for good quality, crumbly feta.
- Eggs: Act as a binder for the filling, holding the spinach and feta together while adding richness and structure.
- Salt & Pepper: Essential seasonings to bring out the best in the ingredients.
- Phyllo Dough: The magic behind the flaky crust. This paper-thin dough requires careful handling but yields incredibly rewarding results. Remember to thaw it properly according to package instructions.
For precise measurements, please refer to the comprehensive recipe card located below.
🍲 Step-by-Step Instructions: Mastering Spanakopita
Crafting the perfect Spanakopita is an enjoyable process that combines simple steps with a touch of culinary patience. Follow these detailed instructions to achieve a flaky, flavorful Greek pie every time:
- Prepare the Spinach with Precision: The first and most crucial step is to ensure your spinach is perfectly dry. If you’re using frozen spinach, allow it to thaw completely, then vigorously squeeze out every drop of excess water. This can be done using a clean kitchen towel or cheesecloth. For fresh spinach, wash it thoroughly, then blanch it briefly in boiling water or steam until wilted. Immediately drain and squeeze out as much moisture as possible. Excess water will make your pie soggy, so take your time here!
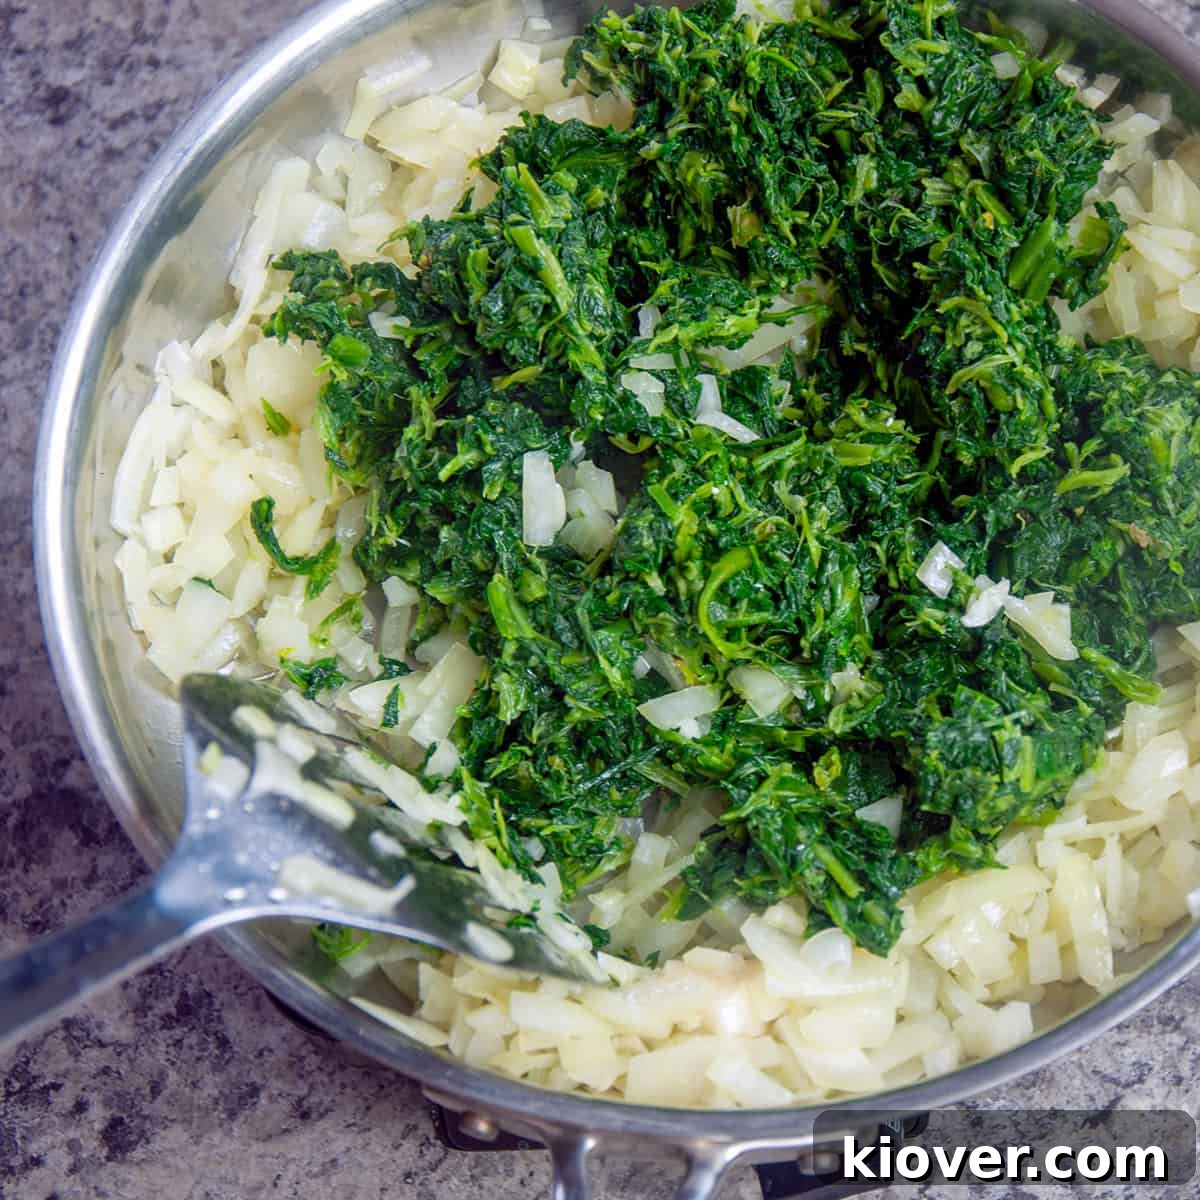
- Sauté the Aromatics: In a large, sturdy skillet, heat a tablespoon or two of olive oil over medium heat. Add your finely chopped onions and sauté them until they become beautifully translucent and begin to soften, releasing their sweet aroma. Next, add the minced garlic and cook for just another minute until fragrant, being careful not to burn it. Finally, incorporate the prepared, well-drained spinach into the pan. Stir briefly, allowing the flavors to meld together for a minute or two. Remove from heat and let this mixture cool slightly.
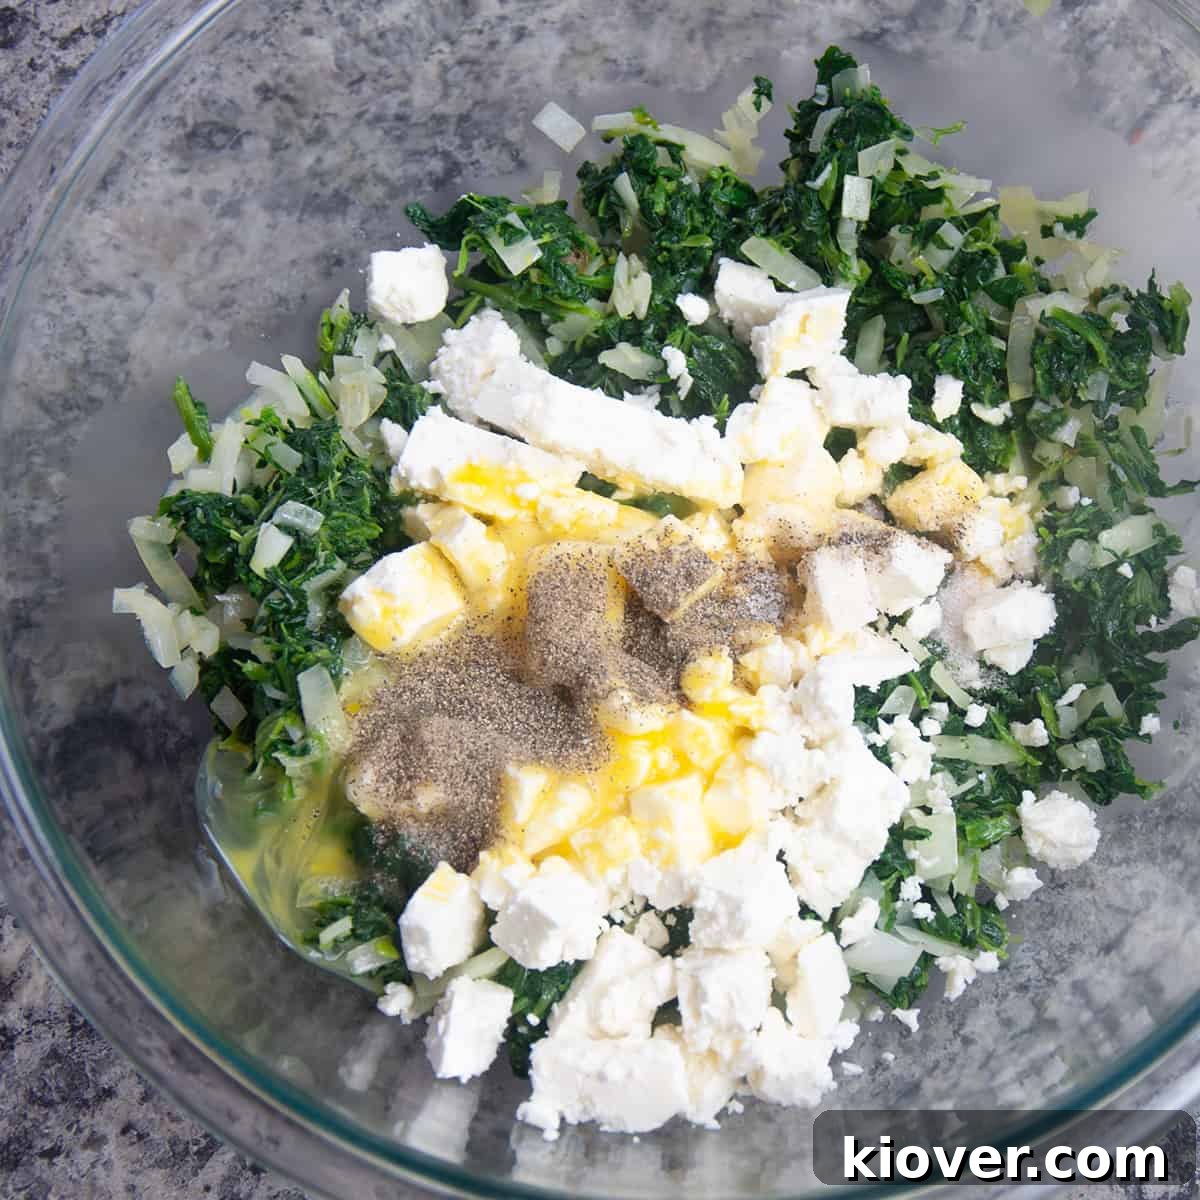
- Craft the Flavorful Filling: Transfer the cooled spinach mixture to a spacious mixing bowl. Now, it’s time to add the crumbled feta cheese, ensuring it’s evenly distributed. Whisk your eggs thoroughly in a separate small bowl, then pour them over the spinach and feta. Season generously with salt and freshly ground black pepper to taste. For an authentic touch and an extra layer of warmth, consider adding a pinch of freshly grated nutmeg – it complements the spinach beautifully. Mix all the ingredients until they are thoroughly combined, creating a rich, vibrant filling.
- Assemble Your Phyllo Layers: Preheat your oven to 350°F (175°C). Prepare a 9×13 inch baking dish by brushing the bottom and sides liberally with melted butter. Unroll your thawed phyllo dough and keep it covered with a slightly damp kitchen towel to prevent it from drying out and becoming brittle. This is key to successful layering.
- Build the Base: Carefully place one sheet of phyllo dough into the prepared baking dish, allowing any excess to hang over the edges. Lightly brush the entire surface with melted butter. Repeat this process, layering about half of your phyllo sheets, brushing each successive layer with butter. Don’t worry if a few sheets tear; the multiple layers will hide any imperfections, and it won’t affect the final product.
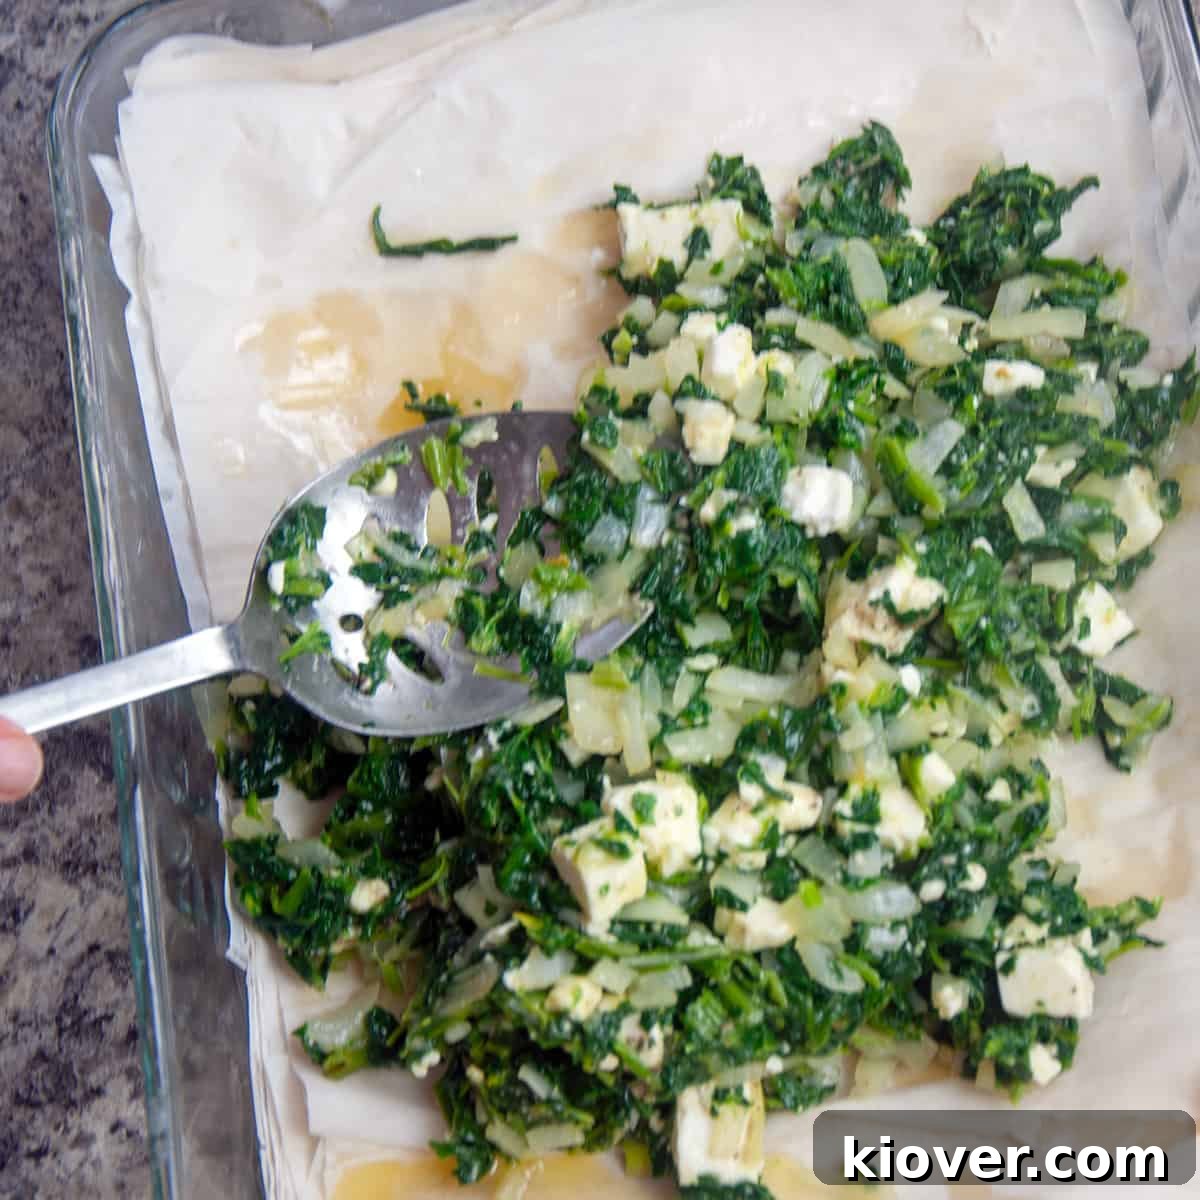
- Add the Heart of the Pie: Once your base layers are complete, evenly spread the entire spinach and feta mixture over the buttered phyllo. Distribute it from edge to edge to ensure every bite is bursting with flavor.
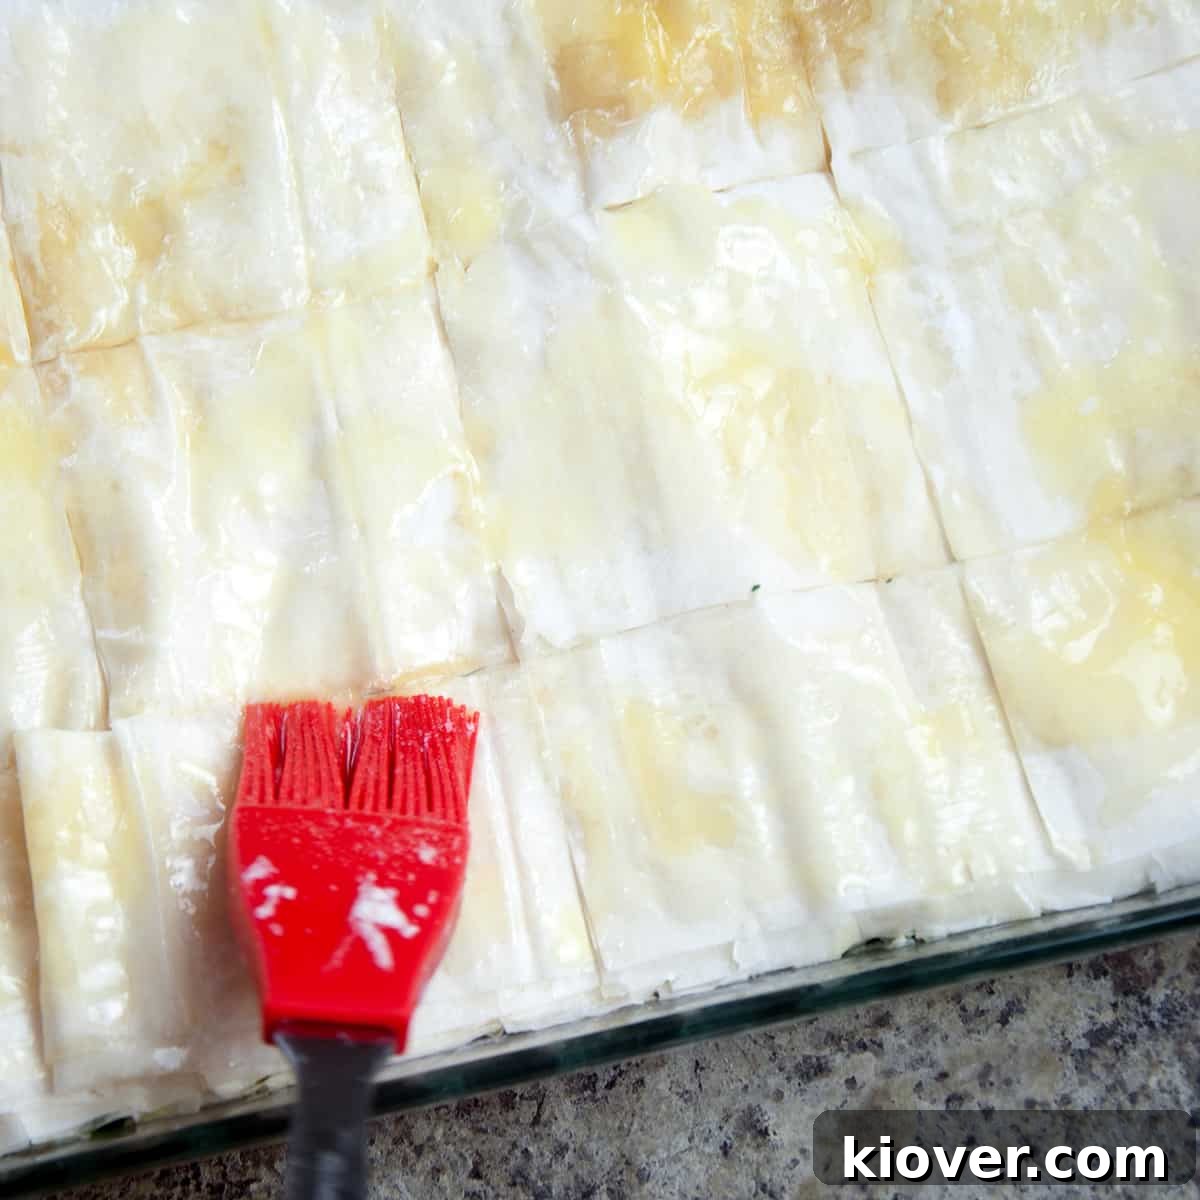
- Cap with More Phyllo: Now, gently lay the remaining phyllo sheets over the filling, continuing to brush each layer generously with melted butter. Once all the top layers are in place, carefully tuck any overhanging phyllo edges into the sides of the dish using a butter knife or your fingers. This creates a neat seal and helps keep the filling securely inside.
- Score for Perfection: Using a sharp knife, lightly score the top layers of the phyllo into squares or diamonds. Do not cut all the way through to the bottom. This scoring not only creates beautiful presentation but also makes it much easier to cut neat slices after baking and allows steam to escape, contributing to a crispier crust.
- Bake to Golden Glory: Place your assembled Spanakopita in the preheated oven. Bake for approximately 50 minutes, or until the top phyllo layers are a beautiful golden brown and exquisitely crisp, and the filling is set and heated through.
- Cool and Serve: Once baked, remove the Spanakopita from the oven and let it cool in the dish for about 10-15 minutes before cutting. This cooling period allows the filling to set further and the crust to firm up, making it easier to slice cleanly along your scored lines. Serve warm or at room temperature, and savor the magnificent flavors of this Greek classic!
Expert Tips for Perfect Spanakopita
- Keep Phyllo Moist: Always keep your phyllo dough covered with a damp cloth or plastic wrap while you are working. This prevents it from drying out and becoming brittle, which can lead to tears and cracks. Work quickly but gently.
- Drain Spinach Thoroughly: This cannot be stressed enough! Excess moisture from the spinach is the number one cause of soggy Spanakopita. Squeeze, squeeze, and squeeze again until you think it’s dry, then squeeze a little more.
- Brush Generously: Don’t be shy with the melted butter (or olive oil). Each layer needs a good, even coating to achieve that signature flakiness and golden-brown color. This also acts as a barrier, preventing layers from sticking together.
- Don’t Fear Tears: Phyllo dough is delicate, and tears are inevitable, especially for beginners. Don’t worry! Simply overlap the torn pieces and continue brushing with butter. The many layers will hide any imperfections, and the pie will still turn out beautifully.
- Score Before Baking: Lightly scoring the top layers of phyllo before baking helps create beautiful, defined slices and allows steam to escape, contributing to an even crispier crust.
- Allow to Rest: After baking, let the Spanakopita rest for 10-15 minutes before cutting. This allows the filling to set and the phyllo to firm up, making for cleaner, more intact slices.
- Consider Your Butter: Using clarified butter (ghee) can enhance the flakiness and give a richer flavor, as it has no water content.
🤷 Substitutions and Variations: Customize Your Spanakopita
Spanakopita, while a classic, is wonderfully adaptable, allowing for a world of culinary exploration to suit your taste preferences and dietary needs. Here are some fantastic ideas for substitutions and variations:
- Greens Swap: While spinach is traditional, you can easily swap it out for other leafy greens. Try kale, Swiss chard, or a mix of various greens for a slightly different flavor and texture profile. Just ensure they are all thoroughly drained after cooking.
- Cheese Alternatives: Experiment with different cheeses! A blend of feta with a bit of ricotta cheese can add a creamy richness, while goat cheese offers a tangier, more assertive flavor. For a dairy-free option, plant-based feta alternatives are widely available and work surprisingly well when seasoned properly.
- Lighter Crust Options: For a slightly healthier twist, you can try using whole wheat phyllo dough, which offers a nuttier flavor. You can also create individual Spanakopita “cups” by pressing phyllo into muffin tins, reducing the amount of dough and making portion control easier.
- Fat Choices: While melted butter is key for the classic rich flavor and crispness, you can certainly trade it for olive oil, especially for a dairy-free version. This will alter the taste profile slightly, giving it a more robust, earthy flavor, but it will still provide the necessary fat to make the phyllo wonderfully crispy.
- Add-ins for Flavor: Elevate the Mediterranean flair by incorporating ingredients like finely chopped sun-dried tomatoes (drained of oil), a handful of pine nuts for a subtle crunch, or briny Kalamata olives (pitted and sliced) into the spinach filling. Fresh herbs beyond dill and parsley, such as oregano or mint, can also add intriguing complexity.
- Make it Vegan: To create a delicious vegan Spanakopita, simply substitute the eggs with a flax egg (1 tbsp ground flaxseed + 3 tbsp water, let sit for 5 minutes) or a commercial egg replacer. For the feta, use a high-quality plant-based feta cheese. Ensure you use olive oil instead of butter for brushing the phyllo layers. Seasoning with extra herbs like oregano and basil will help enhance the savory notes.
Let your creativity guide you as you tailor this timeless Greek dish to your personal culinary vision!
📦 Storage and Reheating: Keeping Your Spanakopita Fresh
Proper storage is essential to maintain the freshness and, crucially, the delightful crispness of your baked Spanakopita. Here’s a comprehensive guide to keeping your pie at its best for as long as possible:
- Cool Completely First: Before storing, it is vital to allow your freshly baked Spanakopita to cool down to room temperature. Attempting to store it while warm will trap moisture, turning the beautiful flaky phyllo soggy – the ultimate Spanakopita tragedy!
- Short-Term Refrigeration: For immediate enjoyment within two to three days, transfer the cooled Spanakopita to an airtight container. Alternatively, wrap individual slices or the entire pie tightly in aluminum foil, then place it in a resealable plastic bag. This dual protection helps prevent it from drying out or absorbing unwanted odors from other foods in your refrigerator.
- Long-Term Freezing (Unbaked): If you want to prepare Spanakopita ahead of time, assembling and freezing it unbaked is an excellent option. Once assembled in the baking dish and scored, cover it tightly with plastic wrap, then a layer of aluminum foil. Freeze for up to 2-3 months. When ready to bake, transfer it directly from the freezer to a preheated oven (you may need to add an extra 15-20 minutes to the baking time).
- Long-Term Freezing (Baked): Baked Spanakopita can also be frozen. After it has completely cooled, cut it into individual serving pieces. Wrap each piece tightly in plastic wrap, then in aluminum foil, and store in a freezer-safe bag or container. It can be frozen for up to 1-2 months.
- Reheating for Optimal Crispness: The best way to revive the crispness of your Spanakopita is to reheat it in the oven. For refrigerated pieces, place them on a baking sheet in a preheated oven at 350°F (175°C) for 10-15 minutes, or until thoroughly heated and the phyllo is crisp again. For frozen, baked pieces, thaw them overnight in the refrigerator first, then reheat as above. Avoid using a microwave, as it will make the phyllo soft and chewy rather than crispy.
By following these storage and reheating tips, you can enjoy the exquisite taste and texture of your homemade Spanakopita long after it’s fresh out of the oven.
🎓 A Taste of History: The Story of Spanakopita
The culinary heritage of Spanakopita is as rich and layered as the phyllo dough itself, tracing its origins back to the annals of ancient Greece. This beloved savory pie has been a staple in Greek cuisine for centuries, with evidence suggesting its existence as far back as 400 years ago, though some culinary historians believe forms of it could be even older.
The name “Spanakopita” itself offers a linguistic window into its composition: “spanaki” (σπανάκι) is the Greek word for spinach, and “pita” (πίτα) broadly refers to a pie or pastry. This simple nomenclature reflects the dish’s humble origins, often prepared with readily available ingredients by peasants and common folk. However, its irresistible taste and satisfying nature ensured its widespread appeal, elevating it to the tables of aristocrats and becoming a cherished part of celebratory feasts.
Throughout the Byzantine Empire and the Ottoman rule, the concept of layered pastries with savory fillings, often involving paper-thin dough (which evolved into phyllo), became popular across the region. Spanakopita, with its distinct spinach and feta combination, flourished as a uniquely Greek iteration. It is deeply ingrained in Greek culture, often prepared during Orthodox Christian Lent, as a Lenten version (Nistisimi Spanakopita) without cheese or eggs is common. This adaptability and timeless appeal underscore its enduring legacy as a symbol of Greek culinary tradition.
❓ Frequently Asked Questions About Spanakopita
Absolutely! Fresh spinach can certainly be used, and it often provides a slightly brighter, fresher flavor. However, it requires a bit more preparation. You’ll need to wash it thoroughly, then blanch it quickly in boiling water or steam it until it’s wilted down. After cooking, it is critical to squeeze out as much water as possible. Use a clean kitchen towel or cheesecloth to really wring out the moisture; this step is crucial to prevent your filling from becoming watery and your phyllo from getting soggy.
Phyllo dough has a reputation for being delicate, but it’s not as difficult as many people imagine. The key is to work quickly and keep it covered. Make sure you thaw it properly according to the package instructions (usually in the refrigerator overnight). While you’re working with individual sheets, always keep the remaining stack covered with a slightly damp kitchen towel to prevent it from drying out and becoming brittle. If a sheet tears, don’t fret! Simply patch it with another piece or overlap it, and continue brushing with melted butter or olive oil. The layers will hide any imperfections, and the final result will still be wonderfully flaky.
Spanakopita is wonderfully versatile and delicious both warm, straight from the oven, and at room temperature. It makes an excellent picnic item or a grab-and-go snack. If you prefer to reheat it, the best method is to place it in a preheated oven at 350°F (175°C) for 10-15 minutes, or until it’s heated through and the phyllo has regained its crispness. Reheating in the oven helps to revive its delicate crunch and restore its savory flavors, making each bite as delightful as the first. Avoid using a microwave for reheating, as it tends to make the phyllo soggy.
For the most authentic and flavorful Spanakopita, aim for a good quality Greek feta cheese, ideally one made from sheep’s or a mix of sheep’s and goat’s milk. These varieties tend to be creamier, tangier, and less crumbly than cow’s milk feta. If possible, buy it in a block and crumble it yourself for better texture and flavor compared to pre-crumbled varieties, which can sometimes be drier.
Yes, Spanakopita is an excellent make-ahead dish! You can assemble the entire pie, unbaked, and then cover it tightly with plastic wrap and foil before refrigerating for up to 24 hours. When you’re ready to bake, remove it from the fridge and let it sit at room temperature for about 30 minutes while your oven preheats. You can also freeze an unbaked pie for longer storage (see the Storage section above for details).
🛠 Products and Tools for This Recipe
To ensure your Spanakopita making experience is as smooth and enjoyable as possible, here are a few essential tools that will come in handy:
- 9×13 Baking Pan: A sturdy, standard-sized baking pan is perfect for achieving an even bake and golden-brown crust for your pie.
- Silicon Pastry Brush: An indispensable tool for evenly brushing melted butter or olive oil onto the delicate phyllo layers. A silicon brush is easy to clean and won’t shed bristles.
- Large Mixing Bowl: For comfortably combining your spinach and feta filling.
- Sharp Knife: Essential for finely chopping onions and garlic, and for scoring the phyllo dough before baking.
- Skillet: A large skillet is needed for sautéing the aromatics and spinach.
😋 Share Your Spanakopita Creation!
We absolutely love seeing your culinary triumphs! If you’ve given this delicious Spanakopita recipe a try, we would be incredibly grateful if you could leave a rating and share your experience in the comment section below. Your feedback helps us grow and assists other home cooks in discovering fantastic recipes. Moreover, don’t forget to sign up for our newsletter to receive regular updates, new recipes, and exclusive tips straight to your inbox. Most of all, thank you for visiting Ramshackle Pantry and being a part of our cooking community. Happy baking!
Print

Spanakopita – Greek Feta and Spinach Pie
5 Stars 4 Stars 3 Stars 2 Stars 1 Star
5 from 1 review
Author: Ben
Prep Time: 30 minutes
Cook Time: 50 minutes
Total Time: 1 Hour 20 minutes
Yield: 12 Squares
Category: Appetizer
Method: Baking
Cuisine: Greek
Description
Spanakopita is a savory Greek pie filled with a delicious blend of spinach, crumbled feta cheese, and fragrant herbs, all nestled in numerous layers of delicate, golden-brown phyllo dough. Get ready to indulge in the authentic and comforting flavors of Greece with this classic, irresistibly buttery, and truly delicious dish!
Ingredients
Units
Scale
- 20 ounces frozen spinach (or fresh, blanched and thoroughly drained)
- 1 medium onion, finely chopped
- 2 cloves garlic, minced
- 1/2 cup butter, melted
- 2 Tablespoons Olive Oil
- 1 cup (200 grams) feta cheese, crumbled
- 2 eggs, beaten
- 1/2 teaspoon salt, or to taste
- 1/2 teaspoon pepper, or to taste
- 1 package (1 pound) phyllo dough, thawed according to package instructions
Instructions
- Prepare the Spinach: If using frozen spinach, ensure it’s completely thawed and squeeze out all excess water using a clean kitchen towel or cheesecloth. If using fresh spinach, wash it thoroughly, blanch quickly in boiling water or steam until wilted, then drain and squeeze out as much water as possible. This step is crucial for a crisp pie.
- Sauté Aromatics: In a large skillet, heat the olive oil over medium heat. Add the finely chopped onion and sauté until it becomes soft and translucent, about 5-7 minutes. Stir in the minced garlic and cook for another minute until fragrant, being careful not to burn it. Add the well-drained spinach to the skillet and cook for an additional 2-3 minutes, stirring to combine the flavors. Remove the mixture from the heat and let it cool slightly.
- Mix the Filling: Transfer the cooled spinach and onion mixture to a large mixing bowl. Add the crumbled feta cheese, the beaten eggs, 1/2 teaspoon of salt, and 1/2 teaspoon of pepper. Mix all ingredients thoroughly until well combined, ensuring the feta is evenly distributed throughout the spinach mixture.
- Preheat Oven: Preheat your oven to 350°F (175°C).
- Prepare Phyllo Dough: Carefully unroll the phyllo dough onto a clean, dry surface. It’s essential to keep the remaining phyllo sheets covered with a slightly damp kitchen towel or plastic wrap to prevent them from drying out and becoming brittle while you work.
- Assemble Base Layers: Brush the bottom and sides of a 9×13 inch baking dish generously with some of the melted butter. Lay one sheet of phyllo dough in the dish, allowing any excess to hang over the edges. Lightly brush the entire surface of this phyllo sheet with melted butter. Repeat this process with approximately half of your phyllo sheets, layering each sheet over the last and brushing it with butter. Don’t worry if a few sheets tear; the multiple layers will hide any imperfections.
- Add Filling: Once you have your base layers formed, spread the spinach and feta mixture evenly over the buttered phyllo dough in the baking dish.
- Top Layers & Seal: Carefully lay the remaining phyllo sheets on top of the filling, continuing to brush each sheet generously with melted butter, just as you did for the bottom layers. Once all the top sheets are in place, gently tuck any overhanging dough into the sides of the dish using a butter knife or your fingertips to create a neat seal around the filling.
- Score the Top: Using a sharp knife, lightly score the top layers of phyllo into squares or diamonds. Make sure to cut through the top layers but not all the way through to the filling or bottom crust. This scoring makes it easier to cut individual portions after baking and allows steam to escape, contributing to a crispier finish.
- Bake: Place the baking dish in the preheated oven and bake for 50 minutes, or until the phyllo crust is beautifully golden brown and crisp, and the filling is heated through and set.
- Cool and Serve: Remove the Spanakopita from the oven and let it cool in the dish for about 10-15 minutes before cutting along the scored lines. This resting period allows the filling to set further and the crust to firm up, making for cleaner, more presentable slices. Serve warm or at room temperature, and enjoy this traditional Greek delight!
Notes
- Keep the phyllo dough covered with a damp cloth or plastic wrap while working to prevent it from drying out and becoming brittle.
- Be patient when working with phyllo dough. It is fragile, and if it tears, it is absolutely okay. Simply overlap the torn pieces and continue brushing with butter. The numerous layers will hide any imperfections, and your pie will still turn out wonderfully flaky and delicious.