

Ultimate Guide to Delicious Apple Hand Pies: Your Portable Pastry Perfection
Imagine the comforting aroma of warm apple pie, now picture it perfectly sized for your hand, ready to enjoy anytime, anywhere. These **Tasty Apple Hand Pies** are more than just a snack; they are a delightful culinary experience, combining the rustic charm of homemade baking with ultimate convenience. Forget the plates and forks; these individual pastries are designed for pure, unadulterated enjoyment, making them an ideal treat for busy families, picnics, or a cozy moment by yourself.

Our culinary journey has often led us through the sweet embrace of apple pies, exploring both time-honored traditional recipes and innovative new variations. Today, we proudly continue that flavorful exploration with a recipe that highlights portability, irresistible flavor, and a luscious glaze that elevates the entire experience. These homemade apple hand pies offer a unique blend of convenience and deliciousness, making them an instant family favorite. Join us as we unlock the secrets to crafting these delightful, individual apple pastries, perfect for sharing (or, perhaps, for savoring all by yourself!).
Why Apple Hand Pies Are an Irresistible Choice
If you’re already a devotee of classic fruit pies, prepare to expand your affection to include apple hand pies. They capture all the beloved flavors and comforting textures of a traditional apple pie but in a charming, individualized format. Beyond their mouth-watering taste, hand pies offer several distinct advantages that make them a superior choice for a variety of occasions, transforming a beloved dessert into a versatile treat. Let’s delve into what makes these portable pastries truly exceptional.
Effortless Portability for Any Adventure
The very name “hand pie” signals its primary benefit: these pastries are designed to be held and eaten with absolute ease. Unlike a large, traditional apple pie that typically requires plates, forks, and a stable surface, these charming individual pies are the epitome of grab-and-go indulgence. Their robust, all-encompassing crust acts as a natural, edible wrapper, keeping the sweet, spiced apple filling securely contained. This makes them perfectly suited for a wide array of activities: they’re ideal for school lunchboxes, a convenient snack during a long road trip, a rewarding treat after an invigorating hike, or a simple, elegant dessert to bring to a potluck. Envision enjoying the warm, aromatic essence of apple pie anywhere your day takes you – that’s the unparalleled magic of a perfectly crafted hand pie!
Perfectly Portioned Single Servings
One of the most practical and appealing aspects of apple hand pies is their individual sizing. Each pie is a complete, satisfying dessert, neatly packaged for a single person. This thoughtful portioning eliminates the typical fuss associated with slicing and serving a larger pie, ensuring that every piece is perfectly formed and aesthetically pleasing. For those who appreciate portion control or wish to avoid excessive indulgence, hand pies offer a gratifying treat without the lingering temptation of an entire pie. While they are inherently designed for solo enjoyment, they can, of course, be generously shared – though many dessert enthusiasts might argue that the desire to savor every crumb of these delicious creations independently is often too strong to resist!
Conveniently Freezable for Future Delights
Are you a fan of meal prep or simply want to have a delightful dessert ready at a moment’s notice? Apple hand pies are remarkably freezer-friendly, offering unparalleled convenience. While the unparalleled warmth and crispness of a freshly baked pie are hard to beat, these pastries maintain their delicious integrity wonderfully after being frozen and gently reheated. This allows you to prepare a larger batch in advance, freeze them for later, and have a taste of homemade comfort ready whenever a craving strikes. Simply retrieve one from the freezer, allow it to thaw, and warm it gently in the oven for a quick indulgence. They are an excellent solution for busy weekdays, unexpected guests, or simply ensuring that you always have a comforting, homemade dessert on hand. However, be forewarned: their delightful nature often means they disappear from the freezer far quicker than anticipated!
Crafting the Flaky Perfection: The Homemade Apple Pie Crust
The foundation of any truly exceptional pie is its crust, and our apple hand pies are no exception to this golden rule. We proudly utilize the same tried-and-true, from-scratch butter pie crust recipe that consistently delivers unparalleled flakiness and a rich, buttery flavor. The secret to achieving an exquisitely flaky crust lies in the quality of the cold butter and meticulous handling techniques. This particular recipe calls for enough dough to form a single disc, typically used for a traditional pie, which we then expertly divide and shape specifically for our individual hand pies.
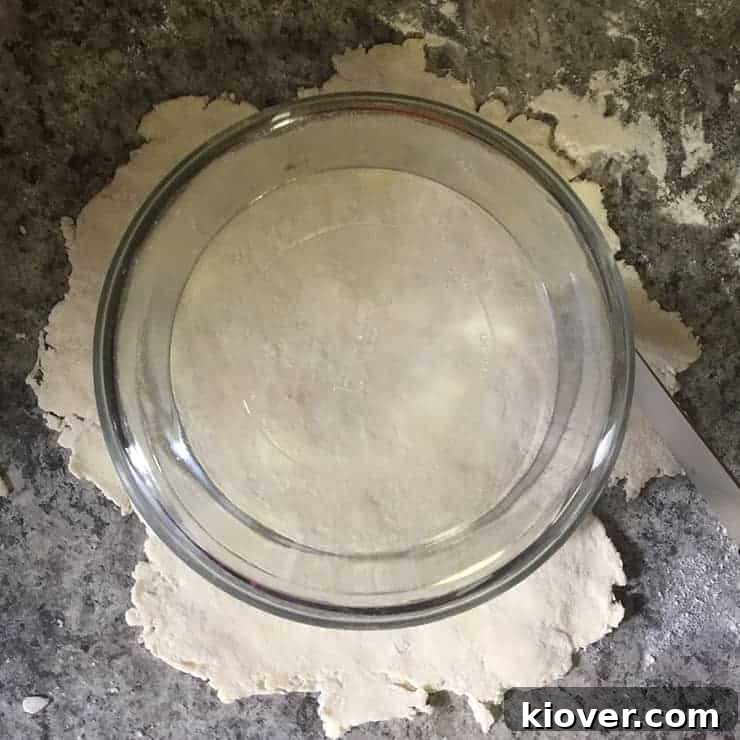
Unlike standard pies where the crust is fitted into a pan and then trimmed, for hand pies, our aim is to create precise, uniform circles. A clever and simple trick involves using the rim of a large Pyrex bowl or a round cookie cutter to cut out perfectly even discs from the rolled-out dough. This methodical approach ensures consistency in both size and shape, making the filling and folding process much smoother and more efficient. The magic of a butter-rich crust is not merely in its taste but profoundly in its texture: the small pockets of cold butter, when subjected to the oven’s heat, transform into steam, which then creates those coveted, distinct flaky layers characteristic of a truly homemade, artisanal pie. Minimal handling and ensuring all ingredients remain chilled throughout the process are paramount steps to achieving this desired, delightful texture.
Mastering the Filling: The Art of Not Overstuffing Your Apple Hand Pies
One of the most common challenges and potential pitfalls when crafting apple hand pies is the temptation to overstuff them with filling. While it’s entirely understandable to want to maximize the delicious apple goodness, packing in too many apples can lead to a multitude of baking issues. Overstuffed pies become exceedingly difficult to seal properly, often bursting open during the baking process, resulting in a messy oven and a potentially soggy, compromised crust. For a pair of perfectly sized hand pies, a single medium-sized apple, such as a crisp Braeburn, Honeycrisp, or even a Fuji, is usually more than ample. I’ve learned from countless batches that those few extra apple chunks might find a delicious home directly into my mouth rather than overflowing the pie, and that’s a perfectly acceptable outcome!
The ultimate goal is to achieve a balanced filling that beautifully complements the flaky crust without overwhelming its delicate structure. The harmonious combination of freshly chopped apples, a slight dusting of flour to expertly absorb any excess moisture, and a fragrant, spiced sugar mixture creates an irresistible symphony of flavors. This meticulous balance ensures that each and every bite offers a delightful interplay of tender, spiced apple and crisp, buttery pastry, with just the right amount of sweetness and aromatic spice. Therefore, resist the compelling urge to overfill; simplicity, precision, and moderation are truly the keys to crafting an impeccably balanced and utterly perfect apple hand pie.
The Irresistible Sweetness: Crafting the Perfect Sugar Glaze
What truly elevates these apple hand pies from merely delicious to absolutely divine is the addition of a simple yet spectacularly effective sugar glaze. This glaze is surprisingly easy to prepare, but it does require a touch of finesse and attention to detail to achieve the ideal, luscious consistency. Begin by combining all the powdered sugar, softened butter, and vanilla extract in a small dish, mixing them thoroughly until a cohesive mixture forms. The milk is the critical element that transforms this powdery base into a smooth, pourable glaze, and it is imperative to add it slowly and incrementally.
Start with just a few drops at a time, mixing thoroughly after each addition with a whisk or a small spoon. You will notice the mixture gradually transforming, becoming thicker, smoother, and developing a beautiful, opaque sheen. The precise amount of milk needed can vary slightly depending on environmental factors like humidity, as well as the exact proportions of your other ingredients; therefore, the “half teaspoon” guideline should be treated as a flexible suggestion, not an absolute rule. The key is to cease adding milk as soon as you achieve a thick, glossy consistency that will gracefully yet firmly adhere to and elegantly drip over your cooled pies. And remember this crucial, non-negotiable tip: always, always wait until your hand pies have completely cooled to room temperature before applying the sugar glaze. Applying it to warm pies will cause the glaze to melt, absorb into the crust, and disappear, rather than forming that alluring, slightly crisp, and perfectly set outer layer that makes these hand pies so visually and gastronomically appealing.
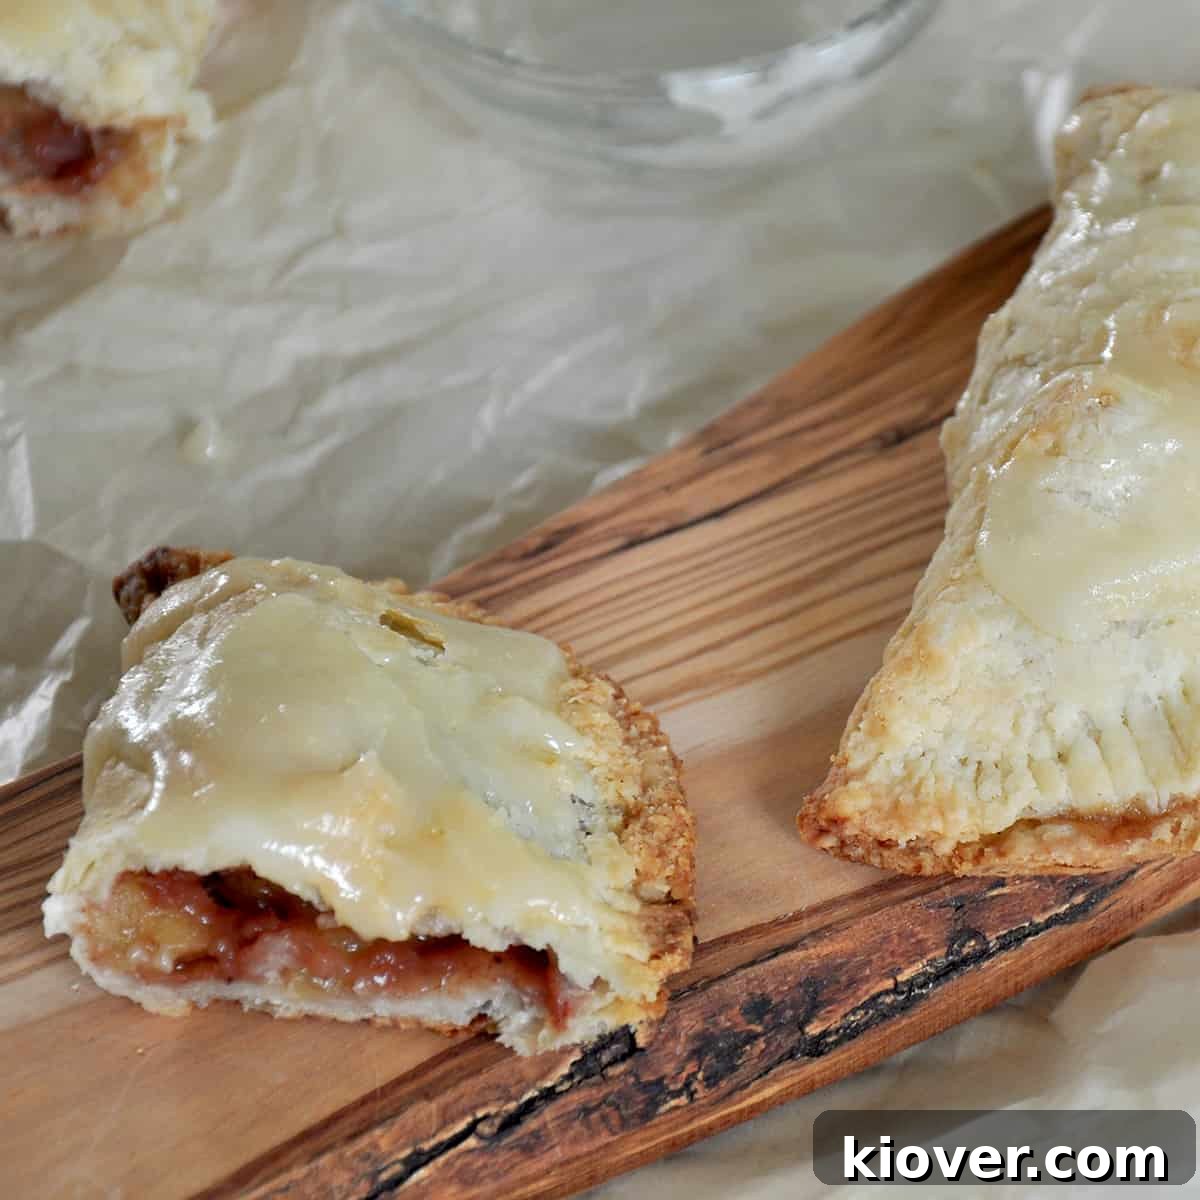
And there you have it – the comprehensive guide to creating your very own batch of truly Tasty Apple Hand Pies. These individual delights are a testament to the profound joy of homemade baking, offering a perfect, harmonious blend of rich flavor, delightful texture, and unparalleled ultimate convenience. They’re much more than just a dessert; they represent a portable slice of comforting nostalgia, ready to brighten any day, whether it’s a casual weekday or a special occasion. Give this rewarding recipe a try, feel free to experiment with your favorite apple varieties to discover new flavor nuances, and please don’t hesitate to share your thoughts, tips, and delightful creations in the comments section below. We genuinely love hearing about your personal baking adventures and successes!
For more mouth-watering recipes, expert baking tips, and culinary inspiration, be sure to subscribe to our exclusive email updates and follow us on Instagram for a daily dose of deliciousness!
Essential Tools for Your Apple Hand Pie Baking Success
Having the right kitchen tools at your disposal can significantly enhance your baking experience and help ensure consistent, perfect results. Here are some of the essential products we recommend and frequently use to achieve flawlessly baked apple hand pies every single time:
- Cookie Sheet: An indispensable item for achieving even baking and ensuring effortless cleanup after your baking session.
- Parchment Paper: Crucial for preventing your hand pies from sticking to the baking sheet and instrumental in achieving a uniformly golden-brown, crisp crust.
- Glass Mixing Bowls: Highly versatile for a myriad of kitchen tasks, including mixing ingredients, chilling dough, and general food preparation.
- Food Processor: A true game-changer in the kitchen, making the process of quickly and efficiently preparing pie crust dough significantly easier and faster.

Tasty Apple Hand Pies Recipe
- Author: Ben Myhre
- Prep Time: 1 hour
- Cook Time: 30 minutes
- Total Time: 1 hour 30 minutes
- Yield: 2 hand pies
- Category: Dessert
- Method: Baking
- Cuisine: Pastry
Description
These Apple Hand Pies are a delightful snack or dessert, offering a portable pocket of sweet, spiced apple goodness. The homemade crust and simple sugar glaze create an unforgettable treat.
Ingredients
For the Flaky Hand Pie Crust:
- 1 stick (½ cup) unsalted butter, cut into ½-inch cubes and chilled
- 1 ¼ cups all-purpose flour
- ½ tablespoon granulated sugar
- ½ teaspoon salt
- ¼ cup ice cold water (approximately, adjust as needed)
For the Sweet Apple Hand Pie Filling:
- 1 medium apple (such as Braeburn or Honeycrisp), peeled, cored, and chopped
- 1 tablespoon all-purpose flour
- ¼ cup granulated sugar
- ½ teaspoon ground cinnamon
- ½ teaspoon ground nutmeg
- 1 tablespoon unsalted butter, diced
For the Simple Sugar Glaze:
- ¼ cup powdered sugar
- ½ tablespoon softened unsalted butter
- 1 teaspoon vanilla extract
- ½ teaspoon milk (start with less and add slowly)
Instructions for Making Apple Hand Pies
Preparing the Pie Crust:
- Cut 1 stick of unsalted butter into ½-inch cubes and place them in the freezer for 20 minutes to ensure they are thoroughly chilled.
- In a food processor, combine 1 ¼ cups all-purpose flour, ½ tablespoon granulated sugar, and ½ teaspoon salt. Pulse a few times to thoroughly mix the dry ingredients.
- Add the chilled butter cubes to the food processor. Pulse 5-6 times, or until the butter is incorporated into the flour mixture and the largest pieces are no smaller than peas. Avoid over-mixing; large butter pieces are key to a flaky crust.
- Transfer the flour-butter mixture to a large bowl.
- Gradually add ¼ cup ice cold water, 1 tablespoon at a time, tossing gently with a fork after each addition. Continue adding water until the dough just begins to come together when squeezed in your hand. You may not need all the water, or you might need a tiny bit more.
- Divide the dough into two equal portions. Gently work each half into a flat disk. Avoid overworking the dough to maintain the flakiness. If necessary, add a few drops more water, but sparingly.
- Tightly wrap each dough disk in plastic wrap and place them in the freezer for another 20 minutes to chill.
Preparing the Apple Filling:
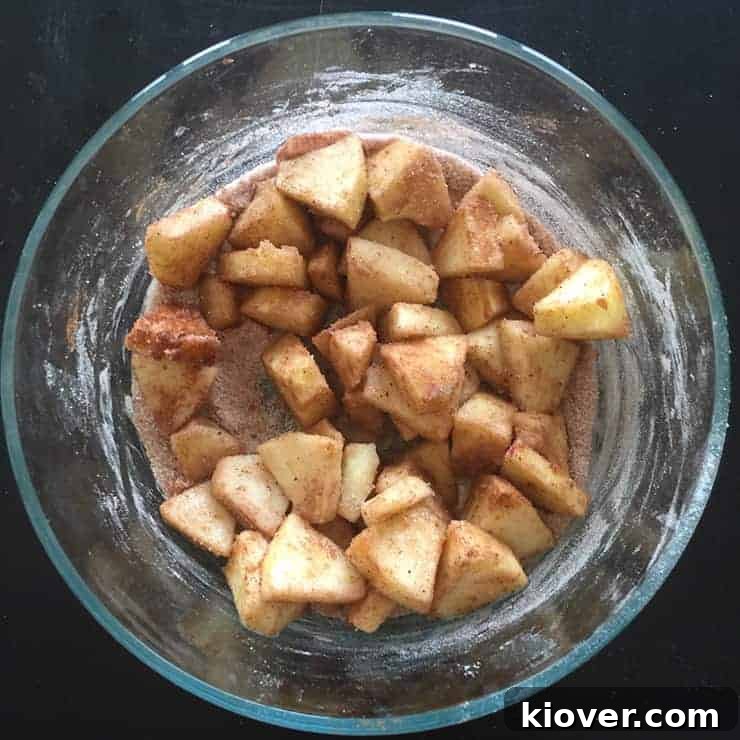
- In a medium mixing bowl, combine 1 tablespoon flour, ¼ cup sugar, ½ teaspoon cinnamon, and ½ teaspoon nutmeg.
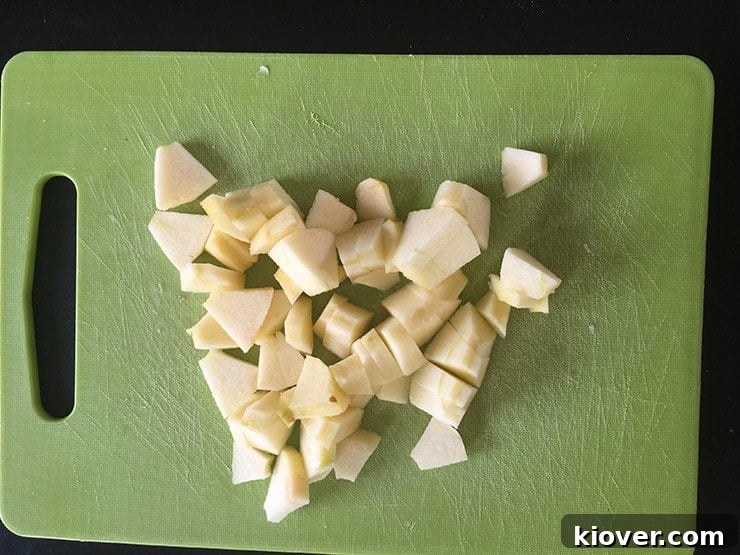
- Peel, core, and loosely chop 1 medium apple.
- Add the chopped apple to the flour mixture and toss gently until the apples are evenly coated with the spice mixture.
Assembling and Baking the Hand Pies:
- Preheat your oven to 425°F (220°C).
- Remove the chilled dough disks from the freezer and unwrap them.
- On a lightly floured surface, roll out each dough disk into a circle approximately 7 ¼ inches in diameter. A large bowl or round cookie cutter can be used to achieve uniform circles.
- Line a baking sheet with parchment paper and carefully place the two dough circles on top.
- Divide the apple mixture evenly between the two crusts, placing it on one half of each circle, leaving a small border for sealing.
- Dice 1 tablespoon of butter and sprinkle it over the apple mixture on each pie.
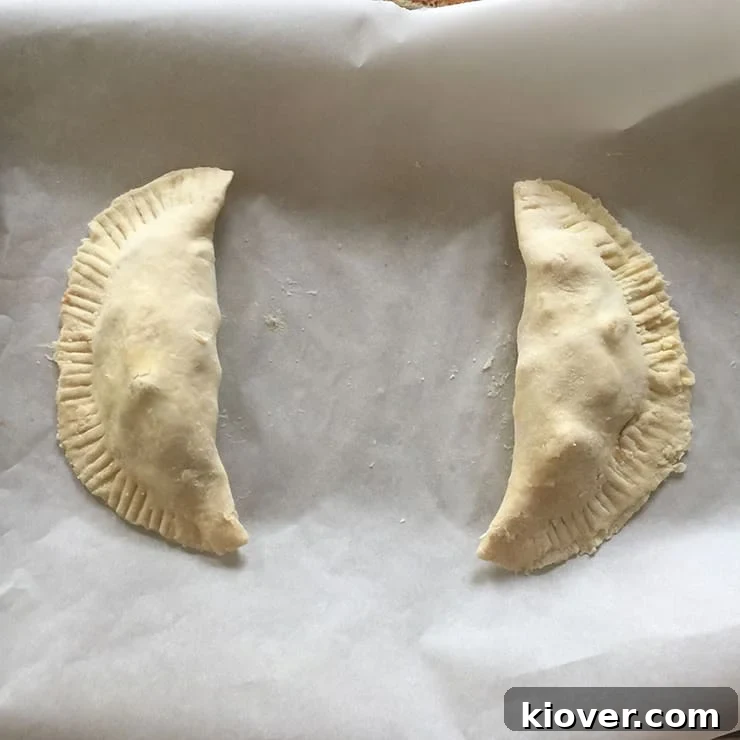
- Carefully fold the other half of the dough over the apple filling to enclose it, forming a semi-circle.
- Use a fork to crimp the edges firmly, sealing the hand pies completely.
- With a sharp knife, poke a few small holes in the top of each crust to allow steam to escape during baking, preventing the pies from puffing up unevenly.
- Place the hand pies in the preheated oven for 20 minutes. Check for a nice golden brown crust. If not fully golden, continue baking for another 5 minutes and check again.
- Once baked, remove the pies from the oven and allow them to rest and cool completely on a wire rack for at least 2 hours before glazing. This is crucial for the glaze to set properly.
Crafting the Sugar Glaze:
- In a small dish, combine ¼ cup powdered sugar, ½ tablespoon softened butter, and 1 teaspoon vanilla extract. Mix thoroughly until smooth.
- Slowly add the ½ teaspoon milk to the mixture, a few drops at a time, stirring continuously after each addition. The goal is to achieve a thick, smooth, and spreadable white glaze. You may not need all the milk.
- Once the hand pies are completely cool, spread or drizzle the frosting evenly over them.
- Allow the glaze to set for an additional hour before serving for the best texture and appearance.
- Serve your delicious homemade apple hand pies and enjoy!
Chef’s Notes & Tips
- The calorie count has been slightly adjusted to account for approximately 20% waste from dough trimmings and any glaze that drips off.
- For a more in-depth visual guide on creating our signature butter crust, including detailed commentary and additional images, refer to our traditional apple pie recipe. While this recipe uses a smaller portion, the fundamental techniques for achieving a perfectly flaky crust remain the same.
- Experiment with different apple varieties! Firmer apples like Granny Smith, Fuji, or Gala also work wonderfully and offer slightly different flavor profiles and textures within the filling.
- To freeze baked hand pies: Allow them to cool completely. Then, wrap each pie individually in plastic wrap, followed by a layer of aluminum foil to prevent freezer burn. Store in a freezer-safe bag or airtight container for up to 3 months. To reheat, thaw at room temperature for 1-2 hours, then warm in a preheated oven (350°F/175°C) for 10-15 minutes until heated through.