

Best Butter Pie Crust: Your Secret to Flaky, Flavorful Pies
Unlock the secret to truly unforgettable homemade pies with this incredible butter pie crust recipe. More than just a base, a perfectly crafted crust elevates any dessert from good to absolutely legendary. If you’ve ever dreamt of baking pies with a tender, flaky texture and rich, buttery flavor that melts in your mouth, your quest ends here. This comprehensive guide will walk you through every step, ensuring your pies are not only delicious but also beautiful and memorable. Say goodbye to store-bought crusts and hello to the best butter pie crust you’ll ever make, designed for both novice and experienced bakers seeking perfection.
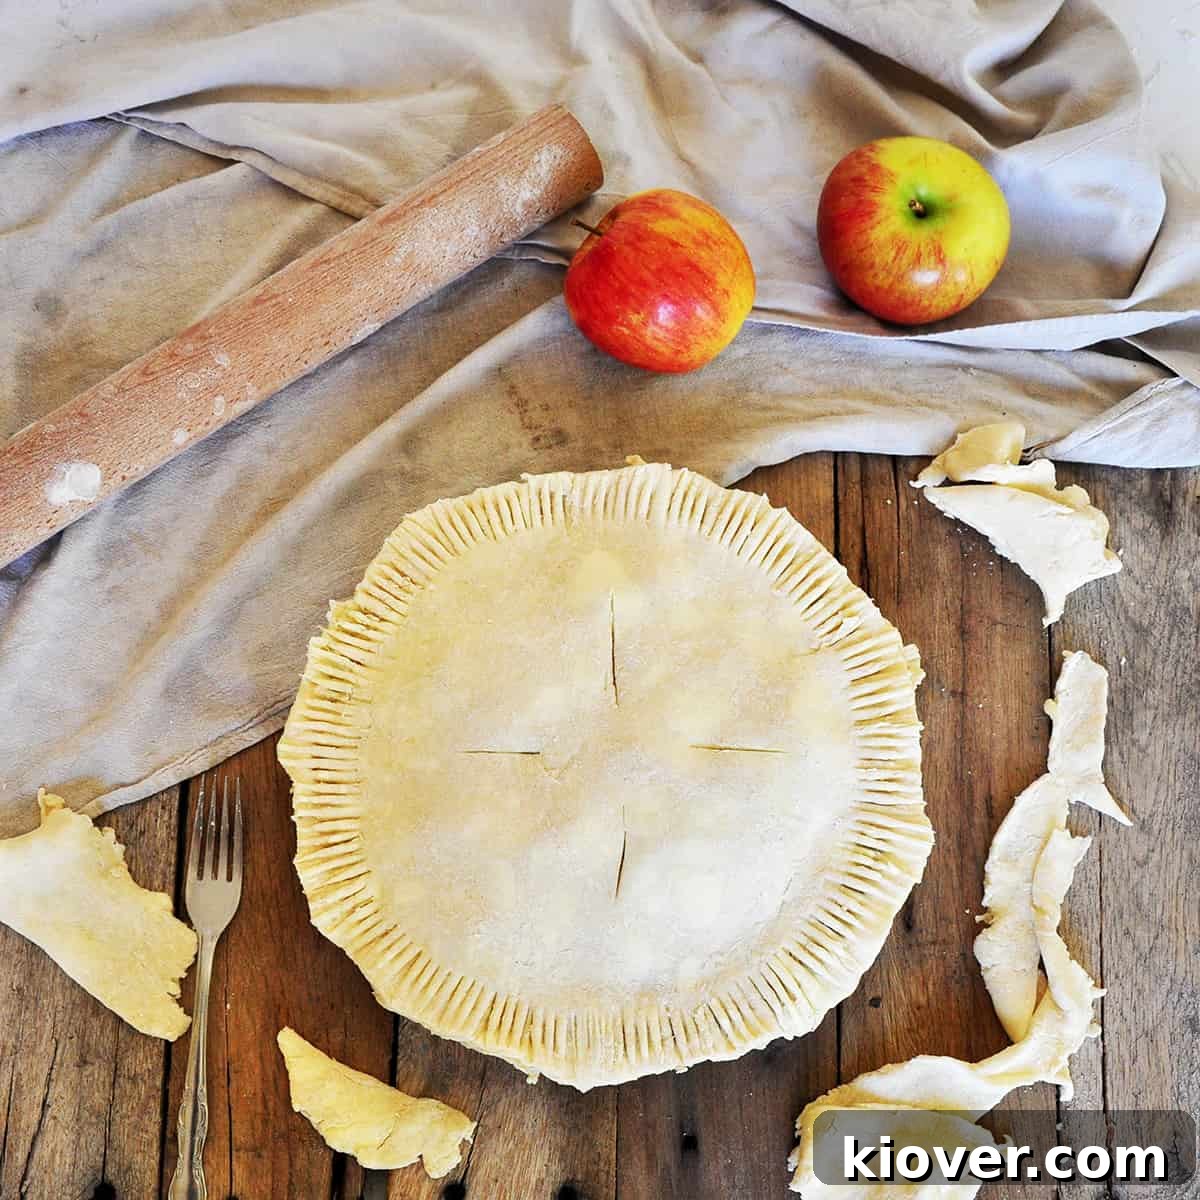
The Unmistakable Excellence of a Homemade Butter Pie Crust
What transforms an ordinary pie into an extraordinary culinary delight? Often, it’s the crust. This specific homemade butter pie crust recipe isn’t just good; it’s the one I’ve perfected over years, consistently featured in our most cherished pie creations, including our popular Apple Pie series. It deserves its own spotlight for the magic it brings to every bite, setting a new standard for homemade baking.
The essence of any great pie crust lies in its fat content, and while many bakers opt for lard or shortening, butter stands in a league of its own. Butter isn’t just a fat; it’s a flavor powerhouse. It imparts an unparalleled richness and a delicate, savory depth that other fats simply cannot replicate. Furthermore, butter is the undisputed champion when it comes to achieving that coveted flaky texture that defines a perfect pie. Each layer of butter within the dough works its magic during baking, creating ethereal pockets of air that result in a crust that shatters beautifully with every forkful. This unique combination of flavor and texture makes butter the superior choice for discerning bakers.
Crafting a butter pie crust does require a delicate balance and a thoughtful approach. The key is understanding how butter interacts with the flour and water to create both incredible taste and a wonderfully flaky structure. Unlike more forgiving recipes, baking with butter demands a certain precision and a commitment to technique, but the rewards are undeniably worth the effort. The rich flavor profile and superior flakiness make this butter pie crust an absolute standout, elevating any filling it cradles from a simple dessert to a gourmet experience.
While this recipe consistently produces a phenomenal base for apple pies – a timeless classic – its versatility knows no bounds. This robust and flavorful crust is perfectly suited for a vast array of sweet and savory pies. Imagine it with the vibrant sweetness of a Blueberry Pie, the tangy zest of a Rhubarb Pie, or the comforting heartiness of a savory chicken pot pie. For those who adore our American Apple Pie, this crust is an indispensable partner. And of course, no pie is truly complete without a generous scoop of homemade vanilla ice cream. No matter your choice of filling, this butter pie crust ensures your dessert is a treat for the senses and leaves a lasting impression.
This recipe is designed to yield two perfect pie crust discs, providing enough for a full-sized pie with both a bottom and a top crust. If your recipe calls for only a single crust, perhaps for a stunning Dutch Apple Pie, simply halve the ingredient quantities. Remember, the journey of making a pie is as delightful as enjoying it, so embrace the process and treat yourself to the best possible outcome.
Table of Contents
- The Unmistakable Excellence of a Homemade Butter Pie Crust
- Essential Ingredients for a Flawless Crust
- Step-by-Step Instructions for Butter Pie Crust
- The Zen of Pie Crust: Mastering the Art
- Understanding How Butter Creates Flakiness
- The Critical Role of Water in Pie Crust
- Temperature Control: The Secret to Perfect Dough
- Rolling Out the Dough: Back to the Baking Zen
- Substitutions and Variations: The Baker’s Dilemma
- Storage Tips for Pie Crust and Pies
- A Brief History of the Humble Pie
- Frequently Asked Questions About Butter Pie Crust
- Pro Tips and Tricks for Pie Perfection
- Tools for the Perfect Pie
- Butter Pie Crust Recipe Card
Essential Ingredients for a Flawless Crust
Creating an exceptional butter pie crust begins with selecting the right ingredients and ensuring precise measurements. In baking, accuracy is paramount, so always double-check your quantities. For the full, detailed measurements, please refer to the recipe card located further down this page.
- Unsalted Butter: The star of our show. Using unsalted butter allows you to control the salt content of your crust and ensures a pure, rich flavor. Ensure it’s very cold, preferably frozen and cut into cubes, for optimal flakiness.
- All-Purpose Flour: The structural backbone of your crust. Standard all-purpose flour works perfectly for achieving the right balance of tenderness and strength needed for a robust pie.
- Granulated Sugar: A touch of sugar enhances the flavor, contributes to a beautiful golden-brown crust, and subtly balances the richness of the butter, especially beneficial for sweet pie fillings.
- Salt: Essential for bringing out all the flavors in both the crust and the filling, providing a necessary contrast and depth of taste.
- Ice-Cold Water: Absolutely crucial. The frigid temperature of the water prevents the butter from melting prematurely and helps minimize gluten development, both vital for creating those distinct pockets of flakiness and a tender crust.
- Egg (for egg wash): Used for brushing the top crust, creating a beautiful golden-brown sheen and a slightly crispier, more appealing finish on your baked pie.
Each ingredient plays a vital role in the final texture and taste, so using high-quality components and precise measurements will set you up for success in achieving a truly perfect pie crust.
Step-by-Step Instructions for Butter Pie Crust
Embarking on the journey of making homemade butter pie crust can seem daunting at first, but with clear guidance and a calm approach, you’ll master it in no time. This detailed guide is designed to simplify the process, helping you achieve a perfect, flaky crust every time. Prepare your ingredients, clear your workspace, and let’s create something truly delicious together, step by step.
The Zen of Pie Crust: Mastering the Art
For many, the idea of making pie crust from scratch evokes images of complicated techniques and potential frustration. If you, like me, didn’t grow up with the comforting tradition of homemade pie, or if baking hasn’t always been your strongest suit, rest assured that you’re in good company. My own journey into the world of pie crusts was paved with numerous trials, errors, and moments of utter exasperation. But through persistence and a willingness to learn, I’ve developed a method that consistently produces an outstanding crust, and I’m eager to share that knowledge with you.
While the quality of ingredients and precise technique are undoubtedly important, there’s an often-overlooked element that I believe is truly critical: finding your “pie crust zen.” This isn’t just about being relaxed; it’s about approaching the dough with patience, intuition, and a willingness to work *with* it rather than against it. In my early experiments, I vividly recall how unmanageable and stubbornly difficult the raw pie dough was to roll out. I suspected the culprit might be insufficient cooling, so I tried chilling it longer. It wasn’t the sole answer. Perhaps not enough water? Again, incorrect; too much water, I learned, leads to a tough, leathery crust rather than the desired flakiness, while too little makes it impossible to work with.
The frustration was palpable. I would forcefully press my rolling pin into the dough balls, trying to bend them to my will. This aggressive approach, however, proved counterproductive. It was only when I stepped back, took a deep breath, and began to truly *feel* the dough – understanding its resistance, its pliability, its temperature – that everything clicked. The key, as it turns out, is patience. Instead of battling the dough, you must engage with it, listen to its subtle cues, and apply gentle, even pressure. This shift in mindset transforms the baking process from a struggle into a meditative experience, allowing you to create the best butter pie crust possible.
This “zen” approach isn’t just philosophical; it has practical implications for the final product. When you approach the dough with patience, you maintain the optimal temperature, prevent overworking the gluten, and ensure the butter remains in distinct pockets—all essential for flakiness. My best pie crusts are always the ones where I lose myself in the moment, appreciating the tactile experience of the dough, and allowing creativity to flow freely. This mindful engagement ultimately leads to a superior crust that is both tender and wonderfully flaky. For more insights on cultivating this mindful baking approach, you can also explore my Traditional Apple Pie post.
Understanding How Butter Creates Flakiness
The magic of a truly flaky pie crust lies in the strategic use of cold butter. When you’re preparing the dough, the objective is not to fully incorporate the butter until it disappears. Instead, you want to achieve distinct, visible pockets of butter distributed throughout the flour mixture. Imagine small, pea-sized chunks of butter nestled within the dough—these are the architects of flakiness, creating the foundational structure for a delicate crust.
To ensure this vital separation, it’s absolutely critical that your butter is thoroughly frozen or at least extremely cold, and that the dough itself is kept sufficiently chilled throughout the mixing and resting phases. The precise steps outlined in this recipe are meticulously designed to safeguard these butter pockets, preventing them from melting into the dough prematurely. This careful handling is what gives your crust its characteristic speckled appearance before baking, signaling a promising outcome.
Once your pie enters the hot oven, these cold butter pockets begin their transformation. The water content within the butter rapidly converts into steam. This steam then expands, creating tiny air pockets and gently pushing apart the layers of uncooked dough. As the baking continues, this expansion and the subsequent release of moisture from the butter chunks work in harmony to separate the flour layers, resulting in a beautifully layered, light, and undeniably flaky texture. It’s a delicate dance of temperature and chemistry that yields a truly superior crust, one that shatters rather than crumbles.
The Critical Role of Water in Pie Crust
Water is the silent hero in our butter pie crust recipe, binding the ingredients together and playing a crucial role in the dough’s final texture. The first, and perhaps easiest, rule regarding water is its temperature: it absolutely must be ice-cold. To achieve this, I typically fill a bowl with ice and water, allowing it to chill thoroughly before I begin adding it to my flour mixture. This cold temperature is vital for preventing the butter from melting and ensuring those precious pockets of fat remain intact, which are essential for flakiness. Additionally, cold water helps to minimize gluten development, which can otherwise lead to a tough, chewy crust.
The second, more nuanced aspect of water is determining the precise amount to use. While I provide an approximate starting point, the honest truth is that the exact quantity can vary. Factors like the humidity in your kitchen, the type of flour you’re using, and even minor fluctuations in ingredient measurements can influence how much water your dough will absorb. This means you need to develop a feel for the dough, trusting your senses as much as your measurements.
Adding too little water will result in a dry, crumbly dough that is impossible to roll out without it cracking and falling apart. You’ll find yourself wrestling with it, leading to frustration and a compromised texture. Conversely, incorporating too much water can lead to an equally undesirable outcome: a tough, leathery crust that lacks the delicate flakiness we strive for. The excess water causes more gluten to develop, making the dough elastic and chewy rather than tender and crisp. Striking the right balance is paramount for a perfectly tender and flaky result.
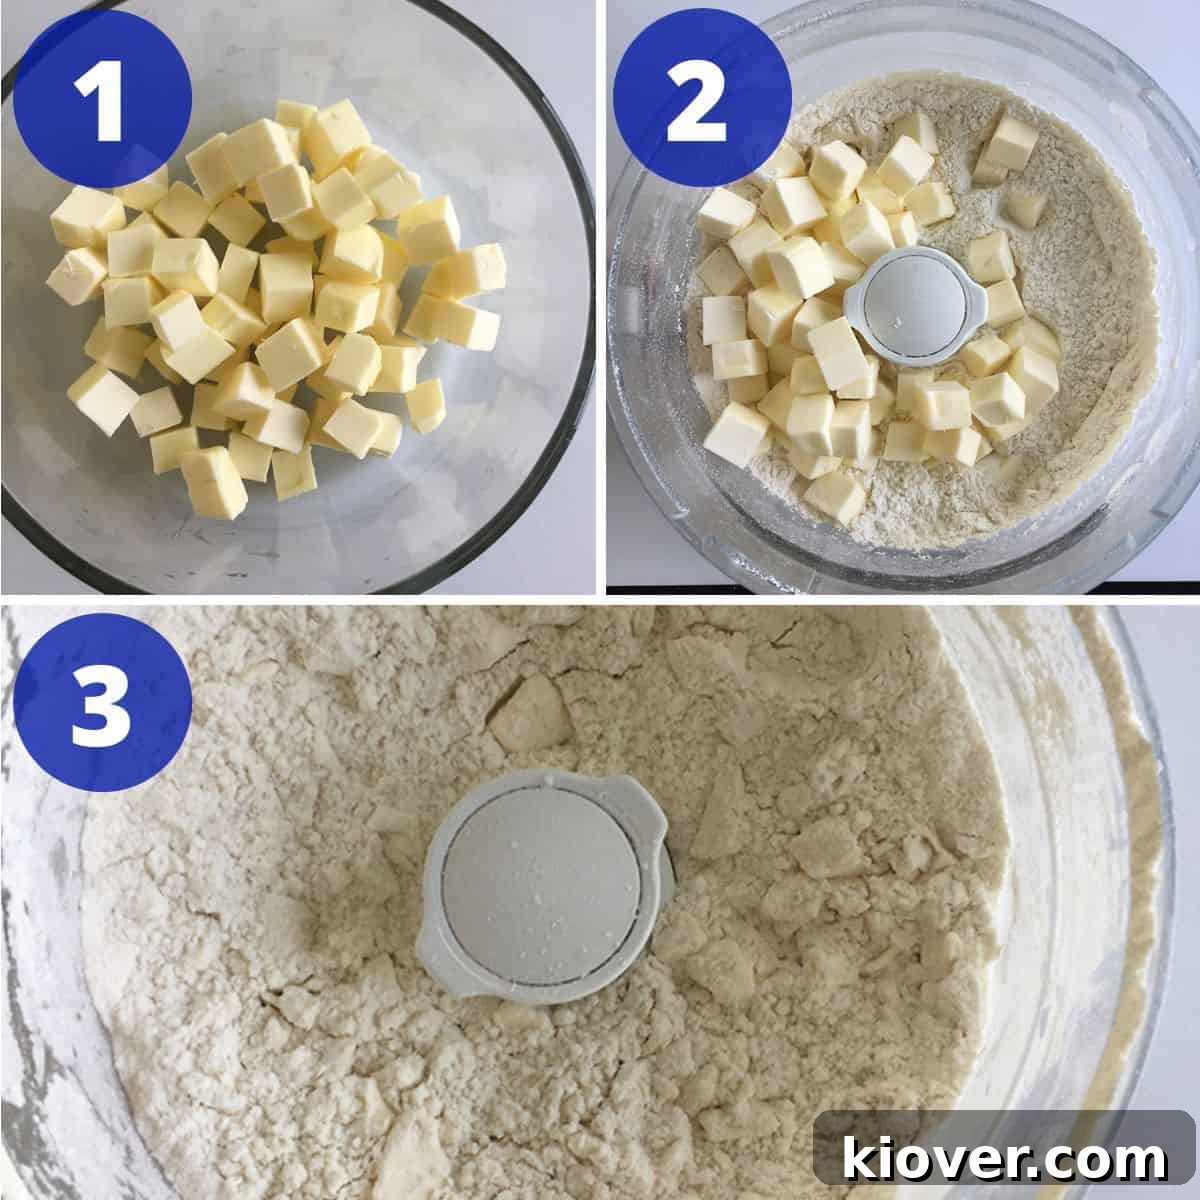
For a recipe yielding two pie discs, I typically start with ½ cup of ice-cold water. I add this water very slowly, tablespoon by tablespoon, incorporating it into the flour mixture until the dough just begins to come together. After adding a few tablespoons and tossing the mixture with a fork, I perform a simple “squeeze test.” Take a handful of the dough and gently squeeze it in your palm. You’re looking for that perfect consistency where the dough holds together in a cohesive clump but still retains a slightly crumbly texture. It should be firm enough to form into a disk without falling apart, yet pliable enough to roll out later. Don’t be afraid to add a little more water, one tablespoon at a time, until you reach this ideal state. This careful, gradual approach ensures you hit that sweet spot for a perfectly balanced, workable dough that will result in a wonderfully flaky crust, ready for your favorite filling.
Temperature Control: The Secret to Perfect Dough
Once your dough has been mixed and divided into discs, and it possesses that ideal consistency from the water incorporation, maintaining the correct temperature is the next crucial step in your quest for perfect pie crust. At this stage, the butter should still be in discernible chunks, and the dough discs should be nicely clumped together, ready for chilling. This is where your freezer becomes your best friend, playing a critical role in the dough’s ultimate texture and workability.
Proper chilling is paramount. If the dough discs are too warm, the precious butter chunks, which are vital for flakiness, will melt and fully incorporate into the dough when you attempt to roll it out. This results in a tough, dense crust rather than the light, layered texture you desire. The melted butter essentially creates a shortbread-like texture, devoid of the delicate layers. Conversely, if the dough is allowed to become too cold, it will solidify into an unyielding, rock-hard disc that is virtually impossible to roll without cracking and tearing. The extreme cold makes the gluten too rigid and the butter too hard to manipulate, leading to a frustrating experience and a damaged crust.
Through countless tests and experiments, I have found that precisely twenty minutes in the freezer is the magic number. This duration allows the butter to firm up sufficiently without turning the entire disc into an unworkable block of ice. It brings the dough to the perfect temperature for rolling: cold enough to keep the butter distinct, yet pliable enough to yield gracefully under your rolling pin. Adhering to this chilling time will significantly contribute to your success in achieving a tender, flaky butter pie crust that handles beautifully and delivers a truly exceptional result.
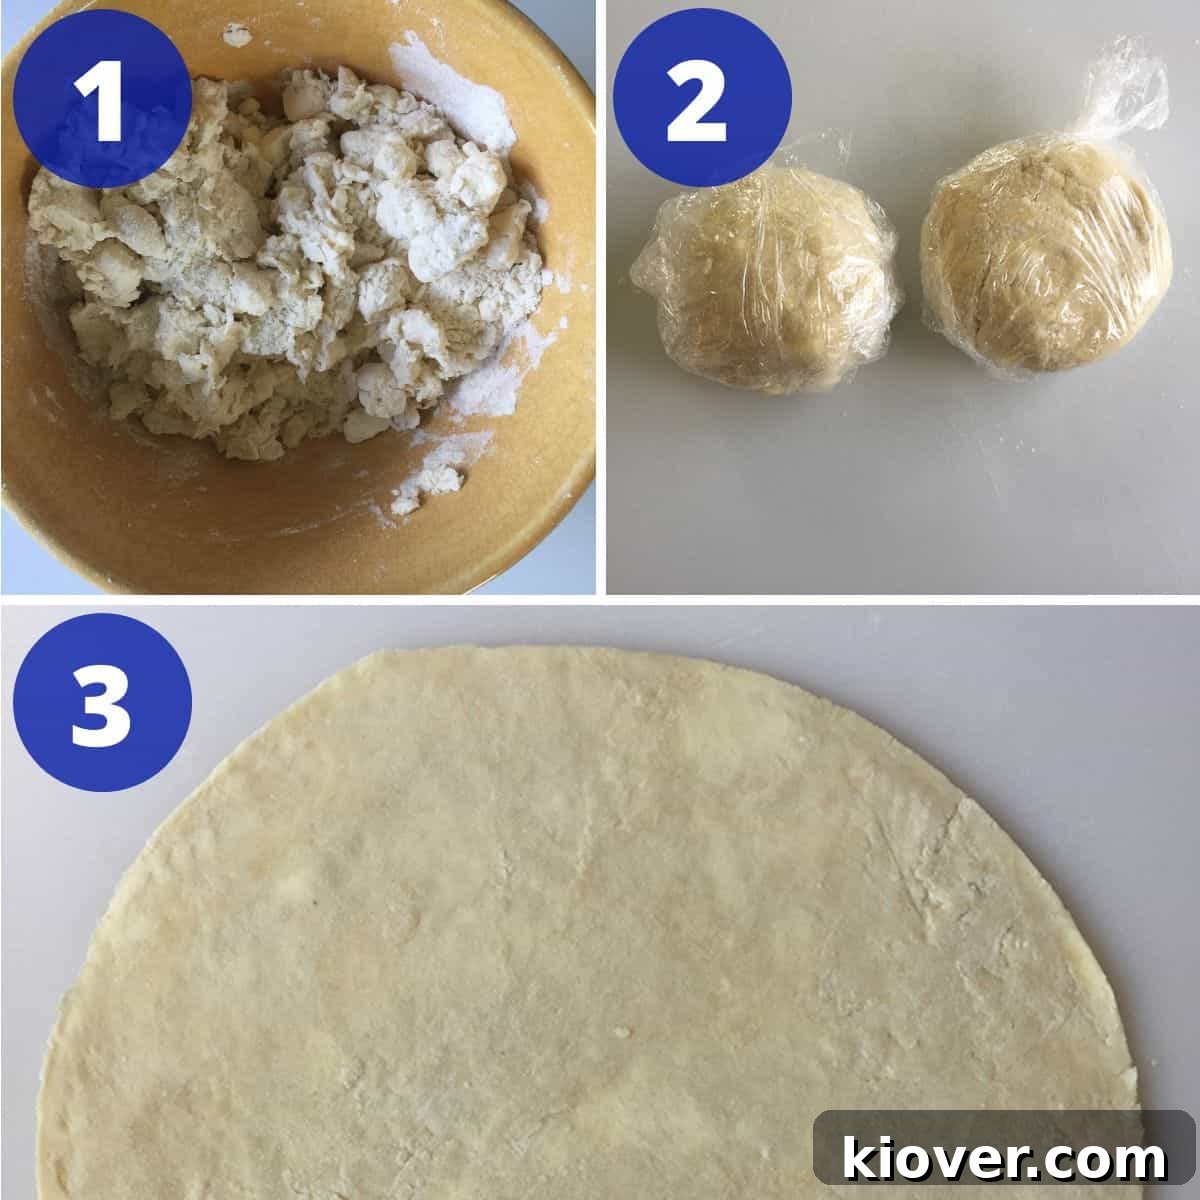
Rolling Out the Dough: Back to the Baking Zen
After your dough discs have enjoyed their essential twenty-minute chill in the freezer, it’s time for the final, and perhaps most delicate, stage: rolling them out. This is where the concept of “pie crust zen” truly comes into play. Patience and a gentle touch are absolutely critical here. If you approach the dough with aggression or try to force it, you risk a multitude of disasters—tears, stickiness, or overworking the gluten, all of which compromise the final texture and flakiness.
Instead, approach your dough with respect and a mindful presence. Place a disc on a lightly floured surface, and begin rolling from the center outwards, rotating the dough frequently to ensure an even circle. If the dough resists or feels too stiff, let it rest for a minute or two; this brief pause allows the gluten to relax, making it more pliable and easier to work with. Think of the dough as a guide; it will tell you what it needs. Don’t be afraid to gently nudge it, coax it, and work with its natural elasticity rather than trying to conquer it. The goal is to manipulate it into a perfect pie crust circle, approximately 12 inches in diameter and about ⅛ inch thick, all while preserving those crucial pockets of butter.
You’ll notice that even after rolling, the dough will still have visible flecks of butter, which is exactly what you want for that signature flaky texture. This visual cue confirms that the butter remained intact, ready to create steam and separate the layers during baking. Remember the wisdom from our earlier discussion on “Pie Crust Zen”—it’s about being in the moment, adapting to the dough, and understanding that some of the best results come from a calm and measured approach. This final stage is where your patience truly pays off, transforming simple ingredients into the foundation of a magnificent pie, truly a work of culinary art.
Substitutions and Variations: The Baker’s Dilemma
When it comes to baking, particularly with a fundamental recipe like pie crust, precision is not just a suggestion—it’s a requirement. Unlike many stovetop cooking methods where you can often improvise and adjust ingredients on the fly, baking is a science. The ratios of fat, flour, and water are meticulously balanced to create specific chemical reactions that result in the desired texture and structure. This means that substitutions and variations should be approached with extreme caution, especially if you’re aiming for that perfect flaky, tender butter pie crust.
For this specific recipe, I strongly advise against making any significant substitutions for the core ingredients. Changing the type of fat (e.g., swapping butter for shortening or lard), altering the flour type, or even adjusting the sugar or salt content without understanding the precise impact can drastically change the outcome. Different fats have different melting points and water contents, affecting flakiness. Various flours absorb liquids differently, influencing dough consistency and gluten development. Even seemingly minor changes can lead to a tough, crumbly, soggy, or otherwise undesirable crust, deviating significantly from the ideal.
If you’re an experienced baker who deeply understands the science behind these ingredients and their interactions, you might experiment with minor tweaks to suit your specific preferences. However, for most home bakers, especially those new to this recipe, sticking to the exact ingredient list and measurements provided is the surest path to success. The beauty of this butter pie crust lies in its carefully developed balance, designed to deliver optimal flavor and flakiness every time. Trust the process, follow the recipe closely, and you’ll be rewarded with a truly exceptional pie that speaks for itself.
Storage Tips for Pie Crust and Pies
Proper storage is key to making the most of your homemade butter pie crust, whether you plan to use it immediately or save it for later. While I highly recommend using the freshly prepared crusts right away for the best results, there are effective ways to store them if needed, ensuring they retain their quality and flakiness for future baking endeavors.
Storing Unbaked Dough Discs:
You can certainly prepare the dough discs in advance and freeze them. After forming your two dough balls into discs and tightly wrapping them individually in several layers of plastic wrap, place them in an airtight freezer bag or container to prevent freezer burn. They can be stored in the freezer for up to 2-3 months without significant loss of quality. When you’re ready to use them, the thawing process is crucial:
- Thaw in the refrigerator: Always transfer frozen dough discs to the refrigerator and allow them to thaw completely overnight. Do not attempt to thaw at room temperature, as this can cause the butter to melt and separate from the flour, compromising the flakiness.
- Re-chill before rolling: Once thawed, it’s vital to place the discs back in the freezer for the recommended 20 minutes (as per the instructions) just before you plan to roll them out. This step ensures the butter is perfectly chilled and firm, which is essential for achieving that characteristic flaky texture and ease of handling when rolling.
Storing Unbaked Pies:
For ultimate convenience, you can also assemble a whole pie (with its filling and crust) and freeze it unbaked. This is a fantastic option for holiday meal prep or when you need a dessert ready to bake on short notice! Ensure the pie is completely cool after assembly. Tightly wrap the entire pie in several layers of plastic wrap, followed by a layer of aluminum foil, to protect it from freezer burn and odors. It can be stored in the freezer for up to 3 months.
- Thawing unbaked pies: When ready to bake, transfer the frozen, unbaked pie directly to the refrigerator and allow it to thaw completely overnight (12-24 hours). This slow thaw helps prevent the crust from becoming soggy by allowing moisture to redistribute.
- Baking unbaked pies: Once thawed, bake the pie according to the recipe instructions, but be prepared to add an extra 10-15 minutes to the baking time if it still feels very cold from the refrigerator. Monitor for desired browning and cover crust edges with foil as needed to prevent over-browning.
By following these comprehensive storage guidelines, you can enjoy the convenience of homemade pie crust whenever the craving strikes, without compromising on quality or that incredible homemade flavor.
A Brief History of the Humble Pie
The history of pie is far richer and extends much further back in time than many might imagine, reaching into the annals of ancient civilizations. While the sweet, fruit-filled pies we adore today are a relatively modern invention, the concept of encasing ingredients within a baked crust dates back thousands of years. Early forms of pie served a practical purpose, acting as a functional container to cook and preserve food, often meats, for travelers or during colder months when fresh ingredients were scarce.
Evidence suggests that the ancient Egyptians were among the first to experiment with pie-like dishes. Hieroglyphs and ancient texts indicate they baked honey and nut fillings into crusts made from grain. Even more remarkably, rudimentary recipes for pies have been traced back to the Sumerians, with records suggesting their use of baked pastry shells with fillings prior to 2000 BC. These early iterations, however, would likely be unrecognizable to modern palates, often featuring savory ingredients and thicker, tougher crusts primarily designed for structural integrity rather than consumption, with the crust sometimes even discarded.
The Romans also embraced a form of pie, particularly a dish known as “placenta cake,” which consisted of layers of pastry filled with cheese and honey. As the Roman Empire expanded, so too did the idea of baked, filled pastries across Europe. During the Middle Ages, pies became a staple, especially for meat. The crusts, often called “coffins,” were very thick and tough, meant to hold and protect the filling during cooking and transportation, effectively acting as a portable cooking vessel. It wasn’t until the 16th century that sweet pies began to emerge, with sugar becoming more accessible and fruits being incorporated into fillings. The evolution of the pie crust from a purely functional vessel to a delightful, edible component is a testament to continuous culinary innovation throughout history, leading us to the flaky butter crusts we cherish today.
Frequently Asked Questions About Butter Pie Crust
Butter pie crust offers a superior flavor profile—rich, creamy, and undeniably delicious—that cannot be matched by lard or shortening. While butter can be slightly trickier to work with due to its lower melting point, it yields a uniquely flaky and tender texture. Lard and shortening can also produce flaky crusts, but they are often more neutral in flavor and don’t impart the same depth of taste as pure butter, making butter the choice for ultimate flavor.
During baking, the small pockets of cold butter distributed throughout the dough melt and release steam. This steam then creates tiny air pockets, which gently push apart the layers of flour. This process is what gives butter pie crust its signature light, airy, and wonderfully flaky texture. It’s a key reason why using cold, distinct chunks of butter is so crucial for achieving optimal results.
Cold water is paramount because it helps keep the butter solid and prevents it from melting into the flour prematurely. If the butter melts too early, it will combine with the flour and create a more homogeneous, tough dough rather than the desired layered, flaky structure. Cold water also minimizes gluten development in the flour, which ensures a tender crust instead of a chewy one.
Yes, absolutely! While a food processor makes the initial mixing quicker and helps keep ingredients cold with minimal handling, you can certainly make pie crust by hand. Use a pastry blender, two knives, or even your fingertips to cut the cold butter into the flour mixture until pea-sized crumbs form. The key is to work quickly and with light hands to prevent the butter from warming up too much from the heat of your hands.
Shrinkage can occur if the dough is overworked, if there isn’t enough moisture, or if it isn’t properly chilled. To prevent this, ensure you don’t over-knead the dough, use enough cold water for it to just come together (refer to the squeeze test), and always chill the formed crust in the pie plate for at least 30 minutes before baking. You can also be generous when trimming the edges, leaving a slight overhang, which allows for some shrinkage while maintaining a good crust lip.
To prevent sticking, ensure your work surface and rolling pin are lightly floured. Begin rolling from the center outwards, rotating the dough frequently (after every few rolls) to ensure even thickness and to prevent it from adhering to the surface. If it starts to stick, lift the dough, add a tiny bit more flour underneath, and continue. Keeping the dough cold is also crucial, as warmer dough is stickier.
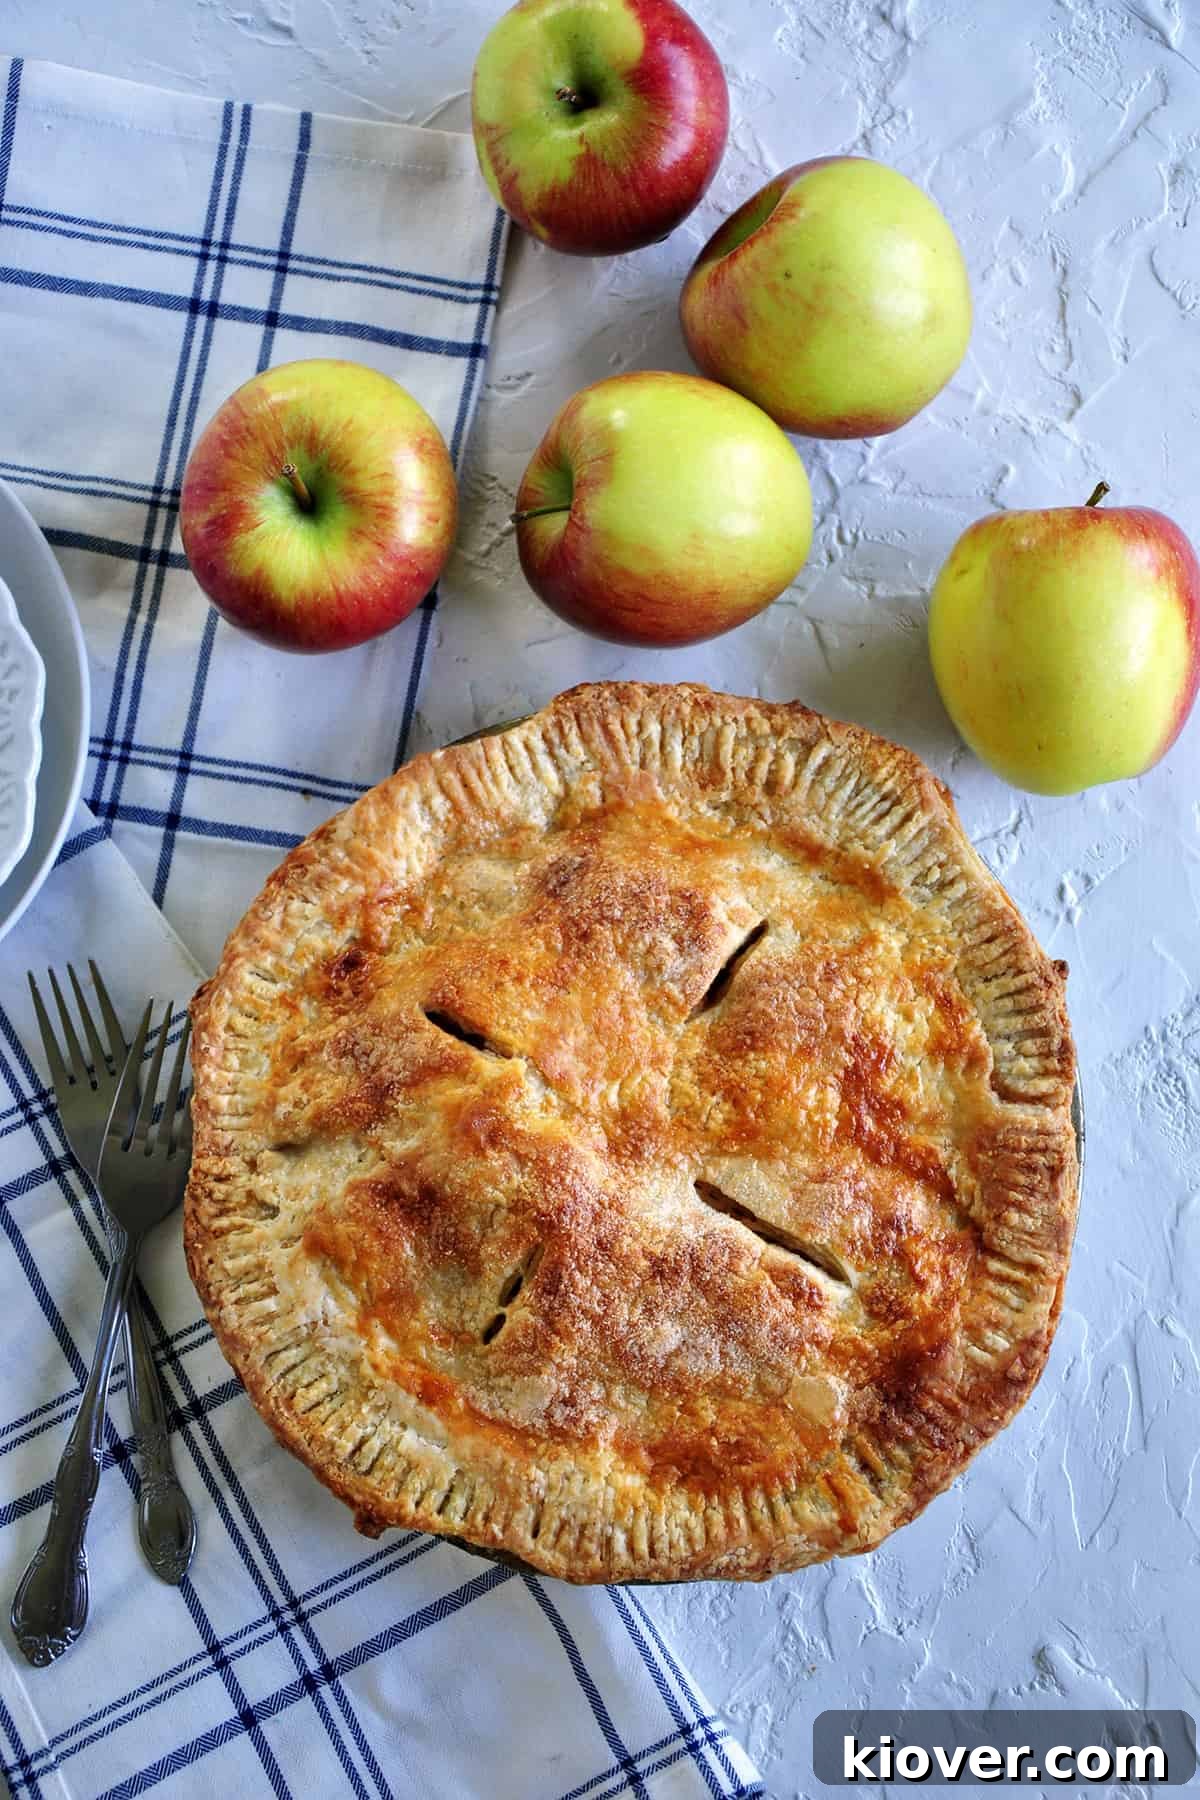
Pro Tips and Tricks for Pie Perfection
- Embrace Patience: This is arguably the most crucial tip. Butter pie crust can be a bit temperamental, but approaching the dough with a calm, patient mindset—working *with* it rather than against it—will make a profound difference in your final product. Rushing leads to frustration and a tough, unworkable crust.
- Versatility is Key: Remember that this robust and flavorful dough is incredibly versatile. It’s perfect for any traditional fruit pie with a juicy filling, such as apple, berry, or stone fruit pies, where a sturdy yet exquisitely flaky crust is desired. It also makes a fantastic base for savory creations.
- Look for Butter Pockets: After rolling out your dough, visually inspect it. The final rolled-out dough should not be uniformly smooth; instead, it should be dotted with visible chunks of easily identifiable butter. These flecks are your assurance of flakiness. Every step in this recipe, from freezing the butter to chilling the dough, is designed to help you achieve this critical texture.
- Be Generous with Edges: During baking, pie crusts tend to shrink slightly. To ensure a beautiful, full lip on your crust, be generous when you trim the excess dough around the pie dish. Leaving about a ½-inch to ¾-inch overhang will prevent a skimpy edge and allow for crimping.
- Prevent Over-Browning: To prevent the edges of your crust from burning before the rest of the pie is cooked, loosely wrap the edges with strips of aluminum foil about halfway through the baking process. Remove the foil for the last 10-15 minutes to allow the edges to achieve a perfect golden hue.
- The Importance of Resting: Once your pie comes out of the oven, resist the urge to cut into it immediately. Letting the pie rest for at least 2 hours (and often longer for fruit pies) allows the filling to set properly, preventing a runny slice, and gives the crust time to fully firm up, enhancing its texture. Warm fruit pie fillings are also more likely to cause steam to soften the crust if cut too early.
- Avoid Overworking the Dough: Overworking the dough develops too much gluten, which leads to a tough, chewy crust. Handle the dough as little as possible, and only until it just comes together.
- Keep Everything Cold: From your butter to your water, and even your hands if possible, maintaining a cold environment for your ingredients is essential for preventing the butter from melting and ensuring flakiness. You can even chill your flour for 30 minutes before starting.
- Practice Makes Perfect: Don’t be discouraged if your first pie crust isn’t flawless. Each attempt will teach you more about the dough and your technique. The more you bake, the more intuitive the process will become.
Tools for the Perfect Pie
Having the right tools can make the pie-making process much smoother and more enjoyable, enhancing both efficiency and the quality of your final product. Here are some of the essential products that will assist you in creating a flawless butter pie crust:
- 9-inch Pie Pan: A sturdy pie pan is fundamental. A ceramic, glass, or metal pan ensures even baking and a beautifully browned bottom crust, preventing dreaded “soggy bottom.”
- Cuisinart Food Processor: While not strictly necessary (you can make pie crust by hand), a good food processor significantly speeds up the process of cutting cold butter into flour, helping to maintain optimal temperatures with minimal handling.
- Mixing Bowls: A set of durable mixing bowls in various sizes is essential for combining ingredients, especially a large one that allows ample space to toss the flour mixture with water without making a mess.
- Rolling Pin: A good quality rolling pin, whether a classic wooden American-style with handles or a French-style tapered pin, is invaluable for evenly rolling out your dough to the desired thickness.
- Pastry Blender or Cutter: If you’re not using a food processor, a pastry blender is ideal for efficiently cutting the butter into the flour mixture without warming it too much with your hands, which is key for flakiness.
- Bench Scraper: An extremely versatile tool, a bench scraper is useful for cleaning your floured workspace, accurately dividing dough, and carefully transferring delicate rolled-out crusts to the pie pan.
- Measuring Cups and Spoons: Accurate measuring tools are non-negotiable in baking. Ensure you have a reliable set for both dry and liquid ingredients.
Butter Pie Crust Recipe Card

Best Butter Pie Crust
-
Author:
Ben Myhre -
Prep Time:
1 hour -
Total Time:
1 hour -
Yield:
2 crusts -
Category:
Dessert -
Method:
Baking -
Cuisine:
Pie
Description
This Best Butter Pie Crust recipe creates the most delicious, flaky foundation for any fruit pie. With simple ingredients and a careful technique, you can achieve a tender, buttery crust that will make your homemade pies truly unforgettable. Perfect for sweet and savory fillings alike!
Ingredients
- 1 Cup (2 Sticks) unsalted butter, very cold and cut into ½-inch cubes
- 2 ½ cups all-purpose flour
- 1 tablespoon granulated sugar
- 1 teaspoon fine sea salt
- ½ cup ice-cold water (approximate, may need 2-3 extra tablespoons)
- 1 large egg, beaten (for egg wash)
- 1 teaspoon granulated sugar (for sprinkling on top crust)
Instructions
- Prepare Butter: Cut 2 sticks of unsalted butter into ½-inch cubes. Place these cubes into the freezer for at least 20 minutes to ensure they are very cold and firm. This is critical for achieving flakiness.
- Combine Dry Ingredients: In a food processor, combine 2 ½ cups all-purpose flour, 1 tablespoon sugar, and 1 teaspoon salt. Pulse a few times to thoroughly mix these dry ingredients together.
- Incorporate Butter: Add the frozen butter cubes to the food processor. Pulse 5-6 times in short bursts of 1-2 seconds each. The goal is to cut the butter into the flour until the butter pieces are no smaller than peas. Avoid over-processing; you want visible chunks of butter, not a smooth paste.
- Transfer and Add Water: Transfer the flour and butter mixture to a large mixing bowl. Begin adding the ice-cold water, 2 tablespoons at a time, tossing gently with a fork after each addition. Continue until the mixture just starts to come together. To test, take a handful of the dough and gently squeeze it; it should hold together in a clump but still be a little crumbly. (You will likely use about ½ cup + 2 tablespoons in total, depending on your environment).
- Form Discs: Divide the dough mixture into two equal halves. Gently work each half into a flat disk, being careful not to overwork the dough. The butter should still be in visible chunks within the dough. If needed, add a tiny bit more water (½ teaspoon at a time) if the dough is too dry to form a cohesive disk.
- Chill Dough: Tightly wrap each dough disk individually in plastic wrap, ensuring no air can get in. Place them back into the freezer for another 20 minutes. This chilling period is crucial for firming up the butter and relaxing the gluten, making the dough much easier to roll out.
- Preheat Oven: While the dough is chilling for its second time, preheat your oven to 425°F (220°C).
- Roll Out Dough (Zen Moment): Remove one dough disc from the freezer and unwrap it. On a lightly floured surface, gently roll out the dough from the center outwards, rotating frequently, until it forms a circle approximately 12 inches in diameter and about ⅛ inch thick. (Refer to the “Rolling Out the Dough” section above for detailed zen tips on handling).
- Line Pie Pan: Carefully transfer the first rolled-out pie crust into your 9-inch pie pan. Gently press it into the bottom and sides of the pan, allowing any excess to hang over the edges.
- Add Filling: Pour in your desired pie filling (e.g., apple, blueberry, cherry, or a savory option). Ensure it’s evenly distributed.
- Add Top Crust: Roll out the second dough disc following the same method as step 8. Carefully place this top crust over the filling.
- Seal Edges: Use your fingers to gently pinch the edges of the top and bottom crusts together around the rim of the pie pan, creating a seal.
- Trim and Crimp: Trim any excess dough from the edges using a sharp knife or pastry wheel, leaving about a ½ to ¾-inch overhang. The crust will shrink slightly during baking, so a generous overhang helps. Then, use a fork or your fingers to further crimp and seal the two doughs together, creating a decorative and secure edge.
- Egg Wash and Sugar: In a small bowl, lightly beat one large egg. Brush a thin, even coating of this egg wash over the entire top crust. Then, sprinkle generously with 1 teaspoon of granulated sugar (this creates a beautiful sparkle and crispness).
- Vent Pie: Using a sharp knife, cut four small slits in the center of the top crust. These vents are essential as they allow steam to escape during baking, preventing the crust from bubbling up or becoming soggy.
- Protect Edges: Loosely wrap the edges of the pie crust with strips of aluminum foil. This helps prevent the delicate edges from over-browning or burning before the rest of the pie is fully cooked.
- Initial Bake: Carefully place the pie in the preheated oven and bake for 35 minutes.
- Finish Baking: After 35 minutes, carefully remove the pie from the oven and remove the tinfoil from the edges. Return the pie to the oven and continue baking for another 5-10 minutes, or until the crust is deeply golden brown and the filling is bubbling thickly. The total baking time is typically 40-45 minutes, but always monitor your pie for doneness, as oven temperatures can vary.
- Cool and Rest: This step is critical! Once baked, remove the pie from the oven and place it on a wire rack to cool completely. Let it rest for at least 2 hours (longer for fruit pies) to allow the filling to set properly, preventing a runny slice, and to allow the crust to fully firm up, enhancing its texture.
- SERVE: Once cooled and rested, slice and enjoy your magnificent homemade butter pie!