
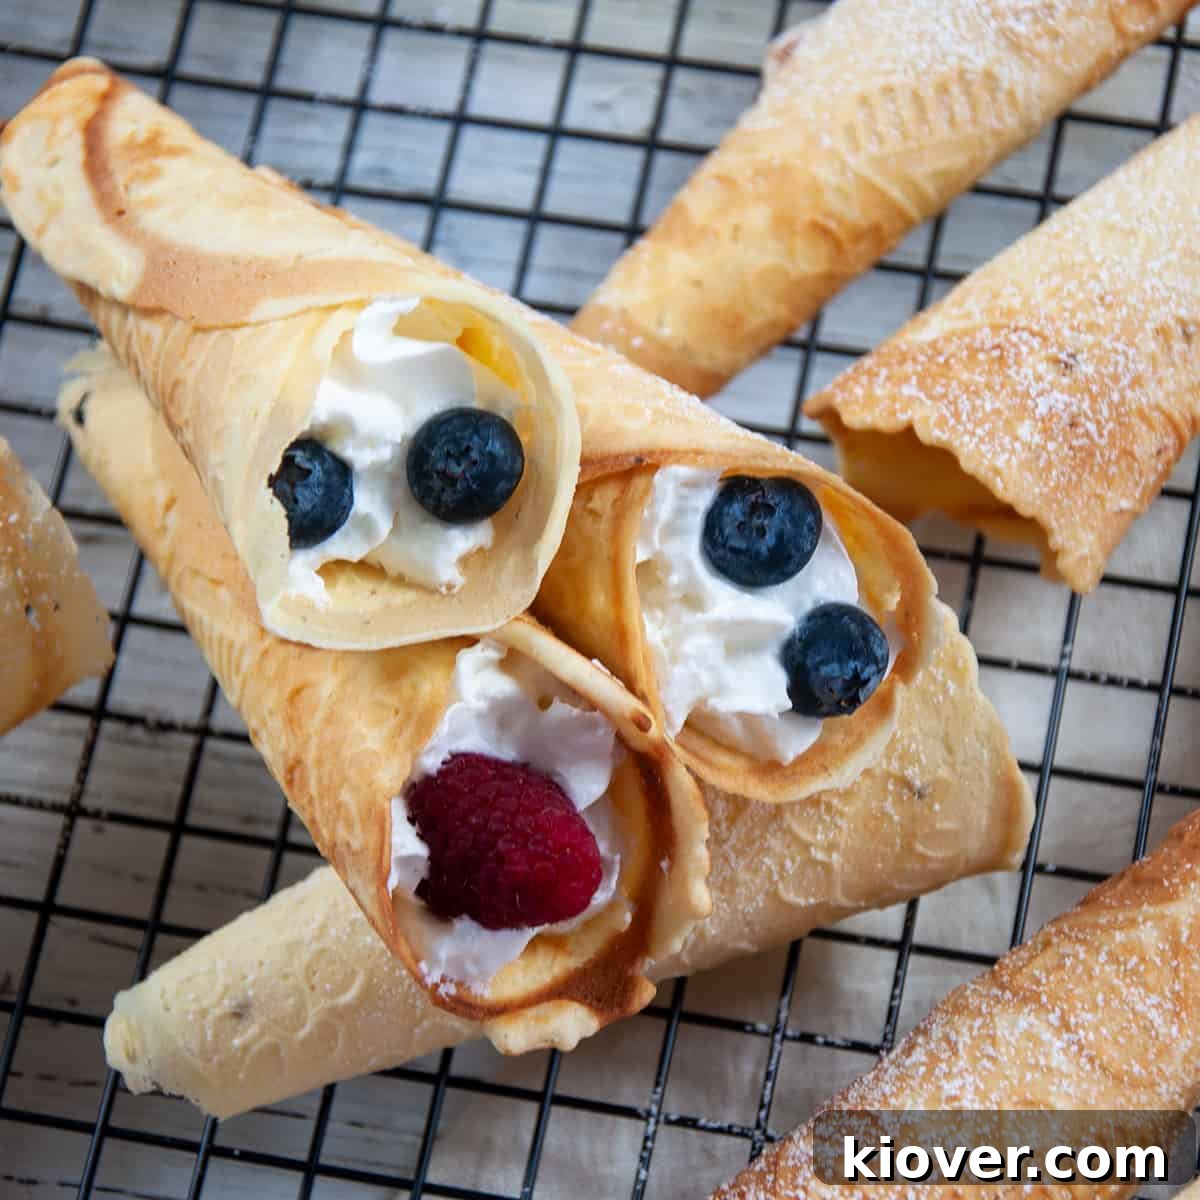
Traditional Norwegian Krumkake Recipe: A Delicate Holiday Delight
Step into the heartwarming world of Norwegian baking with Krumkake, a timeless dessert that beautifully bridges the gap between a crispy cookie and a delicate waffle. This exquisite treat, often shaped into elegant cones, is not just a dessert but a piece of culinary heritage, especially cherished during festive seasons. Today, we invite you to discover the charm of Krumkake with our detailed, authentic recipe, designed to bring a touch of Scandinavian tradition right into your kitchen.
Imagine a light, golden wafer, intricately designed with patterns pressed into its surface, offering a satisfying crunch with every bite. Whether Krumkake is a familiar staple in your holiday celebrations or you’re simply eager to explore a unique and beautiful dessert, this recipe promises an enjoyable baking experience and a truly delightful result. Get ready to create a sweet masterpiece that looks as good as it tastes!
The Magic of Krumkake: Why This Recipe is Special
What makes Krumkake so incredibly special? Beyond its delicate appearance and delightful taste, it’s the rich tapestry of tradition and family heritage woven into every wafer. Making Krumkake is more than just following a recipe; it’s an experience that often brings families together, passing down culinary skills and stories from one generation to the next. The aroma of freshly baked Krumkake, especially with a hint of cardamom, instantly transports you to a festive Norwegian home.
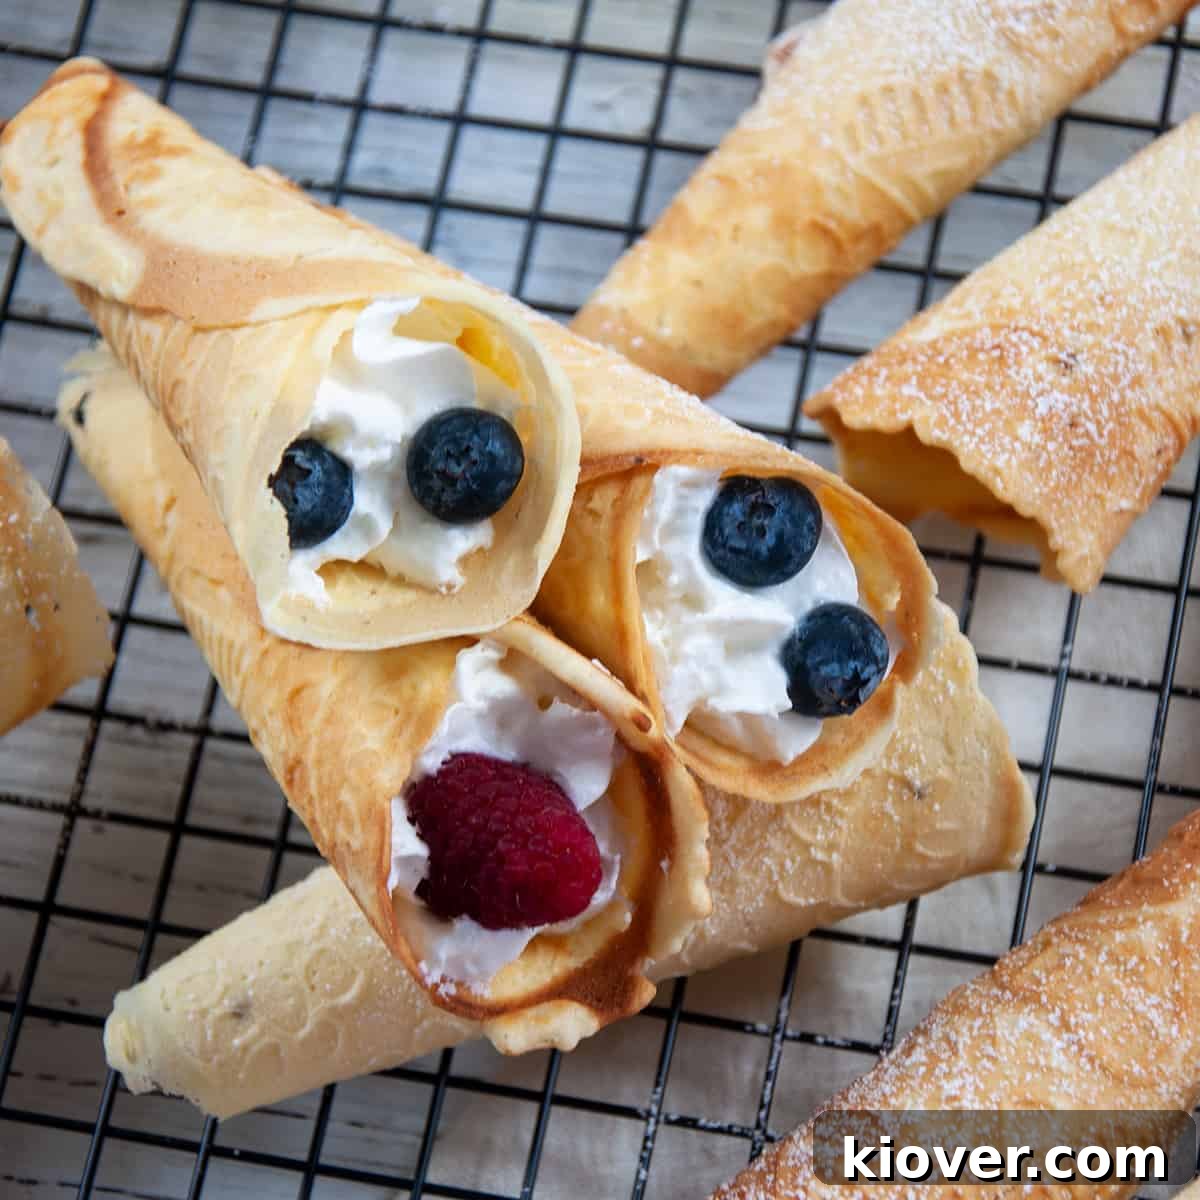
Our recipe aims to capture the true essence of traditional Norwegian Krumkake. We believe in honoring the authenticity of this dessert, ensuring that each wafer embodies the flavors and textures that have been loved for centuries. While the classic Krumkake stands perfectly on its own, its cone shape practically begs for a luscious filling. Our favorite combination includes light, airy whipped cream paired with fresh, vibrant fruits like raspberries and blueberries, creating a perfect balance of sweetness and tartness. However, the beauty of Krumkake lies in its versatility, allowing you to customize fillings and toppings to make it uniquely yours.
If your culinary explorations often lead you to the comforting tastes of Scandinavian desserts, you’ll find Krumkake to be a truly rewarding endeavor. For those who appreciate traditional Northern European treats, we also recommend exploring other cherished recipes such as Rosette cookies, Kringler cookies, these traditional German coconut macaroons, or the savory comfort of Rømmegrøt. Each offers a unique glimpse into the rich culinary traditions of the region, but for now, let’s focus on treating ourselves to the magnificent world of Krumkake!
Table of Contents
- The Magic of Krumkake: Why This Recipe is Special
- What Are Krumkake? Understanding These Norwegian Wafer Cookies
- Essential Ingredients for Perfect Krumkake
- The Allure of Cardamom in Norwegian Baking
- Choosing and Mastering Your Krumkake Iron
- Should You Invest in a Krumkake Iron?
- Step-by-Step Krumkake Instructions: Crafting Your Delicious Wafers
- Optimal Cooking Techniques: Maximizing Efficiency
- The Art of Shaping Krumkake Cones
- Flat Krumkake vs. Cones: Your Choice
- Creative Fillings and Toppings for Krumkake
- Krumkake Substitutions and Variations
- Storing Krumkake for Freshness and Enjoyment
- The Rich History of Krumkake: A Taste of Norwegian Heritage
- Frequently Asked Questions About Krumkake
- Expert Tips and Tricks for Krumkake Success
- Recommended Tools for Krumkake Making
- Share Your Krumkake Creation!
- Norwegian Krumkake Recipe Card
What Are Krumkake? Understanding These Norwegian Wafer Cookies
If you’ve seen the captivating images, you already have a visual introduction to Krumkake. The name itself, “Krumkake,” literally translates from Norwegian to “curved cake.” While it may not fit the conventional definition of a cake, this name hints at its unique form and delightful character. These treats boast a fascinating texture: they possess the delicate crispness and crumbly nature of a wafer cookie, yet they are cooked in an iron, much like a waffle, resulting in their signature thinness and beautiful embossed patterns.
Krumkake can be enjoyed simply on their own, allowing their subtle sweetness and unique texture to shine. However, they are most famously served as elegant cones, generously filled with luxurious whipped cream and adorned with fresh berries or a drizzle of melted chocolate. This presentation elevates them from a simple cookie to a sophisticated dessert, perfect for any special occasion.
Crucial to the creation of Krumkake is a specialized piece of equipment: the Krumkake iron. Similar to how a waffle iron is indispensable for waffles, a Krumkake iron is key to achieving the distinctive look and texture of these Norwegian treats. Chances are, if you’re reading this, you might already own one, perhaps passed down as a family heirloom or recently acquired. Today, we’re going to put that iron to wonderful use, transforming simple ingredients into a celebration of Norwegian culinary tradition!
If a Krumkake iron isn’t yet part of your kitchen arsenal, now could be the perfect moment to consider purchasing one. It’s an investment in countless future moments of joy and tradition. Alternatively, you might just be here to learn more about this fascinating Norwegian heritage recipe. Whatever your motivation, prepare to immerse yourself in the delicious world of Krumkake, celebrating this delightful Nordic dessert!
Essential Ingredients for Perfect Krumkake
The beauty of Krumkake lies in its relatively simple ingredient list, which shares commonalities with many beloved cookie recipes but also features a distinctive element that sets it apart. The combination of these ingredients creates a batter that cooks into a light, crisp, and flavorful wafer. Here’s a closer look at what you’ll need:
- All-purpose flour: The structural backbone, providing the delicate crispness.
- Sugar: For sweetness and to aid in browning.
- Corn starch: A key secret to achieving that extra delicate, almost melt-in-your-mouth crispness.
- Crushed cardamom: The signature spice that gives Krumkake its distinct aromatic, warm, and slightly citrusy flavor.
- Eggs: Act as a binder, contributing to the texture and richness.
- Heavy whipping cream: Adds richness, tenderness, and a lovely creaminess to the batter.
- Vanilla extract: A classic flavor enhancer that complements the other ingredients beautifully.
- Butter: Provides a rich, buttery flavor and contributes to the tender texture. Ensure it’s melted but not hot to avoid cooking the eggs.
For precise measurements and quantities, please refer to the comprehensive recipe card located further down this page.
The Allure of Cardamom in Norwegian Baking
One of the most intriguing and prominent flavors in Krumkake, and indeed much of Norwegian baking, is cardamom. It’s fascinating how deeply ingrained this spice, native to India, has become in Nordic cuisine. Its journey to the northern regions is a testament to ancient trading routes, where its unique aromatic qualities must have captivated local palates. It’s even said that Norwegians consume significantly more cardamom per capita than the global average, highlighting its cultural importance.
Cardamom, a relative of ginger, offers a complex flavor profile that is warm, slightly citrusy, subtly floral, and a little bit spicy. In Krumkake, it imparts an unmistakable depth and warmth, elevating the cookie from a simple sweet treat to something truly special and distinctly Norwegian. Our Krumkake recipe includes cardamom for this very reason.
However, if cardamom isn’t a flavor you typically enjoy, or if you have difficulty sourcing it, it can certainly be omitted without ruining the cookie. But we strongly encourage you to give it a try; many find it to be the enchanting “secret ingredient” that makes Krumkake so unique and memorable. You can usually find crushed cardamom in the spice aisle of your local grocery store, or conveniently order cardamom online to ensure you have this essential spice on hand.
Choosing and Mastering Your Krumkake Iron
As emphasized, a special iron is an indispensable tool for crafting these delicate cookies. But it’s more than just an appliance; it’s an heirloom, a conversation starter, and a gateway to creating cherished memories. Bringing out your Krumkake iron during the Christmas season or any special gathering transforms the act of baking into a fun, festive event, allowing you to share these beautiful treats and traditions with loved ones.
Historically, Krumkake irons were stovetop devices, requiring manual flipping to cook both sides evenly. While these traditional irons still exist and are cherished by some for their authentic experience, modern Krumkake irons offer significant conveniences. Today’s electric models plug right in, often feature automatic preheating and timers, and, most notably, come with non-stick surfaces, making the baking process considerably easier and more consistent. For our recipe, we utilized a Cucina Krumkake Iron, which has proven to be highly effective.
Krumkake irons vary in size, design, and heating capabilities. This diversity is perfectly fine, but it underscores a crucial point: you must get to know your specific equipment. While this recipe provides a tried-and-true process, part of successfully making Krumkake involves understanding and adapting to your iron’s unique characteristics. Every iron is a “special snowflake,” with nuances that can affect cooking times and results.
Don’t be discouraged if your first few Krumkake aren’t picture-perfect. This is part of the learning curve! For instance, some recipes might suggest cooking for just a few seconds per side. With our electric iron, we don’t need to flip anything, but it takes a full minute and thirty seconds to achieve the desired golden-brown crispness. We’ve found that maintaining a surface temperature between 330°F and 360°F works best, with a slightly hotter iron often yielding superior results. Allowing the iron to fully heat back up by closing it between batches is vital for consistent golden color. Adapt your process, observe your iron, and soon you’ll be producing flawless Krumkake tailored to your equipment.
Should You Invest in a Krumkake Iron?
The journey to crafting this delightful Norwegian treat begins with a modest investment in a specialized iron. But consider this purchase not just an expense, but an investment in tradition. Whether Krumkake is a cherished part of your family’s history or a new tradition you’re eager to establish, these beautiful, intricately patterned cookies offer a unique joy that extends beyond their taste.
Making Krumkake is a fun and engaging culinary exercise, perfect for sharing with family and friends. It’s an activity that can create lasting memories, regardless of your Norwegian ancestry. The satisfaction of transforming a simple batter into these elegant cones is immense. While the appeal of old-style stovetop irons, with their rustic charm, is understandable – and commendable if you prefer them despite potential sticking or uneven heating – modern electric irons offer consistent results and ease of use, making the process more accessible and enjoyable for everyone.
The Krumkake iron we use has proven to be reliable and efficient, but the best iron is truly the one that works for you. Investing in this tool is investing in the joy of baking, the celebration of culture, and the creation of beautiful, delicious moments.
Step-by-Step Krumkake Instructions: Crafting Your Delicious Wafers
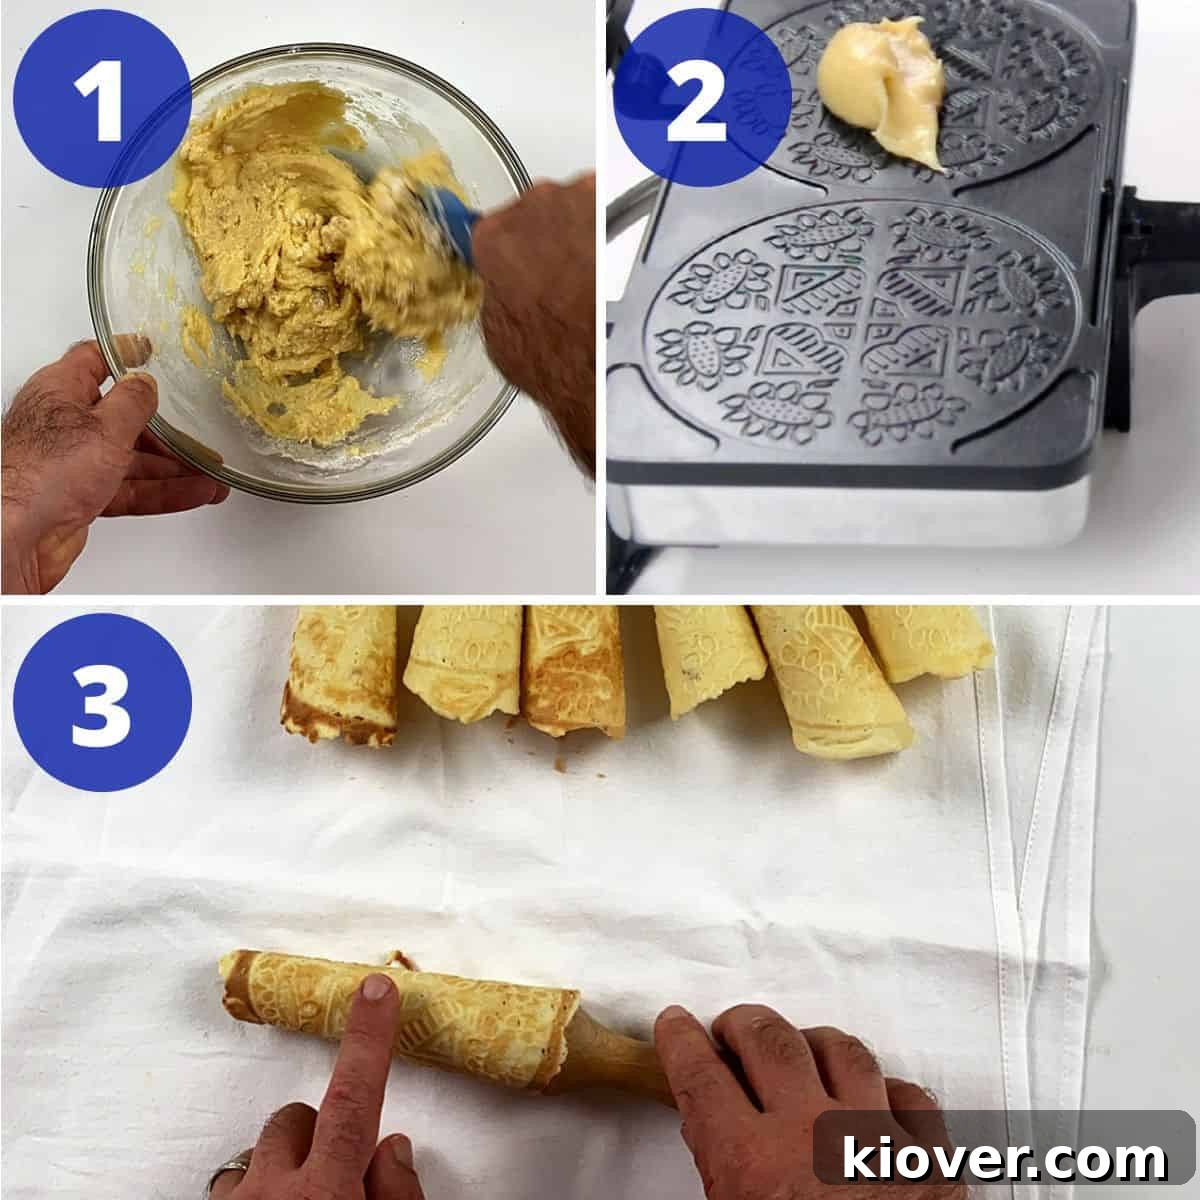
The batter for Krumkake is surprisingly straightforward to prepare, requiring just a few key ingredients and minimal fuss. The goal is to achieve a smooth, creamy consistency, often likened to that of rich peanut butter. This particular consistency is crucial for the batter to spread evenly in the Krumkake iron and cook into thin, delicate wafers.
Our method involves first combining the dry ingredients thoroughly in one bowl, then mixing all the wet ingredients in a separate bowl. This ensures that the leavening agents and spices are evenly distributed, and the eggs and liquids are fully incorporated before they meet. Finally, the liquid mixture is gently folded into the dry mixture until a homogenous batter is formed. While the batter itself is quite simple, the cardamom adds that distinct, aromatic twist that sets Krumkake apart from other wafer cookies.
Optimal Cooking Techniques: Maximizing Efficiency
Many modern Krumkake irons feature two cooking spots, offering the potential to bake two wafers simultaneously. While this can be a significant time-saver, especially when preparing a large batch for a family event, we highly recommend starting with just one cooking spot if you’re new to Krumkake making or using a new iron. This approach allows you to familiarize yourself with the equipment, understand its heating patterns, and perfect your technique without the added pressure of managing two wafers at once.
Focusing on one Krumkake at a time during your first batch or two will help you gauge the ideal cooking time for your specific iron, the perfect amount of batter to use, and the speed required for shaping. Once you feel comfortable and confident with the process, then, by all means, utilize both cooking spots to double your output! This efficiency becomes particularly valuable when doubling or even tripling the recipe for larger gatherings, ensuring you can produce a generous quantity of these delightful cookies in a reasonable amount of time.
The Art of Shaping Krumkake Cones
The magic of Krumkake truly comes alive in the shaping process. Once cooked to a perfect golden crisp, the delicate wafers must be quickly transformed into their iconic cone shape. Your Krumkake iron typically comes equipped with a cone-shaped device designed specifically for this purpose. If not, these cone makers are readily available for separate purchase online.
The key to successful shaping is speed. Immediately after removing the Krumkake from the hot iron, it is pliable and flexible. You have a window of only a few seconds before the cookie rapidly cools and hardens into its final, rigid form. During this limited time, you must expertly wrap the warm wafer around the cone device, pressing gently to form a perfectly shaped Krumkake. It’s a delicate dance of precision and quick action.
A word of caution: the freshly cooked Krumkake wafers can be quite hot! This rapid shaping process might be challenging if you are sensitive to heat. To protect your fingers, consider wearing a pair of food-safe gloves designed for handling hot items. Some bakers also find relief by wrapping a few fingertips with tin foil or keeping a shallow dish of cool water nearby to dip their fingers in between shapings. While I personally manage without these aids, I’ve certainly had my share of “hot potato” moments with these cookies. If the heat proves too intense, these simple tips can make the shaping process much more comfortable and enjoyable.
Flat Krumkake vs. Cones: Your Choice
While the traditional and most recognized form of Krumkake is the elegantly rolled cone, there’s absolutely no rule saying you must shape them this way. If you prefer, you can certainly leave your Krumkake flat, allowing them to cool into delicate, decorative disks. It’s that simple!
There are compelling reasons for both presentations. Leaving them flat makes for an equally delicious, crumbly wafer, perfect for stacking, dipping, or simply enjoying as a crispy cookie. However, the cone shape offers distinct advantages that contribute to its popularity. It not only makes the Krumkake more portable and easier to handle, but it also creates a perfect edible vessel for a wide array of luscious fillings and toppings. This capacity for filling is what often makes the cone shape the preferred choice for those looking to elevate their Krumkake into a truly decadent dessert experience.
Creative Fillings and Toppings for Krumkake
While Krumkake wafers are perfectly delightful on their own, their hollow, conical shape practically begs to be filled. This is where you can truly unleash your creativity and personalize this traditional Norwegian treat. Our go-to combination features light, homemade whipped cream paired with a vibrant mix of fresh raspberries and blueberries, offering a refreshing contrast to the sweet, crispy wafer. But the possibilities extend far beyond this classic pairing.
Consider a rich chocolate ganache or a simple melted chocolate drizzle as a decadent topping, perhaps alongside the whipped cream. For a unique twist, you could swirl fruit preserves – such as lingonberry, strawberry, or apricot – into your whipped cream before filling, adding another layer of fruitiness and texture. If you’re feeling adventurous, our homemade Whipped Cream recipe is a fantastic base, but for an adult indulgence, try the Kahlua Whipped Cream we featured in our White Russian Coffee Recipe. Imagine that subtle coffee liqueur kick in your Krumkake!
Other fantastic filling ideas include lemon curd for a tangy zest, pastry cream for a richer custard-like experience, or even a scoop of your favorite ice cream for a delightful warm-meets-cold treat. Nutella or other chocolate hazelnut spreads can also make for a wonderfully rich and creamy filling. Don’t be afraid to experiment; if it’s sweet, delicious, and fits inside the cone (or can be used to dip the cone), it’s probably a winning combination for your Krumkake!
Krumkake Substitutions and Variations: Tailoring to Your Taste
One of the joys of traditional recipes is the flexibility they often offer for adaptation and personalization. Krumkake is no exception, allowing for a few simple substitutions and variations to match your preferences or dietary needs.
- Cardamom: As discussed, while cardamom is a hallmark of authentic Krumkake flavor, it can be omitted if you have difficulty sourcing it or if its unique taste isn’t to your liking. The cookies will still be delicious, simply without that distinct Nordic spice. You could also experiment with a tiny pinch of cinnamon or nutmeg for a different warm spice note, though it won’t be traditional.
- Fillings: This is truly your playground for creativity! Beyond whipped cream and fresh fruit, consider a variety of dessert toppings. Think about luscious lemon curd, rich chocolate ganache, sweet fruit compotes, creamy pastry cream, or even a scoop of softened ice cream. For a festive twist, a cream cheese frosting or a caramel drizzle could be delightful.
- Dietary Adaptations: For those with dietary restrictions, some experimentation may be required. While a traditional Krumkake relies on wheat flour and dairy, some bakers have successfully adapted recipes using gluten-free flour blends or dairy-free alternatives for butter and cream. Note that the texture might vary slightly, but a delicious result is still achievable.
- Flavor Enhancements: A touch of orange or lemon zest in the batter can add a bright, fresh note that complements the cardamom beautifully. A very small amount of almond extract could also be introduced for a subtle nutty undertone.
Feel free to experiment with these suggestions to make this Norwegian treat perfectly suited to your palate and occasion.
Storing Krumkake for Freshness and Enjoyment
While it’s unlikely that a batch of these irresistible Krumkake will last long in most households, proper storage is key to maintaining their delicate crispness and fresh flavor if you do happen to have leftovers. For optimal taste and texture, Krumkake are best enjoyed as soon as possible after baking and cooling.
If you need to store them, place the cooled Krumkake in an airtight container at room temperature. This will help protect them from moisture and keep them crisp for up to 3 days. Humidity is the enemy of Krumkake, so avoid refrigerating them unless they are already filled with a perishable ingredient like whipped cream, in which case they should be consumed within a day.
For longer storage, unfilled Krumkake can be frozen. Once completely cooled, arrange them in a single layer on a baking sheet and freeze until solid. Then, transfer the frozen Krumkake to an airtight freezer-safe container or bag, separating layers with parchment paper to prevent sticking. They can be stored in the freezer for up to 2-3 months. To enjoy, simply thaw them at room temperature. If they’ve lost a bit of their crispness, a quick refresh in a warm oven (around 250°F or 120°C) for a few minutes can often revive their delicate crunch.
The Rich History of Krumkake: A Taste of Norwegian Heritage
The precise origins of Krumkake are somewhat elusive, lost in the mists of time, yet one significant clue points to its long-standing heritage: the specialized iron required for its creation. This distinctive tool suggests that Krumkake emerged at a point in history when societies had the necessary resources, leisure time, and artisanal skills to craft such bespoke cooking implements. This likely places its genesis in a period when specialized kitchenware became more accessible, moving beyond simple hearth cooking.
Historical records, though sparse, do offer glimpses into its past. The Smithsonian, for instance, houses a Krumkake iron dating back to 1946, manufactured in Minneapolis, Minnesota, by the renowned company Nordic Ware. Interestingly, Nordic Ware continues to produce traditional Krumkake irons today, a testament to the dessert’s enduring popularity and the company’s commitment to culinary heritage.
We know Krumkake’s history stretches further back than the mid-20th century. A recipe discovered in a 1920s cookbook provides evidence of its presence in home kitchens even earlier. Push back further, and photographic evidence, such as a Krumkake iron from the 1800s displayed on Wikimedia Commons, firmly establishes its roots in the 19th century. This era seems a plausible time for such treats to become more commonplace, coinciding with the widespread adoption of stovetops and more sophisticated cooking methods within homes.
While extensive detailed accounts prior to the 1800s are challenging to uncover, the consistent use of a specialized iron over centuries highlights Krumkake’s deep cultural significance in Norway. It speaks to a tradition cherished enough to warrant a dedicated piece of equipment, passed down through generations. If you happen to possess any further fascinating information or historical anecdotes about the origin and evolution of Krumkake, we would absolutely love for you to share them in the comments section below! It’s a collective effort to uncover and preserve these culinary stories.
Frequently Asked Questions About Krumkake
- What is a Krumkake iron?
- A Krumkake iron is a specialized cooking device, similar to a waffle iron, used to bake Krumkake cookies. It typically features intricate patterns that are embossed onto the delicate wafers. Historically, they were manual stovetop irons, but modern electric versions are now widely available, offering convenience and consistent heating.
- How do you store Krumkake?
- To maintain their crispness, Krumkake should be stored in an airtight container at room temperature. They are best eaten within 3 days. Unfilled Krumkake can also be frozen for up to 2-3 months; simply thaw at room temperature and, if desired, briefly reheat in a warm oven to restore crispness.
- Is Krumkake Swedish or Norwegian?
- Krumkake is unequivocally a traditional Norwegian dessert. However, Scandinavian countries share many culinary traditions due to their close cultural ties and geographical proximity, so similar wafer-like cookies might exist in neighboring regions with slight variations.
- Can I make Krumkake without a special iron?
- Unfortunately, the unique thinness, crisp texture, and embossed patterns of Krumkake are achievable only with a specific Krumkake iron. It’s the essential tool that defines this cookie. Without it, you wouldn’t be able to replicate the authentic Krumkake experience.
- Why are my Krumkake not crispy?
- Several factors can lead to soft Krumkake. Ensure your iron is sufficiently hot and maintained at a consistent temperature between batches. Overmixing the batter can develop gluten, making them tougher rather than crispy. Also, make sure to cook them until they are a consistent golden brown. Finally, proper cooling and immediate storage in an airtight container are crucial to prevent them from absorbing moisture and becoming soft.
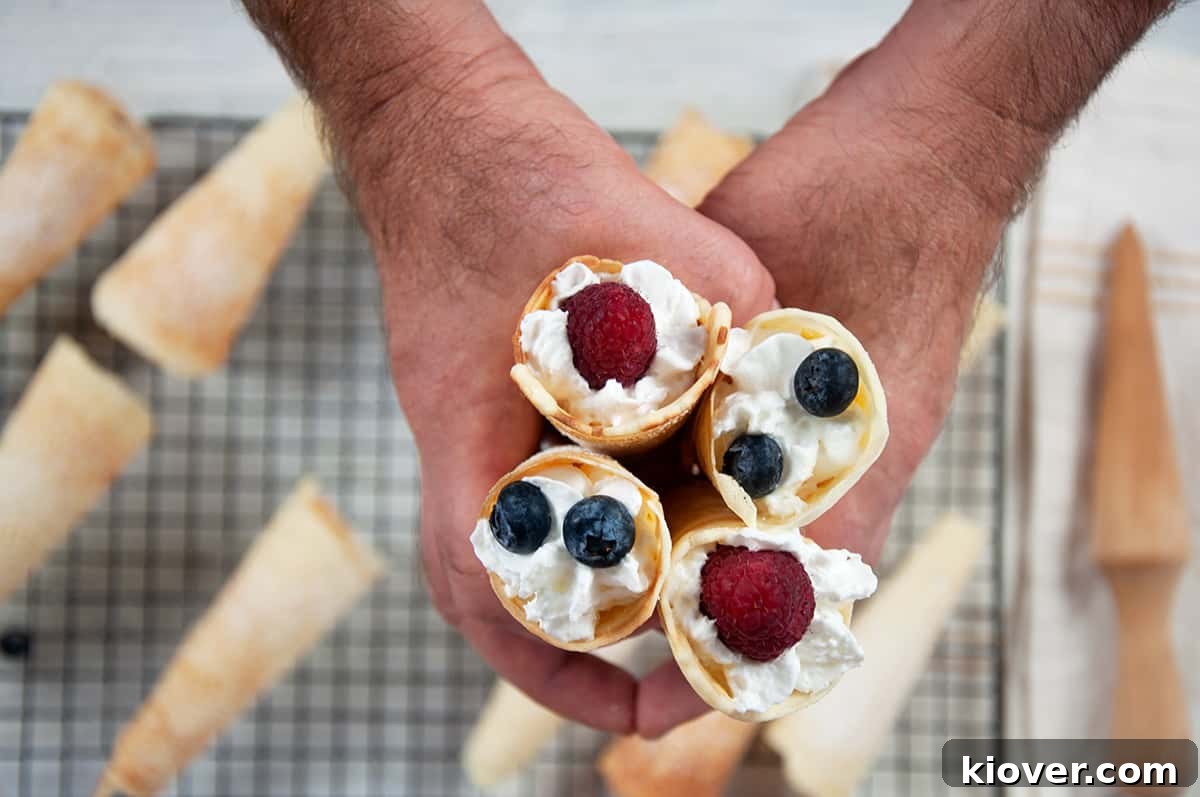
Expert Tips and Tricks for Krumkake Success
Mastering Krumkake is a rewarding endeavor, and a few insider tips can make all the difference in achieving perfect, delicate wafers every time:
- Know Your Equipment: Every Krumkake iron is unique. Take the time to understand its specific heating capabilities and required cook times. Your first few cookies are for learning!
- Maintain Iron Temperature: Always close your Krumkake iron between each batch. This allows it to heat back up properly and ensures consistent golden-brown results.
- Handle with Care (and Caution): Freshly cooked Krumkake are incredibly hot and delicate. Be quick but careful during the shaping process. Wearing food-safe gloves or having a bowl of cool water nearby can save your fingertips from the heat. It’s a bit of a “hot Krumkake” challenge!
- Experiment with Fillings: While whipped cream and fresh fruit are classic, don’t hesitate to explore other delicious fillings and toppings. Lemon curd, chocolate ganache, or even a spiced apple compote can add exciting new dimensions.
- Embrace the Crumble: Krumkake are designed to be thin and crispy, meaning they can be a bit crumbly when eaten. This is part of their charm, so enjoy the delightful texture!
- Consistent Batter Portions: Use a consistent amount of batter (about 1.5 tablespoons per Krumkake) for uniform size and cooking. An ice cream scoop can be helpful here.
- Don’t Overmix the Batter: Mix the batter just until combined. Overmixing can develop the gluten in the flour, leading to tougher, less delicate Krumkake.
- Cool Completely Before Storing: Ensure your Krumkake are entirely cooled on a wire rack before storing them in an airtight container. Storing them while warm will trap moisture and make them soft.
Recommended Tools for Krumkake Making
Having the right tools can make your Krumkake baking experience smoother and more enjoyable:
- Krumkake Iron: Essential for achieving the signature thinness and decorative patterns.
- Cardamom Pods (or ground cardamom): For that authentic, aromatic Norwegian flavor.
- Krumkake Cone Roller: Most irons come with one, but a separate cone roller is useful if yours didn’t or for extra speed.
- Heat-resistant Gloves: For handling hot Krumkake during the quick shaping process.
- Wire Cooling Rack: To ensure Krumkake cool completely and remain crisp.
- Large and Small Mixing Bowls: For combining wet and dry ingredients separately.
- Whisk and Spatula: For mixing batter and gently removing cooked Krumkake.
- Measuring Cups and Spoons: For accurate ingredient proportions.
Share Your Krumkake Creation!
We absolutely love seeing your culinary successes! If you embark on the delightful journey of making this Norwegian Krumkake recipe, we’d be thrilled to hear about it. Your feedback helps us improve and guides other home bakers in their decisions.
Please take a moment to leave a rating and share your thoughts in the comment section below. Did you try a unique filling? Did you pass down this tradition with your family? Let us know! Most importantly, thank you for visiting Ramshackle Pantry and for bringing a piece of Norwegian tradition into your home.
Print Recipe

Norwegian Krumkake
- Author: Ben Myhre
- Prep Time: 10 minutes
- Cook Time: 30 minutes
- Total Time: 40 minutes
- Yield: 14 Krumkake
- Category: Dessert
- Method: Iron
- Cuisine: Norwegian
Description
The Krumkake is a delicious holiday treat that is versatile, tasty, and a great way to celebrate Norwegian heritage. Great for Christmas, Thanksgiving, or just a fun treat for your family.
Ingredients
- ¾ cup of sifted all-purpose flour
- ½ cup sugar
- 1 Tablespoon cornstarch
- ¼ teaspoon crushed cardamom
- 2 eggs
- 2 Tablespoons heavy whipping cream
- ½ teaspoon vanilla extract
- 4 Tablespoons melted butter, but not hot
Instructions
- Add flour, sugar, cornstarch, and cardamom to large bowl. Mix well.
- In smaller bowl, beat eggs and then add cream, vanilla, and butter. Mix well.
- Add liquid mixture into dry mixture and combined until a smooth peanut butter like consistency.
- Preheat krumkake grill.
- Each Krumkake will require about 1 ½ tablespoons of batter. Add one to your Krumkake maker and cook until golden brown. For my tool, this is about 1:30 seconds.
- Remove with fork and use Krumkake tool to form into cone before it cools down.
- Allow grill to heat back up, repeat until batter is gone.
- Sprinkle with powdered sugar. Fill with whipped cream and fruit. Eat!
Notes
- Learn your equipment. Different Krumkake irons require other cook times.
- Close your iron between each Krumkake to help it heat back up.
- Those krumkakes can be pretty hot when they are just off the iron. Just know that. It is like playing a bit of hot potato… or hot Krumkake I suppose.
- While I filled with whipped cream and topped with fruit, explore your toppings!
- These do get crumbly when eating. Enjoy the crumble.
- These surely won’t last long, but you can keep in a tight plastic container for several days.
Nutrition
- Serving Size: 1 cone
- Calories: 100 Calories
- Sugar: 7 g
- Sodium: 11 mg
- Fat: 5 g
- Saturated Fat: 3 g
- Unsaturated Fat: 2 g
- Carbohydrates: 13 g
- Fiber: 0 g
- Protein: 2 g
- Cholesterol: 38 mg