
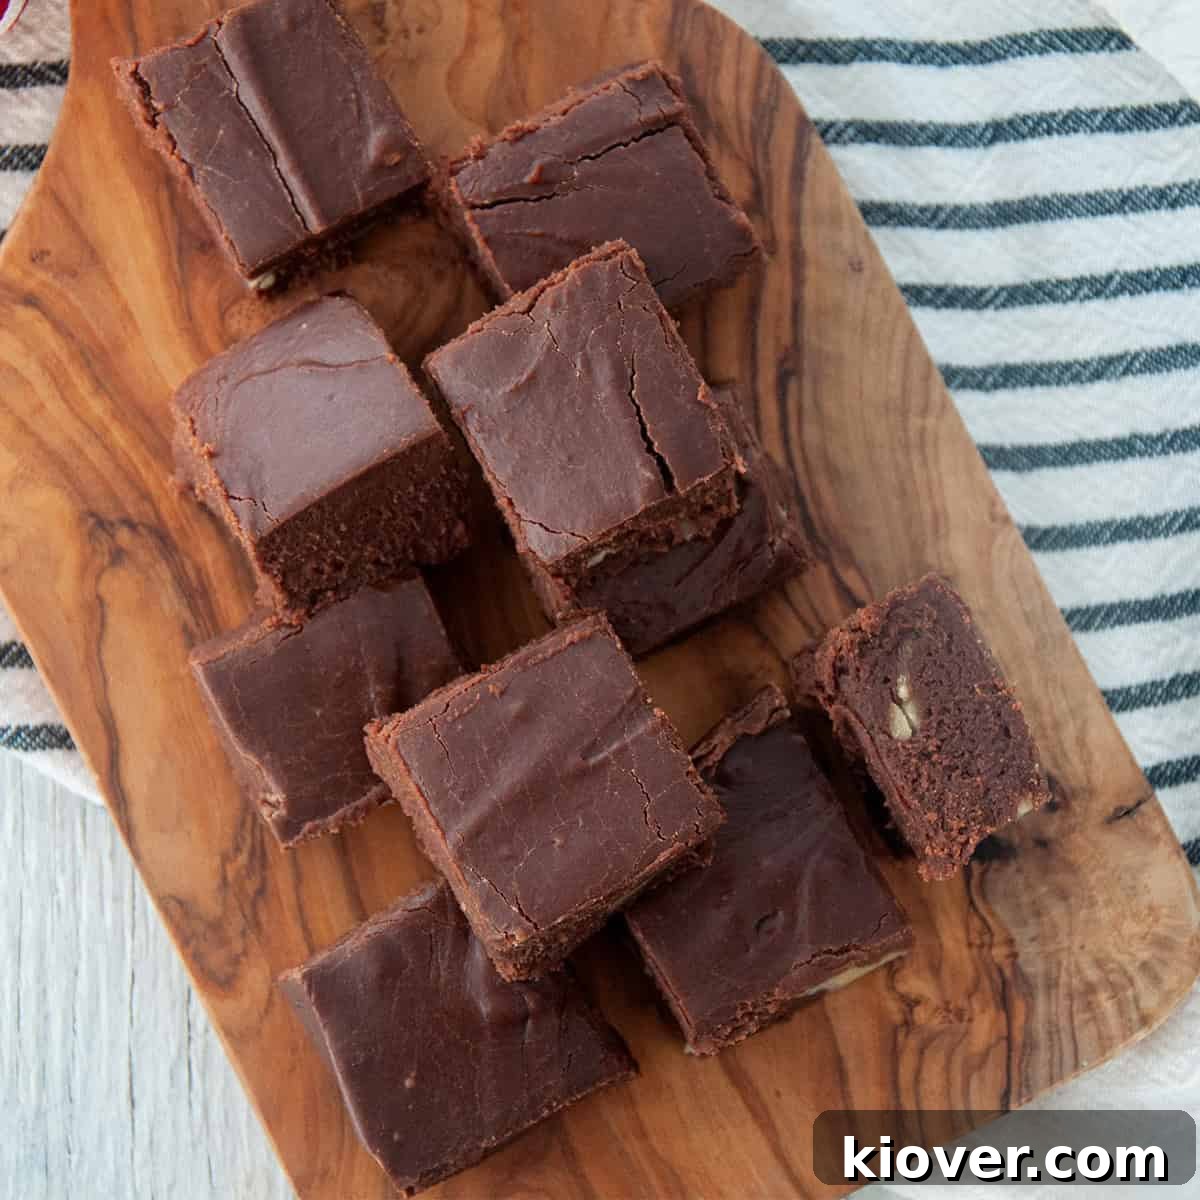
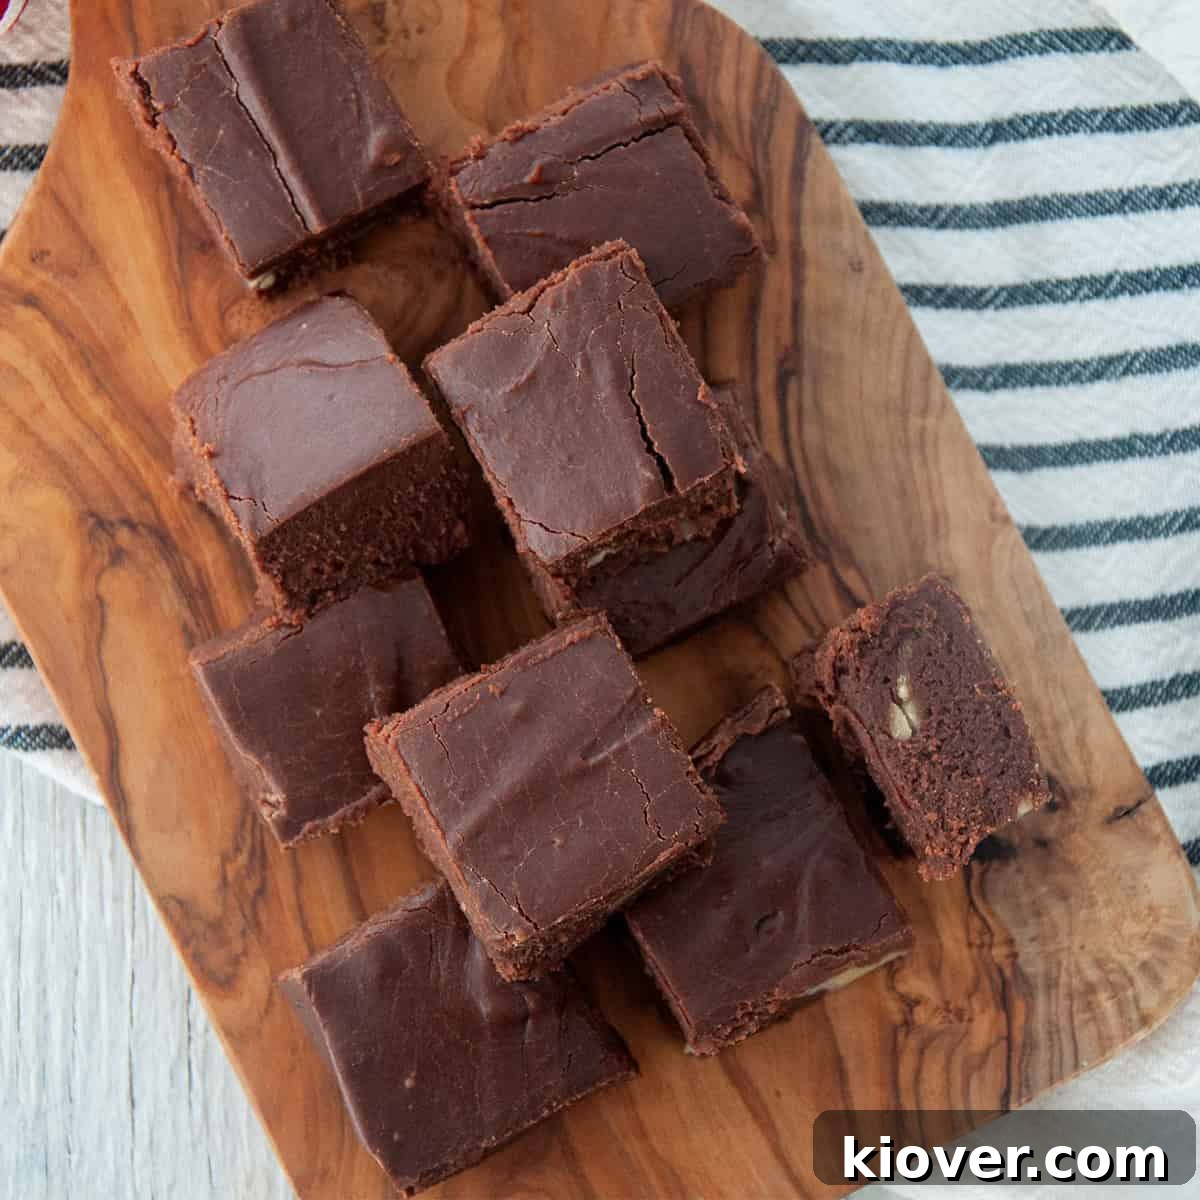
Prepare to challenge your perceptions of dessert with Velveeta Fudge, a truly unique and surprisingly delicious vintage recipe that captivates and delights. For many, the idea of using processed cheese in a sweet treat sounds outlandish, but this recipe is a testament to culinary ingenuity, transforming skepticism into sheer enjoyment. Not only is Velveeta Fudge incredibly easy to make and virtually foolproof, but it also delivers an unbelievably smooth, rich, and creamy texture that rivals traditional fudge varieties.
This isn’t just a dessert; it’s an experience. Each square of this chocolatey delight is a conversation waiting to happen, a moment of wonder as guests try to guess the secret ingredient. You’ll love seeing their reactions when you reveal the unexpected star of the show. If you’re searching for a special fudge that promises simplicity, delectable taste, and a guaranteed spark of curiosity at your next gathering, this Velveeta Fudge recipe is an absolute must-try. It’s a nostalgic journey for some, a thrilling discovery for others, and a consistently satisfying treat for all.
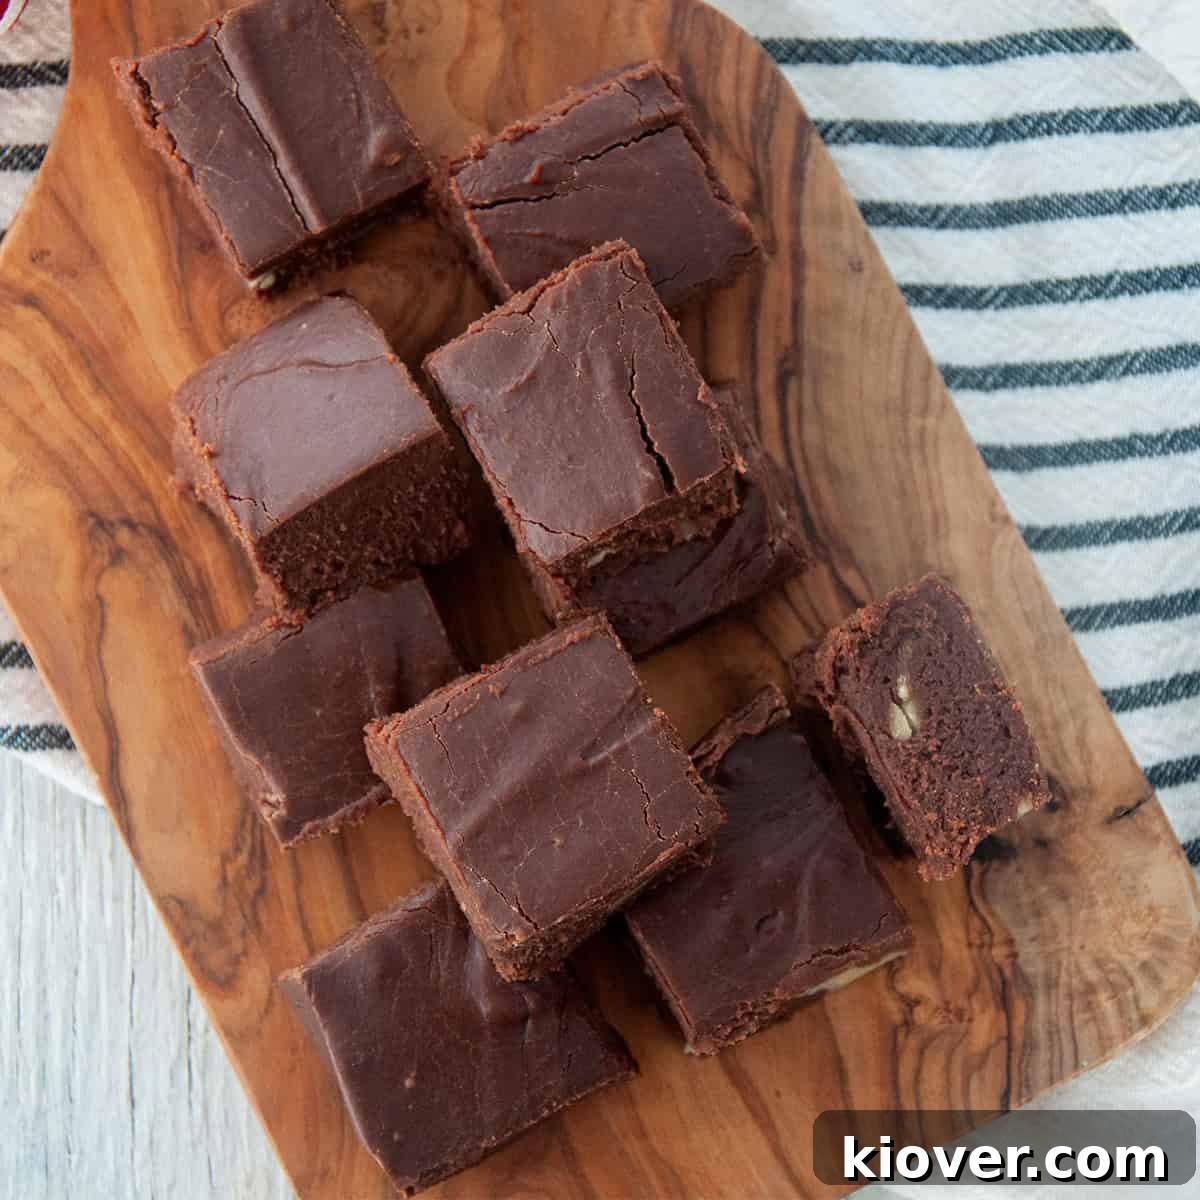
Why Velveeta Fudge? The Unconventional Secret to Creamy Perfection
You might be asking yourself: Do I really need this recipe? Do I want this recipe? Should such a recipe even exist? The answer to all three is a resounding YES! If you’ve read this far, your curiosity is piqued, and that’s precisely why you should try it. This isn’t just an interesting story; it’s a genuinely delicious, incredibly fast, and remarkably forgiving fudge recipe that’s almost impossible to mess up.
The secret lies in Velveeta’s unique properties as a processed cheese product. Unlike traditional cheese, Velveeta melts exceptionally smoothly and contains emulsifiers that help bind the ingredients together seamlessly. This prevents the grainy texture often found in homemade fudge and eliminates the need for precise temperature monitoring with a candy thermometer. It simply creates an ultra-creamy, melt-in-your-mouth texture that is consistently perfect, batch after batch.
Similar recipes, often shared by word-of-mouth, can be found tucked away in community and church cookbooks across the Midwest, highlighting its enduring appeal as a regional favorite. I’ve eagerly anticipated sharing my updated version, eager for you to witness the delighted astonishment on people’s faces when they learn the secret ingredient after devouring these delightful treats. Having served this fudge at numerous gatherings, I can confirm it’s always a highlight. It’s truly perfect for any holiday celebration, a casual get-together, or simply for a fun, surprising indulgence.
If you’re looking for other delightful treats to prepare this holiday season, consider exploring our Soft Ginger Cookies, festive Rum Balls, or these classic German Coconut Macaroons. Whatever you decide to bake, remember to treat yourself to something sweet!
🔥 Essential Ingredients for Your Velveeta Fudge
While Velveeta is undoubtedly the star of this show, it’s the harmony of all the ingredients that truly brings this exceptional fudge together. You’ll be surprised at how few items you need to create such a decadent dessert.
- Velveeta Cheese: The cornerstone of this recipe, providing the unparalleled creamy texture. Ensure it’s cut into 1-inch cubes for even melting.
- Salted Butter: Adds richness and contributes to the smooth consistency. Cutting it into cubes also aids in quick, uniform melting. If using unsalted butter, a small pinch of salt can be added to the dry ingredients to balance the flavors.
- Unsweetened Cocoa Powder: The source of that deep, satisfying chocolate flavor. Using unsweetened cocoa allows you to control the sweetness perfectly with the powdered sugar.
- Pure Vanilla Extract: A crucial flavor enhancer that elevates the chocolate and adds warmth.
- Powdered Sugar (Confectioners’ Sugar): Provides the bulk of the sweetness and helps achieve that characteristic fudge texture without being gritty.
- Chopped Nuts (Optional): Pecans or walnuts are classic choices that add a delightful crunch and nutty flavor, complementing the smooth fudge beautifully. Feel free to omit them for a pure, silky fudge experience.
Each ingredient plays a vital role in creating a fudge that is not only easy to make but also incredibly satisfying. The simplicity of the list belies the rich complexity of the final product.
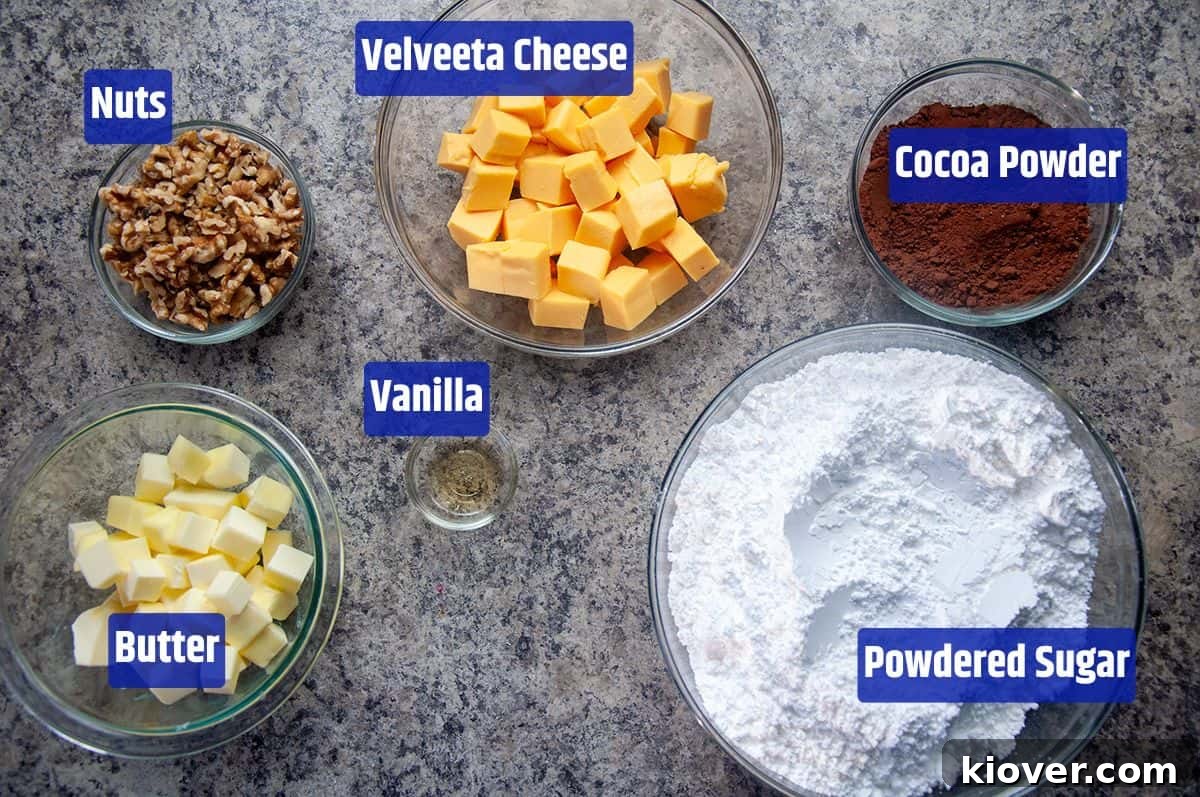
For precise quantities, please refer to the comprehensive recipe card below.
🍲 Step-by-Step Instructions: Crafting Your Perfect Velveeta Fudge
Making Velveeta Fudge is a remarkably straightforward process, often much easier than people anticipate. Follow these simple steps for a truly rewarding dessert experience.
- Prepare Your Pan: Begin by lining a 9×13-inch baking dish with parchment paper. Allow the parchment to hang over two sides; this creates convenient “handles” that will make lifting the cooled fudge out of the pan incredibly easy. A light spray of cooking oil or a smear of butter under the parchment can help it stick to the pan and prevent shifting.
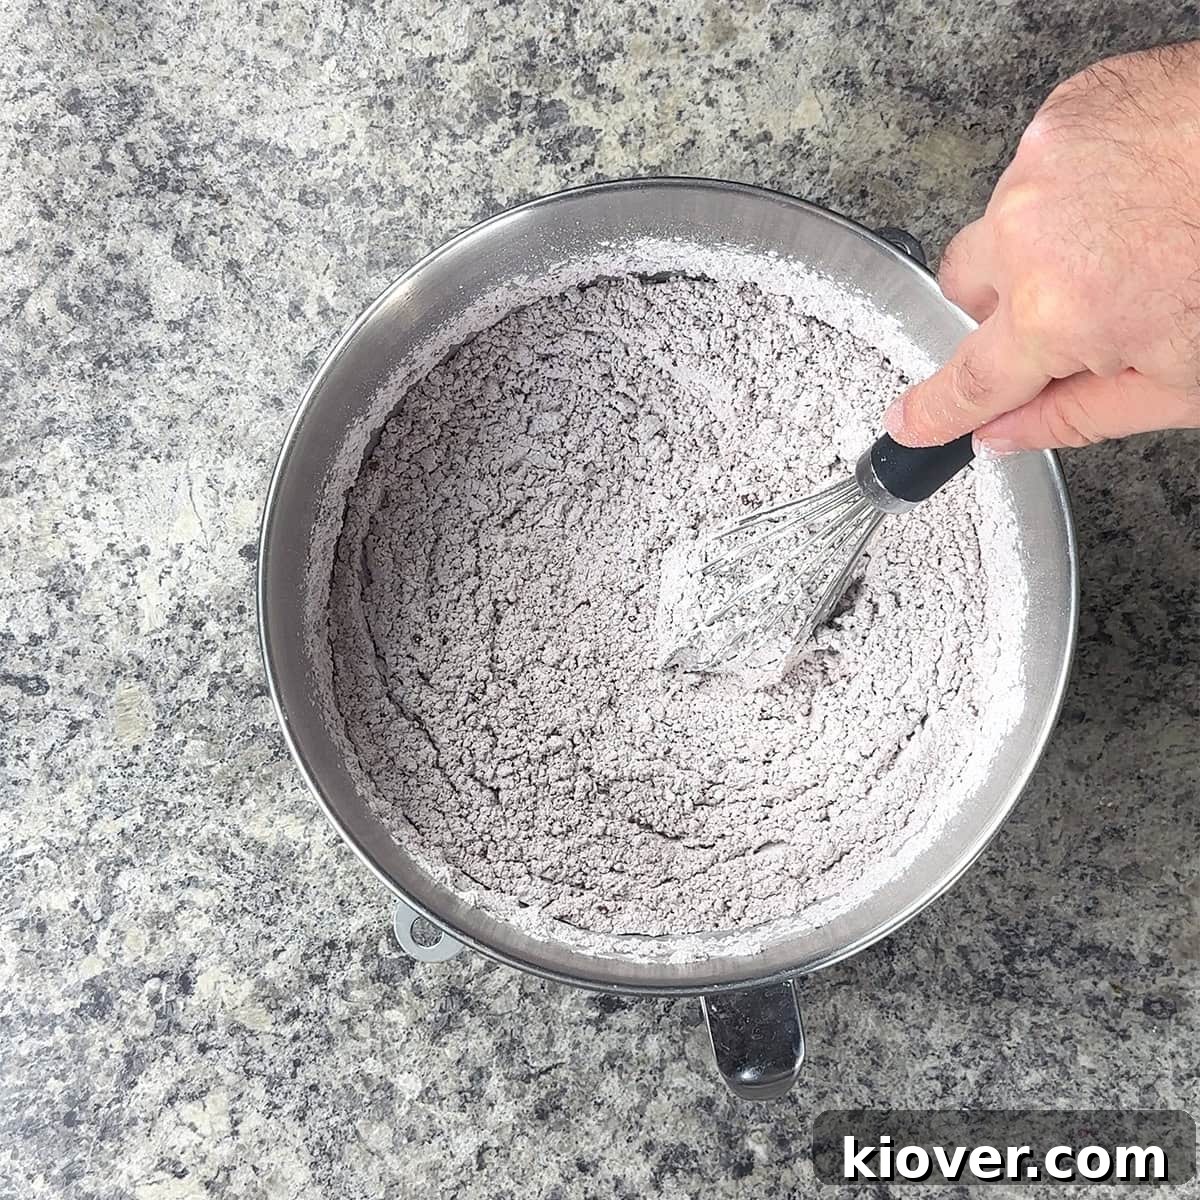
- Combine Dry Ingredients: In a large mixing bowl, or the bowl of your stand mixer, thoroughly whisk together the powdered sugar and cocoa powder. This crucial step helps to break up any lumps in the sugar and cocoa, ensuring a smooth, lump-free fudge texture later on. A smooth dry mixture makes the final blending stage much more effortless.
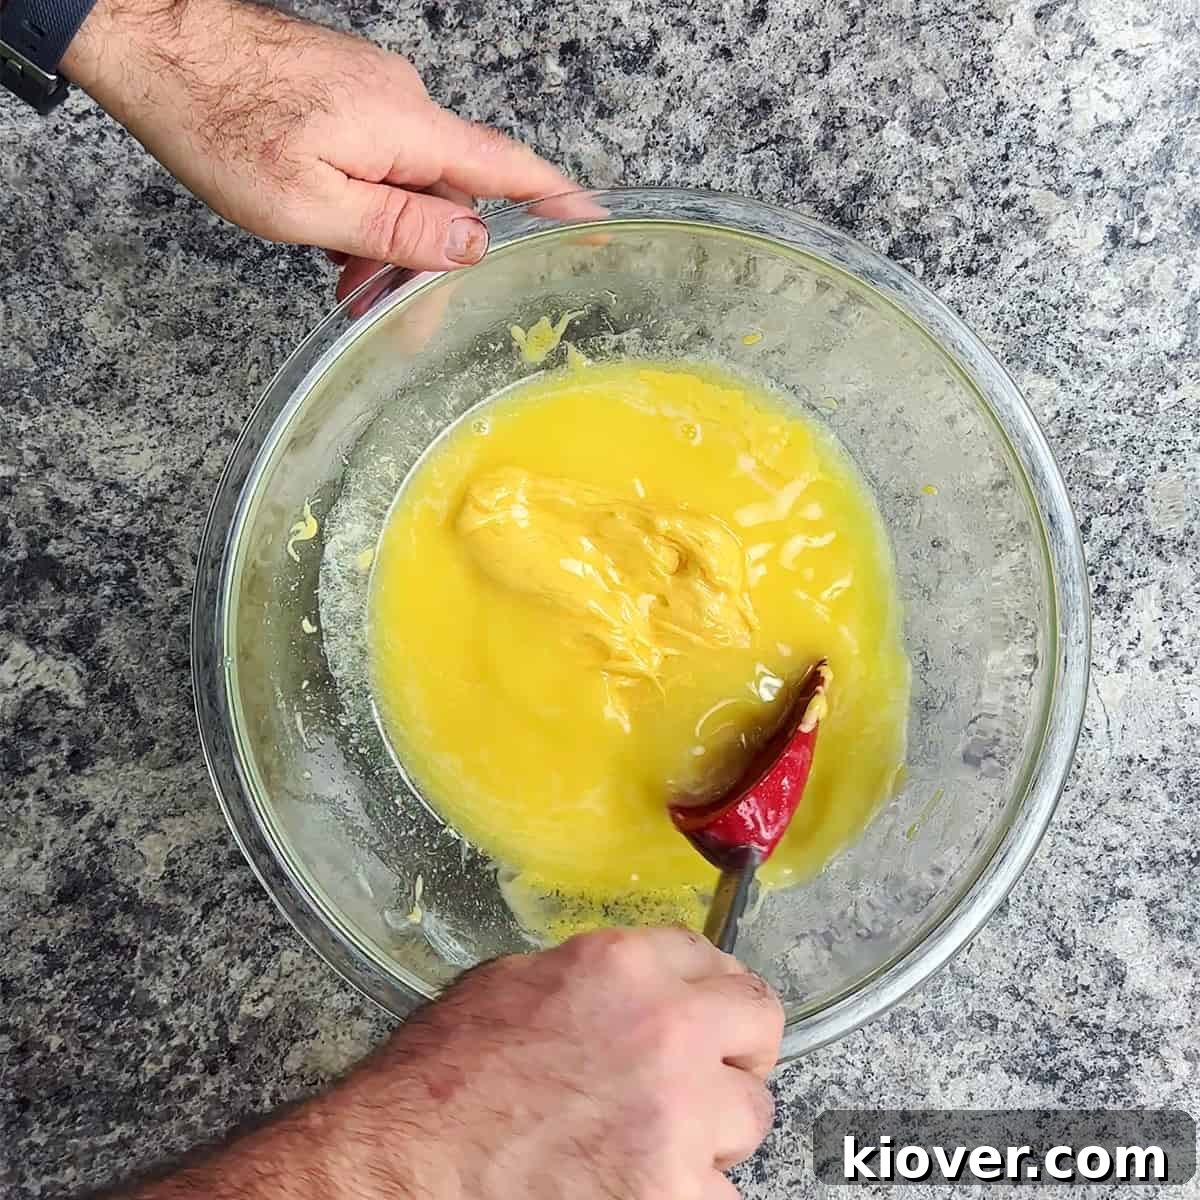
- Melt Velveeta and Butter: In a separate, microwave-safe bowl, combine the cubed Velveeta cheese and butter. The small cubes will help them melt more evenly and quickly.
- Microwave with Care: Microwave this mixture for 1 minute initially, then stir well. Continue microwaving in short, 30-second increments, stirring vigorously after each interval. This gradual melting prevents scorching and ensures a smooth, glossy liquid forms. Don’t be alarmed if the butter and cheese don’t fully incorporate into a single uniform liquid; the goal is a melted, pourable mixture. It may feel unusual to melt cheese for fudge, but trust the process—this is the magic that gives the final squares their famously creamy, almost truffle-like texture.
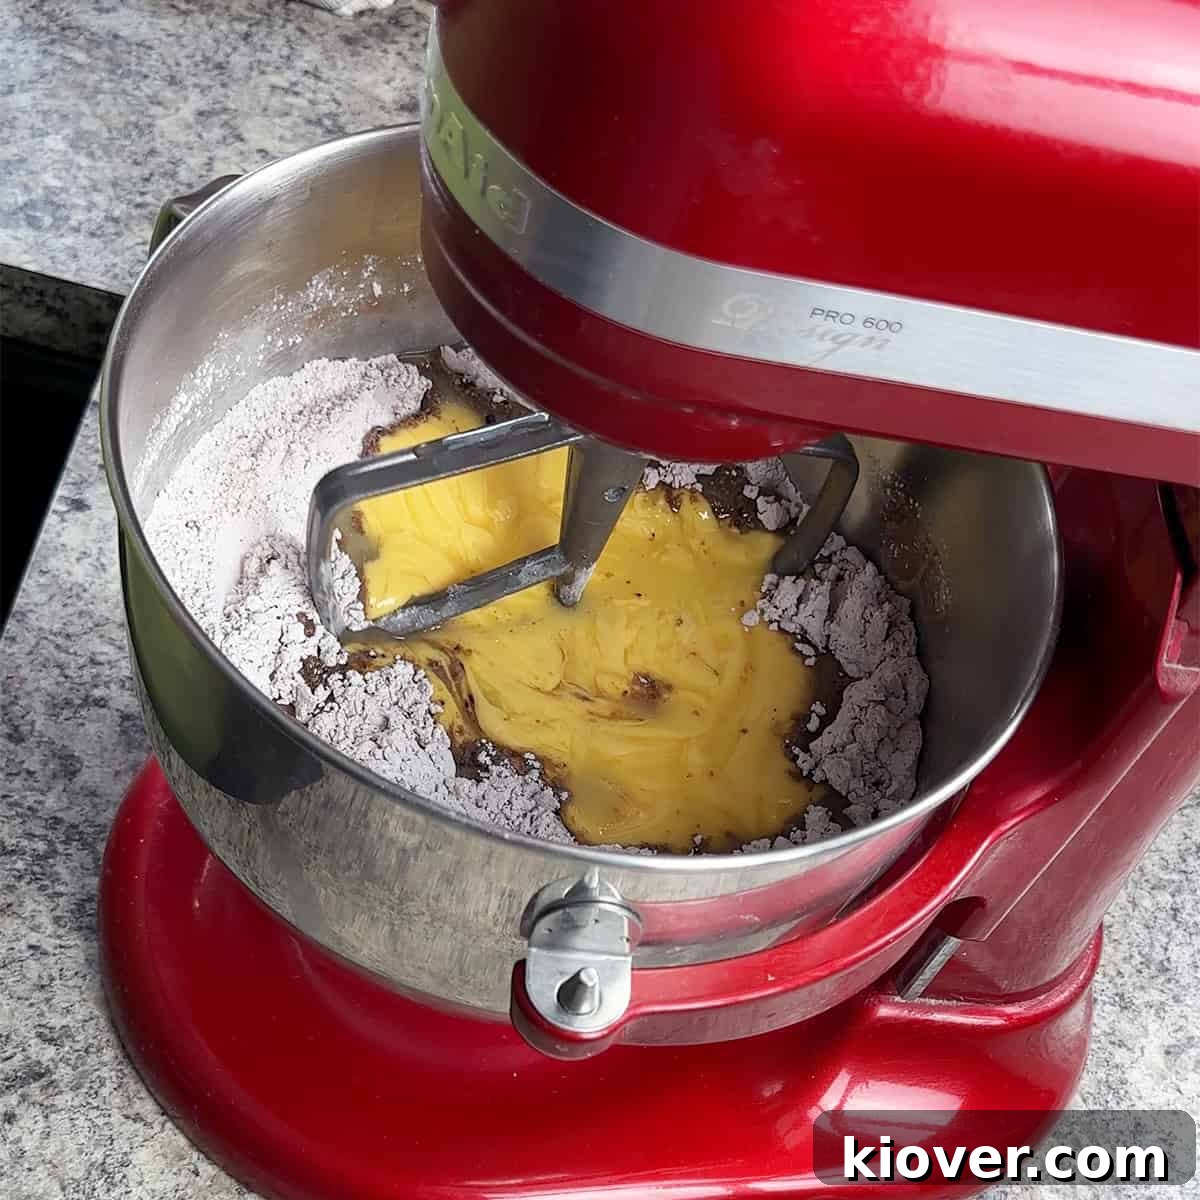
- Combine Wet and Dry: Once your Velveeta and butter mixture is perfectly melted and smooth, immediately pour the hot liquid over your whisked dry ingredients. The warmth helps everything incorporate beautifully.
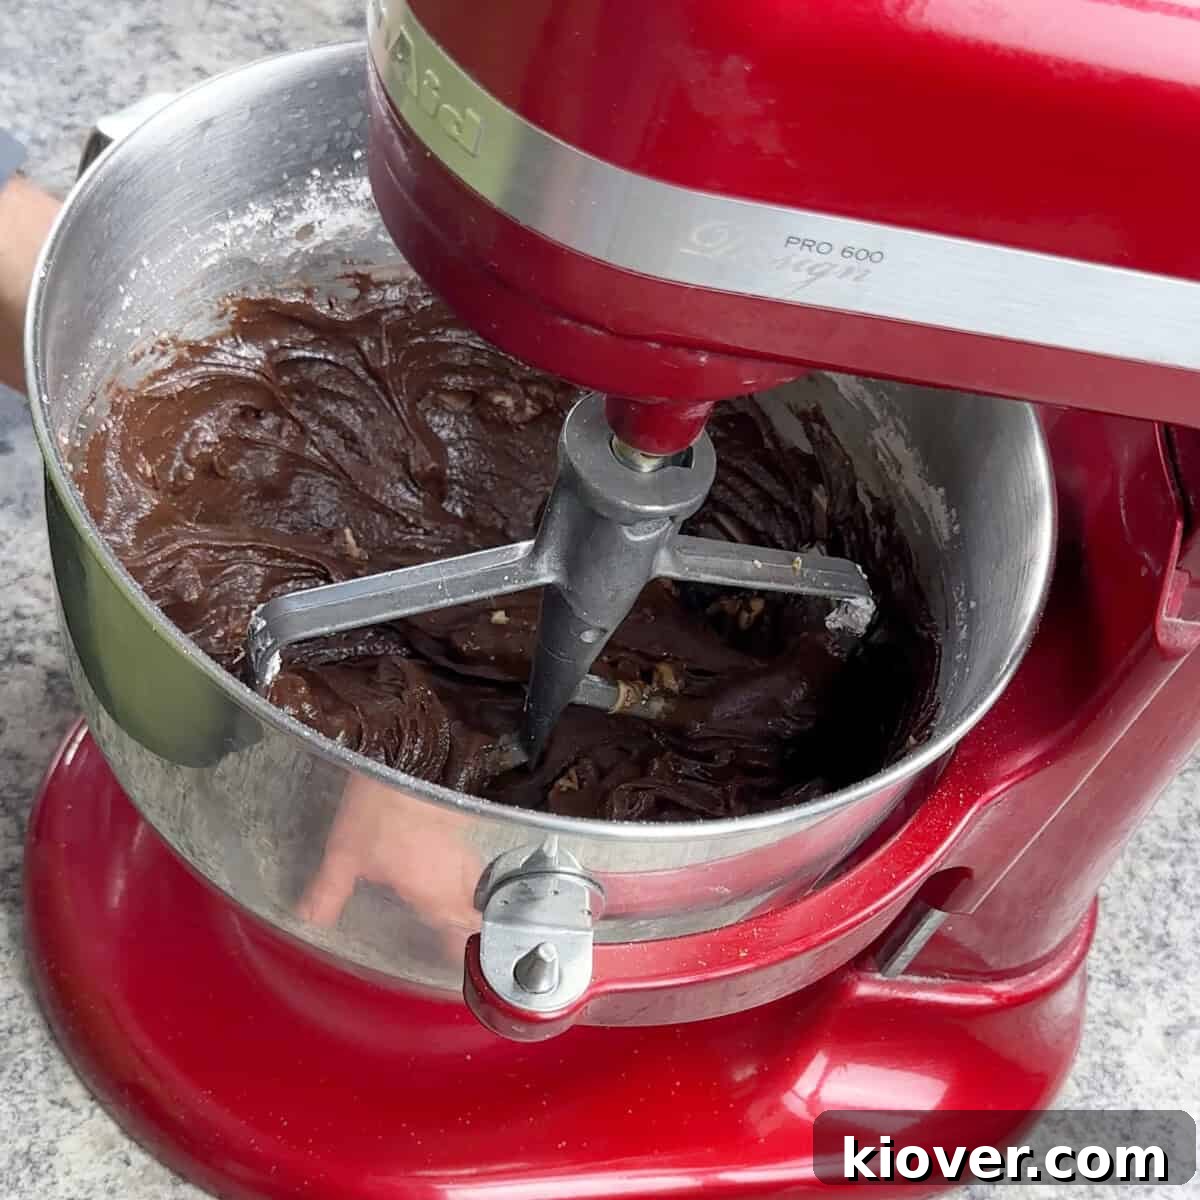
- Mix Until Smooth: Begin mixing the two components. You’ll notice the fudge starts to firm up quite quickly as the warm ingredients meet the cool powdered sugar. A stand mixer with a paddle attachment is incredibly helpful here, making the mixing stage much easier and ensuring a uniformly smooth consistency. If using a stand mixer, start on a low speed to avoid a powdered sugar cloud, then gradually increase the speed as the ingredients come together. If mixing by hand, a sturdy spoon and a bit of elbow grease will also get the job done; just be prepared to work quickly and thoroughly.
- Add Flavor and Texture: Stir in the vanilla extract until it’s evenly distributed. If you’re incorporating nuts, add the chopped pecans or walnuts now and mix just until they are evenly dispersed throughout the warm fudge.
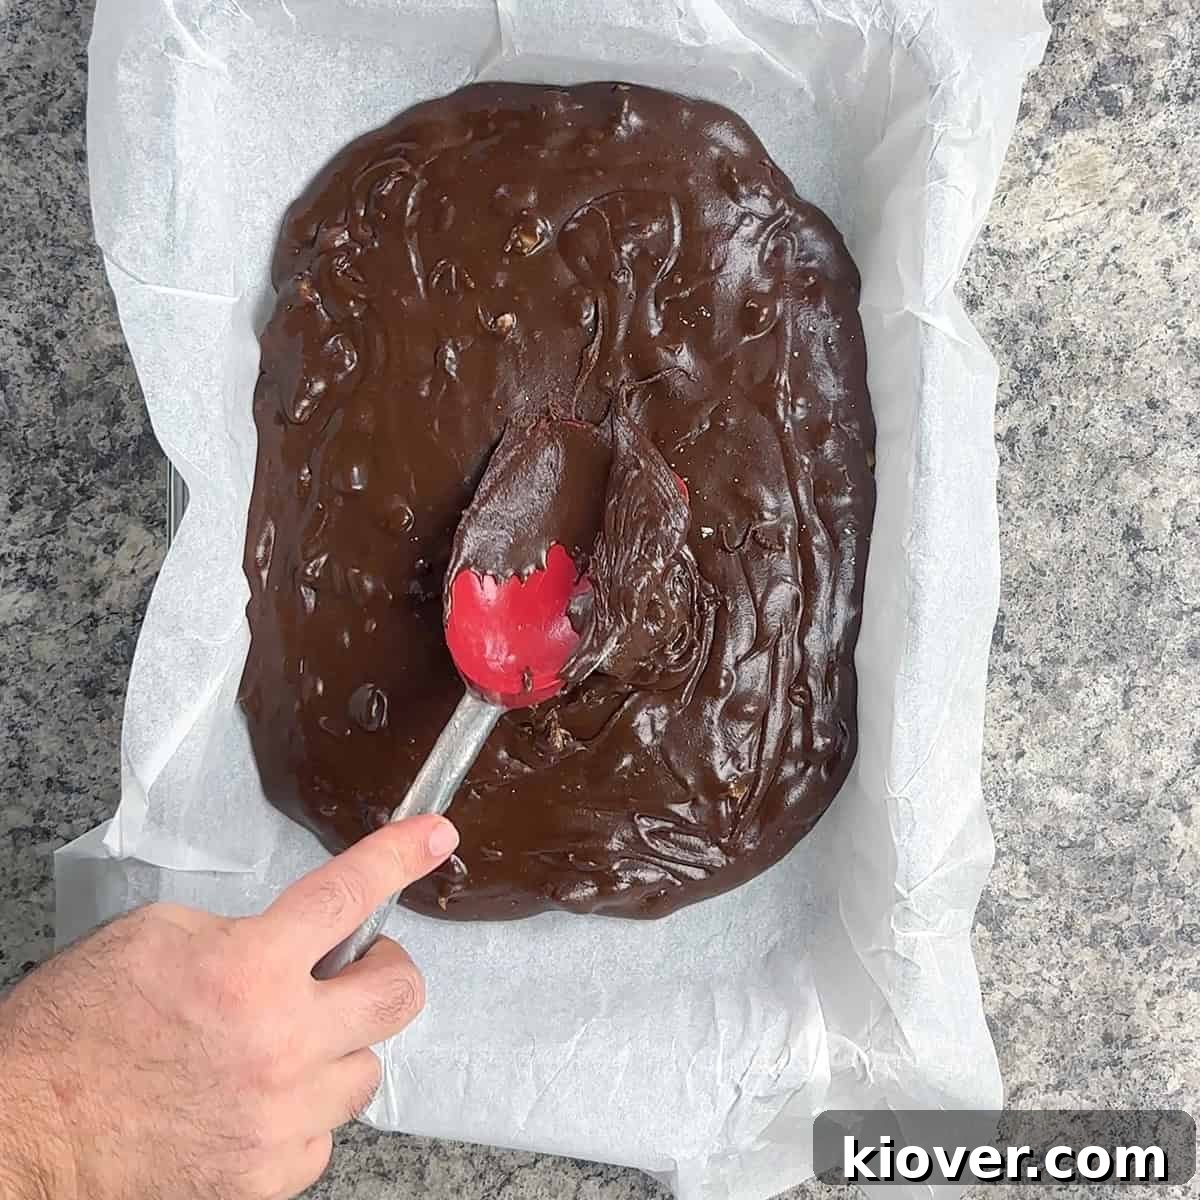
- Spread into Pan: Working quickly before the fudge sets completely, spread the warm, rich fudge mixture evenly into your parchment-lined 9×13-inch pan. Use an offset spatula or the back of a spoon to create a smooth, appealing top surface.
- Cool and Set: Allow the fudge to cool completely at room temperature. This can take a few hours. For a firmer set, you can refrigerate it after it has cooled sufficiently at room temperature.
- Cut and Serve: Once completely firm, use the parchment paper overhangs to lift the entire slab of fudge out of the pan. Place it on a cutting board and slice it into desired squares. A common way is to cut it into a 4×8 grid, yielding 32 generous pieces. Store your delicious homemade Velveeta Fudge in an airtight container and enjoy!
🤷 Substitutions and Creative Variations for Velveeta Fudge
One of the joys of Velveeta Fudge is its versatility. While the classic recipe is fantastic, there are several simple ways to customize it to your taste or to use ingredients you already have on hand.
- Butter Choice: If you only have unsalted butter, simply add a small pinch (about 1/4 teaspoon) of fine salt to your dry ingredients alongside the cocoa and powdered sugar. This will help balance the sweetness and bring out the chocolate flavor, mimicking the effect of salted butter.
- Nut Varieties: Pecans and walnuts are timeless choices for fudge, offering a comforting crunch and earthy flavor. However, don’t hesitate to experiment with other nuts like chopped almonds, pistachios for a vibrant green hue, or even roasted peanuts for a delightful sweet-and-salty combination. For those who prefer a purely smooth, melt-in-your-mouth experience, feel free to omit the nuts entirely.
- Exciting Add-ins: The possibilities for jazzing up your Velveeta Fudge are endless!
- Peanut Butter Swirl: After spreading the fudge, dollop spoonfuls of creamy peanut butter on top and swirl gently with a knife for a marbled effect.
- Mini Marshmallows: Fold in a cup of mini marshmallows just before spreading the fudge into the pan for a softer, chewier texture reminiscent of rocky road.
- Pretzel Crunch: Crumbled pretzels offer a fantastic salty counterpoint and a satisfying crunch. Fold them in with the nuts or sprinkle on top.
- Holiday Flavors: During the festive season, crushed candy canes (peppermint extract can also be added) or a touch of cinnamon would be wonderful additions.
- Spicy Kick: For a unique “Mexican hot chocolate” inspired fudge, add a pinch of cayenne pepper to the dry ingredients. Start small and taste!
- White Chocolate Drizzle: Once the fudge is set, melt some white chocolate and drizzle it decoratively over the top for an elegant finish.
- Extracts: Beyond vanilla, consider almond extract, peppermint extract, or even a hint of coffee extract to deepen the chocolate flavor.
Don’t be afraid to get creative and make this Velveeta Fudge recipe truly your own!
📦 Storage Solutions for Your Velveeta Fudge
One of the many benefits of Velveeta Fudge is its excellent keeping qualities and its ability to maintain its delightful creaminess longer than many traditional fudge recipes. Proper storage ensures you can enjoy your delicious creation for days, or even months!
- Room Temperature Storage: For immediate enjoyment or short-term keeping, store your Velveeta Fudge in an airtight container at room temperature. It will remain perfectly fresh and wonderfully creamy for up to a week. Ensure it’s well-sealed to prevent it from drying out and to protect it from absorbing any ambient odors.
- Refrigerated Storage: If you prefer a slightly firmer texture, or if your kitchen is particularly warm, refrigerating the fudge is an excellent option. Place the fudge in an airtight container in the refrigerator, where it will keep well for up to two weeks. The colder temperature will make it firmer, which some people prefer for cleaner slicing and a more substantial bite.
- Freezer Storage: Velveeta Fudge freezes beautifully, making it an ideal candidate for meal prepping desserts or for savoring later. You can wrap the entire slab or individual pieces tightly in plastic wrap, then place them in a freezer-safe container or heavy-duty freezer bag. It will maintain its quality in the freezer for up to three months.
- Thawing Frozen Fudge: When you’re ready to enjoy your frozen fudge, simply transfer it to the refrigerator to thaw overnight, or let it come to room temperature for a few hours. This gradual thawing process helps to preserve its smooth texture and prevents condensation from forming excessively. Once thawed, it will be as creamy and delicious as when it was first made.
With these storage tips, you’ll always have a delightful batch of Velveeta Fudge ready to impress or to satisfy your sweet cravings.
🎓 History Tidbit: The Curious Origins of Velveeta Fudge
The story of Velveeta is quite fascinating, deeply intertwined with American culinary innovation! Invented in 1918 by Emil Frey of the Monroe Cheese Company, Velveeta was initially marketed as a nutritious and digestible cheese product. The Velveeta Cheese Company was officially formed in 1923, marking its commercial rise. Given its timeline, Velveeta Fudge, as we know it, could not have been created before the 1920s.
While an exact origin or specific date for Velveeta Fudge remains elusive, culinary historians and enthusiasts often place its surge in popularity around the 1970s. This era was characterized by a penchant for convenience foods and innovative uses for readily available pantry staples. Velveeta, with its unique melting properties and long shelf life, perfectly fit the bill for experimental home cooks looking for easy, no-fuss recipes.
This is not a recipe you’ll commonly encounter in mainstream, traditional cookbooks. Instead, its charm lies in its grassroots appeal, frequently surfacing in local community cookbooks, particularly those from churches, school fundraisers, and women’s clubs, often dated to the 1970s and 1980s. These cookbooks served as invaluable repositories for beloved family recipes and clever culinary hacks, passed down through generations. Velveeta Fudge, with its intriguing ingredient and surprising deliciousness, found a natural home among these cherished, often quirky, community favorites.
❓ Frequently Asked Questions About Velveeta Fudge
Absolutely not! This is one of the most common misconceptions, and a delightful surprise for anyone who tries it. Velveeta acts purely as a texture enhancer, not a flavoring agent. Its unique composition helps the fudge melt smoothly and set into an incredibly creamy, almost truffle-like consistency without imparting any noticeable cheesy taste. The dominant flavors you’ll experience are rich chocolate and sweet vanilla – it tastes exactly like classic fudge, just smoother!
The reason is purely pragmatic and brilliantly effective: Velveeta creates an ultra-smooth, remarkably creamy, and virtually foolproof fudge. Its emulsifying properties are key. In traditional fudge, achieving the right texture without graininess often requires a candy thermometer and precise temperature control. Velveeta bypasses these complexities, helping the mixture emulsify and set perfectly every time, preventing sugar crystallization and ensuring a consistent, dreamy texture. It simplifies the fudge-making process significantly.
Yes, you can! Any smooth-melting processed cheese loaf, often found in similar block forms to Velveeta, will generally work as a substitute. The critical factor is that it must be a processed cheese loaf designed to melt smoothly. Avoid shredded cheese varieties or anything that explicitly states it contains anti-caking agents, as these can negatively impact the fudge’s texture and prevent proper melting and emulsification.
No, and this is one of the greatest advantages of this recipe! Velveeta Fudge is celebrated for being one of the easiest fudge styles to make because it eliminates the need for a candy thermometer. The unique composition of the Velveeta and butter allows them to melt together smoothly and incorporate with the other ingredients without needing to reach a specific, high temperature. This makes the recipe much more accessible and stress-free for home bakers.
While technically possible, substituting chocolate chips directly for cocoa powder would significantly alter the recipe’s balance and texture. This recipe relies on cocoa powder for intense chocolate flavor and the powdered sugar for bulk and sweetness. Using chocolate chips would introduce extra fat and sugar from the chocolate itself, requiring significant adjustments to the other ingredients. For best results and to maintain the integrity of the Velveeta Fudge texture, it’s recommended to stick with unsweetened cocoa powder.
To make the fudge firmer, you can try reducing the amount of butter slightly (by 1-2 tablespoons) or increasing the powdered sugar by about half a cup. For a softer fudge, you could slightly increase the butter (by 1-2 tablespoons) or ensure you don’t over-mix once the wet and dry ingredients are combined. Remember that refrigeration will naturally make the fudge firmer, while room temperature storage keeps it creamier.
📝 Expert Tips and Tricks for Perfect Velveeta Fudge
Achieving perfectly smooth and delicious Velveeta Fudge is simple, especially with a few helpful tips and tricks. These pointers will ensure your fudge turns out flawlessly every time.
- Leverage a Stand Mixer: If you’re fortunate enough to own a stand mixer, this is the ideal tool for mixing your fudge. Velveeta Fudge gets very thick, very fast, once the wet and dry ingredients combine. A stand mixer with a paddle attachment makes quick work of it, ensuring a uniform consistency without tiring your arm. Start on the lowest speed to avoid creating a cloud of powdered sugar, then gradually increase the speed once the ingredients begin to come together and form a cohesive mass.
- Work with Speed: The moment the melted Velveeta-butter mixture meets the powdered sugar and cocoa, the fudge will begin to firm up rapidly. It’s crucial to have all your preparations done beforehand: your pan lined, ingredients measured, and all tools within reach. Mix swiftly and spread the fudge into the prepared pan without delay to ensure a smooth, even layer before it becomes too stiff to work with.
- Best Nuts to Use: For classic flavor and texture, pecans and walnuts are undoubtedly the best choices for Velveeta Fudge. Their natural oils and slightly bitter notes perfectly complement the sweet, rich chocolate. Toasting the nuts lightly before adding them can also enhance their flavor and crunch.
- Parchment Paper is Your Friend: Don’t skip the parchment paper! It’s the secret to effortlessly removing the fudge from the pan once it’s set. To ensure the parchment paper stays securely in place and doesn’t shift while you’re spreading the fudge, use a small amount of cooking spray or a thin smear of butter or oil underneath it. This acts as an adhesive, keeping the paper flat and preventing any fudge from seeping underneath.
- Clean Cuts: For neat, professional-looking squares, use a large, sharp knife. For the cleanest cuts, wipe the knife blade clean with a damp cloth after each slice. If the fudge is very cold, letting it sit at room temperature for 10-15 minutes can make it easier to cut.
- Ingredient Quality: While Velveeta is processed, using good quality unsweetened cocoa powder and pure vanilla extract can significantly enhance the overall flavor profile of your fudge.
🛠 Recommended Products for this Recipe
Having the right tools can make your Velveeta Fudge experience even more seamless and enjoyable. Here are a few products that can assist you in preparing this delicious treat:
- KitchenAid Stand Mixer: Invaluable for quickly and efficiently mixing the thick fudge, ensuring a smooth, lump-free consistency with minimal effort.
- 9×13 Baking Dish: The standard size for this recipe, providing the perfect thickness for your fudge squares.
- High-Quality Cocoa Powder: Investing in good cocoa powder makes a noticeable difference in the richness and depth of your chocolate fudge flavor.
- Parchment Paper: Essential for easy removal of the fudge from the pan and for convenient cleanup.
- Offset Spatula: Helpful for spreading the warm fudge evenly and smoothly into the baking dish.
These tools, while not all strictly necessary, can certainly enhance your fudge-making process and results.
😋 Did you make this extraordinary recipe?
That is truly awesome! Thank you so much for giving this intriguing Velveeta Fudge recipe a try. We are confident it exceeded your expectations and perhaps even became a new favorite. If you enjoyed it as much as we do, we would be incredibly grateful if you could take a moment to leave a rating and a comment in the section below. Your feedback not only helps us understand how we’re doing but also assists other curious home bakers in deciding to embark on this delicious adventure. Most of all, thank you for visiting Ramshackle Pantry and sharing in our culinary discoveries!
Print
Velveeta Fudge: The Surprisingly Easy & Creamy Vintage Recipe
5 Stars
4 Stars
3 Stars
2 Stars
1 Star
No reviews
Author: Ben
Prep Time: 10 minutes
Cook Time: 5 minutes
Total Time: 15 minutes
Yield: 48 Pieces
Category: Dessert
Method: Microwave
Cuisine: American
Description
This Velveeta Fudge recipe is a vintage, no-fail treat with an unbelievably smooth, creamy texture. Quick to make, fun to share, and always a conversation starter, it’s a surprising delight for any occasion.
Ingredients
Units
Scale
- 1/2 pound Velveeta cheese, cut into 1-inch cubes
- 1 cup salted butter, cut into 1-inch cubes
- 1/2 cup unsweetened cocoa powder
- 1 teaspoon pure vanilla extract
- 7 1/2 cups powdered sugar
- 1 cup chopped nuts (pecans or walnuts), optional
Instructions
-
Prepare the pan: Line a 9×13-inch baking dish with parchment paper, allowing it to hang over two sides for easy lifting. You can lightly spray the pan with cooking oil or butter underneath the parchment to help it adhere.
-
Mix dry ingredients: In a large bowl or the bowl of a stand mixer, whisk together the powdered sugar and unsweetened cocoa powder until thoroughly combined and free of lumps. This step ensures a smooth final fudge.
-
Combine Velveeta and butter: Place the cubed Velveeta cheese and cubed salted butter into a separate large, microwave-safe bowl.
-
Microwave to melt: Microwave the cheese and butter mixture for 1 minute, then remove and stir well. Continue microwaving in 30-second bursts, stirring vigorously between each round, until the mixture is fully melted, smooth, and glossy. This usually takes between 2½ to 3½ minutes in total, depending on your microwave. The butter and cheese will become a thick, pourable liquid, though they may not fully homogenize.
-
Combine mixtures: Immediately pour the hot, melted Velveeta and butter mixture over the powdered sugar and cocoa in the large mixing bowl. Speed is key here.
-
Stir until smooth: Mix everything together until it is fully combined and perfectly smooth. The fudge will thicken quickly as the warm and cool ingredients integrate. If using a stand mixer with a paddle attachment (which is highly recommended for ease, as shown in the images), start on a low speed to avoid a powdered sugar cloud, then increase the speed once the mixture begins to come together. Continue mixing until the fudge has a uniform, creamy consistency.
-
Add vanilla and nuts: Stir in the pure vanilla extract until it’s evenly distributed. If you are using chopped nuts, add them now and stir just until they are well combined throughout the fudge.
-
Transfer to pan: Quickly transfer and spread the warm fudge evenly into the parchment-lined 9×13-inch dish. Use an offset spatula or the back of a spoon to smooth the top surface.
-
Cool and set: Allow the fudge to cool completely at room temperature until it is firm enough to slice. For a firmer set, you can transfer it to the refrigerator after it has cooled for about an hour at room temperature.
-
Cut and serve: Once fully set, use the parchment paper overhangs to carefully lift the entire slab of fudge out of the pan. Place it on a clean cutting board. Using a large, sharp knife, cut the fudge into squares. A common method is to cut it into a 4×8 grid, which will yield 32 delicious pieces. Store your Velveeta Fudge in an airtight container at room temperature for up to a week, or refrigerate for a firmer texture.
Notes
-
Use a stand mixer if you have one. This fudge sets quickly. Start on low speed to prevent powdered sugar from scattering, then increase speed once ingredients begin to combine for a smooth mixture.
-
Work swiftly. Once the melted Velveeta and butter are added to the dry ingredients, the fudge firms up rapidly. Ensure your pan is ready and waiting before you start mixing to facilitate quick spreading.
-
Recommended Nuts: Pecans and walnuts are excellent choices for this fudge, adding a delightful crunch and classic flavor.
- Parchment Paper Tip: For best results, use a small amount of cooking spray or oil underneath the parchment paper. This helps it stick to the pan, preventing it from shifting as you spread the warm fudge.
- Clean Slices: For neat squares, wipe your knife clean with a damp cloth after each cut. If the fudge is very cold, let it sit for a few minutes at room temperature before slicing.