
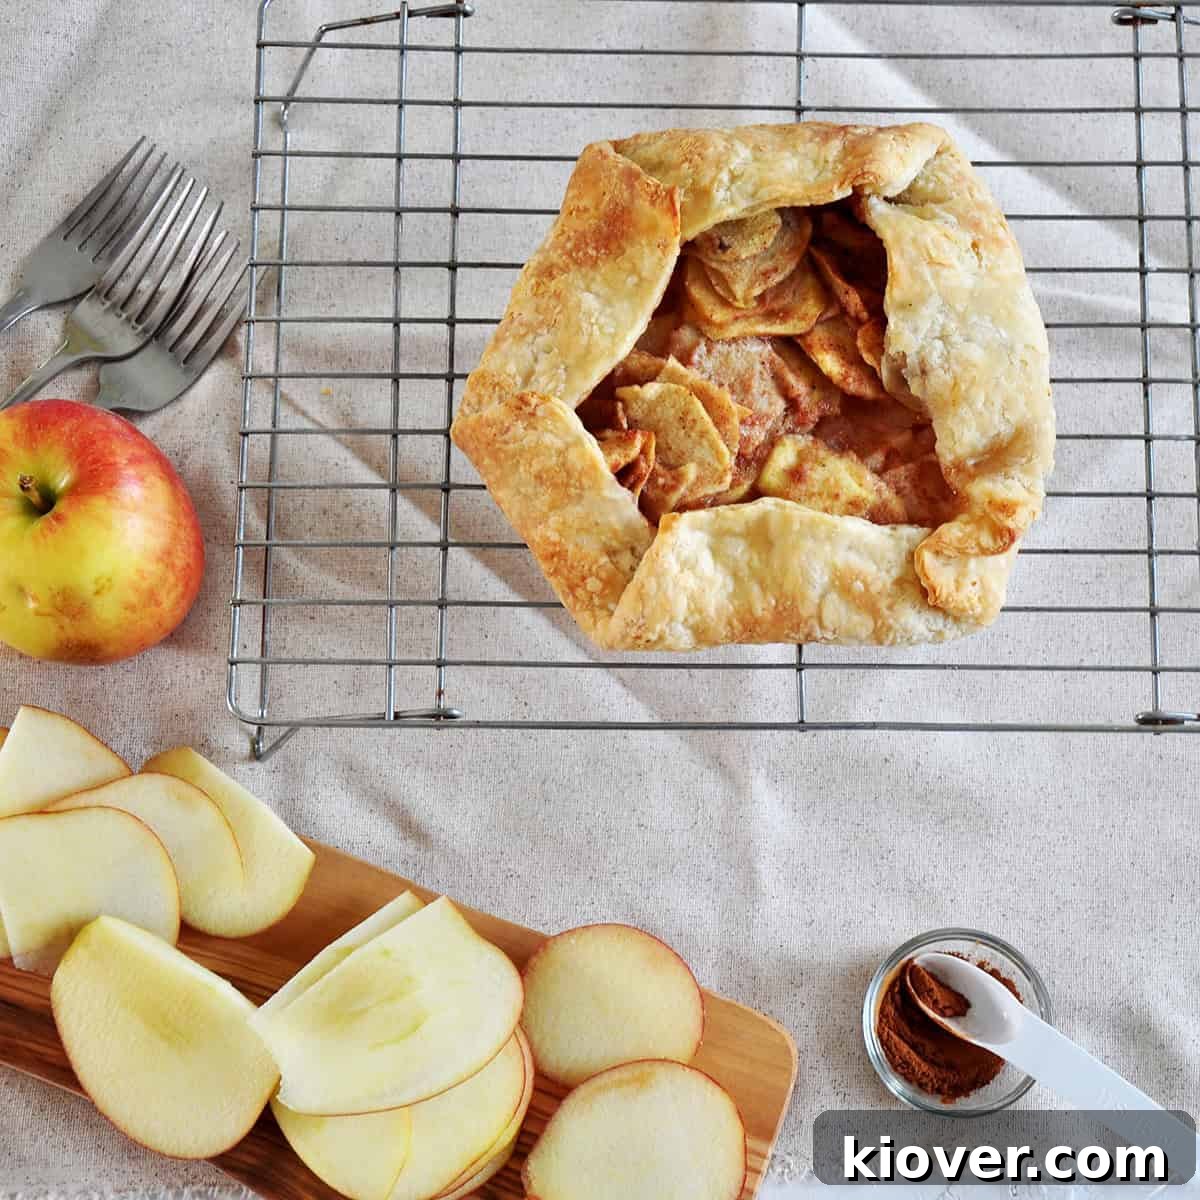
Craving a delightful dessert that combines rustic charm with irresistible flavor? Look no further than our **Rustic Apple Crostata**, a heavenly treat that delivers all the warmth and comfort of a classic apple pie, but with significantly less fuss. Forget the traditional pie dish – this free-form tart is designed for simplicity and stunning presentation, making it an ideal choice for both novice bakers and seasoned pros. With its signature **golden, flaky butter crust** enveloping a generous **spiced apple filling**, each bite is a perfect symphony of textures and tastes. Whether you’re seeking a cozy dessert for a quiet evening at home or a charming centerpiece to share with friends, this **easy apple crostata recipe** is sure to impress. Embrace the joy of homemade baking and give this fantastic **apple galette** a try today!
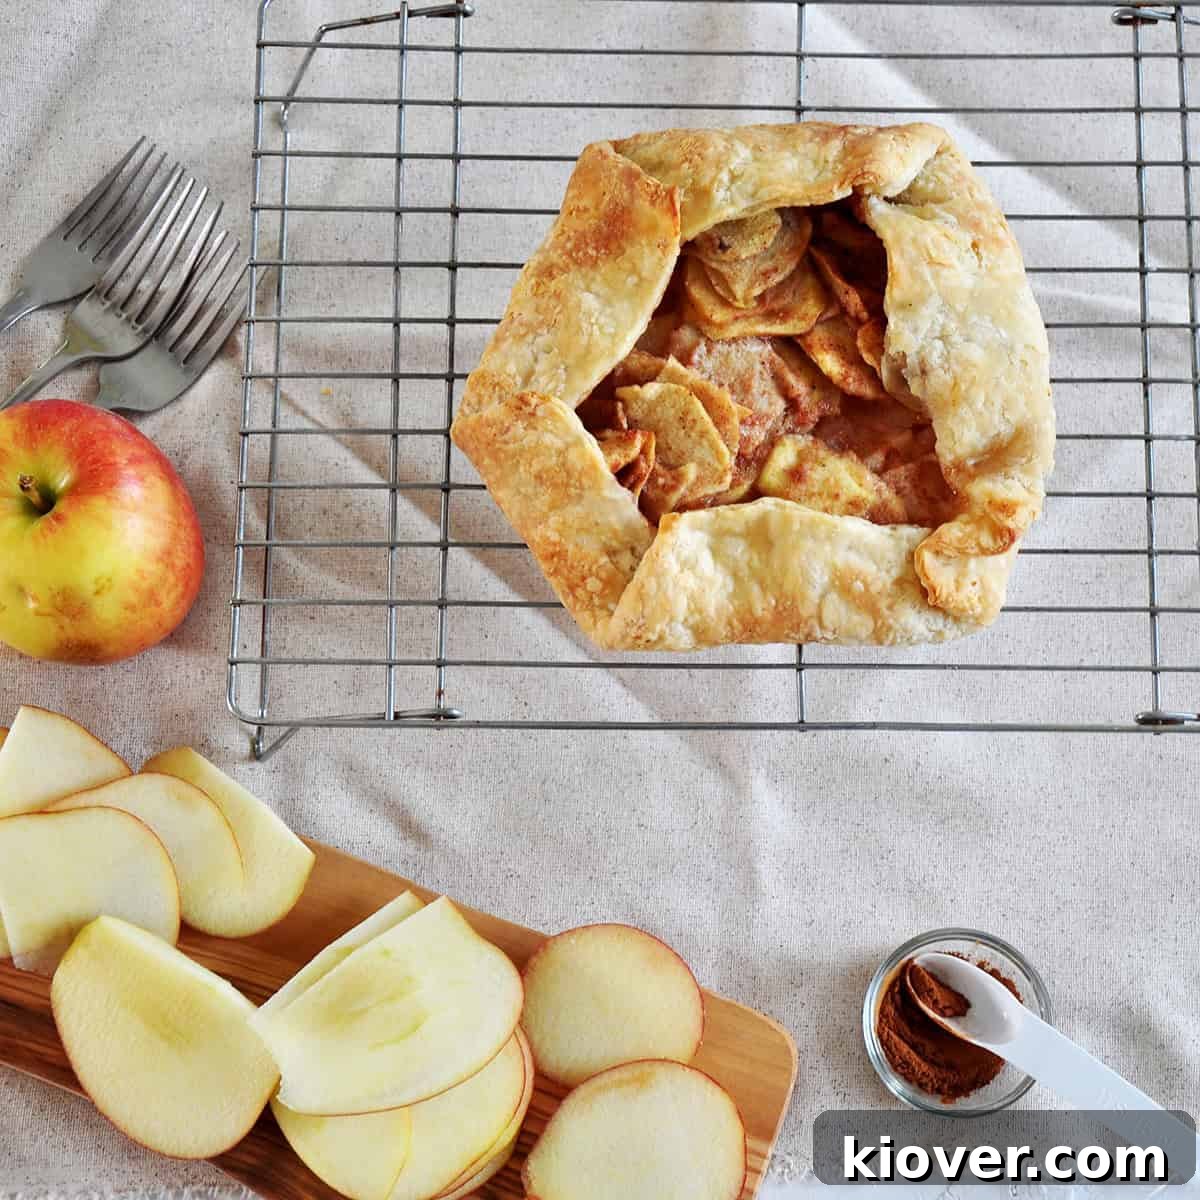
Why Choose a Rustic Apple Crostata? A Simpler Path to Apple Perfection
As autumn leaves begin to fall and the air turns crisp, there’s an undeniable call for warm, comforting **apple desserts**. While a traditional **American apple pie** holds a special place in our hearts, the Rustic Apple Crostata offers an exciting and often less intimidating alternative. This recipe is a fantastic stepping stone for anyone looking to master the art of pie crust making, as its free-form nature allows for a more forgiving approach. Unlike pies that demand precise crimping and perfect symmetry, a crostata embraces its “rustic” appellation – irregularities are part of its charm! This means you can achieve a beautifully impressive dessert even if your baking skills are still developing. The result is always a delightful, homemade creation that tastes wonderful, no matter how “perfect” its edges.
This **Italian-inspired apple dessert** embodies the essence of seasonal baking, bringing together simple, wholesome ingredients to create something truly special. It’s perfect for those who appreciate the deep, comforting flavors of baked apples and cinnamon, encased in a buttery, **flaky pastry**. If you enjoyed crafting this delightful crostata, we highly recommend exploring other related recipes like our homemade All-American Apple Pie for a classic experience, or mastering the foundation with our Best Butter Pie Crust, which is a versatile base for countless sweet and savory creations. Given the seasonal nature of apple desserts, you might also find inspiration in our comprehensive collection of Thanksgiving Day recipes or our crowd-pleasing Game Day recipes. No matter the occasion, remember to treat yourself and your loved ones to the joy of homemade baking.
Table of Contents
- Ingredients for Apple Crostata
- Mastering the Flaky Butter Crust
- Step-by-Step Instructions for Rustic Apple Crostata
- Substitutions and Variations: Customizing Your Crostata
- Storing Your Apple Crostata for Freshness
- A Sweet Taste of History: The Crostata Story
- Frequently Asked Questions About Apple Crostata
- Expert Tips and Tricks for the Perfect Crostata
- Kitchen Tools for Baking Your Crostata
- Share Your Apple Crostata Creation!
- Recipe Card: Rustic Apple Crostata
Ingredients for Apple Crostata: Simple Goodness
The beauty of a **homemade apple crostata** lies in its simplicity, requiring just a handful of quality ingredients to create a truly spectacular dessert. While the star of the show is, of course, fresh apples, each component plays a crucial role in achieving that perfect balance of flavor and texture. Here’s a closer look at what you’ll need:
- Butter: Essential for a rich, flaky crust and dots of golden deliciousness in the filling. Use high-quality unsalted butter for best results. Keeping it very cold is key for crust success.
- All-purpose flour: The foundation of our versatile and tender pastry.
- Sugar: Sweetens both the crust and the apple filling, balancing the tartness of the fruit.
- Salt: A pinch of salt enhances all the other flavors, making both the crust and filling sing.
- Ice-cold water: Crucial for bringing the pastry dough together without developing too much gluten, ensuring a tender, flaky texture.
- Braeburn Apples: Our preferred apple variety for its excellent balance of sweetness and tartness, and its ability to hold its shape beautifully when baked.
- Cinnamon: The quintessential spice for apple desserts, adding warmth and aromatic depth.
- Nutmeg: A subtle hint of nutmeg complements the cinnamon and apples, adding a layer of sophisticated spice.
Remember, the quality of your ingredients directly impacts the final taste of your crostata. Opt for fresh, firm apples and good quality butter for an unforgettable experience. Exact quantities are provided in the comprehensive recipe card below.
Mastering the Flaky Butter Crust for This Crostata Recipe
The crust is undoubtedly the unsung hero of any **fruit crostata**, and for this **rustic apple crostata**, we rely on our tried-and-true Best Butter Pie Crust. This recipe is a true workhorse, delivering an incredibly flaky, rich, and flavorful foundation that complements a wide array of fillings. There’s no need to reinvent the wheel when you’ve found a good thing! The primary difference for our crostata application is that we’ll halve the recipe to yield a single crust and then shape it freely, rather than pressing it into a traditional pie dish.
Making your own pie crust from scratch is a rewarding experience that elevates any dessert. There’s an unparalleled satisfaction that comes from transforming basic ingredients into something so delicious and tender. While it’s certainly tempting, and perfectly acceptable, to use a store-bought crust – a convenient option I’ve utilized successfully myself when time is short – I genuinely believe in the superior taste and texture of a homemade crust. The cold butter incorporated into the flour creates pockets of steam during baking, resulting in those coveted flaky layers. Don’t be intimidated; the “rustic” nature of a crostata means there’s less pressure for perfection, making it an excellent opportunity to hone your pastry skills.
Step-by-Step Instructions for Rustic Apple Crostata: A Visual Guide
Crafting this **charming apple crostata** is a straightforward process that yields incredibly delicious results. Follow these steps carefully to achieve a golden, flaky crust and a perfectly spiced, tender apple filling:
First, begin with the dough preparation: Start by combining chilled, cubed butter with flour, a touch of sugar, and salt. The key here is to work quickly, incorporating the butter until the mixture resembles coarse meal with pea-sized pieces of butter still visible. This is vital for a flaky crust. Gradually add ice-cold water, a tablespoon at a time, mixing gently with a fork until the dough just comes together. Avoid overworking the dough to prevent toughness. Once formed, flatten it into a disk, wrap it tightly, and chill it in the refrigerator for at least 20-30 minutes, or even longer.
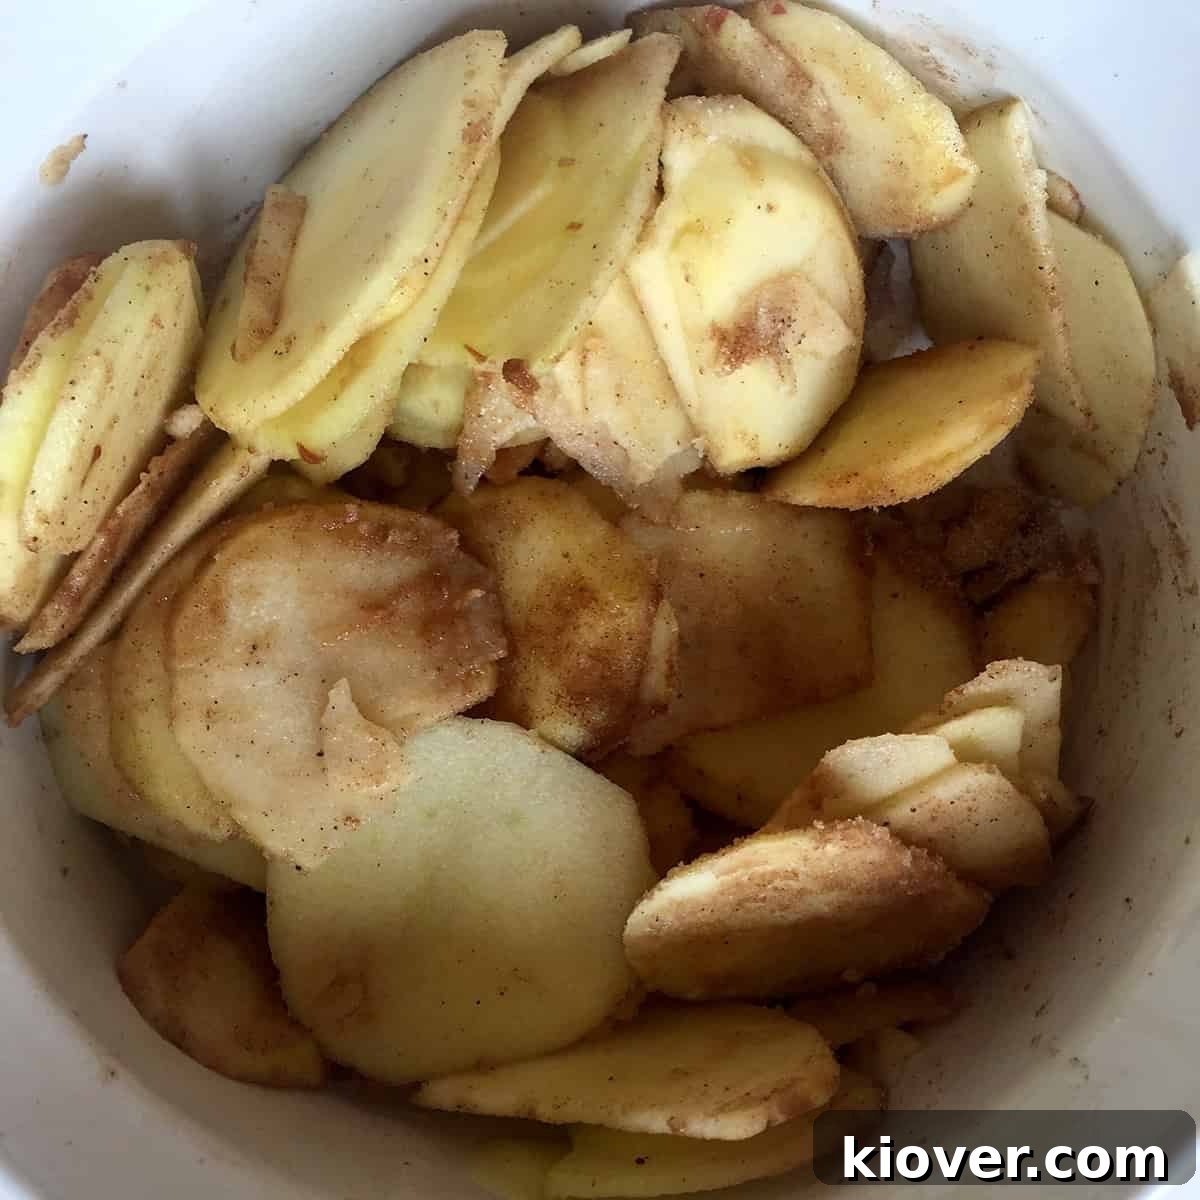
While your dough chills, prepare the irresistible apple filling: Peel, core, and slice your Braeburn apples into uniform pieces, about 1/4-inch thick. This ensures even cooking. In a separate bowl, toss the sliced apples with sugar, flour (to absorb excess moisture and thicken the juices), cinnamon, and nutmeg. Make sure every apple slice is evenly coated with the aromatic spice mixture.
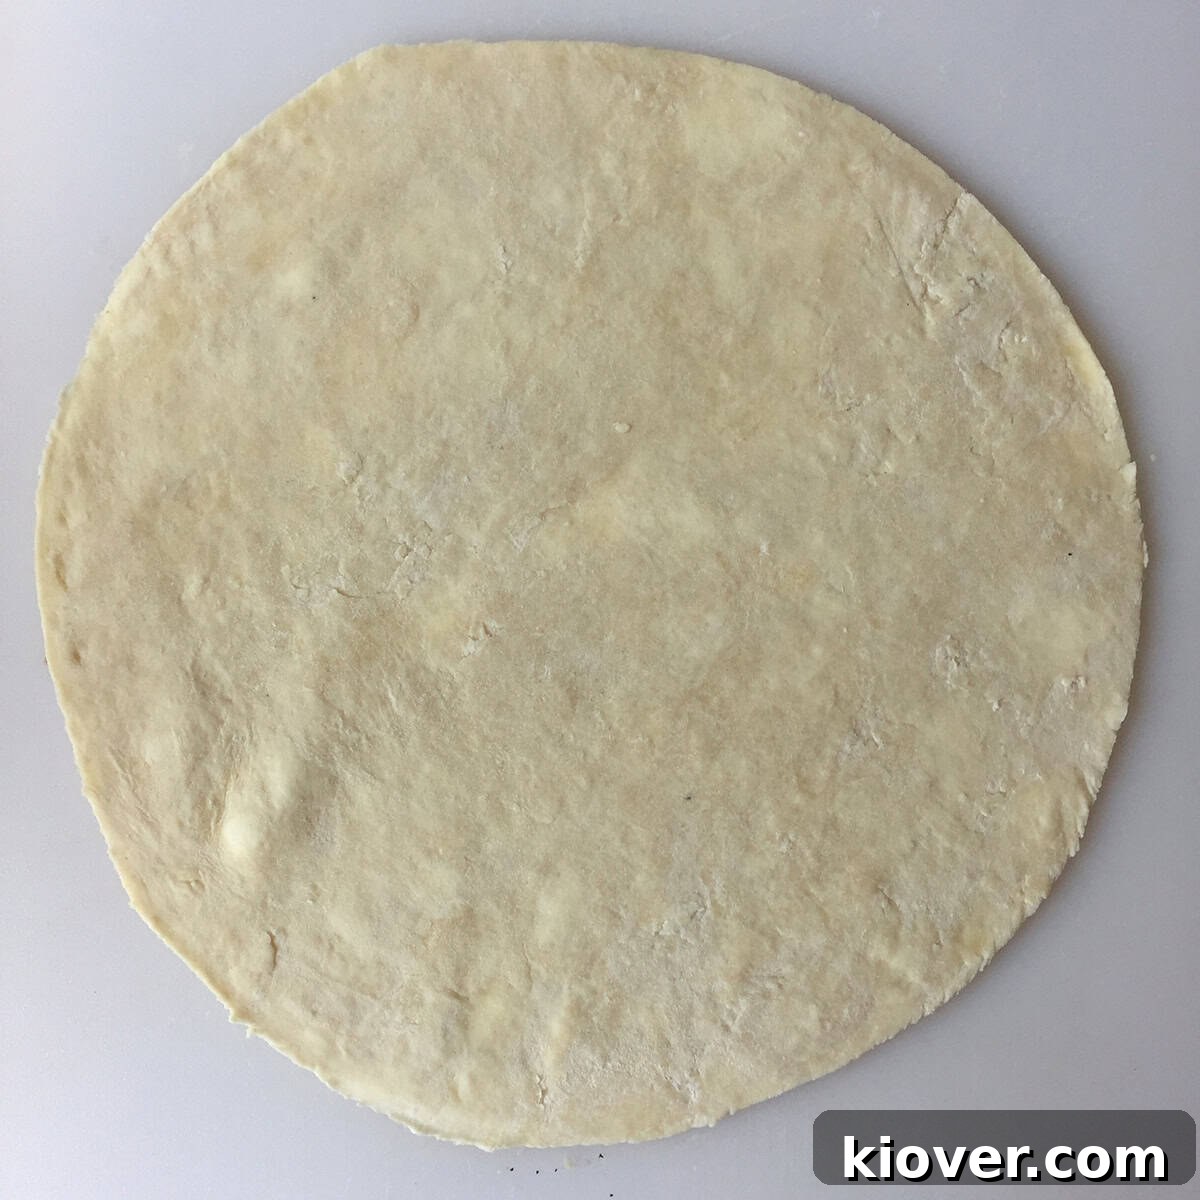
Next, it’s time to assemble your crostata: Once the dough is adequately chilled, lightly flour your work surface and roll it out into a large, roughly 12-14 inch circle, about 1/8-inch thick. Don’t worry about perfect edges; the rustic look is part of its charm! For a more uniform base, you can place a large glass bowl face down on the rolled dough and use a knife to trim around it, creating a neat disk. While a crostata is inherently rustic, a somewhat uniform disk can lead to more even baking and a slightly more refined finished product.
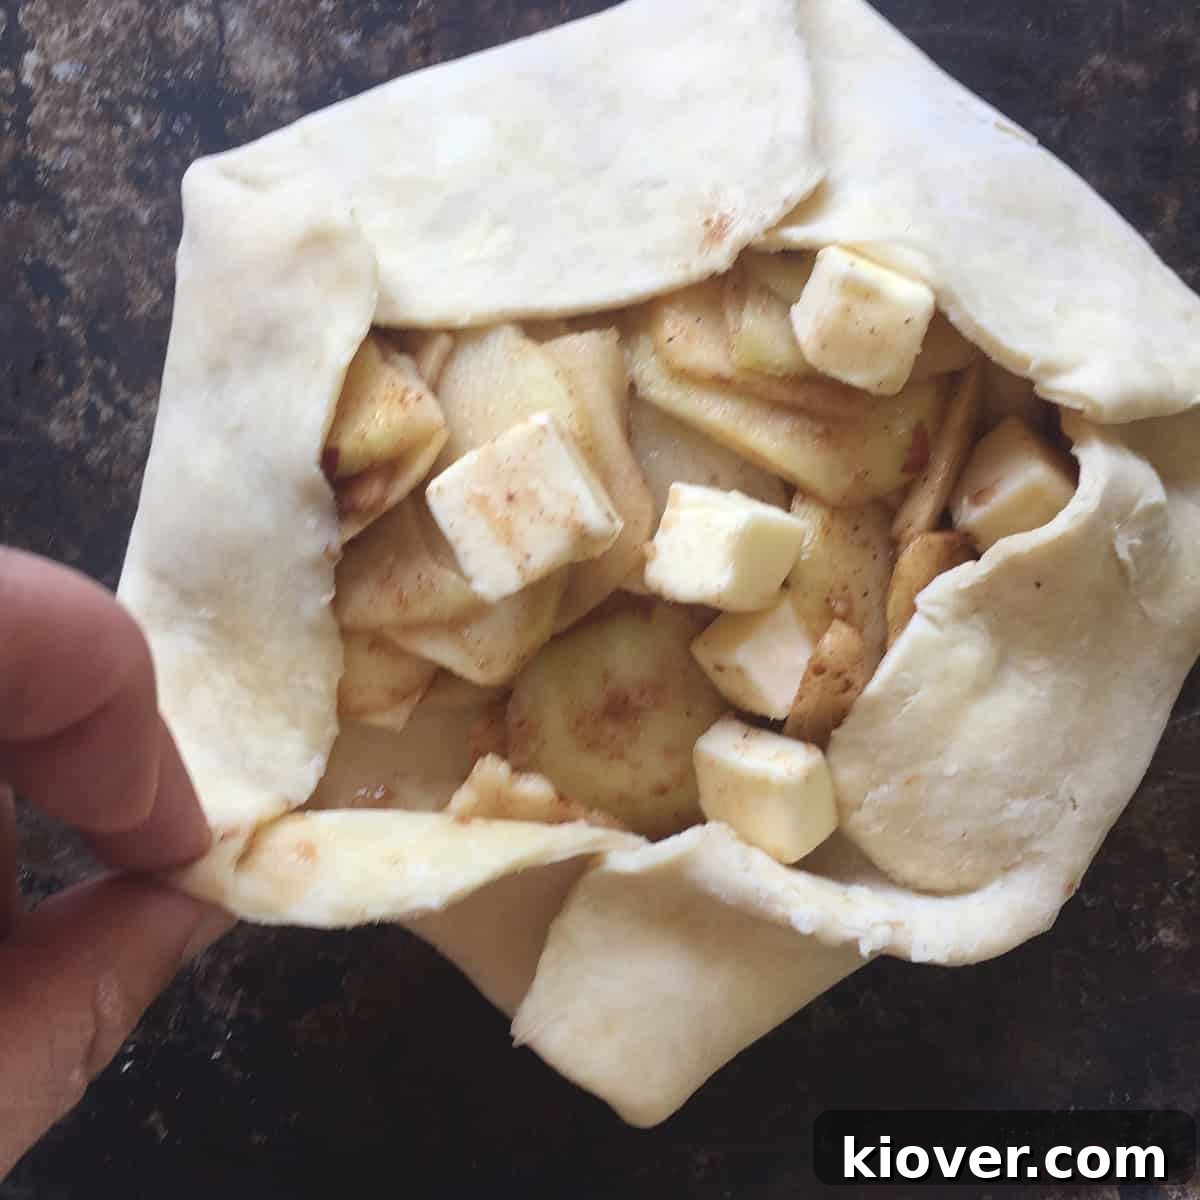
Now, for the filling and folding: Carefully transfer your rolled dough to a parchment-lined baking sheet. Spoon the apple mixture into the center of the dough, leaving a generous 2-inch border all around. Dot the top of the apples with small pieces of butter – this will add richness and help create a beautifully glossy topping. Then, gently fold the edges of the dough up and over the apples, overlapping the pastry as you go, leaving the center of the filling exposed. Lightly press the folds to secure them.
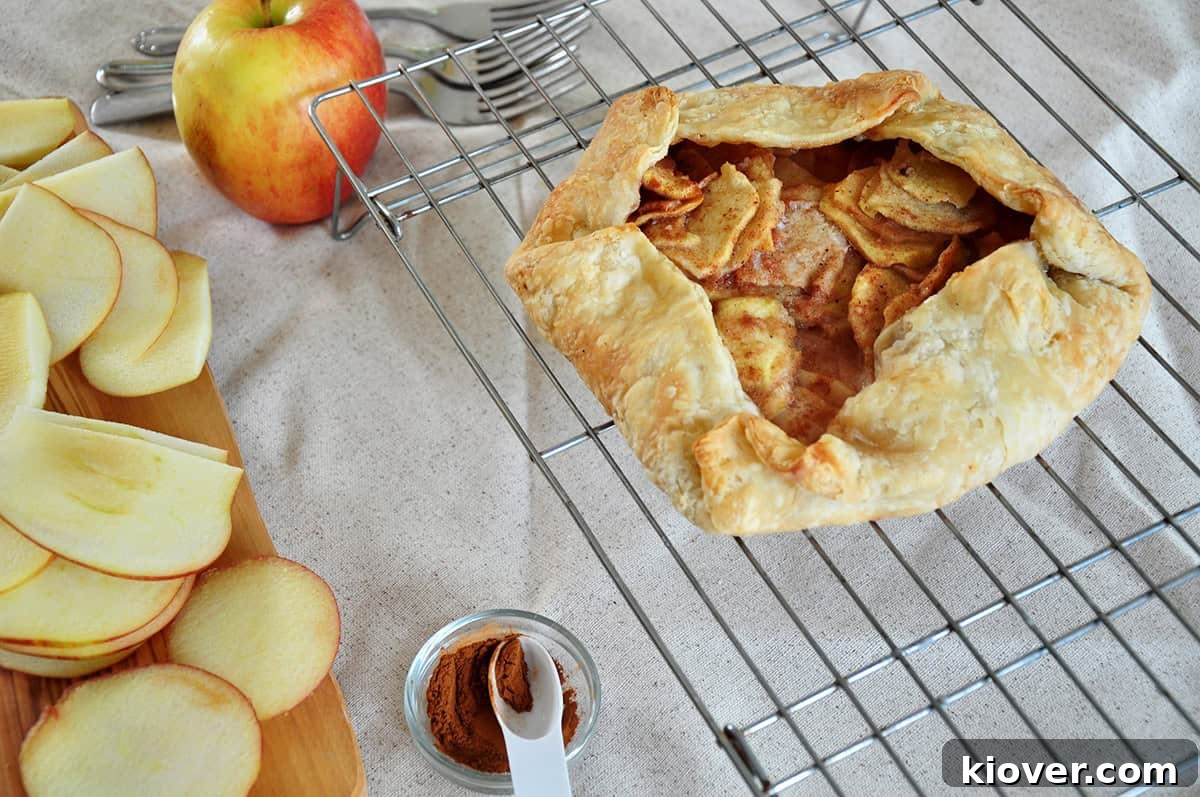
Finally, bake to golden perfection: Preheat your oven to 425°F (220°C). Bake the crostata for about 20 minutes at this higher temperature to help the crust brown and become flaky. After 20 minutes, reduce the oven temperature to 375°F (190°C) and loosely cover the exposed apple center with aluminum foil to prevent it from browning too quickly. Continue baking for another 20-30 minutes, or until the crust is deeply golden brown and the apple filling is bubbling and tender when pierced with a knife. Allow the crostata to cool on the baking sheet for at least 30 minutes before transferring it to a wire rack to cool completely. This cooling period is crucial for the filling to set, ensuring the best texture when slicing and serving.
Substitutions and Variations: Customizing Your Crostata
One of the many delights of baking a **rustic crostata** is how adaptable it is to different tastes and seasonal ingredients. Feel free to get creative and make this **easy apple dessert** truly your own! Here are some ideas for exciting substitutions and variations:
- Apple Varieties: While Braeburns offer a perfect balance, experiment with other apple types. For a tarter, more classic apple pie flavor, opt for Granny Smith apples. If you prefer a sweeter profile, Honeycrisp or Fuji apples are excellent choices. A mix of two or three varieties can add complexity to the filling.
- Spice It Up: Beyond cinnamon and nutmeg, consider adding a pinch of ground cardamom for an exotic warmth, a touch of allspice for a deeper, complex note, or even a hint of ginger for a zesty kick. A dash of vanilla extract in the apple mixture can also enhance the overall flavor.
- Crust Convenience: Short on time? A store-bought pie crust or puff pastry sheet works wonderfully and significantly cuts down on prep time. Just ensure it’s thawed according to package directions. You can also explore gluten-free flour blends to make this **homemade crostata** suitable for those with dietary restrictions.
- Add a Nutty Crunch: Before folding the edges, sprinkle chopped walnuts, pecans, or almonds over the apple filling for added texture and a rich, nutty flavor. You can also mix them directly into the apple filling.
- Flavor Boosters: A tablespoon of lemon juice tossed with the apples can brighten the flavor and prevent excessive browning. A splash of bourbon or apple brandy can also add a sophisticated depth to the filling.
- Seasonal Fruit Swaps: While this is an **apple crostata**, the beauty of a crostata is its versatility with fruits. In summer, try peaches, berries, or plums. In colder months, pears or a mix of apples and pears are fantastic. Adjust sugar levels based on the sweetness of your chosen fruit.
- Finishing Touches: For extra shine and a hint of sweetness, brush the exposed crust with an egg wash (one egg yolk whisked with a tablespoon of water) and sprinkle with coarse sugar (like turbinado or demerara) before baking. A light dusting of powdered sugar after baking, or a drizzle of caramel sauce, vanilla bean glaze, or a scoop of vanilla ice cream, takes this **rustic dessert** to another level.
Storing Your Apple Crostata for Freshness
Proper storage is key to enjoying your **homemade apple crostata** for as long as possible while maintaining its delicious flavor and flaky texture. Here’s how to keep it fresh:
- Room Temperature: For up to two days, you can store the crostata loosely covered with aluminum foil or plastic wrap at room temperature. Ensure it’s in a cool, dry place. This is ideal for enjoying the crispness of the crust.
- Refrigeration: To extend its freshness, refrigerate the crostata for up to four days. Again, cover it loosely to prevent condensation from making the crust soggy.
- Reheating: To bring back that freshly baked warmth and crispness, pop individual slices or the whole crostata into a preheated 350°F (175°C) oven for about 10-15 minutes, or until warmed through and the crust is revitalized.
- Freezing: For longer storage, the crostata freezes beautifully. Once completely cooled, wrap it tightly in several layers of plastic wrap, followed by aluminum foil. It can be stored in the freezer for up to three months. To serve, thaw the crostata in the refrigerator overnight, then warm it in the oven as described above before serving. Freezing individual slices makes it convenient for a quick treat!
A Sweet Taste of History: The Crostata Story
The crostata is more than just a dessert; it’s a culinary artifact with a rich history that stretches back centuries into the heart of Italian kitchens. Often referred to as a “rustic tart” or “rustic pie,” this delightful pastry embodies the simplicity and resourcefulness of traditional Italian cooking. Its origins are believed to trace back to Naples, where it evolved as a versatile dish made with whatever seasonal fruits, jams, or even savory fillings were available to home cooks.
What truly defines the crostata, and distinguishes it from its more formal tart and pie cousins, is its characteristic free-form shape. This casual elegance stems from the fact that it traditionally requires no special pie dish or tart pan; it’s baked directly on a baking sheet, with its edges simply folded over the filling. This technique not only makes it incredibly accessible but also gives it that charming, homemade, and unpretentious appearance that we adore today. Over time, as Italian culinary traditions spread, the crostata adapted to various regional flavors and ingredients, solidifying its place as a beloved staple in Italian homes and pastry shops alike. Its enduring appeal lies in its ability to marry simple ingredients with a straightforward method, delivering a deeply satisfying and visually appealing dessert that stands the test of time.
Frequently Asked Questions About Apple Crostata
Absolutely! While Braeburn apples offer a fantastic balance, many varieties work beautifully. Tart apples like Granny Smith can provide a lovely contrast to the sweetness, while sweeter apples such as Honeycrisp, Fuji, or Gala will contribute more natural sugar and a softer texture. Feel free to mix and match for a more complex flavor profile!
A food processor certainly speeds up the process, but it’s not essential. You can easily make the dough by hand using a pastry cutter, two knives, or even your fingertips. The goal is to cut the cold butter into the flour until it resembles small peas, ensuring a flaky crust. Just be mindful not to overwork the dough with your warm hands, as this can melt the butter and lead to a tough crust.
Yes, absolutely! Preparing the dough in advance is a great time-saver. You can make the dough and refrigerate it, tightly wrapped in plastic wrap, for up to 2-3 days. For longer storage, you can freeze the dough for up to a month. Just remember to thaw it overnight in the refrigerator before you plan to roll it out and assemble your crostata.
The terms “crostata” and “galette” are often used interchangeably, and they essentially describe the same thing: a free-form pastry that can be filled with either sweet or savory ingredients. They are characterized by their rustic, open-faced appearance, baked on a flat baking sheet without the need for a specific pan. For our recipe, we’re using delicious apples as the filling for our **apple crostata**.
A tart, while similar in concept, is defined by the vessel it’s baked in. Tarts are typically baked in a specialized tart pan, which often has fluted sides and a removable bottom. This results in a more structured, polished appearance compared to the charmingly irregular edges of a crostata or galette.
To prevent a soggy crust, ensure your apples are sliced relatively thin and tossed with a tablespoon of flour (as the recipe suggests) to absorb excess moisture. Baking at a higher initial temperature also helps to “shock” the crust and make it crisp. Make sure your oven is fully preheated before putting the crostata in. Using a metal baking sheet instead of glass can also promote a crispier bottom.
Certainly! Apples pair wonderfully with many other fruits. Consider adding a handful of fresh cranberries or raspberries for a tart counterpoint and beautiful color. Sliced pears can also be a delightful addition, blending seamlessly with the apple and spice flavors.
Expert Tips and Tricks for the Perfect Crostata
Achieving a truly spectacular **Rustic Apple Crostata** is easier than you think, especially with a few insider tips:
- Keep Everything Cold: This is the golden rule for a flaky pastry. Ensure your butter is ice-cold and cut into small cubes, and use ice-cold water when mixing the dough. This prevents the butter from melting into the flour too quickly, creating those desirable pockets of steam that result in flaky layers during baking. Chill the dough at every possible step.
- Don’t Overfill: One common pitfall in this **apple crostata recipe** is trying to use too much fruit. While a generous filling is tempting, overfilling can make it difficult to fold the edges neatly, leading to a messy appearance and potentially uneven baking. For two medium Braeburn apples (as specified in our recipe), aim for a balanced mound that allows the crust to fold gracefully over the edges. A balanced crostata is a beautiful crostata, and it bakes more consistently too.
- Embrace the Rustic: Remember, a crostata’s charm lies in its imperfection. Don’t stress about a perfectly round crust or uniform folds. The beauty is in its homemade, free-form nature. Enjoy the process and the unique character of your creation.
- Uniform Apple Slices: While you’re embracing the rustic aesthetic, strive for relatively uniform thickness when slicing your apples. This ensures that all the apple pieces cook evenly, giving you a consistent tender texture throughout the filling.
- Egg Wash for Shine: For a beautiful golden sheen and extra crispness, brush the visible pastry edges with an egg wash (one egg yolk whisked with a tablespoon of water or milk) before baking. You can also sprinkle coarse sugar over the egg wash for a sparkling, sweet crunch.
- Parchment Paper is Your Friend: Always roll out your dough and bake your crostata on parchment paper. This prevents sticking, makes cleanup a breeze, and allows for easy transfer to a cooling rack.
- Cool Completely: Patience is a virtue, especially when it comes to fruit tarts. Allowing the crostata to cool completely (ideally for at least two hours) before slicing ensures that the fruit filling sets properly, preventing a runny slice and allowing the flavors to meld beautifully.
- Listen to Your Oven: Oven temperatures can vary. Keep an eye on your crostata during baking. If the crust is browning too quickly, especially the edges, you can tent the entire crostata loosely with foil. If the center apples are browning too fast, cover just the middle with foil as instructed.
Kitchen Tools for Baking Your Crostata
Having the right tools can make the baking process even smoother. While many items are common kitchen staples, here are a few specific products that will help you create a perfect **rustic apple crostata**:
- Glass Bowls: Essential for mixing ingredients, especially for chilling butter and combining the apple filling. Their transparency also helps you see the mixture easily.
- Cookie Sheet: A sturdy baking sheet is crucial for baking your free-form crostata. Ensure it’s heavy-duty to prevent warping at high temperatures and promote even browning.
- Food Processor: While not strictly necessary, a food processor makes quick work of cutting cold butter into the flour for your pie crust, ensuring a perfectly flaky result with minimal effort.
- Rolling Pin: To roll out your dough evenly.
- Parchment Paper: For a non-stick surface and easy cleanup.
- Pastry Cutter or Two Knives: If you don’t have a food processor, these are excellent for cutting butter into flour by hand.
- Measuring Cups and Spoons: For accurate ingredient quantities.
- Sharp Knife: For peeling and slicing apples.
Share Your Apple Crostata Creation!
We absolutely love seeing your culinary creations! If you’ve given this **Rustic Apple Crostata recipe** a try, we’d be thrilled to hear about your experience. Your feedback helps us improve and guides other home bakers in their journey. Please consider leaving a rating and a comment in the section below – it’s a huge help and genuinely appreciated. It lets us know how we’re doing and encourages others to discover the joy of this delicious dessert. Most of all, thank you for visiting Ramshackle Pantry and for sharing in our passion for simple, wholesome, and incredibly tasty homemade food.
Print Recipe
Rustic Apple Crostata Recipe
- Author: Ben
- Prep Time: 1 hour
- Cook Time: 30-40 minutes
- Total Time: 1 hour 30 minutes (plus cooling)
- Yield: 6 pieces
- Category: Dessert
- Method: Baking
- Cuisine: Italian
Description
This Rustic Apple Crostata is as impressive as a traditional pie but requires only half the effort. It’s a truly delicious apple dessert that celebrates the rich traditions of Italian pastries, apple-focused sweets, and comforting baked goods. We use a fantastic homemade butter pie crust filled with perfectly spiced, tender real apples, creating an unforgettable culinary experience.
Ingredients
For the Crust:
- 1 stick (1/2 cup) unsalted butter, very cold and cut into 1/2-inch cubes
- 1 1/4 cups all-purpose flour
- 1/2 Tablespoon granulated sugar
- 1/2 teaspoon salt
- 1/4 cup ice-cold water (approximate, may need a little more or less)
For the Apple Filling:
- 2 Medium Braeburn Apples, peeled, cored, and finely sliced
- 1/3 cup granulated sugar
- 1 Tablespoon all-purpose flour
- 1/2 teaspoon ground cinnamon
- 1/2 teaspoon ground nutmeg
- 2 Tablespoons unsalted butter, chopped into small pieces (for dotting on top)
Instructions
- Prepare the Butter: Cut 1 stick (1/2 cup) of unsalted butter into 1/2-inch cubes. Place the cubed butter in the freezer for at least 20 minutes to ensure it’s very cold.
- Combine Dry Ingredients: In a food processor, combine 1 ¼ cups flour, ½ tablespoon sugar, and ½ teaspoon salt. Pulse a few times to thoroughly mix.
- Incorporate Butter into Flour: After the butter has chilled, add it to the food processor with the dry ingredients. Pulse 5-6 times in short bursts. The goal is to mix the butter into the flour until the butter pieces are no smaller than peas and still visible.
- Add Water Gradually: Transfer the flour and butter mixture to a large bowl. Add the ice-cold water, 2 tablespoons at a time, tossing gently with a fork after each addition. Continue until the dough just begins to come together when squeezed in your hand. Be careful not to add too much water; the dough should be shaggy but cohesive.
- Form and Chill Dough: Gently gather the dough and form it into a flattened disk. Avoid overworking the dough to maintain flakiness. Wrap the disk tightly in plastic wrap and place it in the freezer for 20 minutes, or in the refrigerator for at least 30 minutes to 1 hour.
- Prepare Apple Filling: While the dough chills, peel, core, and finely slice the 2 medium Braeburn apples. In a large bowl, combine ⅓ cup sugar, 1 Tablespoon flour, ½ teaspoon cinnamon, and ½ teaspoon nutmeg. Add the sliced apples to this mixture and toss gently until all apple slices are evenly coated.
- Preheat Oven: Preheat your oven to 425°F (220°C). Line a large baking sheet with parchment paper.
- Roll Out Dough: Remove the chilled dough from the freezer and unwrap it. On a lightly floured surface, roll out the dough into a large circle, approximately 12-14 inches in diameter and about 1/8-inch thick. If desired, use a large glass bowl (around 12 inches) placed face down on the dough as a guide to cut a uniform circle with a knife.
- Assemble Crostata: Carefully transfer the rolled dough onto the prepared baking sheet. Place the apple mixture in the center of the dough, leaving a 2-inch border around the edges. Distribute the 2 tablespoons of chopped butter evenly over the top of the apple filling.
- Fold Edges: Gently fold the edges of the dough over the apple filling, overlapping the pastry as you go, leaving the center apples exposed. Lightly press the folds to create a rustic, sealed edge (refer to images for visual guidance).
- Initial Bake: Place the crostata in the preheated oven and bake for 20 minutes at 425°F (220°C).
- Reduce Heat and Continue Baking: After 20 minutes, reduce the oven temperature to 375°F (190°C). Loosely cover the exposed apple center with aluminum foil to prevent excessive browning. Continue baking for an additional 20-30 minutes, or until the crust is golden brown and the apple filling is bubbling and tender when poked.
- Cool and Serve: Remove the crostata from the oven and allow it to cool on the baking sheet for at least 30 minutes, then transfer to a wire rack. It is crucial to allow it to rest for at least 1-2 hours before slicing to allow the filling to set properly.
- Enjoy: Slice and serve your delicious homemade Rustic Apple Crostata. It’s fantastic on its own or with a scoop of vanilla ice cream!
Notes
- For a quicker option, you can certainly forgo the homemade dough and use a good quality store-bought pie crust. Adjust baking times as per package instructions if necessary.
- Be mindful not to overfill your crostata with too much fruit. While the filling is incredibly tasty, using more than two medium apples can make it challenging to fold the crust neatly and might lead to uneven cooking or a soggy bottom. A balanced amount of filling ensures a beautiful and perfectly baked crostata.