
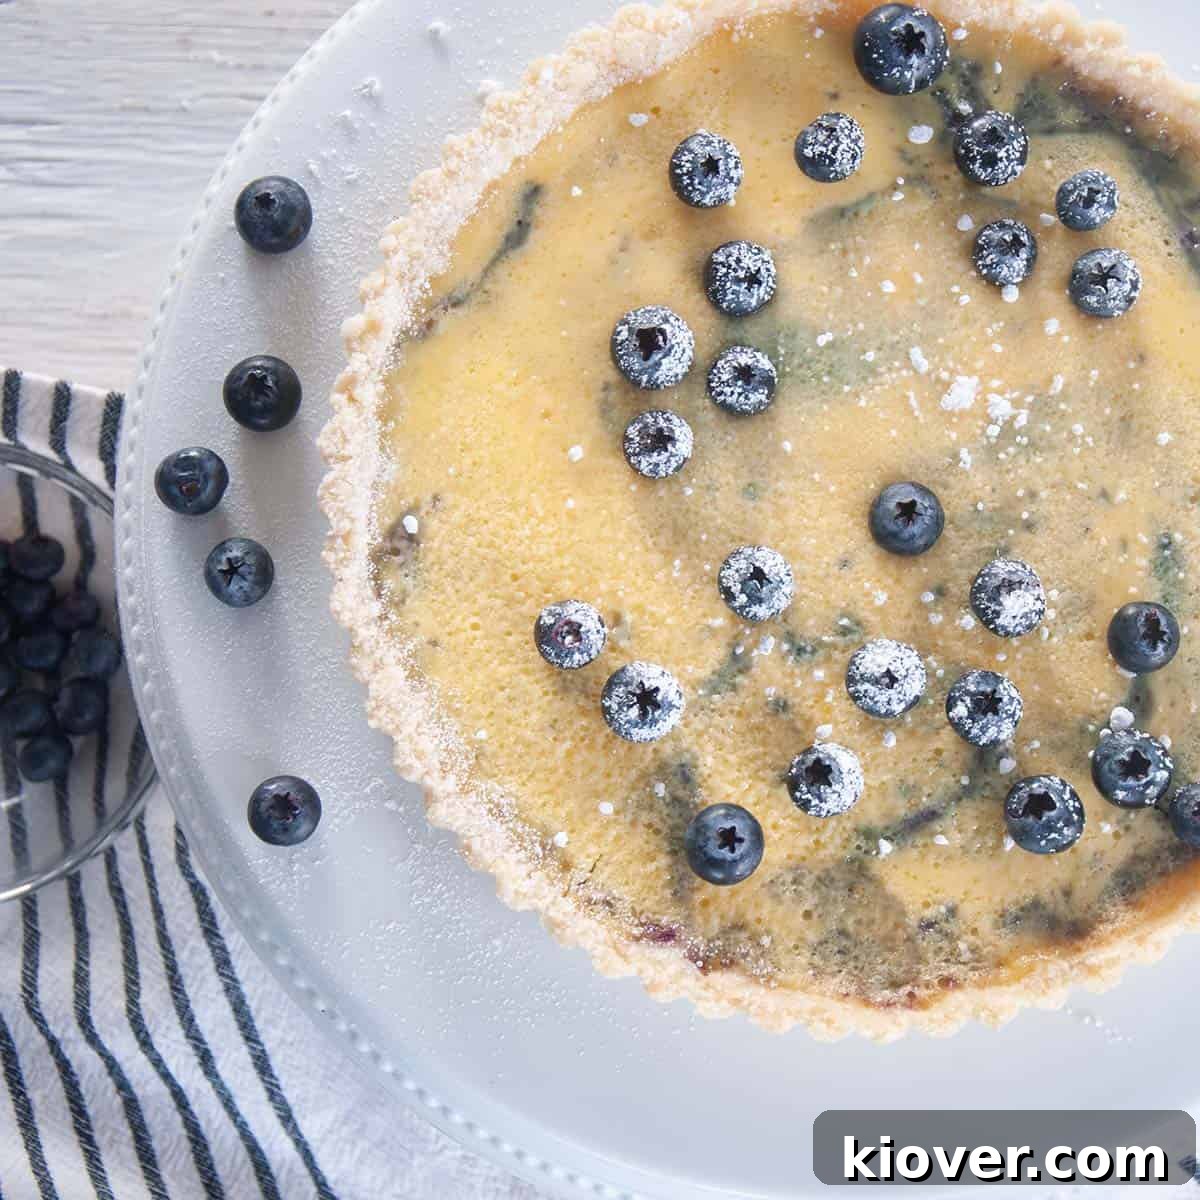
Delight your senses with this exquisite Blueberry Tart, a dessert that masterfully blends the vibrant flavors of fresh blueberries, the velvety richness of homemade custard, and the irresistible, buttery crumble of a perfect shortbread crust. This exceptional recipe promises a symphony of textures and tastes, creating a truly memorable culinary experience. Whether you’re a seasoned baker or new to the world of tarts, this detailed guide will help you craft a dessert that is as beautiful to behold as it is delicious to eat. Prepare to impress your guests and satisfy your sweet cravings with this delicate yet bold creation.
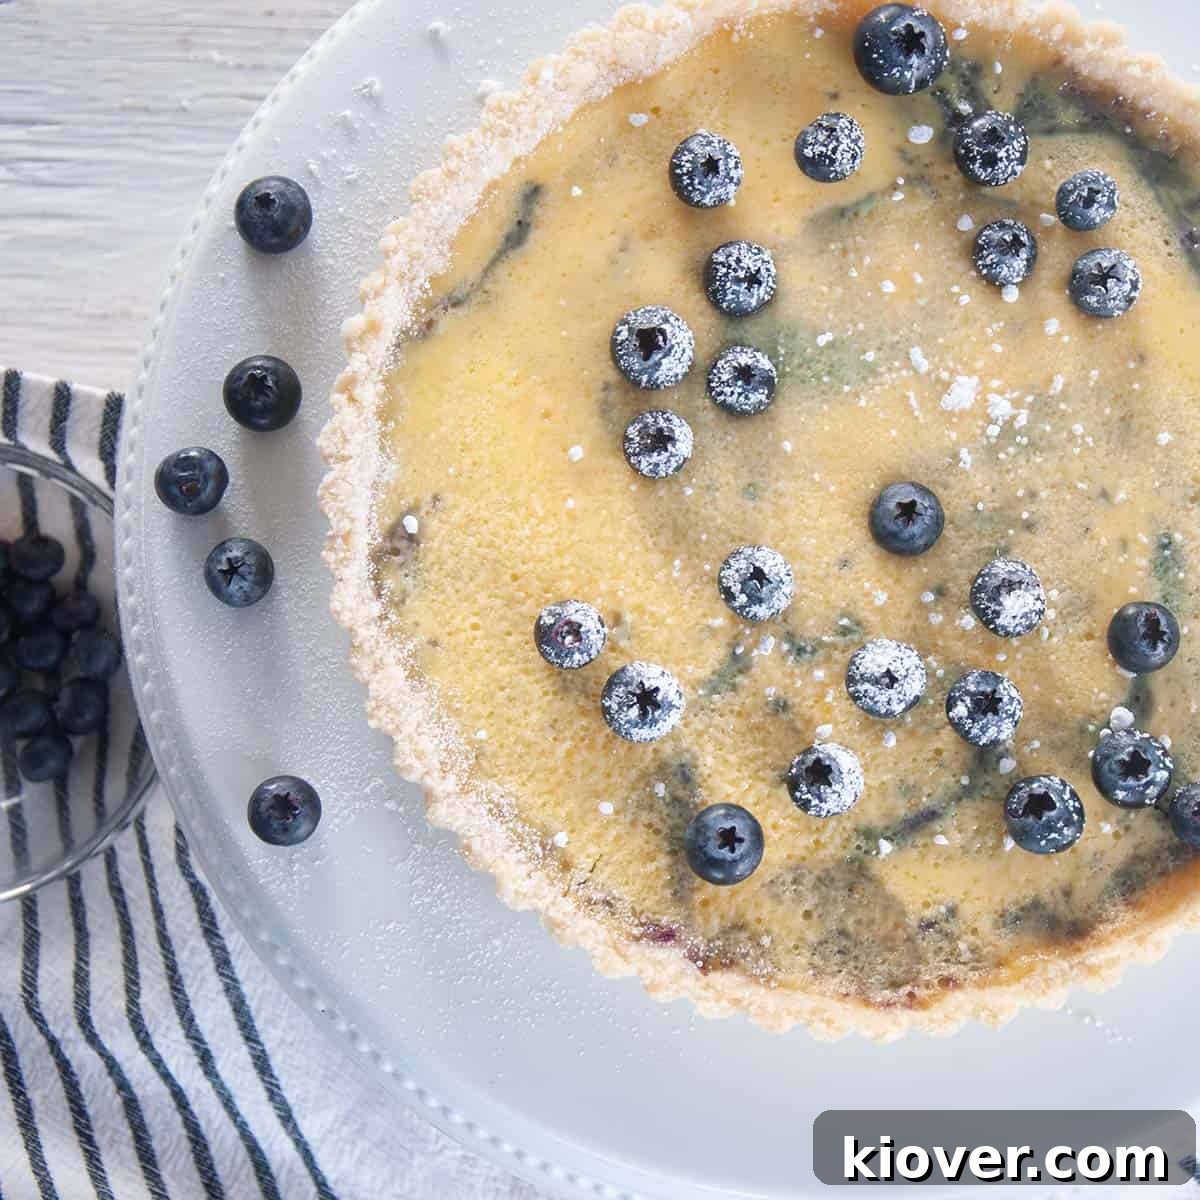
Discover the Uniqueness of This Homemade Blueberry Tart
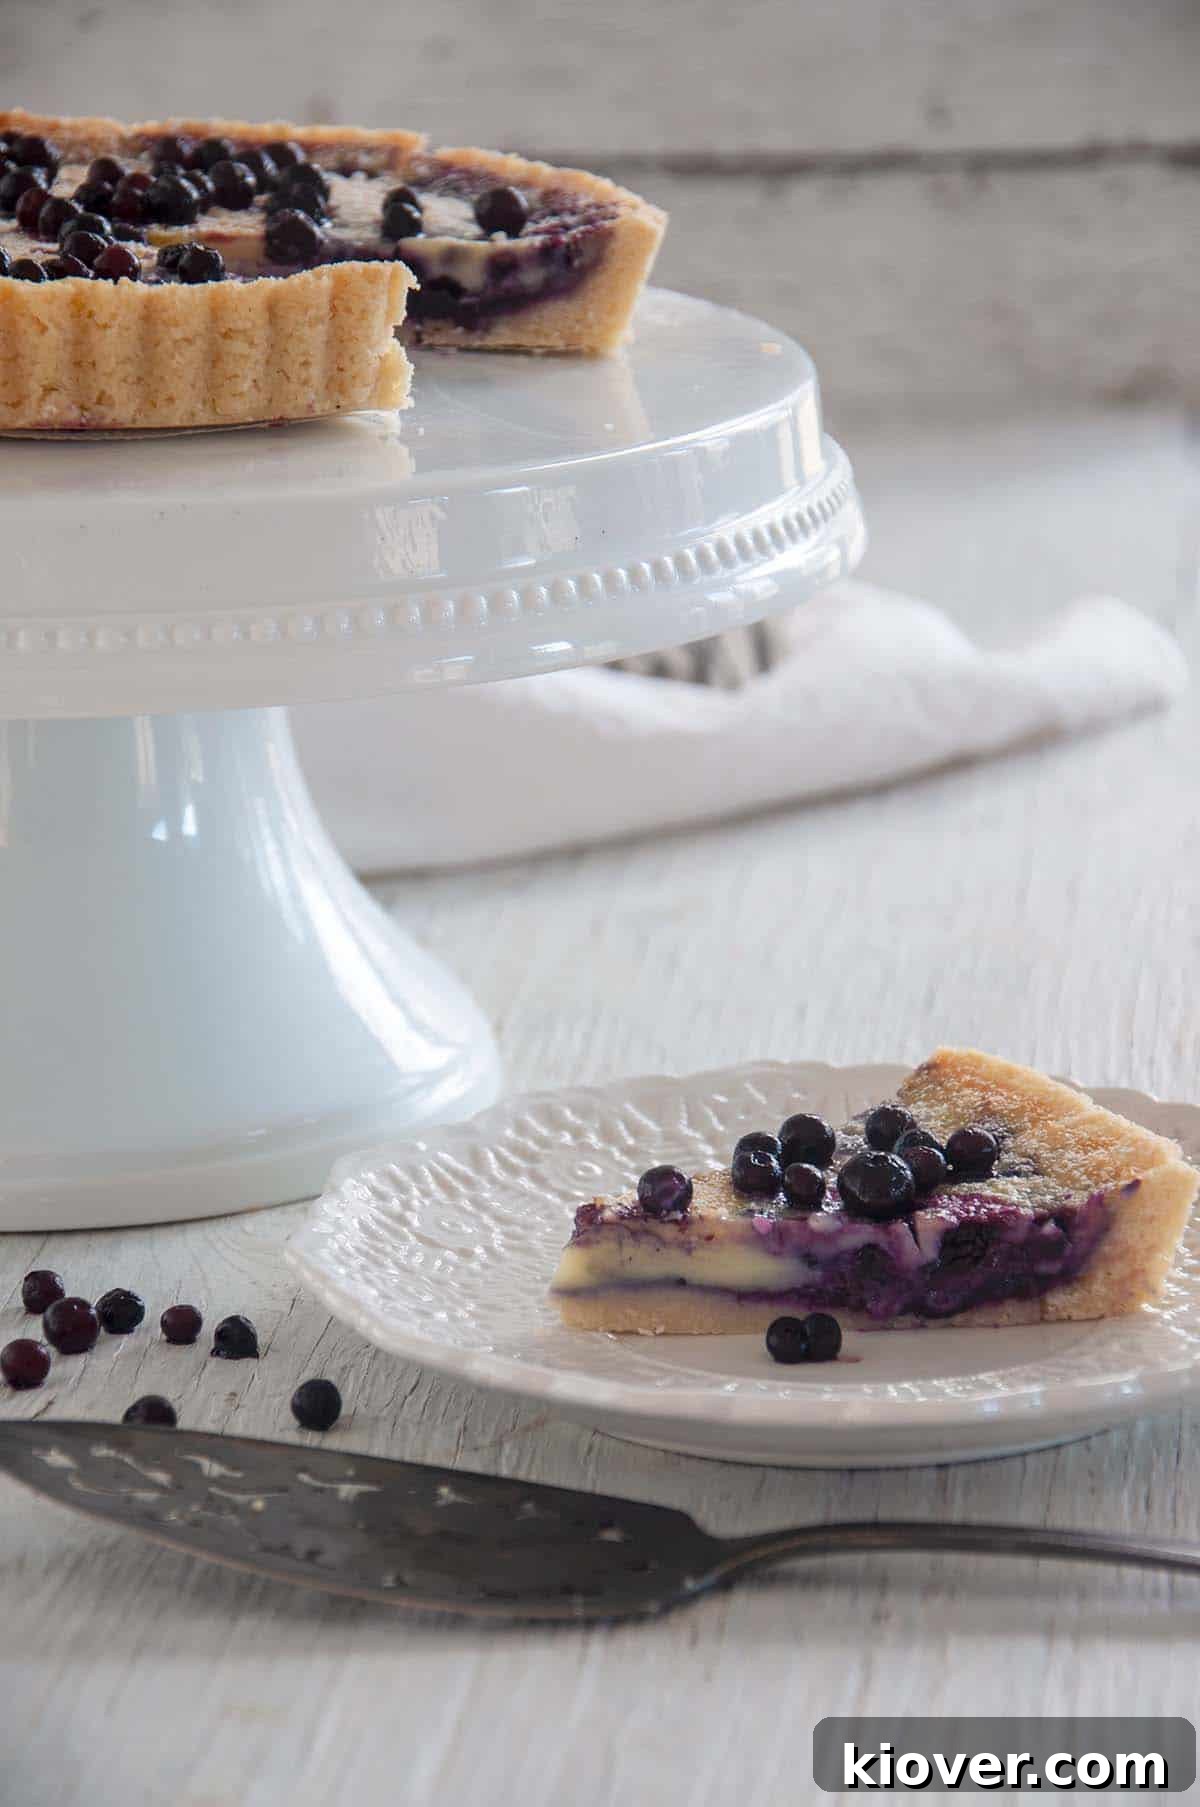
What sets this particular blueberry tart apart is the harmonious interplay of its three distinct, yet perfectly complementary, layers. Each component contributes a unique element, elevating a simple fruit dessert into a truly gourmet experience. The base is a delectable shortbread crust, offering a tender, crumbly texture with a rich, buttery flavor that provides a sturdy foundation for the layers above. Nestled within this crust is a luscious, creamy custard, baked to a silken perfection that melts in your mouth. Finally, a generous layer of plump, juicy blueberries, gently cooked to release their natural sweetness and vibrant tang, crowns this magnificent dessert. It’s a dessert that speaks to comfort and indulgence, perfect for any occasion, from a casual family gathering to a sophisticated dinner party. This is more than just a recipe; it’s an invitation to create a dessert that will be remembered long after the last bite.
Looking to explore other delightful homemade treats? Consider trying a Homemade Cookies and Cream Ice Cream Cake for a frosty delight, or perhaps a charming White Russian Mini Trifle recipe for an elegant individual serving. Whatever your preference, remember to savor these moments of sweet indulgence!
Blueberry Tart Recipe Overview: Crafting Perfection in Layers
Creating this splendid blueberry tart involves preparing its three core components separately before bringing them together for their final bake. This methodical approach ensures each layer achieves its optimal flavor and texture, resulting in a perfectly balanced dessert. You’ll begin by preparing the bright and fruity blueberry filling, followed by the rich and smooth custard, and finally, the tender and buttery shortbread crust. Once each is ready, they are artfully combined in the tart pan and baked until golden and set. Let’s delve into the specifics of each layer.
Crafting the Vibrant Blueberry Filling
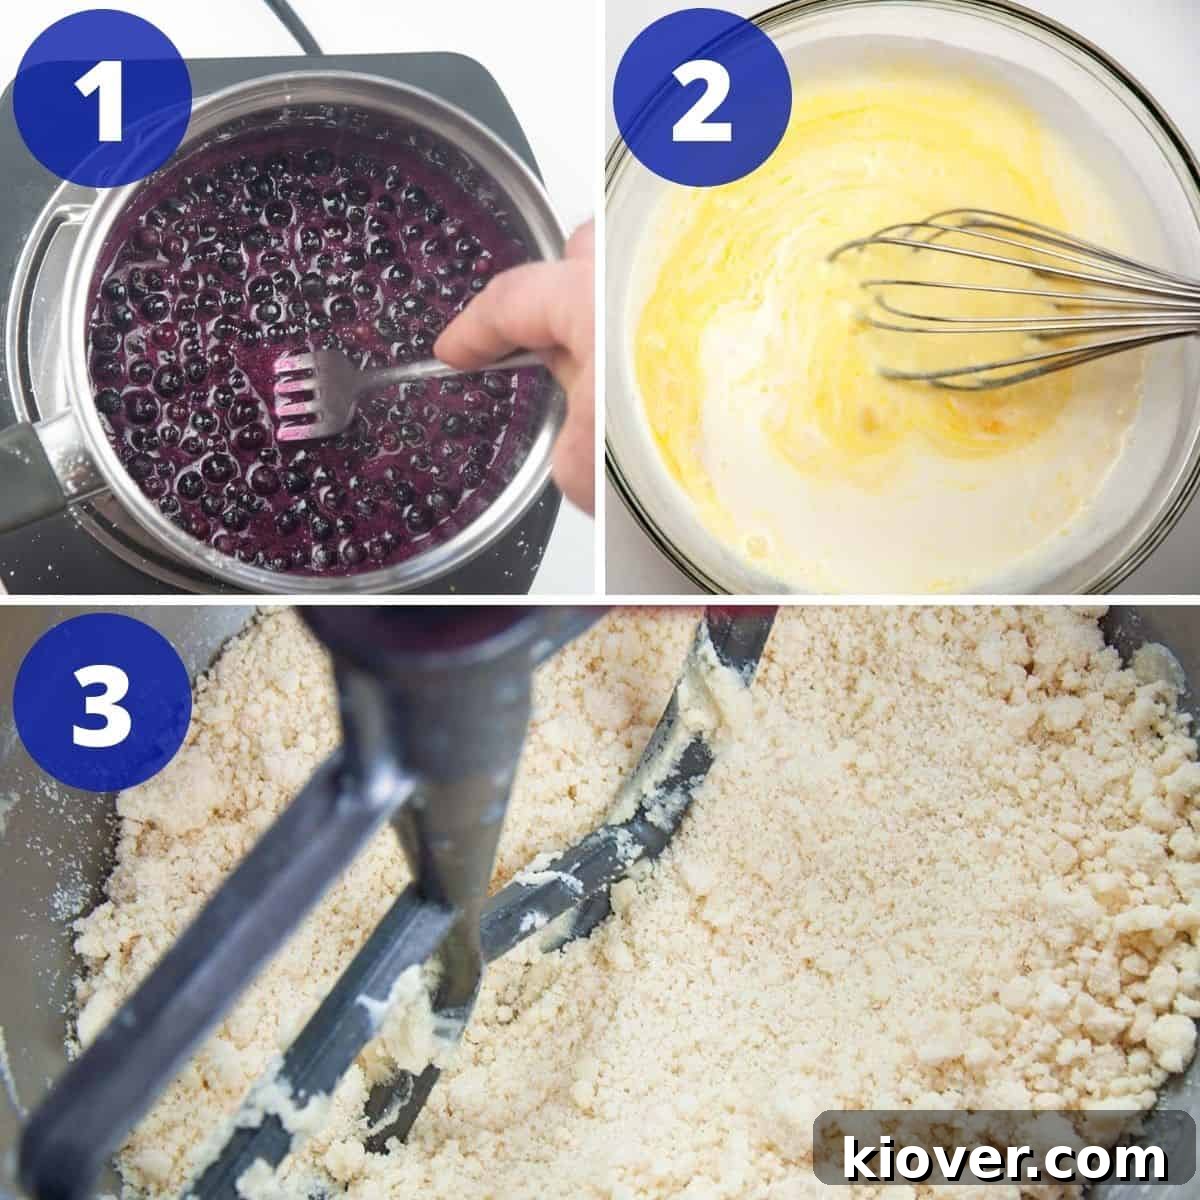
The blueberry filling is designed for both ease and maximum flavor. It begins with a simple combination of fresh or frozen blueberries, sugar, lemon juice, and cornstarch. As these ingredients gently heat on the stovetop, the blueberries naturally soften and begin to release their juices, creating a rich, flavorful base. A key step here is to gently mash some of the blueberries with a fork as they heat. This helps to break them down further, intensifying the color and ensuring a delightful mix of whole berries and a smooth, saucy consistency throughout the filling. The cornstarch acts as a thickening agent, ensuring the filling sets beautifully when cooled, providing structure without being overly firm. This results in a sweet yet tangy filling that truly captures the essence of fresh blueberries, making it a standout feature of the tart.
Preparing the Creamy Custard Filling
The custard layer provides a luxurious, creamy counterpoint to the fruity blueberries and crisp crust. This traditional custard is surprisingly simple to prepare: just whisk together heavy cream, eggs, vanilla extract, and sugar until thoroughly combined. The mixture should be smooth and homogenous, ready to transform in the oven. When baked, the custard will gently set into a rich, velvety layer that adds depth and comfort to the tart. The vanilla extract enhances the overall sweetness, while the eggs and cream lend a beautiful richness and texture that is both delicate and satisfying. This simple step is crucial for achieving the signature creaminess that defines this dessert.
Mastering the Buttery Shortbread Crust
The foundation of our blueberry tart is a classic shortbread crust, known for its incredible tenderness and rich, buttery flavor. This crust is prepared using a stand mixer with a paddle attachment, making the process straightforward. Begin by combining the flour, sugar, and a pinch of salt. Then, gradually add softened butter, allowing the paddle attachment to incorporate it into the dry ingredients. The goal is to achieve a consistent, crumbly texture that, when pressed, holds together. It’s important to mix on a low speed to avoid overworking the dough, which could lead to a tough crust. This careful attention to mixing ensures the shortbread remains delightfully tender and crumbly, providing the perfect contrast to the smooth fillings.
Assembling and Baking Your Blueberry Tart
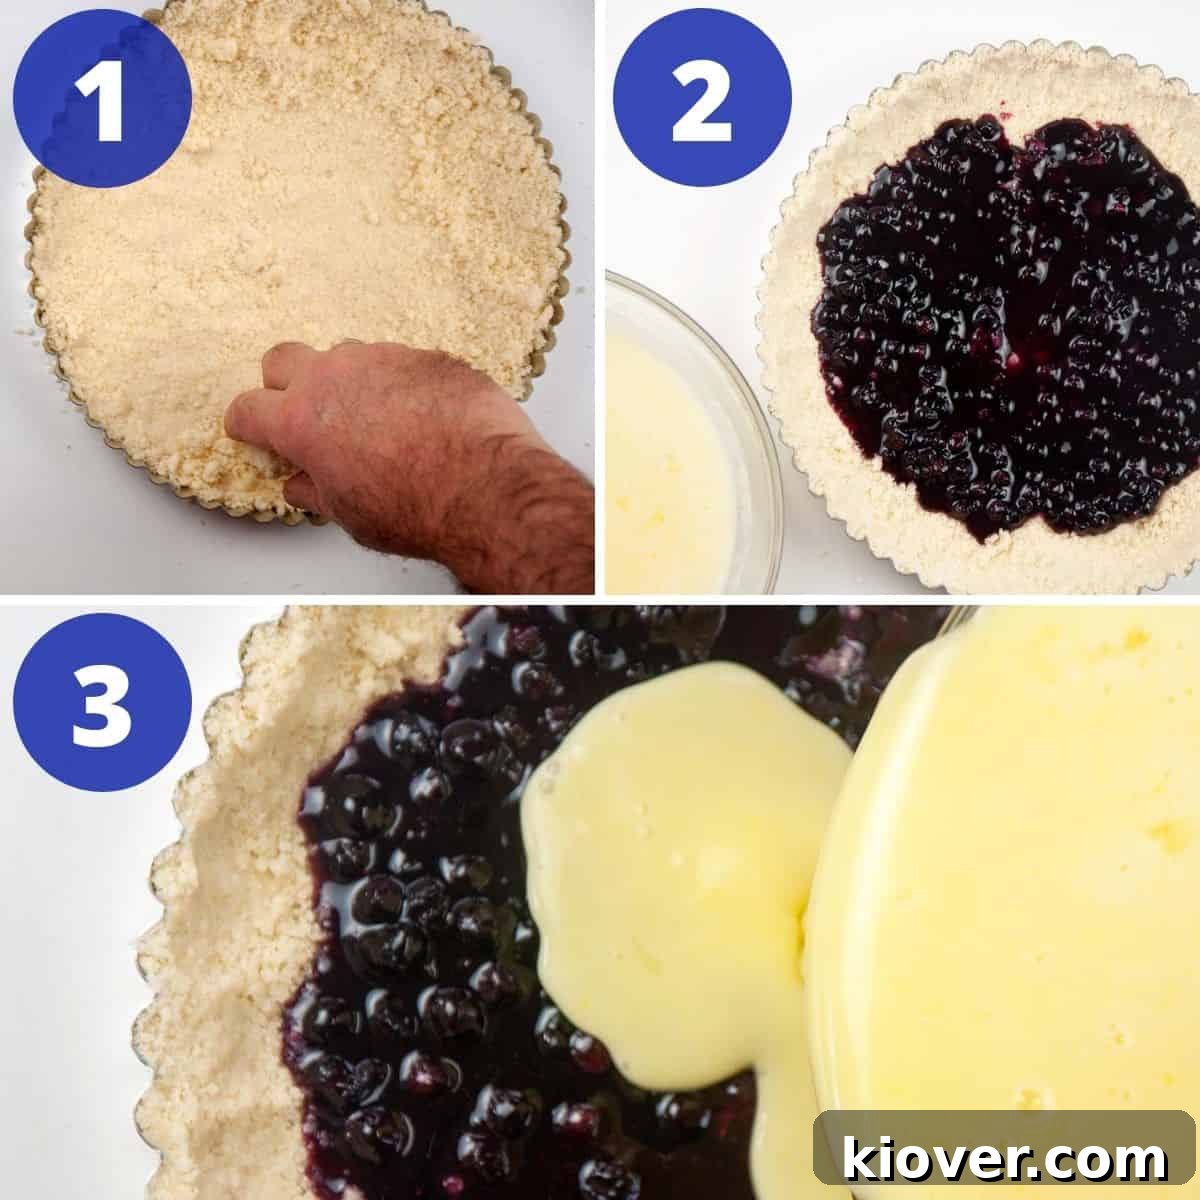
With all three components prepared, it’s time to bring them together. First, firmly pat the shortbread crumble into your tart pan, ensuring an even layer across the bottom and up the sides. This creates a solid base that will hold its shape. Next, carefully spoon the blueberry filling over the crust. Finally, pour the creamy custard over the blueberry layer. The tart is then baked in a preheated oven at 350° Fahrenheit (175°C) for approximately 45 minutes, or until the custard is set and the crust is golden. Once removed from the oven, patience is key: allow the tart to cool completely for at least three hours. This crucial cooling period allows the custard to fully set and the flavors to meld beautifully. After cooling, transfer the blueberry tart to the refrigerator until you are ready to serve, ensuring it is perfectly chilled and firm.
Secrets to a Perfect Shortbread Crust for Your Blueberry Tart
The shortbread crust is more than just a base; it’s a star player in this blueberry tart. This recipe follows a classic shortbread ratio of 1:2:3—one part sugar, two parts butter, and three parts flour—a foolproof formula for tender, melt-in-your-mouth results. I also incorporate a small amount of salt to enhance the butter’s flavor and balance the sweetness. Understanding the nuances of shortbread preparation will elevate your tart from good to truly exceptional.
To begin, combine the flour, sugar, and salt in your mixing bowl. Using a stand mixer with a paddle attachment on a low speed, gradually add the softened butter, about two tablespoons at a time. This slow incorporation allows the butter to evenly distribute throughout the dry ingredients, creating that signature crumbly texture. Resist the urge to add all the butter at once, as this can hinder proper mixing and lead to an uneven dough. The goal is a uniform crumble, not a dense, cohesive dough, which is why proper mixing technique is paramount.
Avoiding the Pitfall of Overmixing the Crust
One of the most common mistakes when making shortbread is overmixing the dough. Overmixing develops the gluten in the flour, which can result in a tough, unyielding crust instead of the desired tender, crumbly texture. What you’re aiming for is a mixture that resembles coarse crumbs or a consistent crumble, where the butter is fully integrated but the mixture still feels light and airy. If you continue to mix past this point, the dough will start to form a dense, sticky paste, indicating that the gluten has overdeveloped. Always keep an eye on the consistency; it should feel like wet sand that can be pressed together. Stopping at the right moment ensures a crust that truly melts in your mouth.
The Parchment Paper Advantage: Preventing Tart Sticking
One of the most frustrating aspects of baking tarts can be the crust sticking to the pan, especially with traditional metal tart pans. While the tart will still taste delicious, a beautifully sliced tart is far more appealing than a scooped-out mess. To circumvent this issue, I highly recommend using parchment paper for the bottom of your tart pan, especially if it’s not non-stick. Simply cut a circle of parchment paper to perfectly fit the removable bottom of your tart pan. This simple step creates a non-stick barrier that significantly aids in removal. While some delicate maneuvering will still be required to lift the tart from its fluted sides, the parchment paper provides crucial assistance, ensuring the bottom of your crust remains intact. This technique has saved many of my tarts from potential disaster!
Investing in the Right Tart Pan for Easy Release
While parchment paper is an excellent workaround, investing in a high-quality non-stick tart pan can simplify the process even further. Tart pans typically feature fluted edges and a removable bottom, which are essential for achieving that classic elegant look and for easy removal. A non-stick coating minimizes the risk of the crust adhering to the pan, making it much easier to release the finished tart without breakage. If you bake tarts frequently, a good non-stick pan is a worthwhile addition to your bakeware collection, providing peace of mind and consistently beautiful results.
Firmly Forming the Crust for Structural Integrity
Properly forming the shortbread crust in the tart pan is a critical step that ensures both an attractive appearance and structural integrity. Start by loosely spreading about a cup of the prepared crumble evenly over the bottom of the tart pan. Then, use the palm of your hand to firmly press the crumbs down, eliminating any gaps and creating a compact, even layer. Next, gently spread additional crumble around the edges of the pan. Using your fingertips, carefully press this crumble firmly into the fluted sides, building up an even wall. Pay close attention to any areas that appear thin and add more crumble, pressing it in firmly until the entire crust is uniform in thickness. Don’t worry if you have a small amount of shortbread crumble leftover; it’s better to have too much than too little. Any excess can be saved for another use or simply enjoyed as a little treat!
Achieving a Polished Look: Even Out the Crust Edges
For a truly professional and refined finish, take a moment to even out the top edge of your tart crust. As you press the crumble into the sides, some may rise slightly above the rim of the tart pan. To achieve a neat and level edge, simply take a butter knife or the straight edge of a small spatula and carefully trim away any excess crust that extends beyond the pan’s top. This simple technique creates a clean, crisp edge that not only looks appealing but also helps ensure even baking. If, after leveling, you find any areas that look a bit sparse, you can gently press a small amount of trimmed crust back into place. This small detail makes a big difference in the final presentation of your beautiful blueberry tart.
All About the Delicious Blueberry Filling
The blueberry filling for this tart is designed to be a vibrant burst of fruity flavor, thickened just enough to hold its shape when sliced. It’s essentially a simple fruit sauce, made substantial with the addition of cornstarch. My experiments with varying amounts of cornstarch led to this precise measurement, which creates a beautifully thick yet tender filling that sets perfectly once cooled. Using too little cornstarch can result in a runny, messy tart, while too much can make the filling overly stiff. This balanced approach ensures a luscious consistency that complements the other layers.
Beyond the cornstarch, the filling relies on just a few key ingredients: fresh or frozen blueberries, sugar for sweetness, and a touch of lemon juice. The lemon juice is crucial; it not only brightens the flavor of the blueberries, preventing the filling from tasting overly sweet, but also enhances the natural tanginess of the fruit, creating a well-rounded and irresistible taste profile.
Exploring Other Fruit Variations for Your Tart
While this recipe shines with blueberries, the versatility of this tart base allows for exciting fruit substitutions. I believe most other berries would be an excellent choice, with raspberries being a particularly fantastic 1:1 substitute. Their tartness and juicy texture would blend seamlessly with the shortbread and custard. Other fruits like blackberries, sliced strawberries, or even a mixed berry blend could work beautifully as well. However, be aware that fruits vary in moisture content and natural pectin, so some minor adjustments to the cornstarch quantity might be necessary. If you’re an adventurous baker and comfortable with a little experimentation, I highly encourage you to explore different seasonal fruits to customize this delightful tart to your liking. Imagine a summer peach tart or a fall apple variation!
The Simplicity and Richness of the Custard Filling
The custard filling is the epitome of simple elegance. Its preparation couldn’t be easier: merely combine all the liquid ingredients thoroughly until smooth. The magic happens in the oven, where the heat transforms this liquid mixture into a firm, creamy, and wonderfully rich custard. When pouring the custard over the blueberries, don’t fret if the layers mix slightly; this is perfectly normal and won’t detract from the final taste or texture. The slight mingling creates an interesting visual and flavor blend within each slice, adding to the homemade charm of the tart. This velvety layer is essential for balancing the tartness of the blueberries and the buttery richness of the crust, making every bite a delight.
Expert Tips for Seamlessly Removing Your Tart from the Pan
For many bakers, removing a finished tart from its pan without damaging the delicate crust can be the trickiest part of the entire process. The key to success lies in careful preparation and patience. Firstly, as emphasized before, either use a high-quality non-stick tart pan or meticulously line the bottom with a circle of parchment paper. This simple step is your best defense against the crust adhering to the pan’s base.
Even with these precautions, some sticking can still occur, and the tart remains fragile until fully set and chilled. Therefore, handle it with the utmost care. Never attempt to force the tart out of the pan immediately after baking or while it’s still warm. The crust and custard need ample time to cool and solidify. Allow the tart to cool at room temperature for at least three hours, and then transfer it to the refrigerator to chill thoroughly. Once it’s completely cold, the tart will be much sturdier. To remove it, gently push up the removable bottom from underneath, allowing the fluted ring to slide away. Take your time, don’t rush the process, and handle the tart delicately. Even if a small piece of the crust breaks, remember that it will still taste absolutely incredible!
A Glimpse into the Rich History of Shortbread and Tarts
Behind every delicious recipe lies a fascinating history, and our Blueberry Tart is no exception, with roots stretching back centuries across different cultures. The delectable shortbread crust, for instance, boasts a noble lineage. According to historical accounts, shortbread originated in Scotland as far back as the 12th century. Initially, it evolved from medieval biscuit bread, a twice-baked, enriched bread dough. Over time, yeast was replaced with butter, transforming it into the rich, crumbly shortbread we know today. It was considered a luxury item, often reserved for special occasions and festivities, a testament to the expense of ingredients like sugar and butter in earlier times. This makes perfect sense; in culinary history, white granular sugar was a rare and costly commodity, making any dessert so generously rich in both sugar and butter a true treat for the privileged few.
While shortbread has Scottish origins, the concept of a tart may trace its roots to France. An intriguing article suggests that tarts gained popularity after being baked by two sisters working at a hotel, with their creation spreading rapidly through other establishments. My own travels to France have certainly confirmed this culinary tradition. I have vivid, wonderful memories of strolling through French pastry shops, captivated by the endless rows of beautifully crafted fruit tarts. These elegant pastries, often showcasing seasonal fruits in vibrant displays, are a staple of French patisserie. This rich heritage adds another layer of appreciation to every slice of this blueberry tart, connecting us to centuries of baking tradition.
Essential Blueberry Tart Baking Tips
- Choose Your Pan Wisely: For easiest removal, use a non-stick tart pan with a removable bottom, or diligently line the bottom of a standard tart pan with parchment paper.
- Flavorful Variations: Don’t hesitate to experiment with other berries. Raspberries, blackberries, or a mix of your favorite seasonal fruits can create exciting new flavor profiles. Adjust cornstarch slightly for fruits with higher moisture.
- Patience During Cooling: Allow the tart to cool completely for at least three hours at room temperature, then chill in the refrigerator before attempting to remove it from the pan or slice. This ensures the custard sets properly and the crust is firm.
- Delicate Removal: When removing the tart from the pan, proceed slowly and gently. The crust is fragile, especially before it’s fully chilled. If it cracks, don’t worry—it will still taste amazing!
- Garnish for Elegance: A dusting of powdered sugar or a handful of fresh berries makes for a beautiful and simple topping, enhancing both the look and taste. A dollop of whipped cream or vanilla ice cream is also a delightful addition.
- Proper Storage: Always store your finished blueberry tart in the refrigerator to maintain its freshness and firm consistency. It tastes best when served chilled.
- Ingredient Quality Matters: Using high-quality butter and fresh blueberries will significantly impact the overall flavor and texture of your tart.
- Don’t Overwork the Crust: Mix the shortbread crust just until it forms a uniform crumble to ensure a tender, rather than tough, result.
Recommended Baking Tools for This Recipe
- 9” Tart Pan: Essential for achieving the classic tart shape and easy serving.
- Pie Server: A sturdy server makes it easy to portion and serve slices cleanly.
- KitchenAid mixer: A stand mixer is highly recommended for efficiently preparing the shortbread crust.
Share Your Culinary Creation!
Thank you for choosing to try this delightful Blueberry Tart recipe! I poured my heart into perfecting it, and I genuinely hope it brings as much joy to your kitchen and palate as it does to ours. If you’ve baked this tart and loved the results, please consider leaving a rating and sharing your feedback below. Your reviews are incredibly valuable; they not only help other aspiring bakers decide if this recipe is right for them but also provide me with valuable insights. Most importantly, thank you for visiting Ramshackle Pantry and for being a part of our culinary journey!
Print Recipe
Blueberry Tart
- Author: Ben
- Prep Time: 30 minutes
- Cook Time: 45 minutes
- Total Time: 1 hour 15 minutes (plus cooling)
- Yield: 8 Servings
- Category: Dessert
- Method: Bake
- Cuisine: French
Description
If you are looking for a creamy, sweet, crumbly baked dessert, this Blueberry Tart is for you. The ingredients are all very simple and the flavor is so special. Give this baked treat a try today.
Ingredients
For Blueberry Filling:
- 1 cup blueberries (fresh or frozen)
- ½ cup sugar
- ½ teaspoon lemon juice
- 2 tablespoons corn starch
For Custard:
- 1 cup heavy cream
- 2 eggs
- 1 teaspoon vanilla extract
- 1 cup sugar
For Crust:
- 1 ½ cups all-purpose flour
- ¾ cup softened unsalted butter
- 6 tablespoons granulated sugar (¼ cup + 2 tablespoons)
- ½ teaspoon salt
Instructions
- Prepare Blueberry Filling: Combine all blueberry filling ingredients in a saucepan. Heat over medium heat, stirring occasionally.
- Mash Blueberries: Once the mixture begins to warm, gently mash some of the blueberries with a fork to release their juices and enhance color.
- Thicken Filling: Continue heating until the mixture starts to bubble and thicken. Remove from heat and allow to cool slightly.
- Prepare Custard and Crust: While the blueberry filling cools, prepare the custard and shortbread crust.
- Make Custard: In a separate bowl, thoroughly whisk together all custard ingredients until smooth.
- Begin Crust: In a stand mixer fitted with a paddle attachment, combine flour, 6 tablespoons of sugar, and salt.
- Add Butter: With the mixer on low speed, gradually add the softened butter, about 2 tablespoons at a time, until fully incorporated.
- Achieve Crumbly Texture: Continue mixing until the crust ingredients resemble a uniform, moist crumble. Use a rubber spatula to scrape down the sides of the bowl to ensure even mixing. Be careful not to overmix.
- Preheat Oven: Preheat your oven to 350°F (175°C).
- Prepare Tart Pan: If not using a non-stick pan, cut a circle of parchment paper to fit the bottom of your tart pan.
- Form Crust Base: Loosely spread about a cup of the shortbread crumble onto the bottom of the tart pan, then firmly press it down with your hand to create an even, compact layer.
- Form Crust Sides: Loosely add more crumble around the edges of the pan, then use your fingers to press it firmly up the sides, creating an even wall.
- Refine Crust: Add any additional crumble to thin areas on the bottom or sides, pressing firmly to ensure a tight, uniform crust.
- Level Edges: Use a butter knife or a flat surface to carefully remove any excess crust from the top edges of the tart pan for a clean finish.
- Leftover Crumble: It’s fine if there’s some crumble leftover; you can discard it or enjoy it as a snack.
- Add Blueberry Filling: Spoon the cooled blueberry filling evenly over the prepared crust.
- Add Custard: Carefully pour the custard mixture over the blueberry filling.
- Bake Tart: Gently place the tart on the middle rack of the preheated oven and bake for 45 minutes, or until the custard is set and the crust is golden.
- Cool Thoroughly: Remove from the oven and allow the tart to cool completely at room temperature for at least 3 hours.
- Remove from Pan: Once fully cooled and set, carefully remove the tart from its pan. Handle with care, as the crust can be fragile. (If it breaks, it will still be delicious!)
- Serve or Store: Enjoy immediately, or refrigerate until ready to serve.
Notes
- Use a non-stick tart pan or line the bottom with parchment paper for easier removal.
- Feel free to substitute other berries for different flavors, adjusting cornstarch slightly if needed.
- Allow ample cooling time (at least 3 hours) before removing from the pan and slicing to ensure the custard is set.
- Garnish with powdered sugar and fresh fruit for a beautiful presentation.
- Store any leftover tart in the refrigerator.
Nutrition
- Serving Size: 1/8 of tart
- Calories: 527 calories
- Sugar: 49 g
- Sodium: 311 mg
- Fat: 31 g
- Saturated Fat: 18 g
- Unsaturated Fat: 13 g
- Carbohydrates: 63 g
- Fiber: 1 g
- Protein: 3 g
- Cholesterol: 132 mg