
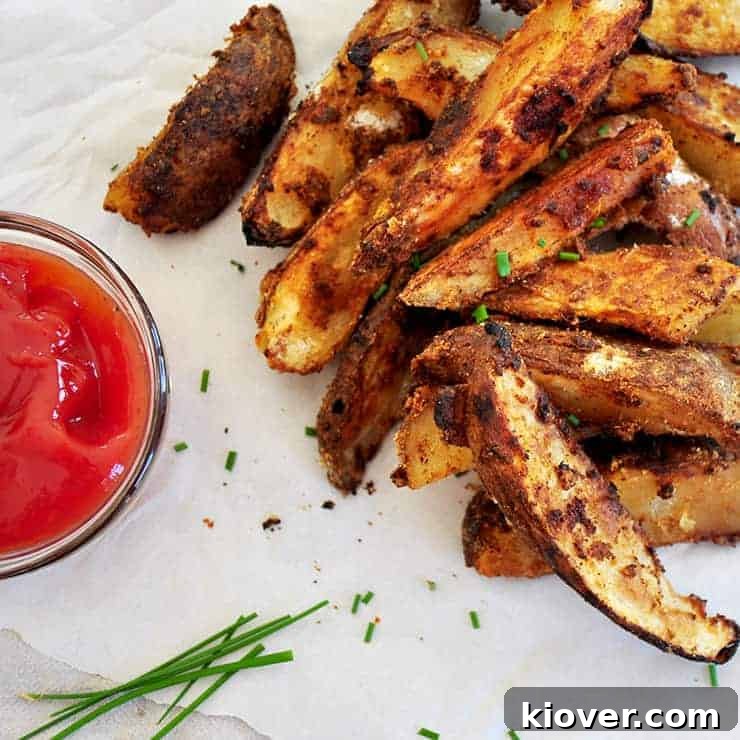
Mastering Grilled Jo Jos: Your Ultimate Guide to Perfectly Seasoned Potato Wedges
There’s nothing quite like the sizzle of the grill during the warmer months, and while burgers and steaks often steal the show, it’s the sides that truly complete a backyard feast. These seasoned grilled potatoes, affectionately known as Jo Jos, have become a beloved staple in our home throughout the Summer grilling season. Offering a delightful departure from traditional fries or baked potatoes, Grilled Jo Jos are an outstanding way to elevate your potato game, infusing your dishes with fantastic flavors perfect for any backyard gathering or even a simple weeknight meal.
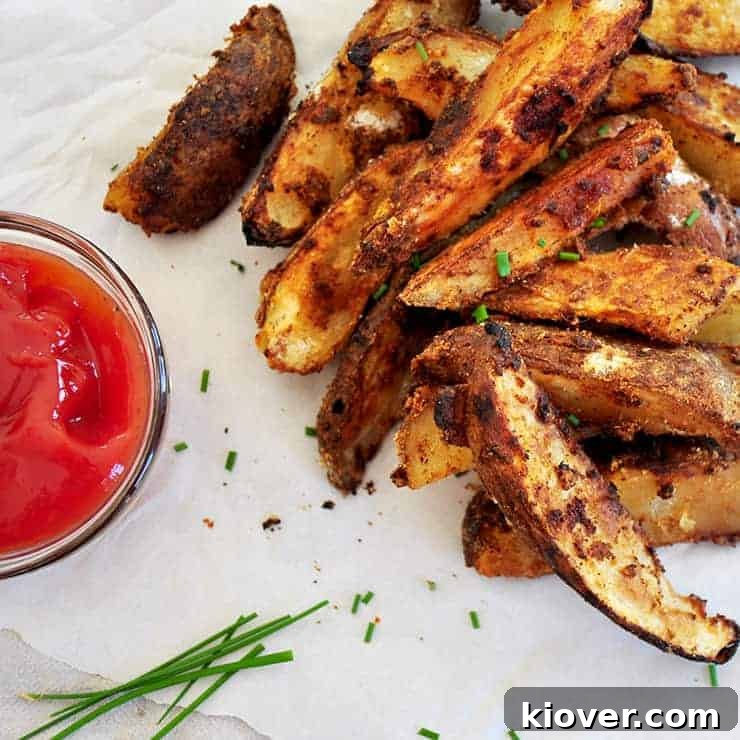
What Exactly Are Jo Jos? Unveiling the Beloved Potato Wedge
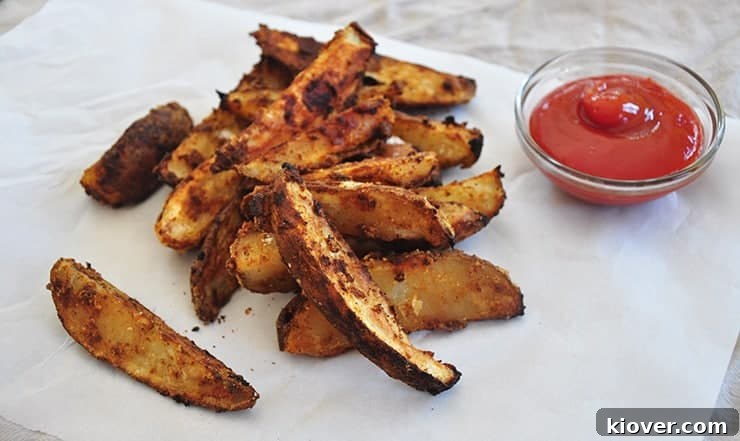
For those unfamiliar with Jo Jos, prepare for a potato revelation! Jo Jos are essentially hearty potato wedges, generously seasoned and cooked to achieve a delightfully crispy exterior while remaining wonderfully tender and fluffy on the inside. If you’ve had the pleasure of encountering them before, you already know the irresistible appeal of these flavorful potato treats. They offer a unique texture and taste profile that sets them apart from other potato preparations.
At their core, Jo Jos are seasoned potato wedges, larger and more substantial than standard french fries, yet not as heavy as a full baked potato. Traditionally, they are coated with various flavorings, spices, or even a light breading. While some versions might be deep-fried for extra crispness, the essence of a Jo Jo leans towards a more wholesome, often baked or, in our case, grilled preparation. When someone asks about Jo Jos, the best way to describe them is “lightly coated, seasoned, and perfectly cooked potato wedges.” We’re confident that once you try this grilled Jo Jo recipe, it will become a go-to side dish, pairing perfectly with anything from classic hamburgers to a gourmet grilled steak.
Nostalgia on a Plate: The Comfort of Jo Jos
For many, Jo Jos evoke a strong sense of nostalgia, reminding us of simpler times and cherished family meals. Here in our town, Duane’s House of Pizza is a local institution, a cornerstone of Fargo-Moorhead’s rich restaurant history, having opened its doors way back in 1959. Beyond their legendary thin-crust pizza, they are renowned for their incredible fried chicken and, of course, their signature Jo Jo potatoes.
Growing up, ordering Duane’s Pizza was always a special occasion. While the pizza was undoubtedly a highlight, the anticipation of those Jo Jos was always just as strong. I have countless fond memories of gathering with my cousins, aunt, and uncle, sharing laughter and stories over plates piled high with this comforting food. The mighty Jo Jo wasn’t just a side dish; it was a catalyst for connection, a shared experience that cemented its place in our family’s culinary lore. This recipe aims to bring that same feeling of comfort and deliciousness right to your backyard.
Choosing the Perfect Potato for Your Jo Jos
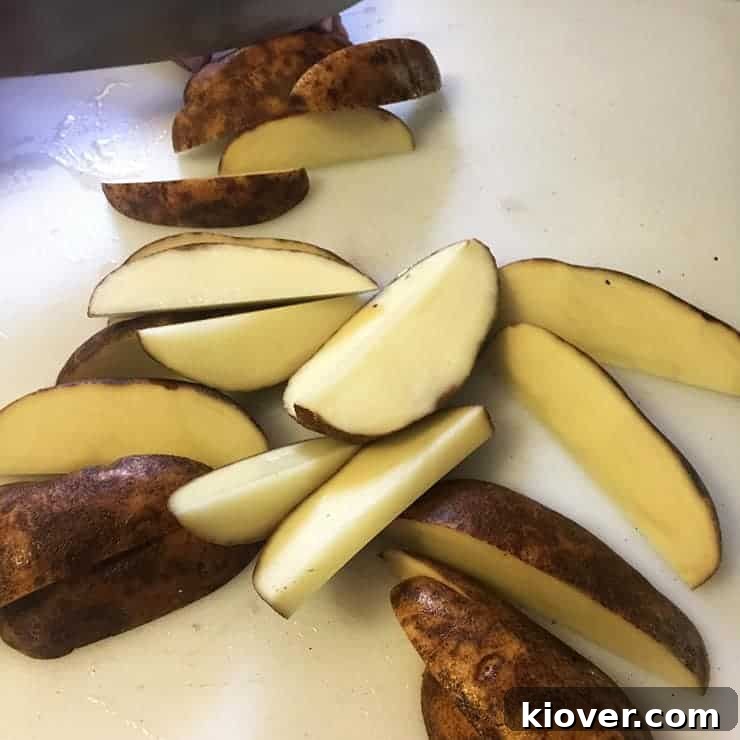
When it comes to selecting potatoes for this recipe, versatility is key. Almost any medium to large potato will work wonderfully, as long as it’s sizable enough to be cut into substantial wedges without being overly massive. The size of your potatoes might necessitate slight adjustments to cooking times, but generally, sticking with medium-sized potatoes like red or russet varieties will yield excellent results. These two types are my personal favorites for their consistent texture and ability to hold their shape during the cooking process.
Russet potatoes, with their starchy interior, become incredibly fluffy and tender once cooked, while their skin crisps up beautifully. Red potatoes, on the other hand, have a waxier texture, which means they hold their shape exceptionally well and offer a slightly creamier bite. Both are fantastic choices and readily available. The most important factor is consistency in wedge size, ensuring even cooking for all your delicious Jo Jos.
The Essential Initial Boil: A Head Start for Perfection
To achieve the ideal texture for our grilled Jo Jos – crispy on the outside and tender within – we start with a crucial par-boiling step. The objective here isn’t to fully cook the potatoes, but rather to give them a gentle head start and infuse them with a bit of moisture before they hit the grill. I typically boil the potato wedges for no more than five minutes, constantly monitoring their doneness with a fork. You want them to be slightly pliable but still quite firm; they should definitely not be soft or mushy at this stage. Removing them just before they become fully tender ensures they won’t overcook on the grill.
A little trick I employ during this boiling process is adding a tablespoon of white vinegar to the water. This seemingly simple addition plays a significant role in maintaining the potato’s structural integrity, helping to prevent them from breaking down and promoting that desirable crispiness later on the grill. Similar to how vinegar helps keep potatoes firm in our homemade corned beef hash recipe, it contributes to a more robust and satisfying texture in these Jo Jos. When a fork can penetrate the potato with some resistance, but not too easily, they are ready to be removed from the heat.
Crafting Your Signature Jo Jo Seasoning Blend
The beauty of this Jo Jo recipe lies in its adaptability, especially when it comes to seasoning. The blend I provide is a fantastic starting point, designed to bring out the best in the potatoes, but feel free to customize it to your heart’s content! If there are spices you dislike, simply omit them. Conversely, if you have a favorite seasoning blend or a particular spice you think would complement potatoes beautifully, don’t hesitate to add it. I highly recommend trying the suggested recipe first to get a feel for the flavors, then experimenting with your own tweaks to create a truly personalized dish.
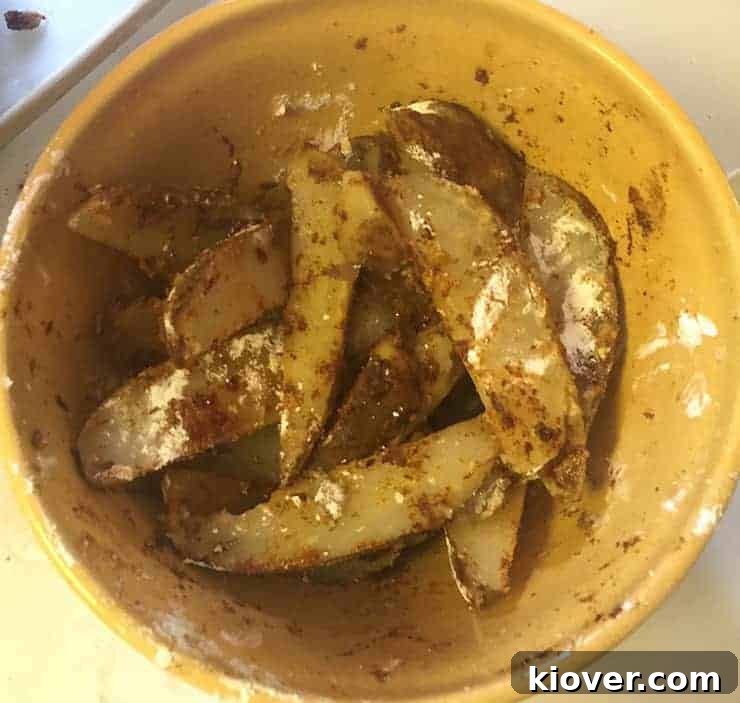
For mixing the ingredients, a large bowl works perfectly for tossing the potato wedges with the seasoning and olive oil. However, an even more efficient method is to place all the par-boiled wedges and seasoning ingredients into a large freezer bag, seal it, and then gently shake to coat everything evenly. This technique ensures every surface of every wedge is perfectly covered, leading to consistent flavor and texture. While the freezer bag method can be slightly more convenient, I often opt for a bowl to minimize waste where possible.
Mastering the Grill: Cooking Your Jo Jos to Perfection
Grilling these potatoes is a regular occurrence at our house, especially when the weather allows. After enduring long North Dakota winters, the chance to fire up the grill and cook outdoors is always a welcome treat. The best part is that these grilled Jo Jos can be cooked alongside your main dishes, like burgers or steak, making them a true summertime delight. This simultaneous cooking saves time and effort, streamlining your entire meal preparation.
Keep in mind that while these potatoes take a little longer to cook than some other grilled items, they are quite forgiving towards the end of their cooking time. If your grill features a non-direct cooking zone (which it ideally should for versatile grilling), this is the perfect spot for your Jo Jos. The indirect heat allows for a slower, more even cook, ensuring they become tender without burning. If you don’t have an indirect zone, simply manage the heat by moving them to cooler spots on the grill. While this recipe focuses on grilling, it’s worth noting that these Jo Jos can also be easily prepared in an oven if weather prevents outdoor cooking. For grilling, the goal is consistent, moderate heat that crisps the outside and softens the inside.
A Note on Grilling Zones and Doneness for Jo Jos
Achieving the perfect Jo Jo involves understanding your grill’s heat zones. Indirect heat is crucial for the initial cooking phase, allowing the potatoes to cook through without scorching. You’ll want to test for doneness by carefully inserting a fork into a Jo Jo. It should be tender in the center, offering minimal resistance, while the exterior has developed a pleasing crispiness. Every grill is different, and the intensity of your indirect heat zone can vary, so cooking times may require slight adjustments. The key is patience: take your time, test your taters regularly, and adjust as needed to get them just right.
Craving Extra Crispy Jo Jos? Here’s How!
This recipe is designed to produce Jo Jos with a lovely, satisfying crispiness. However, if you’re a fan of potatoes with an extra crunchy exterior, you can easily achieve this by extending their cooking time slightly. An additional 5 to 10 minutes on the grill can make a significant difference in developing that extra crisp texture. For an even more intense crisp, consider moving your grilling basket directly over the hot zone (direct heat) for those final 5-10 minutes. Keep a close eye on them during this stage to prevent burning, flipping them frequently to ensure even browning and maximum crunch.
The Indispensable Grilling Basket (and Alternatives!)
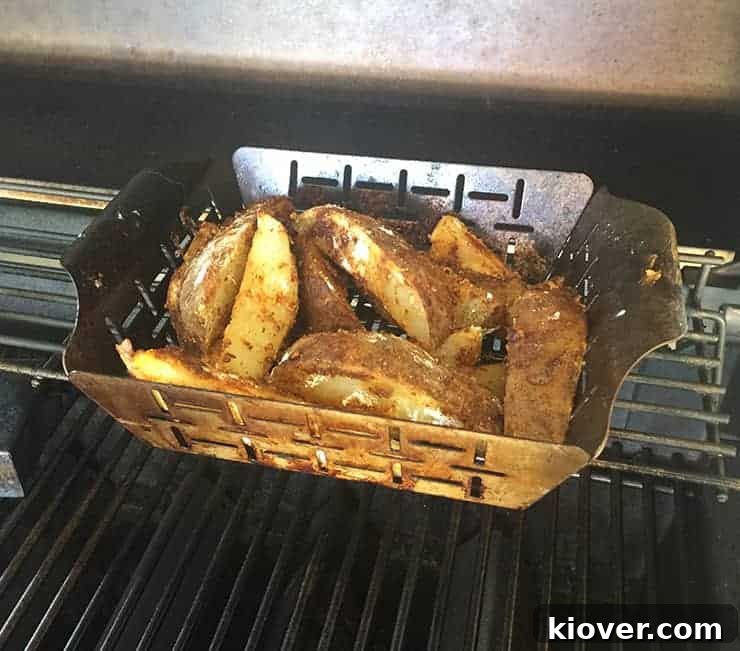
For cooking these Jo Jos, a Weber Vegetable Basket is an absolute game-changer. It provides an ideal surface for the potatoes to cook evenly and prevents them from falling through the grates. The perforated design allows heat and smoke to circulate, creating that characteristic grilled flavor and texture. While highly recommended, a grilling basket isn’t strictly necessary. If you don’t have one, there are viable alternatives.
One method I’ve used successfully is creating a foil packet. Simply spray some heavy-duty aluminum foil with a non-stick cooking spray (like Pam) or brush it with vegetable oil, then wrap the seasoned potatoes securely within. This creates a small cooking environment that steams the potatoes while allowing some grilling flavor to penetrate. Alternatively, you could cook the Jo Jos directly on well-oiled grill grates. If choosing this method, ensure your grates are thoroughly cleaned and oiled to prevent sticking, and be prepared to turn the wedges more frequently to prevent burning and ensure even cooking. While direct grilling is not the preferred method without a basket, it’s certainly an option if you’re keen to try. And yes, a vegetable basket is indeed for vegetables – grilled veggies are fantastic, so perhaps get two baskets if you want both!
Expert Tips for Perfect Grilled Jo Jos Every Time
- Potato Size Matters: If you opt for larger potatoes, be prepared to adjust your cooking time. Larger wedges will naturally require more time on the grill to become tender all the way through.
- Maximize Crispiness: For those who love a truly crispy potato, move your grilling basket (or foil packet) over direct heat during the final 5 to 10 minutes of cooking. This blast of high heat will create a beautifully browned and crunchy exterior. Just remember to watch them closely and flip frequently!
- The Vinegar Secret: Don’t skip the vinegar in the boiling water! This simple ingredient is a game-changer, helping the potatoes maintain their firmness and ensuring they develop a fantastic crisp texture on the grill.
- Even Coating: Use a large bowl or a freezer bag to ensure all potato wedges are thoroughly coated with the seasoning and oil. An even coat means even flavor and crispiness.
- Preheat Your Grill: Always preheat your grill to the recommended temperature before adding the potatoes. A hot grill prevents sticking and kickstarts the crisping process.
Why Grill Your Jo Jos? The Benefits of This Method
While Jo Jos can be deep-fried or baked, grilling offers a unique set of advantages that make it our preferred method, especially during the summer. First, the smoky flavor infused into the potatoes from the grill is simply unparalleled. It adds a depth of taste that oven-baked versions can’t replicate. Second, grilling allows for excellent texture control; you can achieve a beautiful char and crispness that’s harder to get without deep-frying. Third, it often means less cleanup indoors, as all the cooking happens outside. Finally, it’s generally a lighter, healthier option compared to deep-frying, as you’re using less oil but still getting that satisfying crunch and flavor.
Perfect Pairings and Serving Suggestions
Grilled Jo Jos are incredibly versatile and make an ideal side for almost any grilled main course. They shine alongside classic burgers, providing a more substantial and flavorful alternative to fries. They’re also fantastic with grilled chicken, steak, or even fish. For an ultimate barbecue spread, serve them with pulled pork or grilled ribs. Don’t forget the dipping sauces! Ketchup is a classic, but don’t shy away from experimenting with homemade aioli, a spicy sriracha mayo, a tangy ranch dip, or even a creamy dill sauce. Garnish your plate with fresh chopped chives or parsley for a burst of color and herbaceous flavor.
Storing and Reheating Your Delicious Leftovers
If you’re lucky enough to have any leftover Grilled Jo Jos, storing them properly will allow you to enjoy them again. Once cooled, transfer them to an airtight container and refrigerate for up to 3-4 days. For reheating, avoid the microwave if you want to retain any crispiness, as it will make them soggy. The best methods are to reheat them in a preheated oven at 400°F (200°C) for 10-15 minutes, or in an air fryer at 375°F (190°C) for 5-8 minutes, until they are hot and re-crisped. This will bring back much of their original texture and flavor.
Grilled Jo Jos – The Potato You Didn’t Know You Needed
- Author: Ben Myhre
- Prep Time: 10 minutes
- Cook Time: 30 Minutes
- Total Time: 40 Minutes
- Yield: 2 servings
- Category: Side Dish
- Method: Grilling
- Cuisine: American
Description
Jo Jos are a potato treat and these grilled jo jos should be on your menu. These are great tasting potatoes with a light breading that makes them taste like a million bucks.
Ingredients
- 2 medium potatoes, cut each into 6 wedges
- 1 Tablespoon white vinegar
- 2 Tablespoons corn starch
- 1 Tablespoon chili powder
- 1 Tablespoon paprika
- 1 teaspoon salt, plus more to taste
- 1/2 teaspoon pepper
- 1/2 teaspoon cumin
- 1/4 cup olive oil
Instructions
- Bring pot of water to boil
- While water is heating, cut each potato into 6 wedges
- Add vinegar to water
- Add potatoes to water, allow water to return to boil, and allow to simmer for approximately 5 minutes. Test with fork at 3 minutes. Should still be firm and we do not want the potatoes to be soft. Remove before they get soft.
- Add corn starch, chili powder, paprika, salt, pepper, cumin, and olive oil to larger bowl and mix well.
- Preheat Grill to 500° Fahrenheit.
- Add potatoes to the container with coating ingredients and gently mix until coated.
- Place in lightly oiled vegetable basket and cook over indirect heat
- Check for doneness at 25 minutes and occasionally turn or mix jo jos in basket to help ensure even cooking.
- Optionally, place over direct heat for additional 5-10 minutes
- SERVE
Notes
- If you use large potatoes, more time will be needed to cook.
- For crispier potatoes, put over direct heat (in the hot zone) for the last 5 to 10 minutes.
- The vinegar helps the potato stay firm and improves the ability to crisp up.
Products That Enhance Your Grilling Experience
To help you achieve the best possible Grilled Jo Jos and a seamless grilling experience, here are some products that come highly recommended:
- Weber Vegetable Basket: An absolute must-have for evenly grilled vegetables and preventing smaller items like potato wedges from falling through the grates.
- Weber Genesis III Grill: A reliable and efficient grill that provides consistent heat and multiple cooking zones, making it ideal for everything from steaks to delicate Jo Jos.
- Digital Thermometer: Essential for precise temperature monitoring, ensuring your grilled foods are cooked perfectly and safely every time.
- Grill Tongs: Long-handled, sturdy tongs are indispensable for safely turning and moving food on a hot grill, making cooking easier and more enjoyable.
Using the right tools can significantly improve your grilling results, and these items are chosen for their quality and utility in the outdoor kitchen.
We hope you enjoy making and sharing these incredible Grilled Jo Jos as much as we do! If you loved this recipe, please consider rating it in the comment section below, and follow me on Instagram for more culinary inspiration and grilling adventures.