
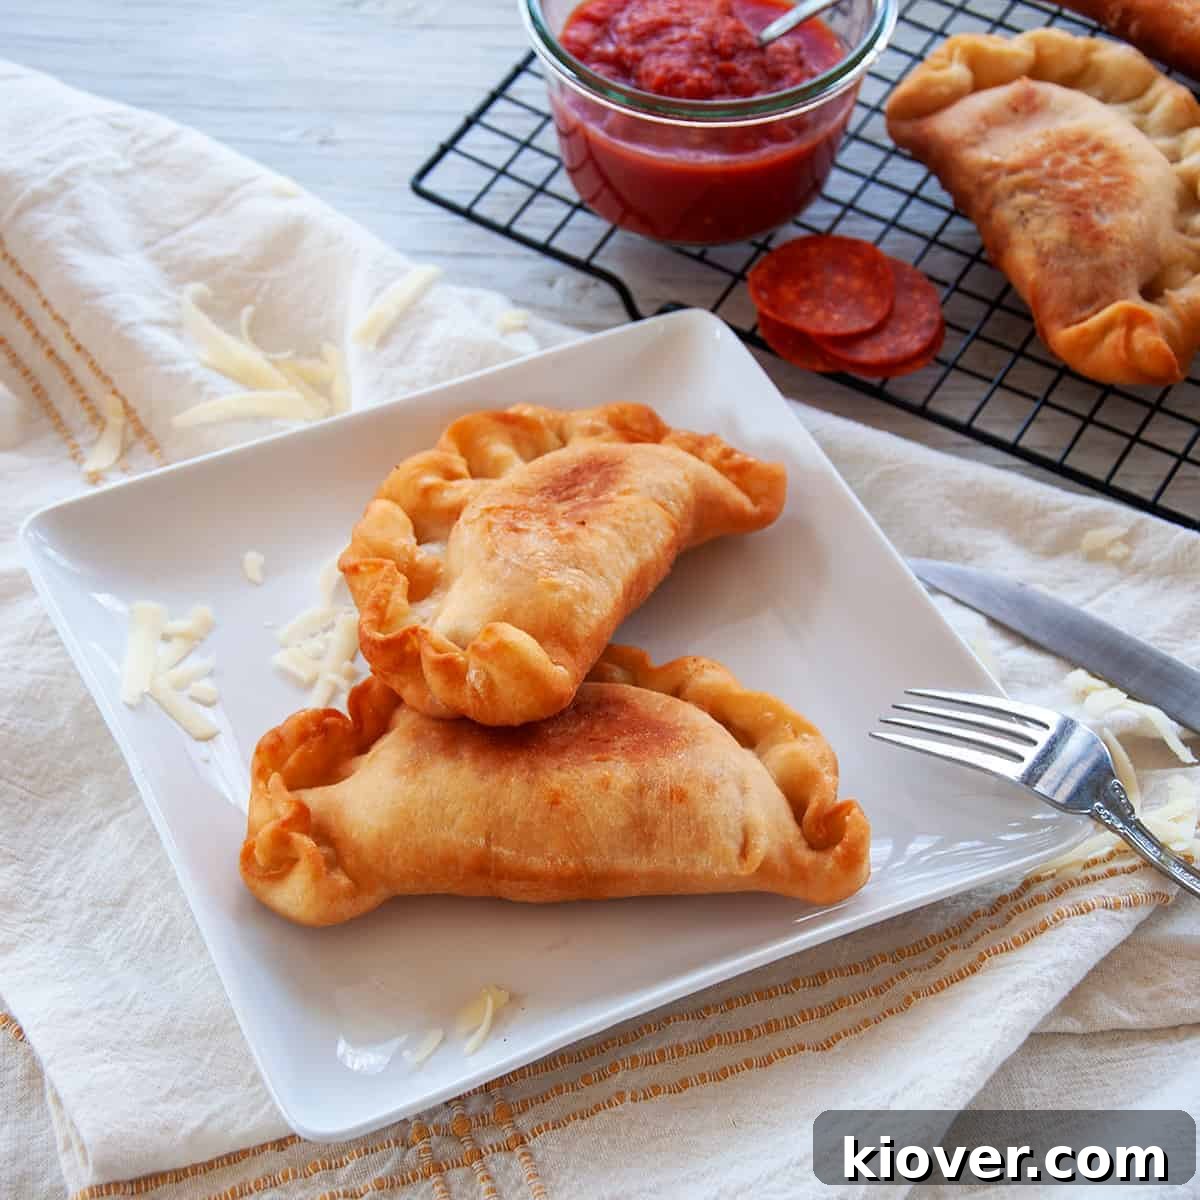
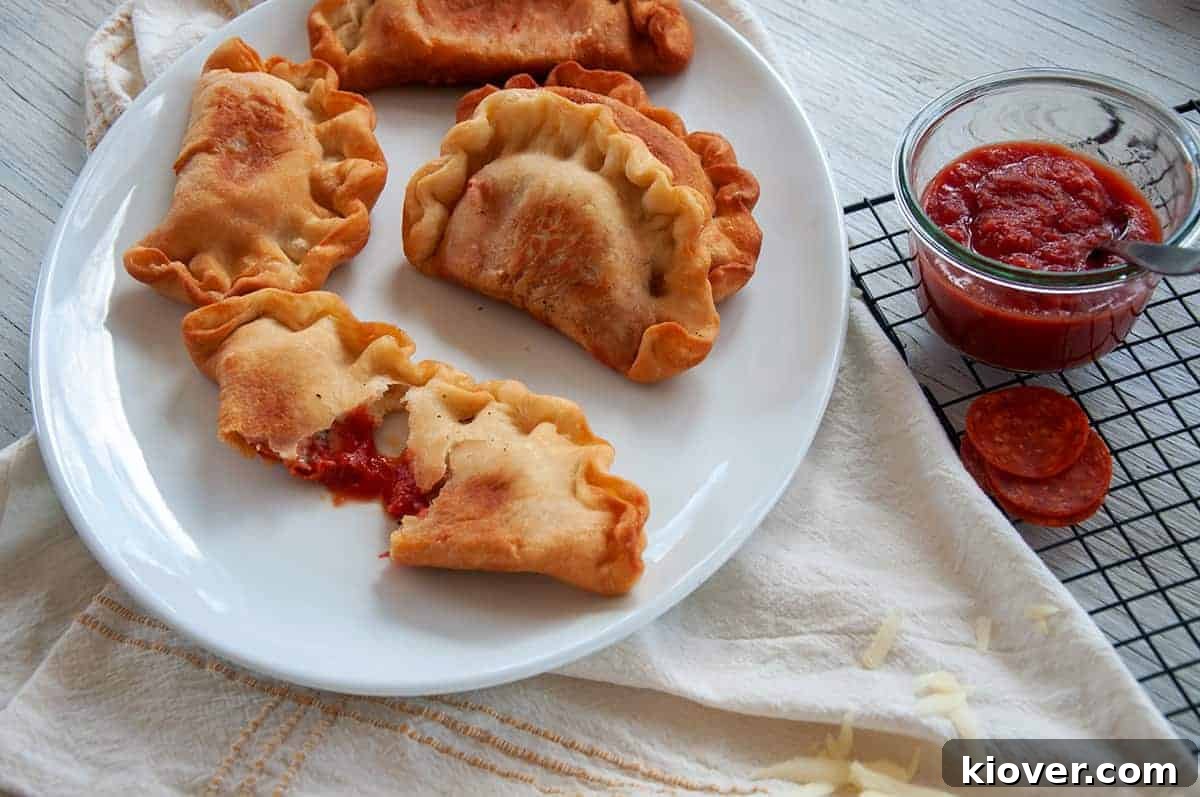
Dive into the delightful world of Italian street food with our classic Panzerotti recipe. Often likened to a gourmet “Hot Pocket” or a sophisticated “pizza pocket,” Panzerotti are truly a league of their own. These small, savory, deep-fried Italian turnovers are packed with traditional pizza ingredients and offer an explosion of flavor in every handheld bite. Unlike their baked cousins, calzones, or their mass-produced counterparts, a true Panzerotti is characterized by its perfectly golden, crispy, and slightly chewy deep-fried crust, encasing a molten core of cheese, rich tomato sauce, and savory fillings.
Our recipe elevates this simple concept into an unforgettable culinary experience, primarily through the use of a meticulously crafted, from-scratch dough. Forget the frozen aisle; this homemade Panzerotti recipe promises to be a resounding success in your home, delivering authentic Italian taste and texture that will leave everyone craving more.
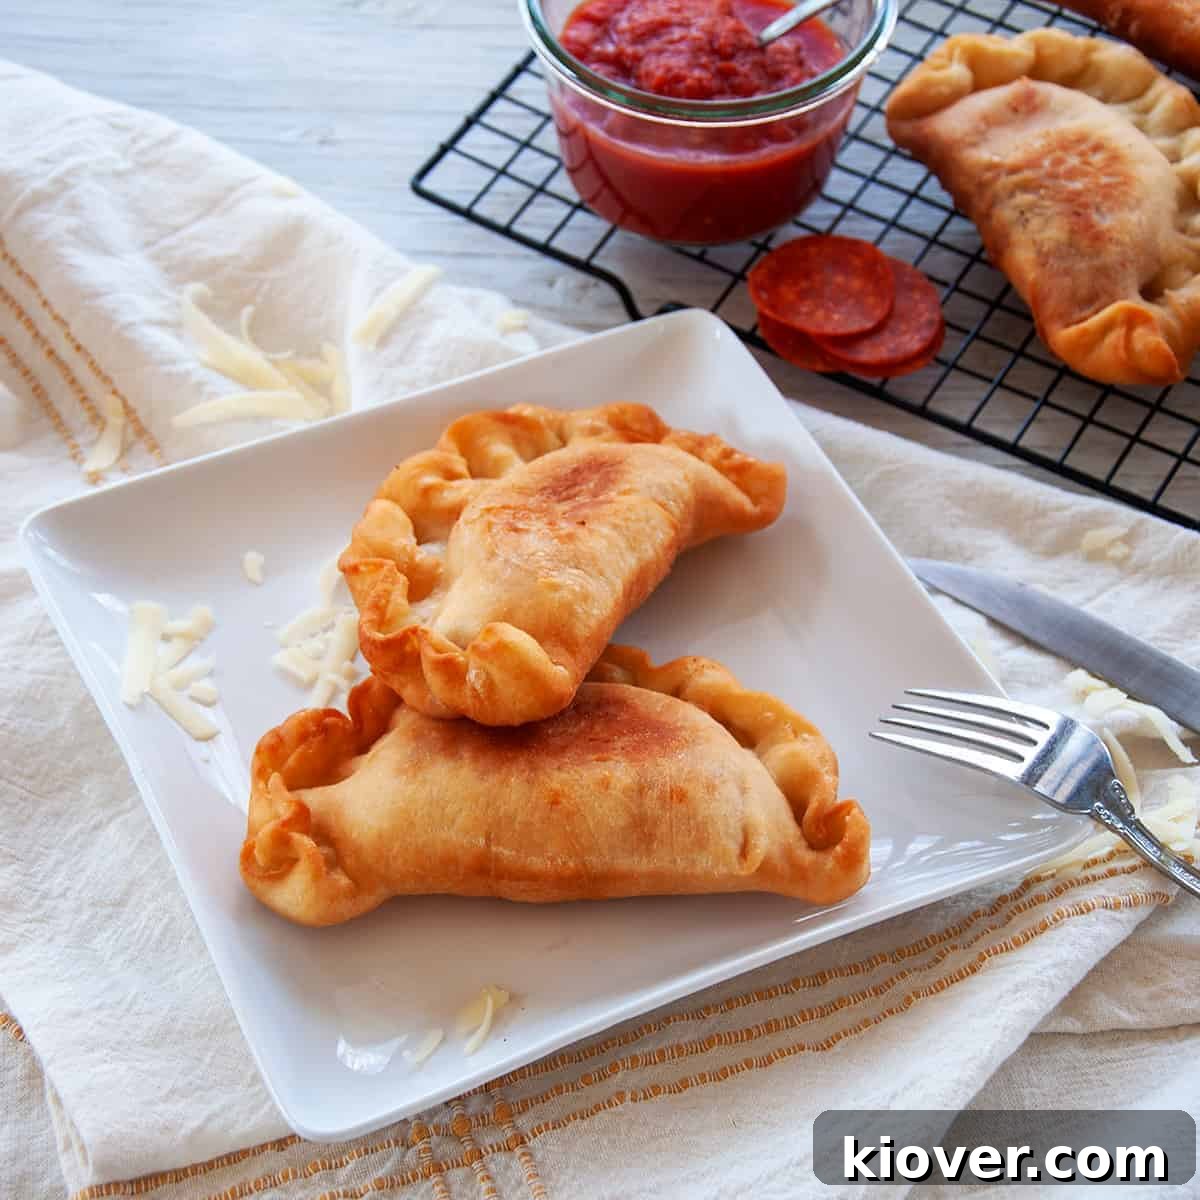
Table of Contents
- The Authentic Panzerotti Experience
- Why Homemade Panzerotti Shines
- Key Ingredients for Perfect Panzerotti
- Step-by-Step Panzerotti Instructions
- Dough Preparation for Panzerotti
- Crafting the Delicious Panzerotti Filling
- Shaping and Sealing Your Panzerotti
- Deep Frying to Golden Perfection
- Creative Substitutions and Variations
- Storage and Reheating Tips
- A Glimpse into Panzerotti History
- Frequently Asked Questions About Panzerotti
- Essential Tips and Tricks for Success
- Recommended Kitchen Tools
- Share Your Panzerotti Creations!
- Classic Italian Panzerotti Recipe Card
The Authentic Panzerotti Experience
Our Panzerotti recipe brings the vibrant flavors of Italy right into your kitchen. Crafted with a homemade, perfectly risen dough and fried to an exquisite golden brown, these handheld delights are not just food; they’re an experience. Forget about the bland, mass-produced versions found in the freezer aisle of supermarkets; these homemade Panzerotti are simple to create yet offer an unparalleled depth of flavor and texture that will truly impress.
Beyond their incredible taste, these savory turnovers are a fantastic option for meal prep. They can be easily frozen and quickly reheated in the microwave, oven, or air fryer whenever you need a quick, satisfying lunch or a delicious snack. Imagine having a gourmet, hot-pocket-style meal ready in minutes! They truly are the ideal quick lunch solution for busy days.
As passionate lovers of pizza, we believe Panzerotti offer a unique and convenient way to enjoy all the wonderful elements of a classic pizza in a portable, deep-fried package. The contrast between the crispy exterior and the warm, gooey filling is simply irresistible.
Why Homemade Panzerotti Shines
Making Panzerotti from scratch isn’t just about cooking; it’s about embracing a culinary tradition and creating something truly special. The secret to exceptional Panzerotti lies in the dough. Our recipe utilizes a homemade risen dough that yields a light, airy, and flavorful crust, providing the perfect counterpoint to the rich, savory filling. This is a stark contrast to store-bought, often dense or flavorless doughs. The act of kneading the dough, watching it rise, and then transforming it into these individual pockets of joy is incredibly rewarding.
Furthermore, making them at home gives you complete control over the quality of ingredients. You can choose premium mozzarella, ripe, flavorful crushed tomatoes, and your preferred pepperoni or other fillings, ensuring a superior taste profile. The frying process, done correctly, gives the Panzerotti a distinctive golden-brown crispness that is simply not achievable with baked versions or frozen, pre-made products. This homemade approach ensures that every Panzerotti is fresh, vibrant, and bursting with authentic Italian goodness, far surpassing any convenience food.
Key Ingredients for Perfect Panzerotti
Crafting these delicious Italian turnovers requires a thoughtful selection of ingredients, many of which are common in traditional pizza making. However, a crucial addition for Panzerotti is the high-heat oil used for frying. While precise quantities are detailed in the recipe card below, here’s an overview of the essential components:
For the Flavorful Dough:
- White Granulated Sugar: A small amount is used to activate the yeast and provide a subtle sweetness to the dough, enhancing its flavor and aiding in the browning process.
- Warm Water: Essential for activating the yeast, ensuring a soft and pliable dough.
- Active Dry Yeast: The leavening agent responsible for the dough’s delightful rise and airy texture.
- Bread Flour: High in protein, bread flour provides the necessary structure and chewiness for a robust dough that can withstand frying.
- Salt: Balances the flavors of the dough and regulates yeast activity.
- Vegetable Oil: Incorporated into the dough for moisture and tenderness, with additional oil reserved for coating and deep frying.
For the Irresistible Filling:
- Mozzarella Cheese (Grated): The quintessential cheese for its incredible meltiness and mild, creamy flavor. Using freshly grated mozzarella is always recommended for superior results.
- Crushed Tomatoes: Forms the vibrant, tangy base of the filling. High-quality crushed tomatoes will make a significant difference.
- Dried Oregano: Provides that classic Italian herbal aroma and taste, complementing the tomatoes and cheese.
- Salt & Pepper: Seasonings to enhance and balance the overall flavor profile of the filling.
- Pepperoni: Small, thinly sliced pepperoni adds a savory, slightly spicy kick, traditional for a classic Panzerotti.
The combination of these simple yet high-quality ingredients is what transforms a basic dough into a delicious Italian delicacy, promising a harmonious blend of textures and tastes.
Step-by-Step Panzerotti Instructions
Making Panzerotti involves a process similar to crafting pizza or calzones, particularly in the dough preparation and assembly phases. However, the unique individual serving size and deep-frying method set them apart. We’ll guide you through each stage, ensuring your homemade Panzerotti are a culinary triumph.
Dough Preparation for Panzerotti
The foundation of a great Panzerotti is its dough. Approach this much like you would a traditional pizza dough, but keep in mind that these are designed for individual servings. Our recipe emphasizes a proper rise for optimal texture and flavor.
- Activate the Yeast: In a medium bowl, combine 1 teaspoon of white granulated sugar with 1/2 cup of warm water (around 105-115°F or 40-46°C). Sprinkle the 1/2 pack of active dry yeast (approximately 3.5 grams) over the water. Allow this mixture to sit undisturbed for about 5 to 10 minutes until it becomes foamy and fragrant, indicating the yeast is active.
- Combine Dry Ingredients: While the yeast is activating, in a separate large bowl, whisk together the 1 1/2 cups of bread flour, the remaining 1 tablespoon of sugar, and 1/2 teaspoon of salt.
- Mix and Knead: Pour the activated yeast mixture and 2 tablespoons of vegetable oil into the dry ingredients. Mix with a spoon or your hands until a shaggy dough forms. Transfer the dough to a lightly floured surface and knead for a full 5 to 7 minutes. The dough should become smooth, elastic, and consistent, no longer sticky.
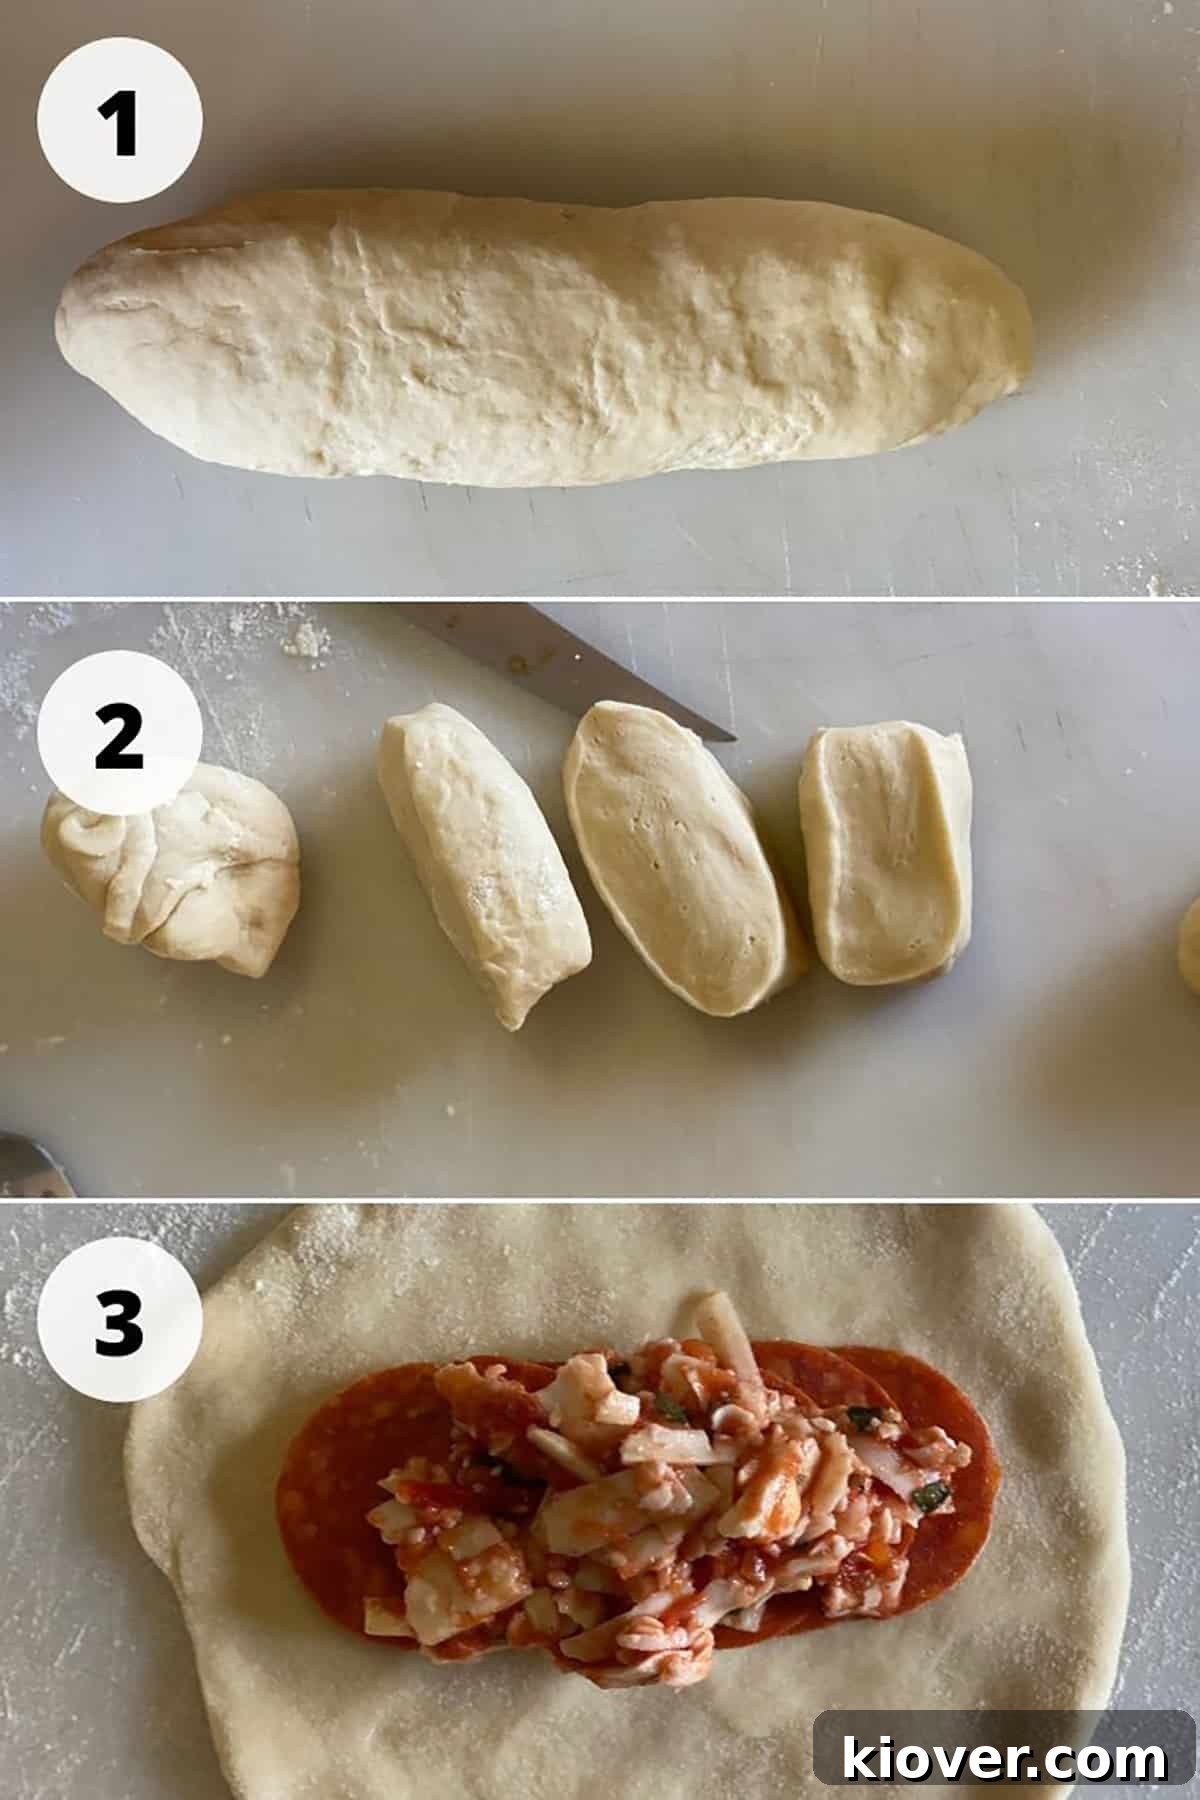
- Portion the Dough: Divide the kneaded dough into 6 equal pieces. Each piece should weigh approximately 2 ounces (around 55-60 grams) for uniform Panzerotti. Using a kitchen scale can help ensure accuracy.
- Form Dough Balls: Gently roll each dough piece into a smooth, round ball.
- First Rise: Lightly oil a baking pan or a large plate. Place the dough balls on the oiled surface, ensuring they have enough space between them. Loosely cover the dough with plastic wrap or a clean kitchen towel. Find a warm, draft-free spot for the dough to rise. A common trick is to place them in a slightly warm oven (turned off, with just the oven light on) alongside a dish of hot water to create a humid environment. Allow the dough to rise for a substantial 1 1/2 hours, or until they have visibly doubled in size. This slow rise develops deep flavor and a beautiful texture.
Crafting the Delicious Panzerotti Filling
While your dough is undergoing its first rise, prepare the simple yet incredibly flavorful filling.
- Combine Filling Ingredients: In a bowl, mix together the 4 1/2 ounces of grated mozzarella cheese, 3/4 cup of crushed tomatoes, 1 teaspoon of dried oregano, 1/4 teaspoon of salt, and 1/4 teaspoon of pepper. Stir well to ensure all ingredients are evenly distributed. It’s crucial not to over-complicate the filling; its simplicity allows the fresh ingredients to shine.
Shaping and Sealing Your Panzerotti
Proper shaping and sealing are key to preventing the delicious filling from escaping during frying.
- Stretch the Dough: After the dough has risen for 1 1/2 hours, gently take each ball and stretch it out into a 6-inch diameter disk. These should resemble mini pizzas, much smaller than a typical pizza or even a calzone. Handle the dough carefully to maintain its airiness.
- Add Filling: On one half of each stretched dough disk, place approximately 7 small pepperoni slices. Then, add 1 to 2 heaping tablespoons of your prepared filling mixture on top of the pepperoni. Be mindful not to overstuff; this is one of the most common mistakes that leads to burst Panzerotti. Leave a clear border around the edge for sealing.
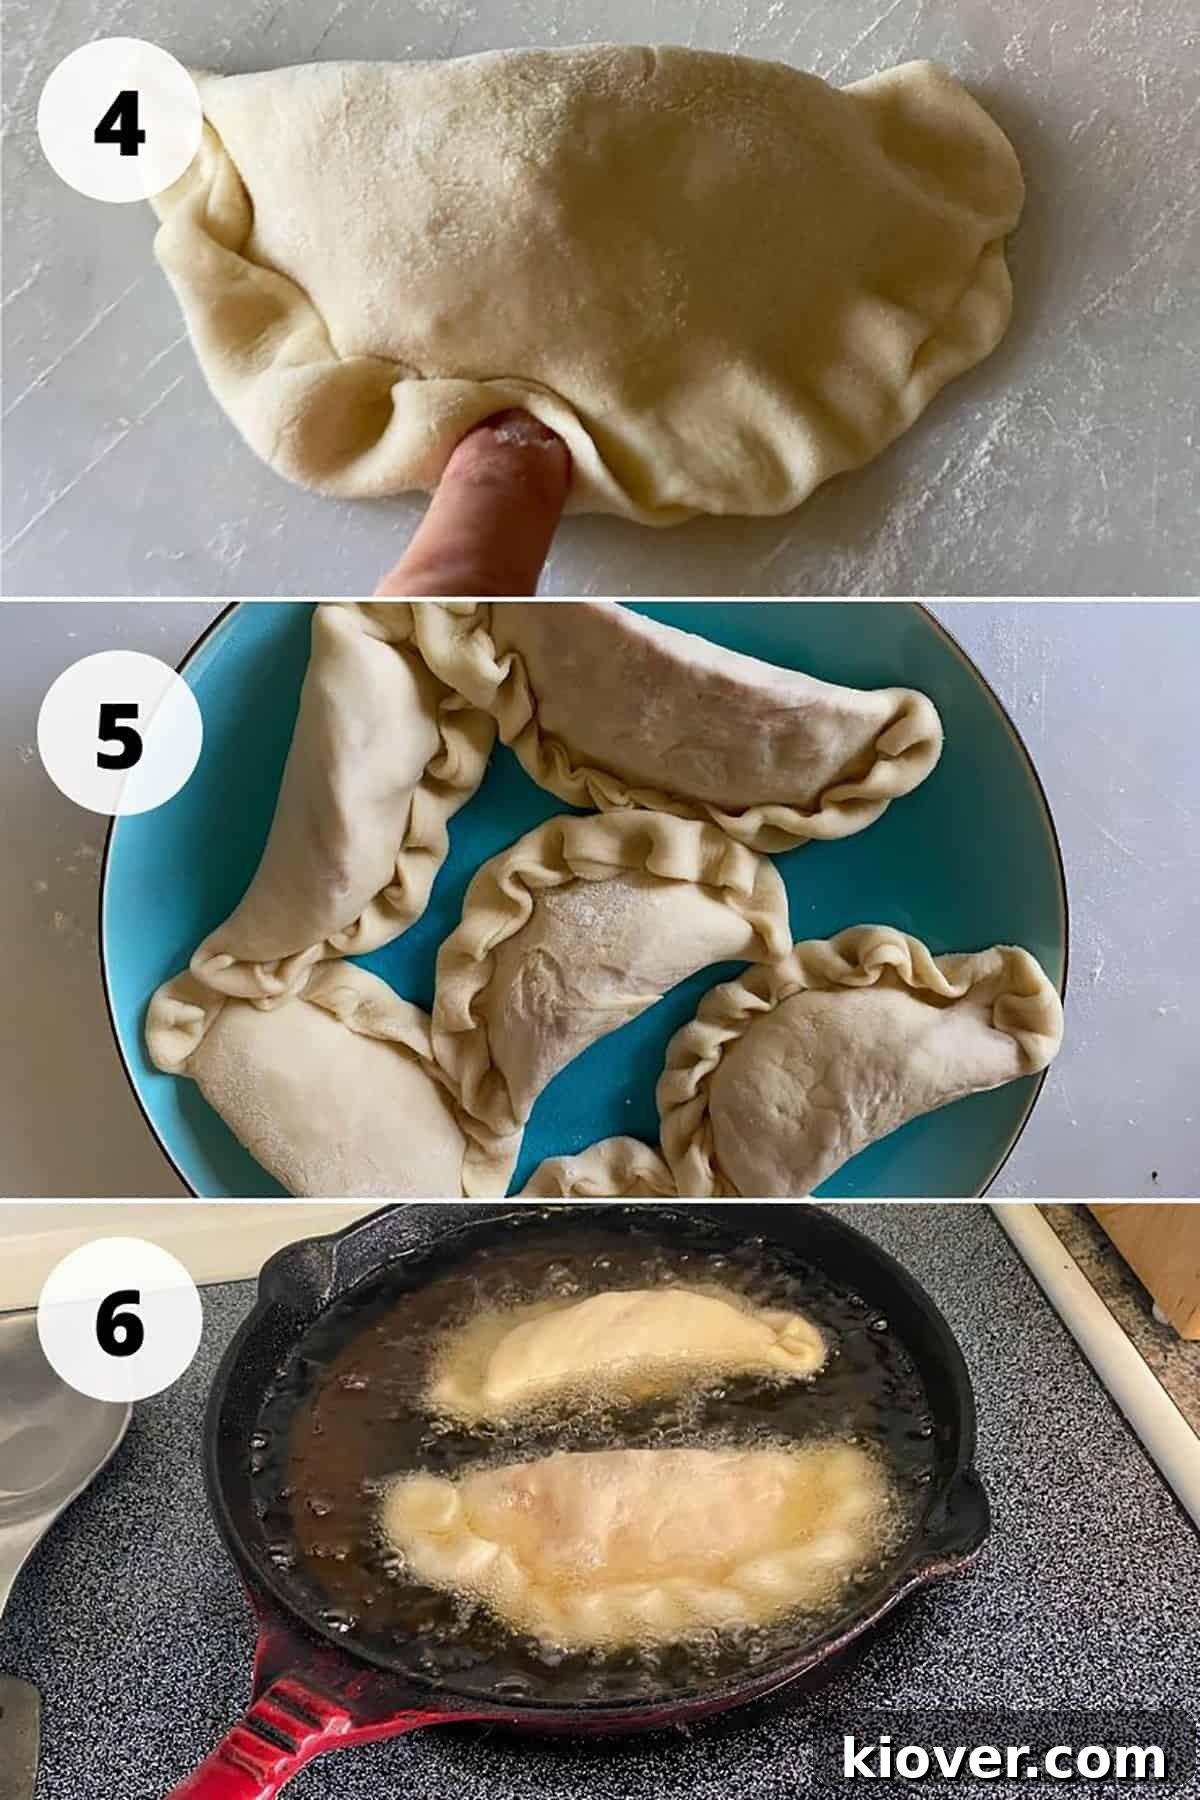
- Moisten and Fold: Lightly brush the edges of the dough with a little water. This creates a natural adhesive. Carefully fold the unoccupied half of the dough over the filling to create a perfect semi-circle.
- Crimp the Edges: Using your thumb and forefinger, firmly crimp the edges of the dough together, pressing down evenly to create a secure, sealed pocket. Go back and perform a second crimping or use the tines of a fork to ensure a tight seal all around the curved edge. This method, similar to sealing hand pies, is crucial for preventing leaks during frying.
- Repeat: Set aside the sealed Panzerotti and repeat the stretching, filling, folding, and crimping process with the remaining dough balls and filling.
Deep Frying to Golden Perfection
The frying stage is where the Panzerotti transforms into its classic golden, crispy form.
- Heat the Oil: Pour about 1 inch of high-heat cooking oil (such as vegetable, canola, or sunflower oil) into a heavy frying pan or cast iron skillet. Heat the oil over medium-high heat until it reaches a temperature of 350°F (175°C). Use a reliable thermometer to monitor the oil temperature accurately; this is critical for even cooking and preventing greasy Panzerotti.
- Fry the Panzerotti: Carefully place 1 to 2 Panzerotti into the hot oil at a time, being careful not to overcrowd the pan, which can lower the oil temperature. Using tongs, gently flip each Panzerotti every 45 seconds to ensure even cooking and browning on both sides. The total cooking time should be approximately 3 minutes, or until both sides achieve a beautiful golden-brown color.
- Drain and Serve: Once golden brown, remove the Panzerotti from the oil using tongs and place them on a plate lined with paper towels to drain any excess oil. Allow them to rest for a few minutes before serving.
- Enjoy!: Serve your homemade Panzerotti immediately while they are hot and the cheese is wonderfully molten. For an extra treat, offer a side of warm marinara or crushed tomato sauce for dipping.
Creative Substitutions and Variations
One of the best aspects of making Panzerotti at home is the endless potential for customization. While our classic recipe is fantastic, feel free to get creative with fillings and dough preparations. The main golden rule for any variation is: do not overstuff your Panzerotti, as this will lead to leaks during frying.
- Alternative Fillings: Instead of or in addition to pepperoni, you can use any pizza-appropriate ingredients. Consider finely chopped cooked sausage, ham, mushrooms, onions, black olives, or bell peppers. Just ensure any raw meats are thoroughly cooked beforehand and vegetables are finely diced and perhaps sautéed to reduce moisture. Other cheese options like provolone or a blend of Italian cheeses also work wonderfully.
- Dough Variations: While a slow-rising homemade dough yields the best results, in a time crunch, you can use store-bought pizza dough. Some recipes even call for a leaner dough without a long rise, offering a slightly different texture. For a richer dough, a touch of olive oil or even an egg yolk can be added during kneading.
- Vegetarian & Vegan Options: Easily make this recipe vegetarian by omitting the pepperoni or substituting it with plant-based pepperoni alternatives. For a vegan version, use a plant-based mozzarella and ensure your dough contains no dairy or eggs. Fillings like roasted vegetables (spinach, artichoke hearts, sun-dried tomatoes), pineapple tidbits, or a variety of sautéed mushrooms are excellent choices.
- Herb and Spice Boost: Experiment with different herbs like basil, marjoram, or a pinch of red pepper flakes in your filling for an extra layer of flavor and a slight kick.
- Baked Panzerotti (Calzone Style): While traditionally fried, you can certainly bake these for a lighter alternative, though they technically become more akin to small calzones. Bake at 400°F (200°C) for 15-20 minutes, or until golden brown. Brush with a little olive oil before baking for a nice crust.
Storage and Reheating Tips
Panzerotti are excellent for making ahead, whether for future meals or to enjoy delicious leftovers. Proper storage ensures they retain their quality and flavor.
- Refrigeration: Once fully cooked and cooled to room temperature, Panzerotti can be stored in an airtight container in the refrigerator for up to 3 days.
- Freezing Cooked Panzerotti: For longer storage, cooked and cooled Panzerotti can be frozen. Wrap each Panzerotti individually in plastic wrap, then place them in a freezer-safe bag or container. They will keep well in the freezer for up to 2-3 months.
- Freezing Uncooked Panzerotti: You can also freeze them uncooked! After shaping and sealing (before frying), place the uncooked Panzerotti on a baking sheet lined with parchment paper and freeze for 1-2 hours until solid. Once firm, transfer them to a freezer-safe bag or container. When ready to cook, thaw them in the refrigerator for a few hours before frying, or fry them from frozen at a slightly lower temperature (around 325°F/160°C) for a bit longer, ensuring they cook through.
Reheating for Best Results:
- Oven: For the crispiest results, reheat frozen Panzerotti directly in a preheated oven at 375°F (190°C) for 15-25 minutes, or until heated through and crispy. Thawed Panzerotti will take less time (10-15 minutes).
- Air Fryer: An air fryer is fantastic for reheating! Place frozen Panzerotti in a preheated air fryer at 350°F (175°C) for 8-12 minutes, flipping halfway, until hot and crispy. Thawed Panzerotti will take 5-8 minutes.
- Microwave: While convenient, the microwave will result in a softer crust. Heat in 30-60 second intervals until warm. This method is best if you’re in a hurry and prioritize speed over crispness.
A Glimpse into Panzerotti History
The humble Panzerotti holds a rich culinary history, originating from the southern Italian region of Apulia (Puglia). This delectable dish began as a clever and tasty way for resourceful cooks to utilize leftover bread dough. Its simplicity and deliciousness quickly made it a beloved staple, particularly as street food and a convenient snack.
Like many Italian culinary traditions, Panzerotti made its way to America through the waves of Italian immigration, spreading its popularity across North America. While many people in the US might recognize similar items as “pizza pockets” or “hot pockets,” it’s essential to understand that comparing an authentic, deep-fried Panzerotti to these commercially produced, often baked, frozen products is not entirely fair. The distinct crispness and flavor profile achieved through deep frying are what truly define a Panzerotti.
Historically, Panzerotti represented a practical, economical, and delicious meal for many Italian families, transforming simple ingredients into something comforting and satisfying. While common in Apulia, finding a traditional fried Panzerotti outside of specific Italian-American communities, especially on the East Coast, can be a rare treat today. Its journey from a thrifty household dish to a cherished Italian-American specialty speaks volumes about its enduring appeal and deliciousness.
Frequently Asked Questions About Panzerotti
- What temperature should I cook Panzerotti?
- Panzerotti should be deep-fried at a consistent oil temperature of 350°F (175°C) using a high-heat cooking oil.
- What’s the difference between a calzone and a panzerotti?
- The primary differences are size and cooking method. Panzerotti are typically smaller, single-serving turnovers that are deep-fried, resulting in a crispy crust. Calzones are generally larger, baked, and have a softer, bread-like crust.
- Are Panzerotti fried or baked?
- Authentic Panzerotti are a deep-fried dish. While variations exist, the signature crispy exterior comes from frying.
- What is a Hot Pocket versus a Calzone?
- A Hot Pocket is a commercial, often microwaved or oven-baked, convenience food that vaguely resembles a fried panzerotti. A Calzone, on the other hand, is a traditional Italian dish, essentially a folded pizza, that is baked.
- Can I make Panzerotti dough in advance?
- Yes, you can prepare the dough a day in advance. After the initial rise, punch down the dough, cover it tightly with plastic wrap, and refrigerate it. Let it come to room temperature for about 30-60 minutes before proceeding with shaping and filling.
- How do I prevent my Panzerotti from bursting during frying?
- The most important steps are not to overstuff the Panzerotti and to ensure the edges are very tightly crimped and sealed. A little water on the dough edges acts as a glue. Also, maintaining a consistent oil temperature prevents sudden expansion or sticking.
Essential Tips and Tricks for Success
Achieving perfect Panzerotti is easier with a few key strategies in mind:
- Prioritize Dough Rising: While you can roll out the dough immediately in a pinch, allowing your dough to complete its full rise yields the best texture and flavor. Patience here pays off immensely.
- Avoid Overstuffing: This is arguably the most crucial tip. An overstuffed Panzerotti is prone to bursting open during frying, leading to a messy kitchen and a loss of delicious filling. Less is more when it comes to the internal volume.
- Maintain Oil Temperature: Use a thermometer to keep your frying oil at a steady 350°F (175°C). Too cool, and your Panzerotti will be greasy; too hot, and they’ll burn on the outside before cooking through.
- Deep-Frying Safety First: Always follow proper deep-frying safety guidelines. Ensure a clean, dry cooking area, never leave hot oil unattended, and have a fire extinguisher or baking soda readily available. Be cautious when adding items to hot oil to avoid splatters.
- Cook in Batches: Fry Panzerotti one or two at a time, depending on the size of your pan. Overcrowding cools the oil, leading to greasy results. Use your best judgment to ensure each Panzerotti has enough space to cook evenly.
- Proper Sealing: Take extra care when crimping the edges. A good seal is your best defense against filling leaks. You can even use the tines of a fork to press down the edges for added security and a decorative touch.
- Drain Excess Oil: Always place cooked Panzerotti on a paper-towel-lined plate immediately after removing them from the oil. This helps absorb excess grease, ensuring a crispier, less oily product.
- Serve Immediately: Panzerotti are best enjoyed fresh off the fryer when the crust is at its crispiest and the filling is wonderfully hot and gooey.
Recommended Kitchen Tools
Having the right tools can make the Panzerotti-making process smoother and more enjoyable:
- Point Thermometer or Fry Thermometer: Absolutely essential for accurately monitoring and maintaining the oil temperature, crucial for perfectly fried Panzerotti.
- Tongs: Ideal for safely flipping and removing Panzerotti from hot oil.
- Cast Iron Skillet or Heavy Frying Pan: A heavy-bottomed pan ensures even heat distribution and retention, which is vital for consistent frying results.
- Kitchen Scale: Helpful for portioning dough into equal sizes, ensuring uniform cooking.
- Large Mixing Bowls: For preparing the dough and the filling.
- Rolling Pin: For stretching the dough into uniform disks.
- Paper Towels: For draining excess oil after frying.
Share Your Panzerotti Creations!
We absolutely love seeing your culinary successes! If you give this Classic Italian Panzerotti recipe a try, we would be incredibly grateful if you could share your experience. Leaving a rating or a comment below helps us understand how the recipe worked for you and also guides other aspiring home cooks. Your feedback is invaluable, and it truly makes a difference. Most importantly, thank you for visiting and allowing us to share this delightful recipe with you. Happy cooking!

Classic Italian Panzerotti
- Author: Ben Myhre
- Prep Time: 90 minutes
- Cook Time: 30 minutes
- Total Time: 2 hours
- Yield: 6 Panzerotti
- Category: Dinner, Appetizer, Snack
- Method: Fry
- Cuisine: Italian
Description
These classic Italian treats are a fried delight, offering the best of pizza and calzone in a convenient, handheld turnover. Perfect for a savory snack or a fun meal.
Ingredients
For Dough:
- 1 teaspoon white granulated sugar + 1 Tablespoon sugar
- 1/2 cup warm water
- 1/2 pack of active dry yeast (3.5 grams)
- 1 1/2 cups bread flour
- 1/2 teaspoon salt
- 2 tablespoon vegetable oil, plus more for frying and coating
For Filling:
- 4 1/2 ounce (approx. 128g) mozzarella cheese, grated
- 3/4 cup crushed tomato
- 1 teaspoon dried oregano
- 1/4 teaspoon salt
- 1/4 teaspoon pepper
- 42 small pepperoni (approx. 7 per panzerotti)
Instructions
- Prepare Yeast: Add 1 teaspoon sugar and warm water in a bowl. Sprinkle yeast on top and allow to sit for 5 minutes until foamy.
- Mix Dry Dough Ingredients: While yeast is sitting, mix flour, remaining sugar, and salt in a separate large bowl.
- Combine Dough: Add the water/yeast/sugar mixture and 2 tablespoons of oil to the dry ingredients. Mix until well combined.
- Knead Dough: Transfer dough to a floured surface and knead for a good 5 minutes until smooth and consistent.
- Portion Dough: Cut dough into 6 equal pieces (about 2 ounces each).
- Form Dough Balls: Form each piece into round balls.
- First Rise: Place dough balls on a lightly oiled baking pan, loosely cover, and let rise in a warm spot for 1 1/2 hours until doubled. (An oven with the light on and a dish of hot water works well).
- Prepare Filling: While dough is rising, mix the filling ingredients: tomatoes, cheese, salt, pepper, and oregano.
- Shape Panzerotti: After the rise, stretch out each dough ball into 6-inch disks.
- Fill Panzerotti: Place 7 small pepperoni on one half of each disk, then add 1-2 heaping tablespoons of filling on top. Do not overstuff.
- Seal Panzerotti: Lightly brush the edges of the dough with water. Fold the dough over to create a semi-circle and firmly crimp the edges to create a sealed pocket. Go back and perform a second crimping or use a fork for extra security.
- Repeat: Set aside and repeat with each of the doughs.
- Heat Oil: Fill a heavy frying pan (like a cast iron skillet) with 1 inch of oil and heat to 350°F (175°C). Use a thermometer for accuracy.
- Fry Panzerotti: Add 2 Panzerotti at a time to the hot oil. Use tongs to flip every 45 seconds until both sides are golden brown (about 3 minutes total).
- Drain: Once golden brown, remove and rest on a paper-towel-lined plate to drain excess oil. Repeat until all Panzerotti are cooked.
- Serve: Serve immediately. Add extra tomato sauce to the side for dipping if desired.
Notes
- Calorie counts are estimated, and it is particularly difficult to accurately estimate the amount of oil absorbed during frying.
- For the best results, always allow your dough to rise properly. In a pinch, you can skip the rise, but the texture will be denser.
- Never overstuff your Panzerotti; this is the primary cause of bursting during frying.
- Maintain an oil temperature of 350°F (175°C) when cooking for even browning and to prevent greasy Panzerotti.
- Always follow all deep-frying safety guidelines to ensure a safe cooking environment.
- Cook Panzerotti in small batches (one or two at a time) to maintain consistent oil temperature and ensure even cooking.
Nutrition (Estimated per serving)
- Serving Size: 1 Panzerotti
- Calories: 466 calories
- Sugar: 5 g
- Sodium: 538 mg
- Fat: 36 g
- Saturated Fat: 10 g
- Unsaturated Fat: 20 g
- Trans Fat: 0 g
- Carbohydrates: 27 g
- Fiber: 1 g
- Protein: 11 g
- Cholesterol: 33 mg