
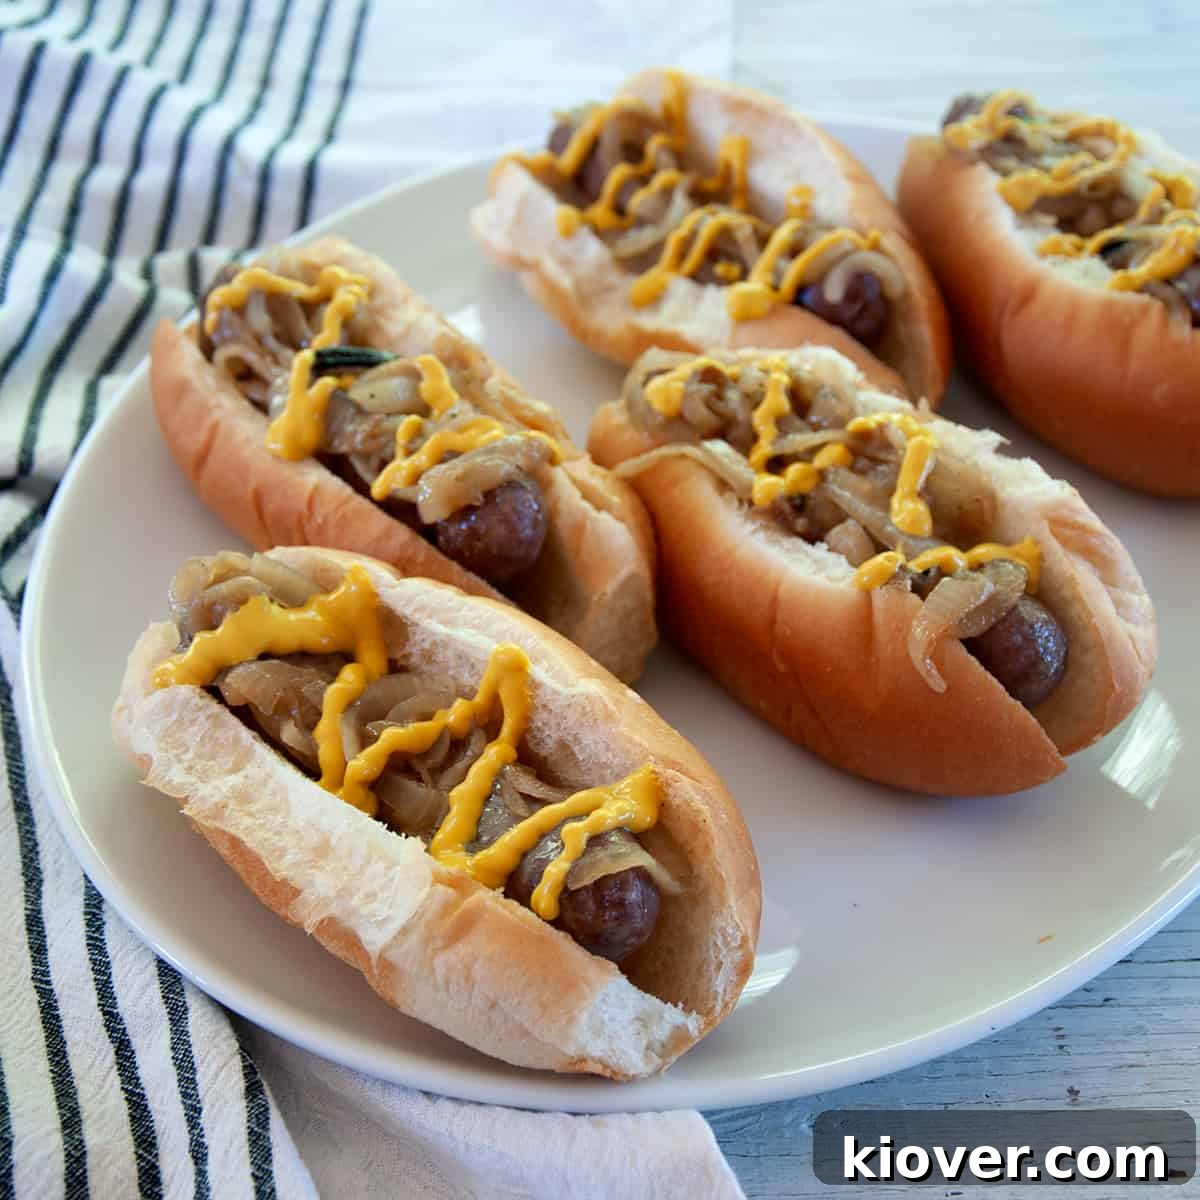
Welcome to the definitive guide for grilling the perfect bratwurst! Whether you’re planning a lively Summer barbecue, celebrating the 4th of July, hosting a spirited game day tailgate, or simply craving a truly satisfying meal, grilled brats are an undeniable crowd-pleaser. There’s something uniquely special about a juicy, flavorful bratwurst, and they become even more extraordinary when infused with the rich essence of beer and caramelized onions. Today, we’re unveiling our tried-and-true tips and tricks to help you master the art of making flawless beer brats on the grill. Get ready to elevate your cooking game and make your next gathering unforgettable!
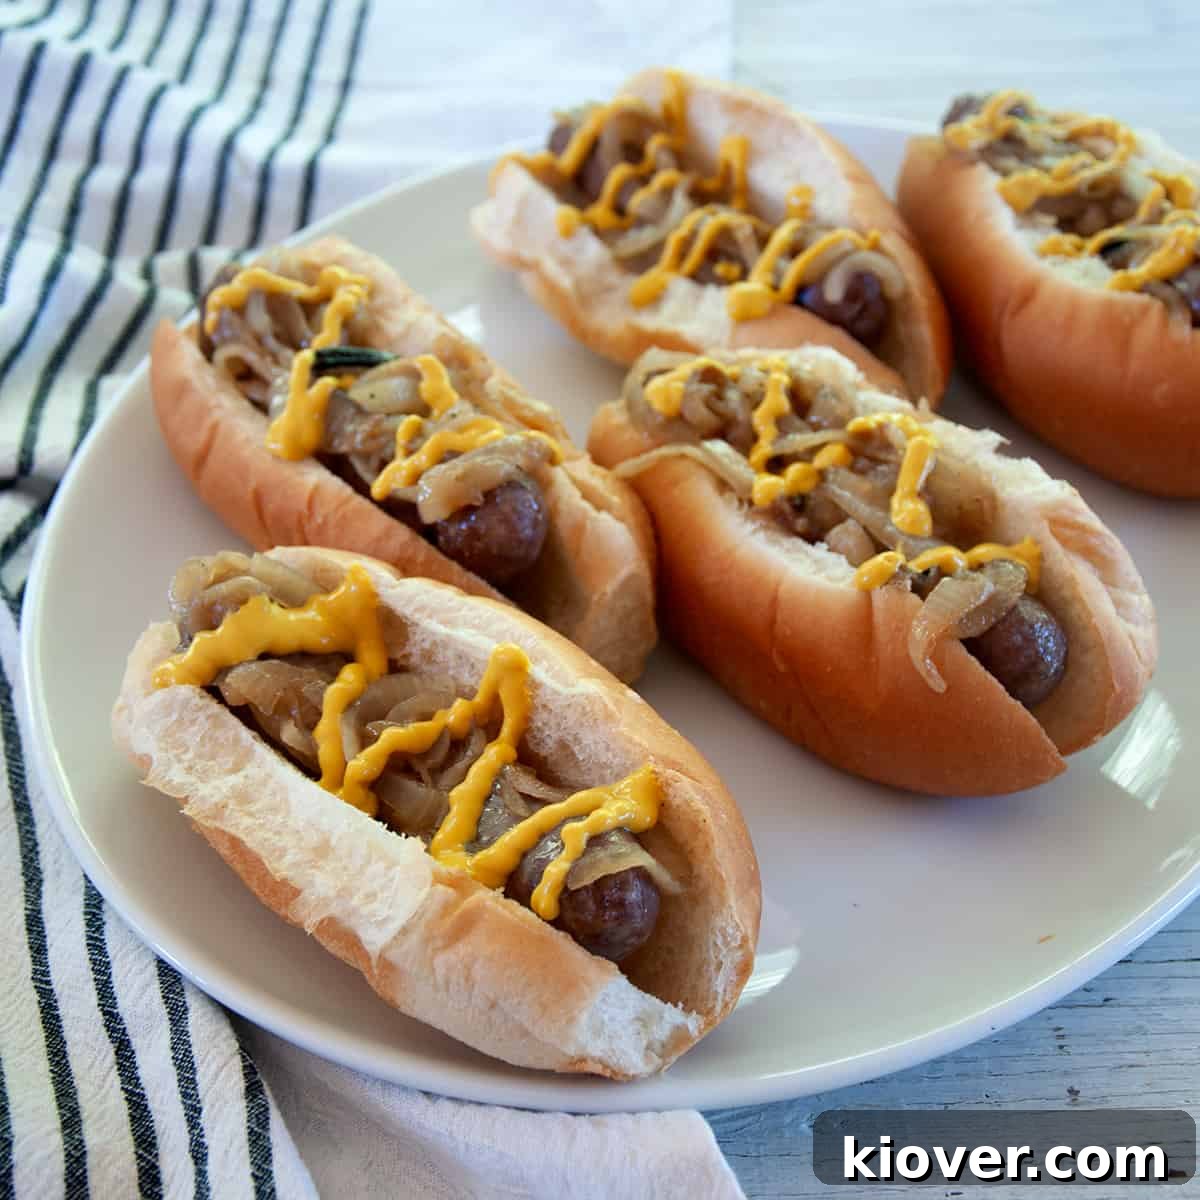
The Ultimate Guide to Grilling Perfect Beer Brats
Creating the best brats on the grill is an art form that combines simple techniques with incredible flavor. Our method focuses on a two-stage cooking process that guarantees juicy interiors and wonderfully seared exteriors. It all begins with a savory beer bath, followed by a quick finish over direct heat on the grill. This approach ensures your bratwursts are cooked through, brimming with taste, and boast that irresistible grilled texture. Let’s dive into the details of making these perfect grilled brats a staple in your culinary repertoire.
Unlock Unforgettable Flavor: The Secret to Our Perfect Brats on the Grill
Our cooking method for truly perfect brats is refreshingly straightforward, yet it yields exceptionally flavorful results. The secret lies in a pre-grill simmer that infuses the brats with aromatic goodness. Here’s a quick overview of the journey your brats will take from raw to absolutely delicious:
- Aromatic Foundation: We start by melting butter in a sturdy pan placed directly on the grill, preheated to approximately 375°F. Into this golden butter, we add thinly sliced onions and fragrant chopped garlic. These are gently cooked until they become beautifully translucent and begin to mingle their sweet and savory notes.
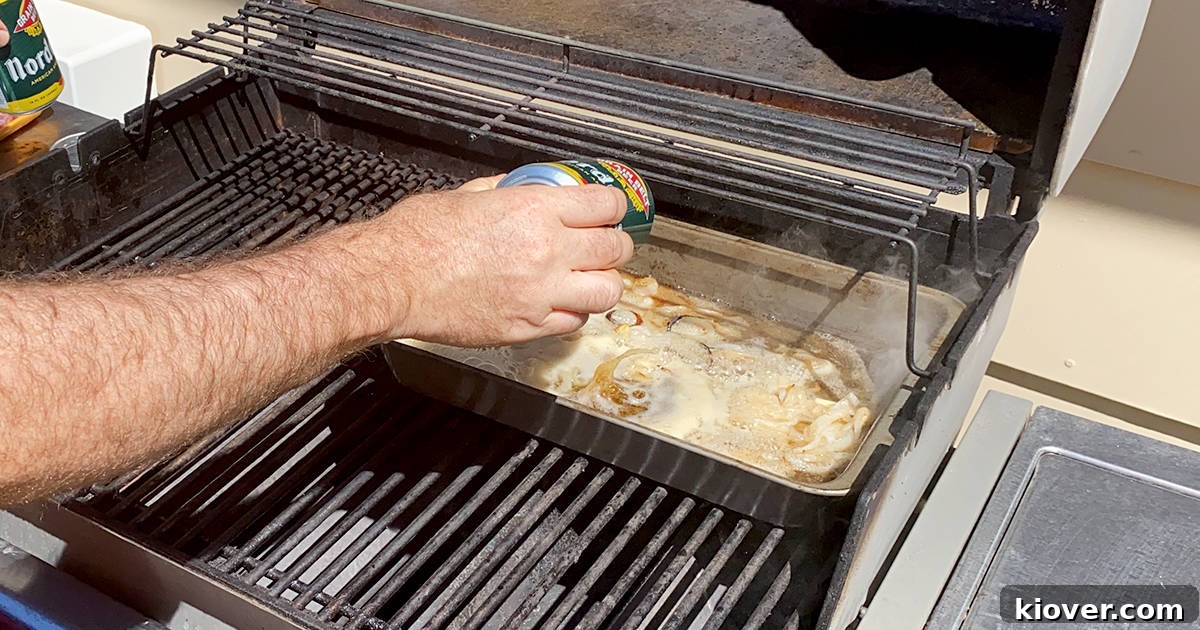
- The Beer Bath Infusion: Once the aromatics are softened, we pour in 24 ounces of your chosen beer, bringing the mixture to a gentle simmer. This creates a deeply flavorful liquid that will tenderize and season your brats.
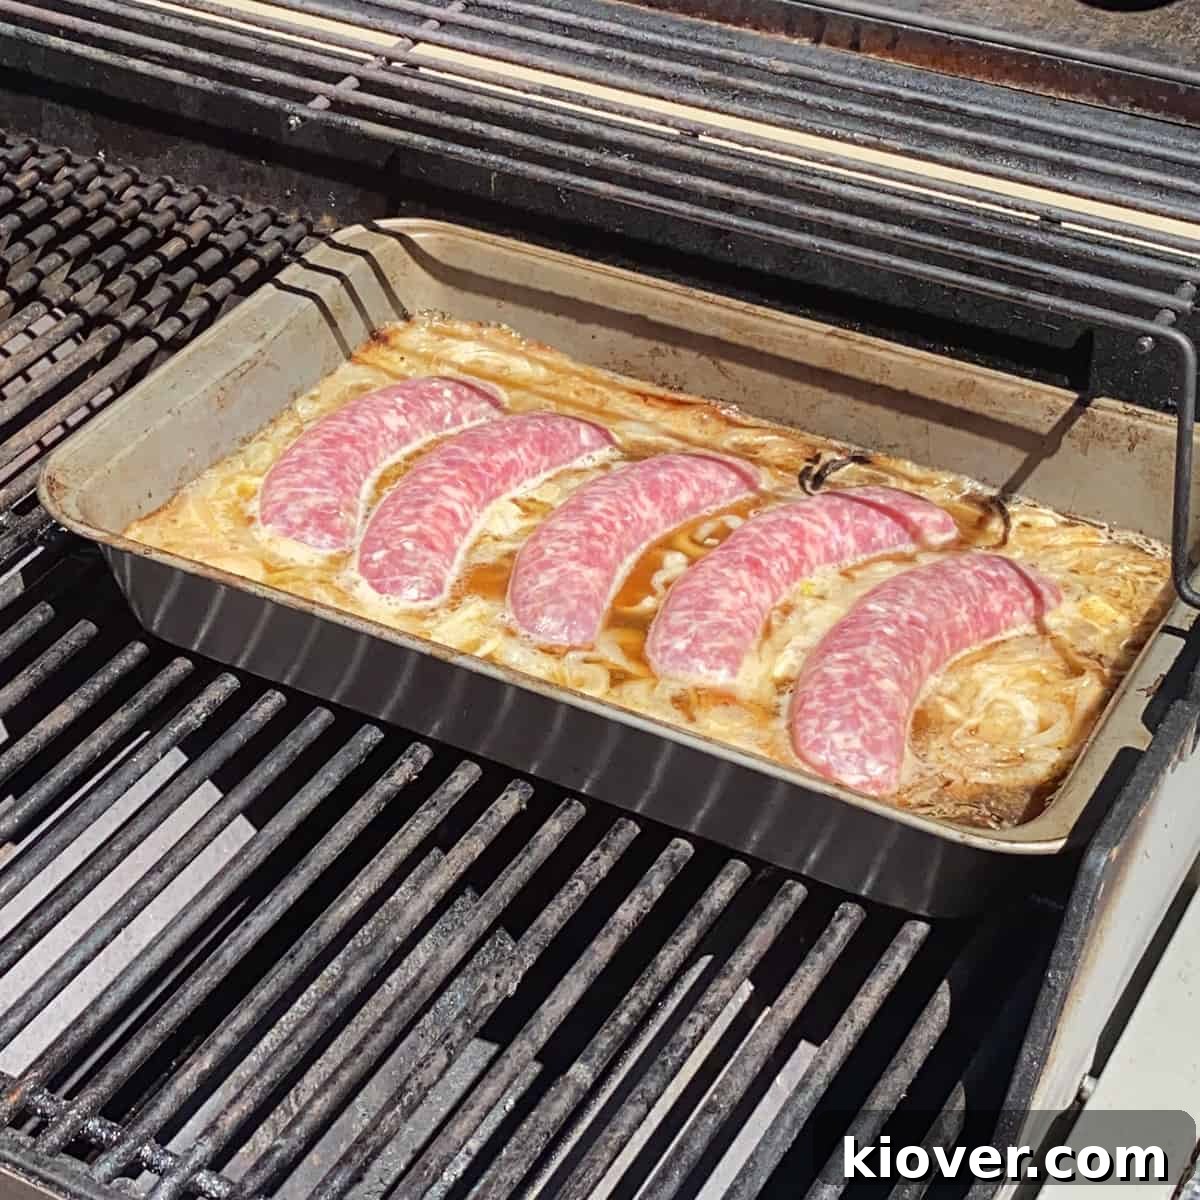
- Gentle Simmering: The uncooked brats are then carefully placed into this simmering beer and onion mixture, cooking for just 5 minutes per side. This crucial step ensures the brats cook through evenly, absorb all those wonderful flavors, and stay incredibly moist.
- The Perfect Sear: After their beer bath, the brats are removed from the pan and transferred directly to the hot grill grates. They’re seared for about three minutes per side, or until they achieve a beautiful golden-brown crust and reach a safe internal temperature of 160°F.
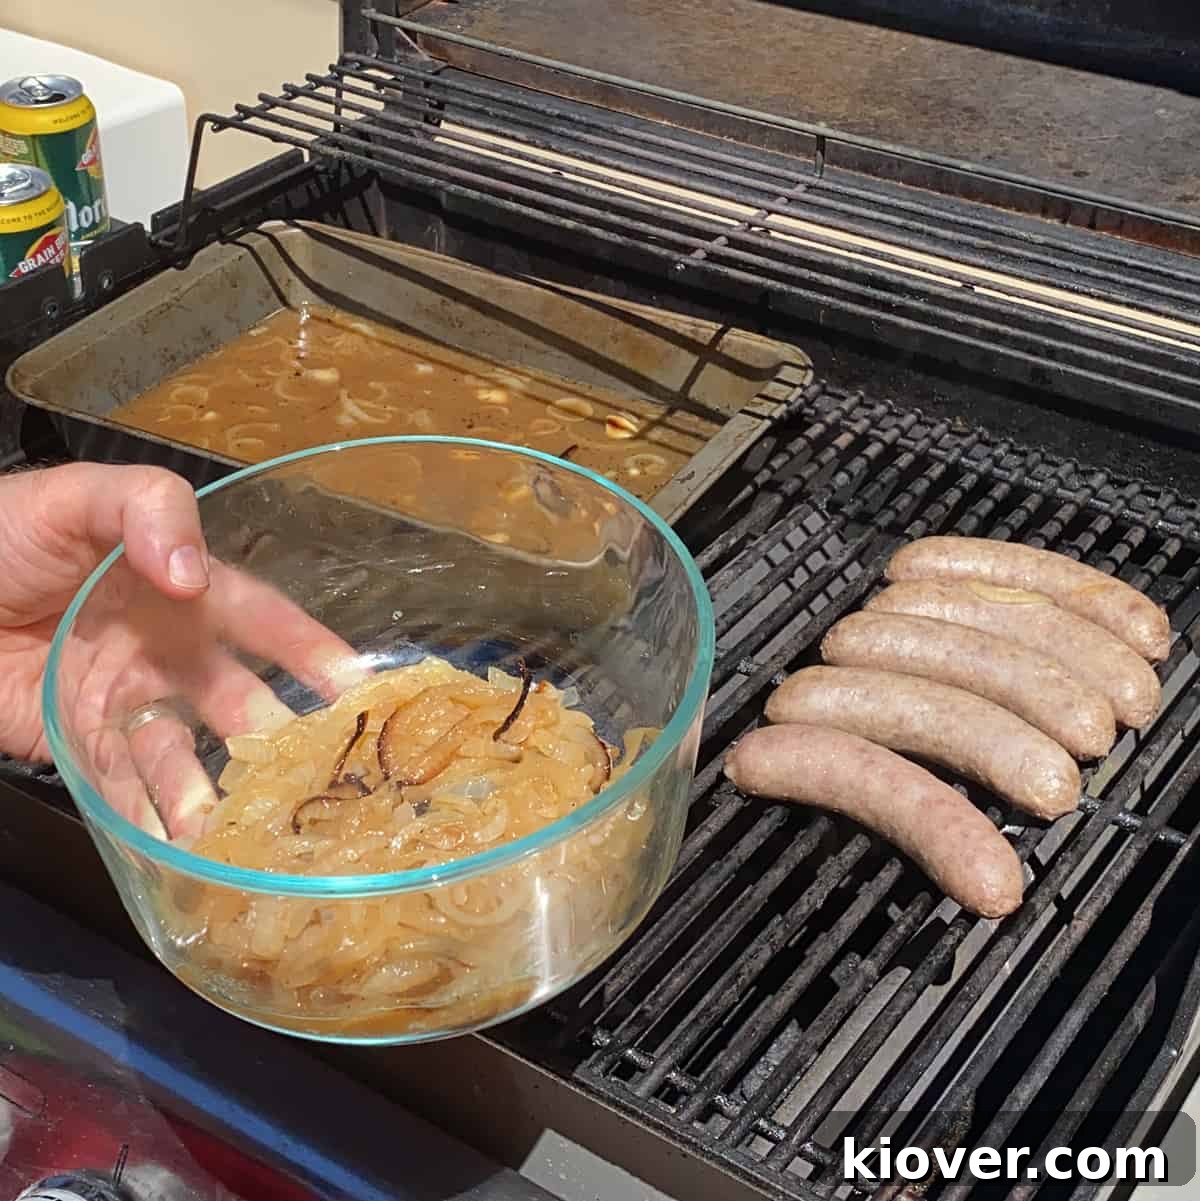
- Onion Gold: While your brats are searing, don’t forget the onions! Remove them from the beer mixture (discarding the beer) and set them aside. These flavorful, beer-infused onions make an exceptional topping for your finished brats.
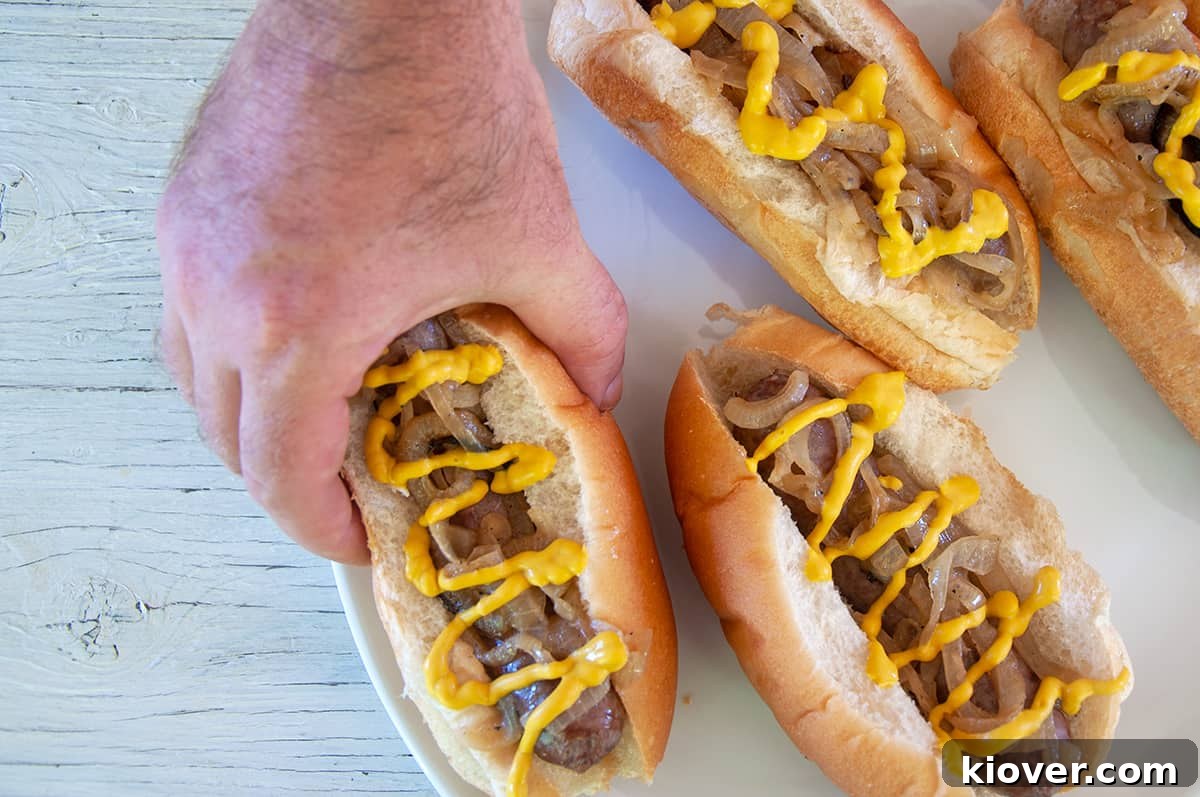
- Assemble and Enjoy: Finally, place your perfectly grilled brats into toasted buns, top with the reserved onions, and add your favorite condiments—mustard, ketchup, relish, or anything your heart desires. Prepare for a truly delightful culinary experience!
Selecting the Best Bratwurst: Your Journey Starts at the Store
Just like any great meal, the quality of your finished brats begins with smart shopping. Choosing the right bratwurst is paramount to achieving those perfect results on the grill. When I’m scouting for brats, I always prioritize uncooked, fresh sausages. These offer the best texture and absorb flavors most effectively during our beer simmering process. You can find excellent options in the fresh meat case at your local grocery store or, even better, from a trusted butcher who prides themselves on quality.
Why Fresh, Uncooked Brats are Key for Grilling
Opting for uncooked bratwurst ensures that you have full control over the cooking process, from the initial flavor infusion to the final sear. Pre-cooked brats, while convenient, often lack the juiciness and depth of flavor that comes from slowly cooking a raw sausage. Look for brats that appear plump and firm, with a natural casing that is intact. The best brats will have a good balance of lean pork and fat, which contributes to their succulent texture and rich taste.
Our Go-To: Johnsonville Original Brats and Beyond
For this specific recipe, I confidently recommend Johnsonville Original Brats. They are widely available across many regions, making it incredibly easy for you to replicate this fantastic bratwurst grilling recipe with consistent, delicious results. These brats are typically around 3.8 ounces each, which works perfectly with our suggested cooking times. However, keep in mind that brat sizes can vary between brands and even within different product lines from the same brand. Always adjust your cooking times accordingly to ensure your brats reach that crucial internal temperature of 160°F for food safety and optimal enjoyment.
Beyond the classic original, the world of bratwurst offers an exciting array of flavors. While I stick to the Johnsonville Original for this particular recipe to ensure wide accessibility, don’t hesitate to experiment! Some of my personal favorites include jalapeno and cheddar, which add a delightful kick and creamy texture. Many stores now stock a vast selection, from spicy to herb-infused, catering to every palate. Feel free to explore these varieties once you’ve mastered the basic technique, adjusting the beer choice to complement the brat’s inherent flavors.
Sizing Up Your Batch: How Many Brats to Grill?
The number of brats you choose to grill is entirely up to you and the size of your gathering. In this recipe, I’m preparing five brats, primarily because that’s the standard count in a single package of Johnsonville Original Brats. It’s a convenient starting point! While it’s a minor culinary mystery why brat packages rarely align with bun packages (often sold in fours or eights), don’t let that deter you. Feel free to scale this recipe up or down as needed. This specific recipe provides ample onion mixture to generously top five brats, ensuring every bite is packed with flavor. If you’re cooking for a larger crowd, simply increase the quantities of butter, garlic, onions, and beer proportionally.
The Flavor Foundation: Onions, Butter, and Garlic
The initial step of cooking the onions and garlic in butter before introducing the beer serves a vital purpose: it creates a rich, aromatic foundation that deeply infuses flavor into our brats. By sautéing the onions until they’re translucent and tender, we unlock their natural sweetness and mellow their pungency, transforming them into a savory, slightly caramelized delight. While this initial sautéing might give them a hint of crispness, their subsequent simmer in beer ensures they become wonderfully soft and imbued with the liquid’s essence.
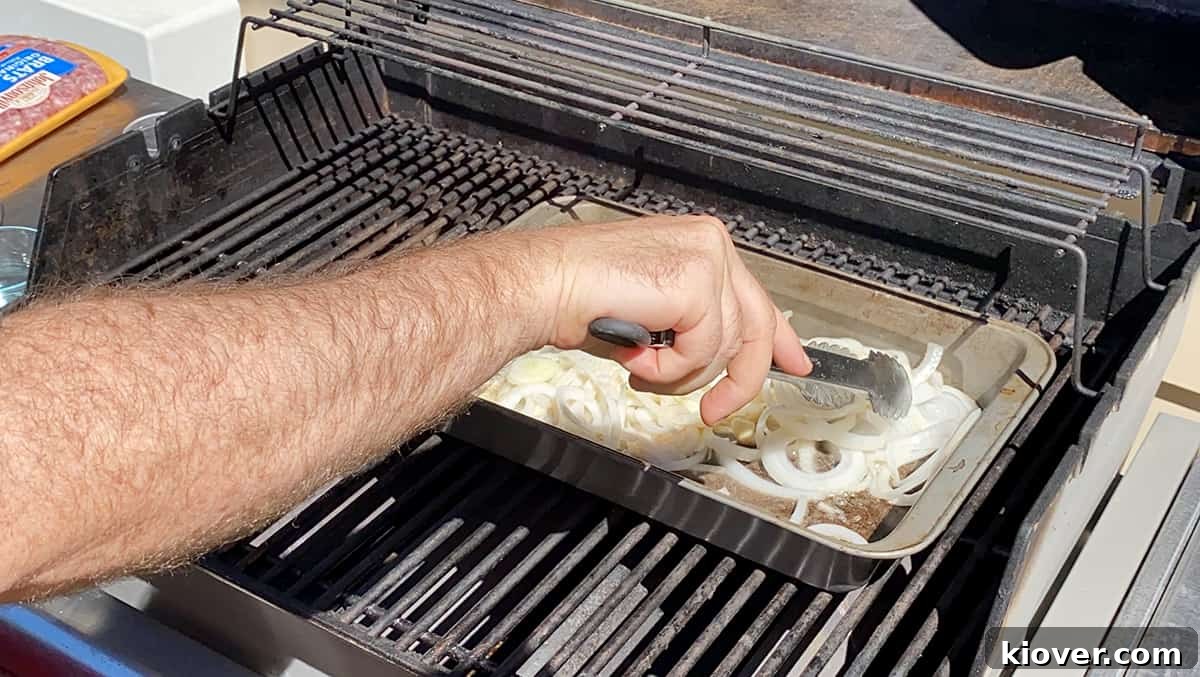
These beer-infused onions aren’t just for flavor; they are also an exceptional topping! Once removed from the beer bath with a pair of tongs, a slotted spoon, or a fork, they add a layer of sweet, savory, and slightly tangy flavor directly to your grilled brats. If you appreciate the nuanced taste of cooked onions, these will undoubtedly elevate your perfect brats on the grill, adding a gourmet touch that many traditional methods overlook. The interplay of sweet onions, pungent garlic, rich butter, and malty beer creates a complex flavor profile that truly makes these brats stand out.
Choosing Your Brew: What Beer to Use for Brats?
One of the beauties of this recipe is its flexibility when it comes to beer selection. The golden rule is simple: use what you have on hand! However, for optimal flavor integration, certain types of beer tend to shine. A crisp pilsner works exceptionally well, offering a clean, subtle bitterness that complements the pork without overpowering it. I often use an amber ale, such as Grainbelt’s Nordeast, which imparts a wonderful malty depth and slight sweetness that pairs perfectly with the savory bratwurst and caramelized onions.
Generally, the stronger and more distinct the flavor of your chosen beer, the more pronounced its impact will be on your brats. For instance, a hoppy IPA might lend a bitter, floral note, while a dark stout could impart hints of roasted malt and chocolate. If you prefer a milder flavor, opt for a light lager or a less assertive ale. Conversely, if you want to experiment, try a craft beer with unique flavor profiles. Remember, you’ll need about 24 ounces of beer, which typically equates to two standard-sized cans or bottles. This is plenty to create that fantastic simmering bath for five brats.
The Simmering Debate: Why a Beer Bath is Not a Cardinal Sin
You might hear some grilling purists claim that submerging brats in any liquid is a culinary transgression. I respectfully, yet firmly, disagree. Our method involves a gentle simmer, not a vigorous boil, and the brats spend a carefully controlled, minimal amount of time in their flavorful beer bath. This is a crucial distinction. We are not “boiling the heck out of them,” which can indeed strip flavor and dry out the meat.
Instead, a mere ten minutes of simmering, five minutes per side, is all it takes before the brats go directly onto the grill. This brief simmer offers multiple benefits:
- Flavor Infusion: The beer, combined with the sautéed onions, butter, and garlic, deeply infuses the brats with incredible flavor, adding complexity that simply grilling alone cannot achieve.
- Even Cooking: Simmering gently begins the cooking process from the inside out, ensuring the brats are thoroughly cooked and succulent, minimizing the risk of a raw center.
- Moisture Retention: By starting them in a liquid, we help to plump the brats and prevent precious juices from escaping, resulting in an incredibly moist and tender sausage.
So, let the purists adhere to their beliefs. For those seeking the most flavorful, juicy, and perfectly cooked brats, our beer simmering technique is a game-changer that delivers consistent, delicious results every time. It’s a foundational step that sets our grilled brats apart.
The Grand Finale: Achieving the Perfect Sear
After their invigorating beer bath, the brats are primed for their grand finale: a direct sear on the hot grill grates. This final stage is absolutely critical for two main reasons. First, it creates that irresistible, beautifully browned and crispy exterior that defines a perfectly grilled bratwurst. This browning is due to the Maillard reaction, a chemical process that enhances flavors and aromas, giving the brats a depth that can’t be achieved through simmering alone. Second, searing helps to finish off the cooking process, ensuring the brats reach their optimal internal temperature while locking in all the juices.
The goal is a golden-brown crust, not a charred exterior. Keep a close eye on them during these last few minutes, flipping them regularly to achieve an even sear on all sides. This quick, high-heat cooking creates a delightful contrast between the tender, flavorful interior and the slightly crisp, smoky exterior—the hallmark of truly exceptional grilled brats.
Food Safety First: Don’t Break the Seal and How to Temp Accurately
Ensuring your brats are safe to eat is the most critical part of this recipe. The absolute most important aspect is making sure your brats reach a safe internal temperature of 160°F (71°C). While some sources might suggest pulling them off as low as 145°F, I strictly adhere to the FDA’s recommendations to guarantee food safety. Investing in a reliable meat thermometer is essential for this. It takes the guesswork out of grilling and ensures perfect results every time.
Another crucial tip is to avoid puncturing the brats during the cooking process, especially during the simmering stage. Each puncture creates an exit point for those delicious, flavorful juices, leading to a drier and less appealing brat. For this reason, I do not take the internal temperature of my brats while they are simmering. I wait until they are on the grill, nearing the end of their cooking time.
When it’s time to check the temperature, exercise caution. If possible, insert the thermometer into the very end of the brat, utilizing any existing opening, and push it towards the center. This minimizes further punctures to the casing. If you must insert it from the side, choose one discreet spot and aim for the thickest part of the sausage. This technique helps retain moisture and ensures your brats remain incredibly juicy from start to finish. Always clean your thermometer after each use to prevent cross-contamination.
Essential Tools for Perfect Brats on the Grill
Having the right equipment can make all the difference in achieving grilling success. While you don’t need a professional setup, a few key tools will ensure your brat cooking experience is smooth and enjoyable, leading to consistently perfect results.
- Weber Grill: A reliable grill, whether gas or charcoal, is your primary cooking vessel. Weber is known for its consistent heat and durability, making it an excellent choice for any grilling enthusiast. Ensure your grill grates are clean and well-oiled before use to prevent sticking.
- Long-Handled Tongs: Essential for safely flipping brats on the grill and maneuvering the hot pan. Long tongs protect your hands from the heat and allow for precise handling, which is crucial for achieving an even sear and avoiding punctures.
- Instant-Read Meat Thermometer: Your most important food safety tool. An instant-read thermometer provides quick and accurate temperature readings, ensuring your brats are cooked to 160°F. This eliminates guesswork and guarantees perfectly cooked, safe brats every time.
- 9×13 Baking Dish (or similar): A sturdy, grill-safe baking dish is vital for creating the beer bath. Cast iron, stainless steel, or aluminum foil pans specifically designed for grilling can work well. Ensure it’s large enough to comfortably hold your brats and the beer mixture without overflowing.
Expert Tips for Grilling Brats Like a Pro
Beyond the recipe steps, a few additional tips can elevate your brat-grilling game from good to absolutely outstanding. These insights cover everything from maximizing flavor to ensuring food safety and presentation:
- Precision Temping: As mentioned, when checking the internal temperature of your brats, aim to insert the thermometer into the end of the sausage, if possible, pushing it towards the center. This clever trick helps preserve the integrity of the casing and keeps those precious juices locked inside, leading to a much juicier brat.
- Strategic Temp Checks: Be patient and avoid over-tempering. Only check the temperature when you believe the brats are nearing completion. Excessive poking can dry them out. Trust the cooking times and use the thermometer as a final verification.
- Beer Selection Matters (But Don’t Overthink It!): For the best flavor infusion, a classic pilsner or a malty amber ale is highly recommended. These beers offer a balanced profile that complements the pork beautifully. However, don’t let a specific beer stop you! Any beer you enjoy drinking will contribute its unique flavor to the brats. Just be mindful that bolder beers will impart stronger flavors.
- Customizable Sear: The suggested 3 minutes of searing per side is a guideline. If your brats haven’t quite reached the target internal temperature of 160°F, or if you simply prefer a crispier, more deeply caramelized exterior, feel free to extend the searing time. Keep a close watch to prevent burning, and adjust based on your grill’s heat and personal preference.
- Delightful Pairings: Complete your bratwurst feast with perfectly chosen side dishes and desserts. Consider serving your beer brats alongside a creamy, tangy coleslaw, some crispy grilled Jo Jos (potato wedges), or even some tangy easy no-cook refrigerator pickles for a refreshing crunch. For a surprising and delicious dessert, try this incredible grilled pineapple with honey sriracha glaze and basil ice cream – it’s an unexpected treat that balances the richness of the brats beautifully.
Share Your Perfect Brat Creation!
I am genuinely thrilled that you’ve decided to give this “Best Brats on the Grill” recipe a try. My sincere hope is that you’ll love these brats as much as I do and that they become a staple in your grilling repertoire. Your feedback means the world to me! Please take a moment to let me know how your brats turned out in the comments section below, consider giving the recipe a star rating, and feel free to share your delicious creations on social media with your friends and family. Most importantly, I’m just happy you’ve cooked along with me, and I look forward to welcoming you back to Ramshackle Pantry for more culinary adventures!
Print Recipe
Best Brats on the Grill
- Author: Ben Myhre
- Prep Time: 5 minutes
- Cook Time: 30 minutes
- Total Time: 35 minutes
- Yield: 5 brats
- Category: Cookout
- Method: Grilling
- Cuisine: American
Description
If you have ever tried to make brats on your grill, but haven’t got it quite right, I have you covered. Check out my Best Brats on the Grill recipe to learn some tips and tricks to make a great bratwurst meal for your Summer cookout, game-day tailgating, or just a delicious brat dinner.
Ingredients
- 4 Tablespoons Salted Butter
- 2 Garlic Cloves, chopped
- 1 White Onion, thinly sliced
- 1 teaspoon salt
- 24 Ounces Beer
- 5 Brats
- 5 Brat Buns or Hot Dog Buns
Instructions
- Preheat grill and 9 by 13 baking pan to 375° Fahrenheit.
- Add butter to pan and melt.
- Add garlic, onions, and salt.
- Cook until onions are glassy.
- Add beer to pan and bring to a simmer.
- Add brats and cook for 5 minutes.
- Flip and cook the other side for 5 minutes.
- Remove from pan and cook for 3 minutes on each side or until internal temperature reaches 160° Fahrenheit.
- While brats are searing, remove onions with tongs and put them aside in a dish. Discard beer.
- Remove brats, add to buns, top with onions (optional) and anything else you like. EAT!
Notes
- When temping the brats, insert the thermometer into the end and hit the center to avoid puncturing the outer skin.
- Try not to temp until you get as close to the end.
- Use a pilsner or amber ale for best results, but any beer will do! Just remember that the flavor will make its way into the brat.
- If 3 minutes of searing is not enough to bring it to temp or you like it a bit crispier, sear them longer.
- Try serving this with a great coleslaw recipe or maybe some grilled jo jos.
- Nutritional Information is an estimate and can change based on the brat and buns you use. I also estimated that only a portion of the butter actually ends up being eaten.
Nutrition
- Serving Size: 1 Brat and Bun
- Calories: 403 calories
- Sugar: 5 g
- Sodium: 956 mg
- Fat: 25 g
- Saturated Fat: 9 g
- Unsaturated Fat: 16 g
- Carbohydrates: 25 g
- Fiber: 1 g
- Protein: 18 g
- Cholesterol: 66 mg