
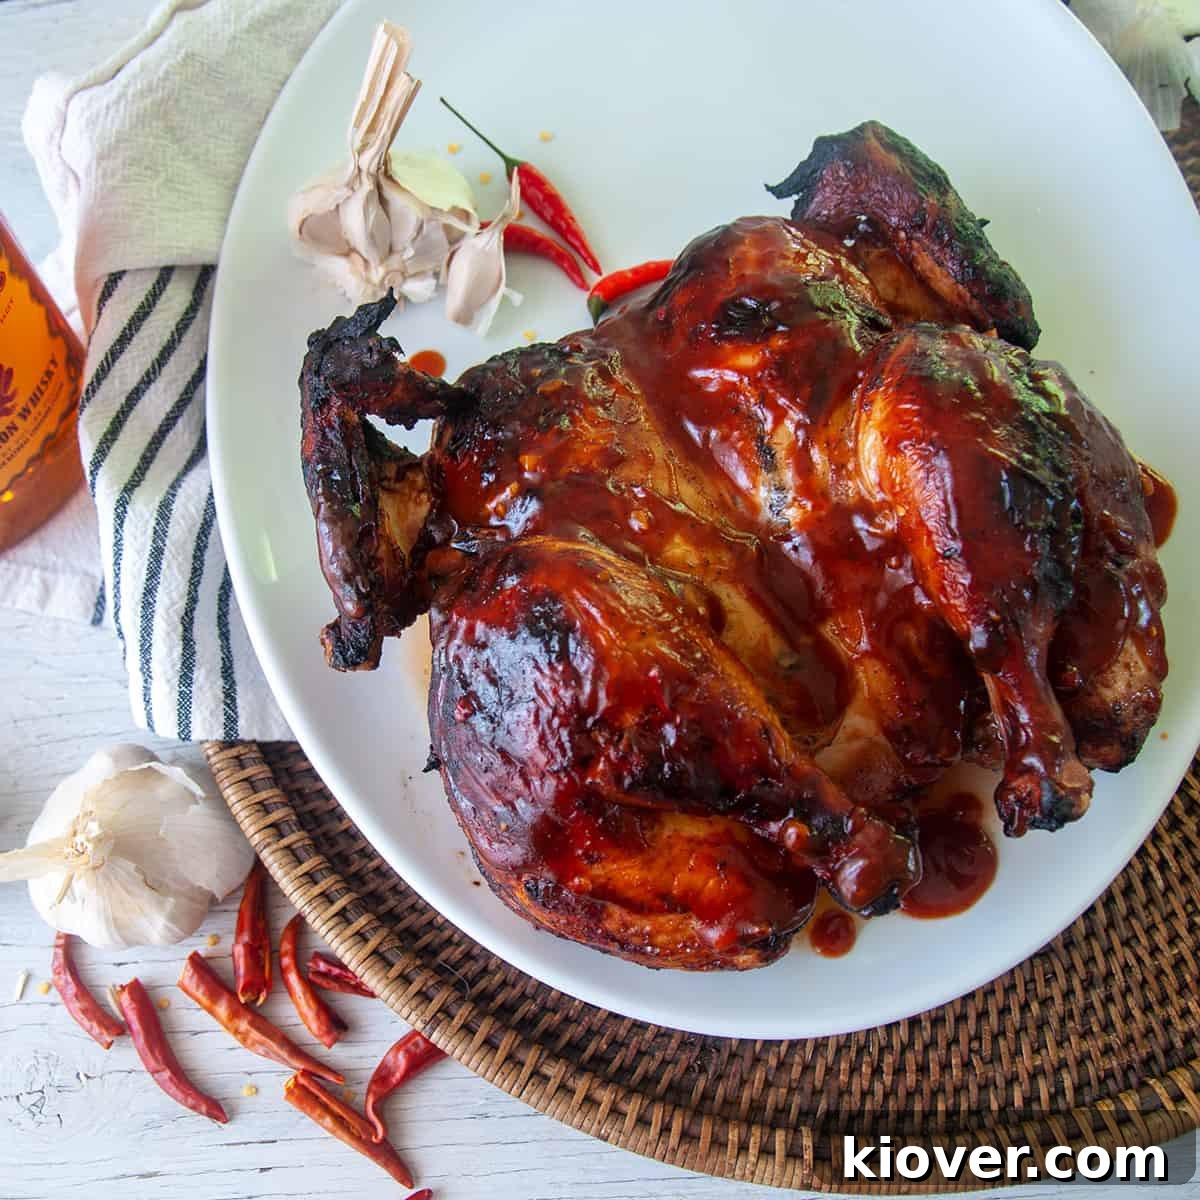
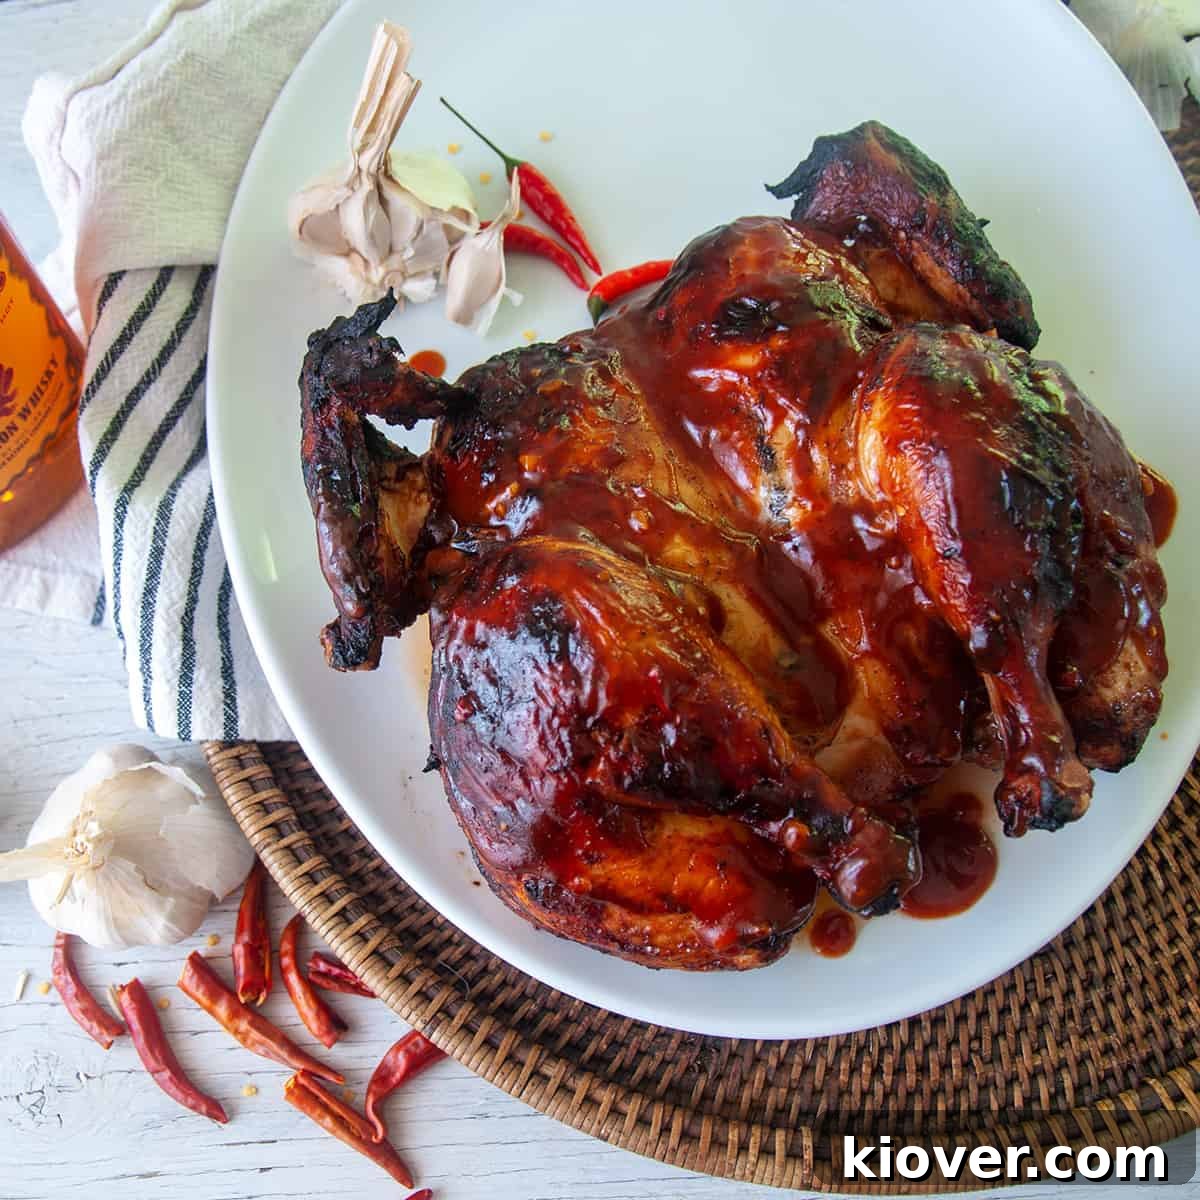
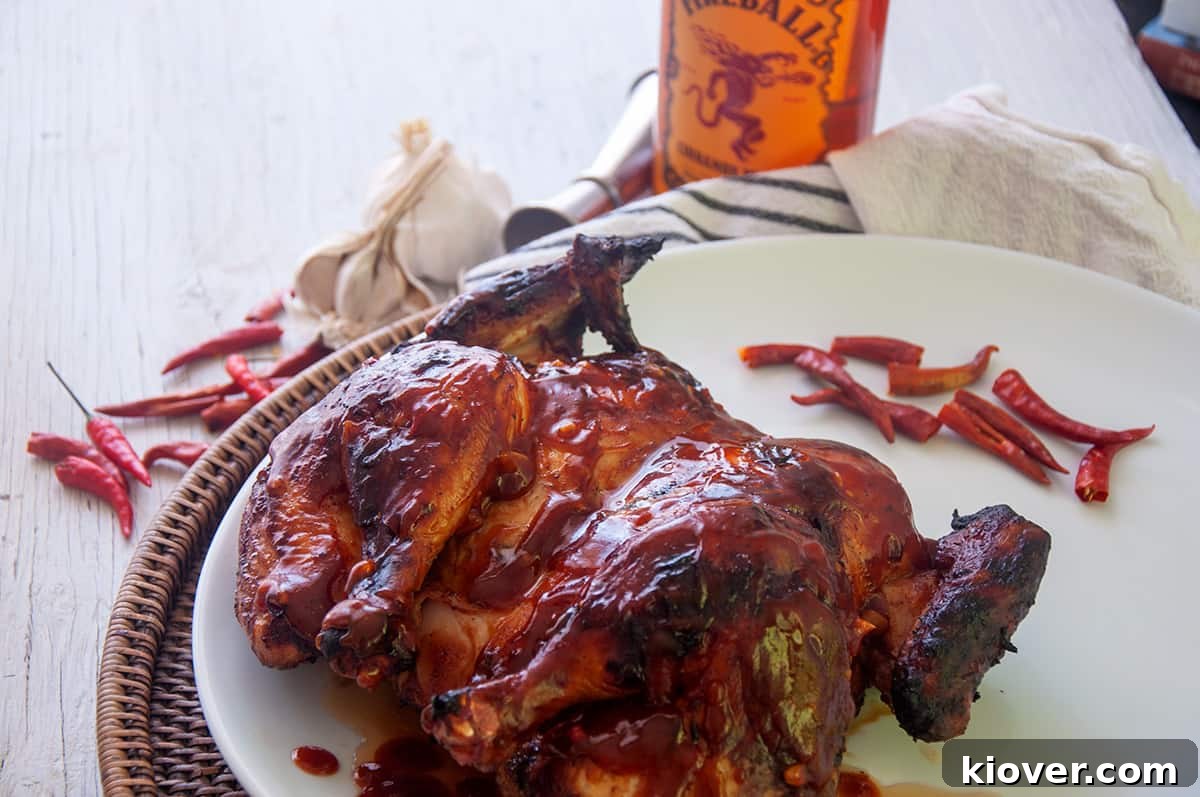
Welcome to the ultimate guide for mastering a deliciously tender and perfectly cooked Spatchcock Grilled Chicken! If you’re looking to elevate your grilling game and impress friends and family with a meal that’s both flavorful and surprisingly simple to prepare, you’ve come to the right place. This recipe takes a whole chicken and transforms it into a juicy masterpiece, starting with an essential dry brine and finishing with a tantalizing layer of our special homemade BBQ sauce. Get ready to experience grilled chicken like never before!
Why This Spatchcock Grilled Chicken Recipe Stands Out
This isn’t just another grilled chicken recipe; it’s a meticulously crafted culinary experience designed to deliver maximum flavor and tenderness with minimal fuss. We incorporate several key techniques that set this dish apart and guarantee exceptional results:
The Power of Dry Brining
Our journey to perfection begins with a crucial step: dry brining. Unlike traditional wet brines, a dry brine uses salt to draw moisture out of the chicken, which then reabsorbs along with the salt, leading to a profound tenderization of the meat. This process not only ensures a consistently moist and succulent bird but also seasons it deeply from within, enhancing its natural flavors. Imagine biting into chicken that’s juicy all the way to the bone, with a subtle hint of savory seasoning that complements any sauce you choose to add. The dry brine is your secret weapon for preventing dry, rubbery chicken and achieving that coveted tender texture.
The Art of Spatchcocking
Spatchcocking, also known as butterflying, is a game-changer for grilling a whole chicken. This technique involves removing the backbone and flattening the bird, allowing it to cook more evenly and significantly reducing grilling time. When a whole chicken is cooked traditionally, the breast often dries out before the thighs and legs are fully cooked. By spatchcocking, the entire chicken lies flat on the grill, exposing all parts to consistent heat. This results in uniformly cooked meat and, perhaps most appealingly, incredibly crispy skin across the entire bird. It’s a simple cut that yields dramatic improvements in texture and cooking efficiency.
Our Signature Fireball Whiskey Spicy BBQ Sauce
While a perfectly cooked chicken is fantastic on its own, a truly exceptional BBQ chicken demands an equally exceptional sauce. Our recipe features a homemade Fireball Whiskey Spicy BBQ Sauce that introduces a unique blend of sweet, smoky, and spicy notes, elevated by the distinct warmth of Fireball Whiskey and the subtle kick of Thai chilies. Crafting your own BBQ sauce allows for complete control over the flavor profile, ensuring it perfectly complements the grilled chicken without overpowering it. This sauce isn’t just a condiment; it’s an integral part of the dish’s identity, delivering a memorable taste that will have everyone asking for the recipe. We’ve previously experimented with bold flavors, like our Blackberry Homemade BBQ Sauce, proving our passion for innovative BBQ.
Perfect Pairings for an Unforgettable Meal
No main course is complete without delightful side dishes. This Spatchcock Grilled Chicken pairs exquisitely with a variety of classic barbecue accompaniments. For a refreshing contrast, our Easy Coleslaw Recipe offers a crisp, tangy bite. If you prefer something heartier, the creamy goodness of our Rancharoni Macaroni Salad provides a comforting balance. And for a truly nostalgic treat, don’t forget a batch of crispy Grilled Jo Jos. These combinations create a balanced and satisfying meal, making this spatchcock grilled chicken the centerpiece of any perfect summertime cookout or family dinner.
Table of Contents
- Why This Spatchcock Grilled Chicken Recipe Stands Out
- Essential Ingredients for Success
- Grilling Instructions: From Brine to BBQ Perfection
- Customizing Your Grilled Chicken: Substitutions and Variations
- Storing Leftovers Safely
- A Brief History of Grilling
- Frequently Asked Questions
- Expert Tips and Tricks for the Best Spatchcock Chicken
- Recommended Products for This Recipe
- Share Your Experience
Essential Ingredients for Success
This recipe celebrates simplicity, focusing on quality ingredients to create profound flavors. Beyond our fantastic BBQ sauce, you’ll be surprised how few items are truly necessary to achieve a magnificent meal. The star, naturally, is the chicken itself. Our focus here is on achieving tenderness and flavor, relying primarily on salt for the dry brine and the robust profile of our chosen barbecue sauce.
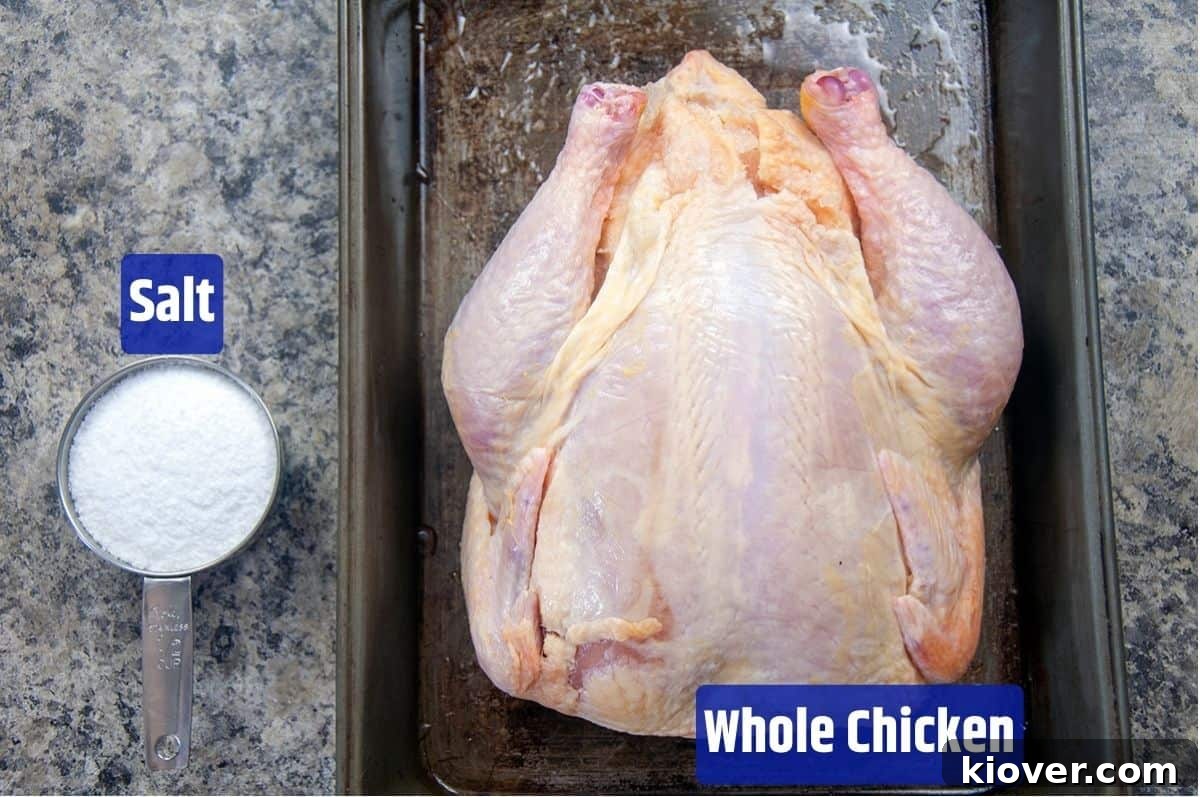
- 1 whole chicken: Aim for a chicken weighing between 3-5 pounds for optimal grilling. Fresher is always better.
- ½ cup coarse salt (like Kosher or sea salt): This is crucial for the dry brine. Avoid fine table salt, as it can make the chicken too salty.
- 2 cups Barbecue Sauce: While we highly recommend our Fireball Whiskey Spicy BBQ Sauce for its unique kick, feel free to use your favorite store-bought brand. A good quality sauce will make a significant difference. Sweet Baby Ray’s is a popular and readily available option that many enjoy.
The quality of your chicken and the flavor of your BBQ sauce are the two most impactful elements on the final taste of this dish. Choose wisely!
Grilling Instructions: From Brine to BBQ Perfection
Achieving a perfectly grilled spatchcock chicken might seem like a multi-step process, especially if you’re making the BBQ sauce from scratch, but each step is straightforward and contributes significantly to the final, delicious result. Our recommended Fireball BBQ Sauce is surprisingly simple to prepare; it typically involves softening some minced garlic and Thai chilies in butter, then adding the remaining ingredients and simmering for about five minutes. For detailed instructions on the sauce, refer to the linked recipe.
Part 1: The Dry Brine – Your Path to Moisture and Tenderness
The dry brining process is incredibly simple yet profoundly effective. It’s the secret to ensuring your chicken remains juicy and flavorful throughout grilling. To dry brine:
- Prepare the Chicken: Unwrap your whole chicken and pat it thoroughly dry with paper towels.
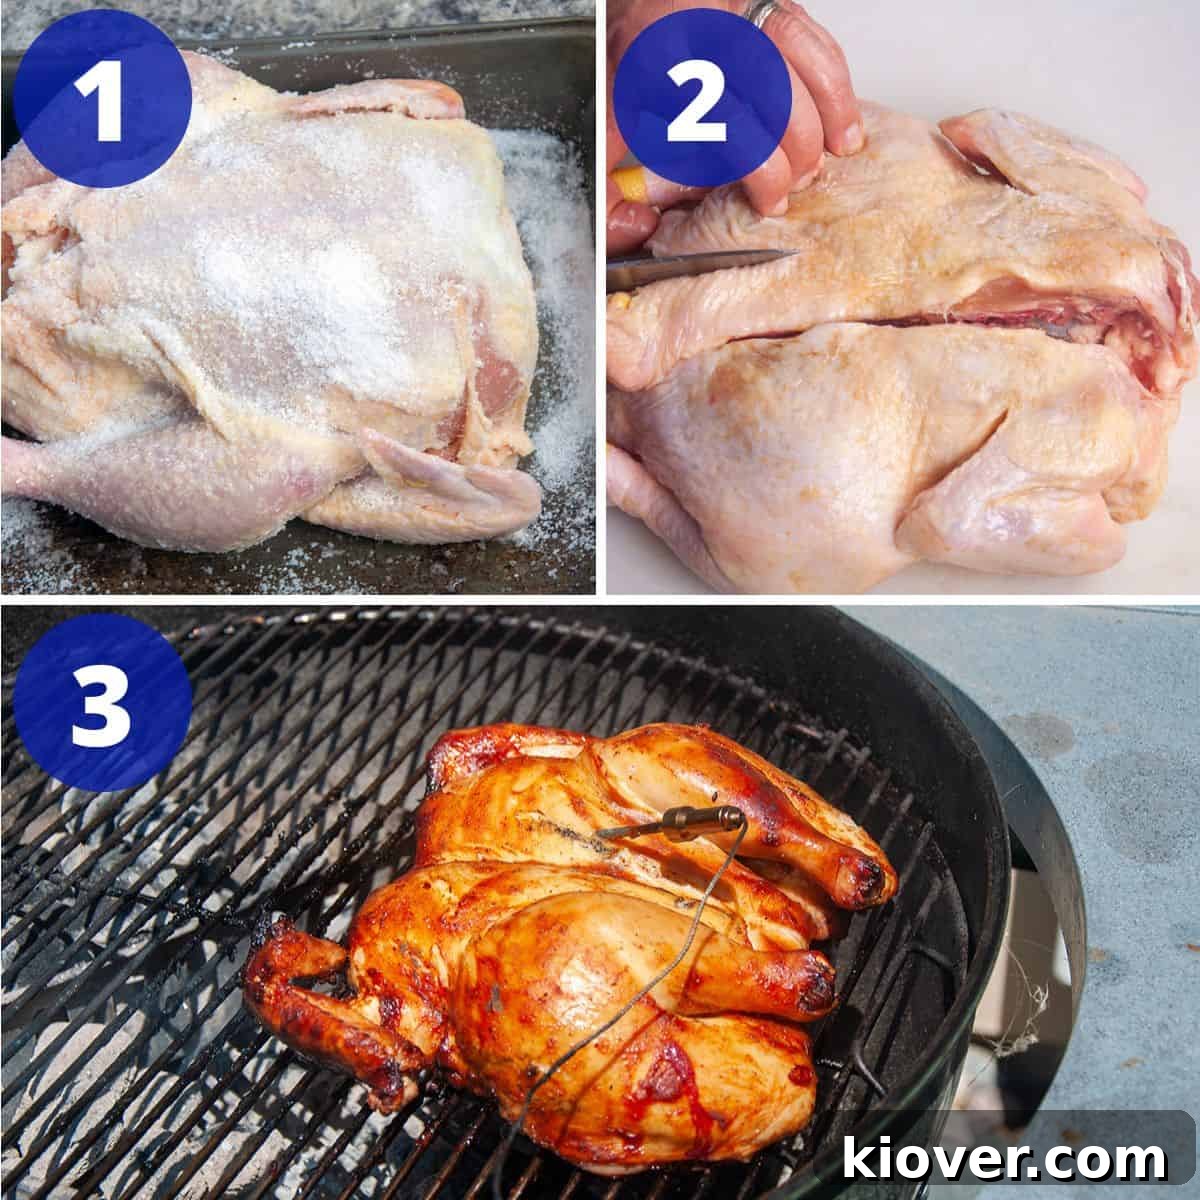
- Apply Salt: Generously sprinkle coarse salt (approximately ¼ to ½ cup, depending on the chicken’s size) over the entire surface of the chicken, both inside and out. Ensure an even coating.
- Refrigerate: Place the salted chicken in a tray or on a wire rack set over a baking sheet. Loosely cover it with plastic wrap or foil, ensuring some air circulation. Refrigerate for at least 8 hours, with overnight (12-24 hours) being ideal for maximum effect. While brining overnight is highly preferential for the best results, you can do it for a shorter period on the same day if you’re short on time, or even skip it in a pinch, though the chicken won’t be as moist.
The salt works by drawing out moisture, which then dissolves the salt, creating a natural brine that is reabsorbed into the meat. This process tenderizes the muscle fibers and enhances the chicken’s natural flavor, making it resistant to drying out on the grill.
Part 2: Spatchcocking the Chicken – Even Cooking Guaranteed
Spatchcocking is the technique that allows your chicken to cook uniformly and achieve that desired crispy skin. Here’s how to do it:
- Remove the Backbone: Place the chicken breast-side down on a cutting board. Using sturdy kitchen shears, cut along one side of the backbone from the tail to the neck. Repeat on the other side to completely remove the backbone. You can save the backbone for making Homemade Chicken Stock.
- Flatten the Breast: Flip the chicken breast-side up. Press down firmly on the breastbone with the heel of your hand until you hear a crack. This flattens the chicken, allowing it to lay flat on the grill. Alternatively, you can use a sturdy knife to make a small incision along the middle of the breastbone to help it flatten more easily.
- Tuck the Wings: Tuck the wing tips underneath the chicken’s body. This prevents them from burning and helps maintain a compact, even shape during grilling.
The goal of spatchcocking is to ensure that all parts of the bird cook at a similar rate. Without it, the thinner wings and legs tend to reach 165°F (74°C) long before the thicker breast, leading to overcooked, dry white meat. By flattening the bird, heat distributes more evenly, and while the dark meat sections might still hit temperature slightly faster, they can tolerate higher temperatures better than the delicate breast meat.
This technique is also excellent for holiday turkeys, dramatically reducing cooking time and ensuring a juicy bird, especially when combined with a dry brine.
Part 3: Grilling the Bird – The Grand Finale
Now for the exciting part – getting that perfectly prepared chicken onto the grill and infusing it with smoky BBQ flavor!
- Preheat the Grill for Indirect Heat: Set up your grill for indirect heat, aiming for a temperature of around 375°F (190°C).
- Charcoal Grill (Preferred for flavor): Pile the hot coals to one side or use charcoal baskets on one side of the grill.
- Gas Grill: If you have a three-burner gas grill, light the two outer burners to medium-high and leave the middle burner off. This creates a hot zone on the sides and a cooler, indirect cooking zone in the middle.
- Coat and Place: Generously coat the chicken with about half of your chosen BBQ sauce. Place the chicken on the grill over the indirect heat zone, breast-side up and closest to the heat source (if coals are to one side, place chicken with breasts towards the coals).
- Cover and Cook: Close the grill lid to allow the heat to circulate evenly. Cook for approximately 1 hour to 1 hour and 30 minutes.
- Monitor Temperature: Use a reliable meat thermometer, such as a ChuGod or Thermopen. Insert the probe into the thickest part of the chicken breast, ensuring it doesn’t touch bone. Continue cooking until the thickest part of the breast reaches an internal temperature of 165°F (74°C). Also check the thigh meat to ensure it has reached 165°F. Remove the chicken from the grill immediately once it reaches this temperature. For those feeling adventurous, you can remove it at 160°F (71°C) as carryover cooking will typically bring it up to 165°F while resting.
- Rest and Serve: Once cooked, transfer the chicken to a cutting board and allow it to rest for at least 5-10 minutes. This resting period is crucial as it allows the juices to redistribute throughout the meat, resulting in a juicier chicken. Carve the roasted chicken – while this video on carving a roasted chicken isn’t specific to spatchcocked chicken, the fundamental principles still apply. Serve your delicious chicken with the remaining BBQ sauce on the side.
Customizing Your Grilled Chicken: Substitutions and Variations
This recipe provides a fantastic foundation, but don’t hesitate to make it your own! Here are a few ways you can customize this spatchcock grilled chicken to suit your taste and available ingredients:
- BBQ Sauce Diversity: While our Fireball Whiskey Barbecue Sauce offers a unique and memorable flavor, the world of BBQ sauces is vast! Experiment with different regional styles:
- Kansas City Style: Thick, sweet, and tangy with a tomato and molasses base.
- Carolina Mustard Style: A zesty, vinegary, and slightly spicy mustard-based sauce.
- Texas Style: Often thinner, savory, and less sweet, with a focus on meat flavor.
- Alabama White Sauce: A mayonnaise-based sauce, tangy with vinegar and black pepper, excellent for chicken.
Choose a sauce that excites your palate; it’s your dinner, after all!
- Grill Type Exploration: Both charcoal and gas grills have their merits.
- Charcoal Grill: My personal preference for this recipe. The longer cooking time allows the chicken to truly absorb that quintessential smoky flavor that only charcoal can provide. Consider adding wood chips (hickory, apple, cherry) for an extra layer of smoke.
- Gas Grill: Offers convenience and precise temperature control. While it might lack the deep smoky flavor of charcoal, you can still achieve fantastic results. You can use a smoker box with wood chips to infuse some smoky essence.
- Flavor Rubs & Marinades: Instead of or in addition to the dry brine, consider a dry rub with your favorite herbs and spices (paprika, garlic powder, onion powder, cayenne, brown sugar). For an even deeper flavor, a liquid marinade can be used *before* the dry brine (if it’s not salt-heavy) or in place of it, but ensure to pat the chicken dry before grilling for crispy skin.
- Herb & Citrus Infusion: Place lemon slices, sprigs of rosemary, thyme, or oregano directly under the skin or inside the cavity of the chicken before grilling. These aromatics will gently infuse the meat with fresh, bright flavors as it cooks.
- Spice Level Adjustment: If you love heat, increase the amount of Thai chilies or add a dash of your favorite hot sauce to the BBQ sauce. If you prefer milder flavors, simply reduce or omit the chilies.
Don’t be afraid to get creative and experiment with different flavor combinations to find your perfect grilled chicken!
Storing Leftovers Safely
Proper storage is essential to enjoy your delicious grilled chicken for days to come. Here’s how to handle leftovers:
- Refrigeration: Allow the cooked chicken to cool completely (within 2 hours of cooking). Carve any remaining meat from the bone, or store larger pieces. Place the chicken in an airtight container or wrap it tightly with plastic wrap or aluminum foil. It will keep fresh in the refrigerator for 3-4 days.
- Freezing: For longer storage, cooked chicken can be frozen. Once cooled, package the chicken in freezer-safe bags or airtight containers. Remove as much air as possible to prevent freezer burn. Frozen cooked chicken will maintain its quality for up to 2-3 months. Thaw overnight in the refrigerator before reheating.
- Reheating: To reheat, you can use the oven (covered with foil to prevent drying out, at 300°F/150°C until warmed through), microwave, or even a grill for a quick refresh. Ensure chicken reaches an internal temperature of 165°F (74°C) when reheating.
A Brief History of Grilling
There’s something inherently primal and satisfying about cooking over an open flame, and for good reason: grilling is one of the oldest cooking methods known to humankind! Long before ovens, stovetops, or even pottery, early humans discovered the transformative power of fire to cook food. This ancient practice of charring meat and vegetables over hot embers made food more digestible, safer to eat, and significantly more flavorful. It played a crucial role in human evolution, potentially influencing brain development and social structures as communities gathered around the communal fire. From the earliest campfires to modern backyard barbecues, grilling connects us to our ancestors and continues to be a cherished tradition worldwide. It’s a testament to the enduring appeal of simple, direct heat cooking. For a deeper dive into this fascinating topic, I encourage you to read my comprehensive article on the History of Grilling.
Frequently Asked Questions
Absolutely! Spatchcocking a chicken sounds intimidating, but it’s remarkably simple. All it involves is cutting out the backbone with kitchen shears, making a small cut in the breastbone, and then flattening the bird with a firm press. Most home cooks can master it in just a few minutes after watching a quick tutorial. The benefits it offers in terms of even cooking and crispy skin are well worth the minimal effort.
For this recipe, we generally do not flip the spatchcock chicken. By cooking over indirect heat, with the chicken breast-side up, the heat circulates around the bird, cooking it evenly from all sides without the need for flipping. This method helps maintain a consistent internal temperature and allows the skin on top to crisp beautifully. If using a charcoal grill, this indirect cooking method also maximizes the wonderful smoky flavor absorption without burning the skin.
The foundation of a good, easy homemade BBQ sauce typically starts with a few basic ingredients: ketchup (which provides a base of tomato and sugar), vinegar (for tang), molasses or brown sugar (for sweetness and depth), and Worcestershire sauce (for umami). From there, you can customize with various spices like paprika, garlic powder, onion powder, and a touch of cayenne or chili powder for heat. Simmering these ingredients together allows the flavors to meld beautifully. Our Fireball Whiskey Spicy BBQ Sauce adds unique layers with whiskey and Thai chilies.
Beyond your grill, a few key tools will make this recipe much easier. You’ll definitely need a good pair of sturdy kitchen shears for removing the backbone. A sharp chef’s knife is also useful for the breastbone and general prep. Most importantly, a reliable instant-read meat thermometer (like a Thermopen or ChuGod) is indispensable for ensuring your chicken is safely cooked to 165°F (74°C). Tongs are also essential for handling the chicken on the grill, and a large cutting board for carving.
Yes, absolutely! While grilling imparts a wonderful smoky flavor, this spatchcocked chicken recipe can be successfully adapted for oven roasting. After spatchcocking and dry brining, preheat your oven to 425°F (220°C). Place the chicken, breast-side up, on a wire rack set over a baking sheet. Roast for 45-60 minutes, or until the internal temperature reaches 165°F (74°C). You can baste with BBQ sauce during the last 15-20 minutes of cooking. The skin might not be as crispy as on a grill, but it will still be incredibly juicy and flavorful.
Expert Tips and Tricks for the Best Spatchcock Chicken
- Don’t Skip the Dry Brine (If Possible): While you *can* skip the dry brine in a pinch, it’s truly a game-changer for moisture and flavor. Plan ahead and give your chicken at least 8 hours, or ideally overnight, for the best results.
- Prepare Sauce Ahead: Our homemade BBQ sauce can be made several days in advance and stored in the refrigerator, saving you time on grilling day. This allows the flavors to deepen even further.
- Chili Customization: If you’re using fresh chilies for the BBQ sauce, feel free to adjust the type and quantity to match your preferred spice level. Just remember to mince them finely for even flavor distribution.
- Utilize the Backbone: Don’t discard the chicken spine! It’s an excellent base for making rich, flavorful Homemade Chicken Stock, adding depth to future soups and sauces.
- Prioritize Food Safety: Always follow proper food safety guidelines. Wash your hands thoroughly after handling raw chicken, use separate cutting boards for raw poultry, and avoid cross-contamination. Always ensure your chicken reaches a safe internal temperature of 165°F (74°C) before serving. The FDA provides excellent resources on safe cooking temperatures for poultry.
- Use a Drip Pan: Placing an aluminum drip pan under the chicken in the indirect heat zone can catch drippings, minimizing flare-ups and making cleanup easier. You can even add a little water or chicken stock to the pan to create a steamy environment, helping to keep the chicken moist.
- Let it Rest: Resist the urge to carve immediately after removing from the grill. A 5-10 minute rest allows the juices to redistribute, ensuring a tender, juicy slice every time.
- Pre-Sauce Strategically: Apply half of the BBQ sauce at the beginning of the grilling process. The remaining half can be warmed and served alongside the carved chicken, allowing people to add more to their liking without burning the sauce on the grill.
Recommended Products for This Recipe
To help you achieve the best possible results, here are some of the tools we use and recommend for this spatchcock grilled chicken recipe:
- Weber Performer Grill: A reliable charcoal grill that offers excellent heat control and a built-in table for prep.
- Chugod Thermometer: An accurate and fast-reading meat thermometer is crucial for ensuring safe cooking temperatures.
- Thermopen Thermometer: A professional-grade instant-read thermometer renowned for its speed and precision.
- Grilling Tongs: Essential for safely moving and handling the chicken on the hot grill.
- Sturdy Kitchen Shears: A must-have for easily removing the chicken’s backbone during the spatchcocking process.
Share Your Experience!
We pour our passion into creating recipes that bring joy to your kitchen and grill. If you’ve tried this BBQ Spatchcock Grilled Chicken recipe, we would be absolutely thrilled to hear about your experience! Your feedback helps us improve and guides other home cooks in their culinary adventures. Please consider leaving a review in the comments section below to share your thoughts, tips, or any variations you discovered. Thank you for inviting our recipe to your table, and for visiting Ramshackle Pantry!
BBQ Spatchcock Grilled Chicken Recipe
5 from 1 review
- Author: Ben
- Prep Time: 12 hours
- Cook Time: 90 minutes
- Total Time: 12 hours 90 minutes
- Yield: 1 whole chicken
- Category: Dinner
- Method: Grilling
- Cuisine: American
Description
This BBQ Spatchcocked Grilled Chicken is tender, tasty, and a fantastic way to utilize your grill. Perfect for a casual dinner or a lively cookout, this whole chicken recipe is easy to make and a truly impressive grilling choice.
Ingredients
Scale
- 1 whole chicken
- ½ cup salt (coarse, like Kosher or sea salt)
- 2 cups Fireball Whisky Barbecue Sauce (or your favorite BBQ sauce)
Instructions
- The Night Before: Generously coat your whole chicken with ¼ to ½ cup of coarse salt. Place it in a tray, loosely cover, and store in the refrigerator for at least eight hours (overnight is preferred).
- Spatchcock the Chicken: The next day, place the chicken breast-side down. Using kitchen shears, cut along both sides of the backbone to remove it.
- Flatten the Breast: Flip the chicken breast-side up. Use a sturdy knife to carefully cut through the middle of the inner breast bone (or press firmly with the heel of your hand) to flatten the chicken completely.
- Position and Tuck: Flip the chicken over so the breasts are up. Push down on the legs to further flatten the bird. Tuck the wing tips underneath the bird’s body to prevent burning.
- Apply BBQ Sauce: Generously coat the chicken with half of the Fireball Spicy BBQ sauce (or your chosen barbecue sauce).
- Preheat Grill: Heat your grill to approximately 375°F (190°C) and set it up for indirect heat. For charcoal, place coals on one side. For a three-burner gas grill, heat the two outer burners and leave the middle off.
- Grill the Chicken: Place the chicken on the grill over the indirect heat zone, breast-side up and closest to the heat source.
- Cover and Cook: Close the grill lid.
- Monitor Temperature: Cook until the thickest part of the breast reaches an internal temperature of 165°F (74°C), typically 1 hour to 1 hour and 30 minutes. Use a meat thermometer to ensure both breast and thigh meat are safely cooked to 165°F (74°C). Remove immediately. (For a very slightly juicier result, you can remove at 160°F (71°C) if confident in carryover cooking bringing it to 165°F before eating).
- Rest and Serve: Allow the chicken to rest for 5-10 minutes before carving. Serve with the remaining BBQ sauce on the side.
Notes
- Calories are estimated based on a 4 lb chicken and 2 cups of BBQ sauce.
- Serving size is largely determined by the appetite of your guests and the size of your chicken.
- While the dry brine is highly recommended, it is a step that could be skipped if time is very limited.
- Reserve the chicken spine for making rich Homemade Chicken Stock.
- Always adhere to food safety guidelines to prevent cross-contamination and ensure proper cooking temperatures.