
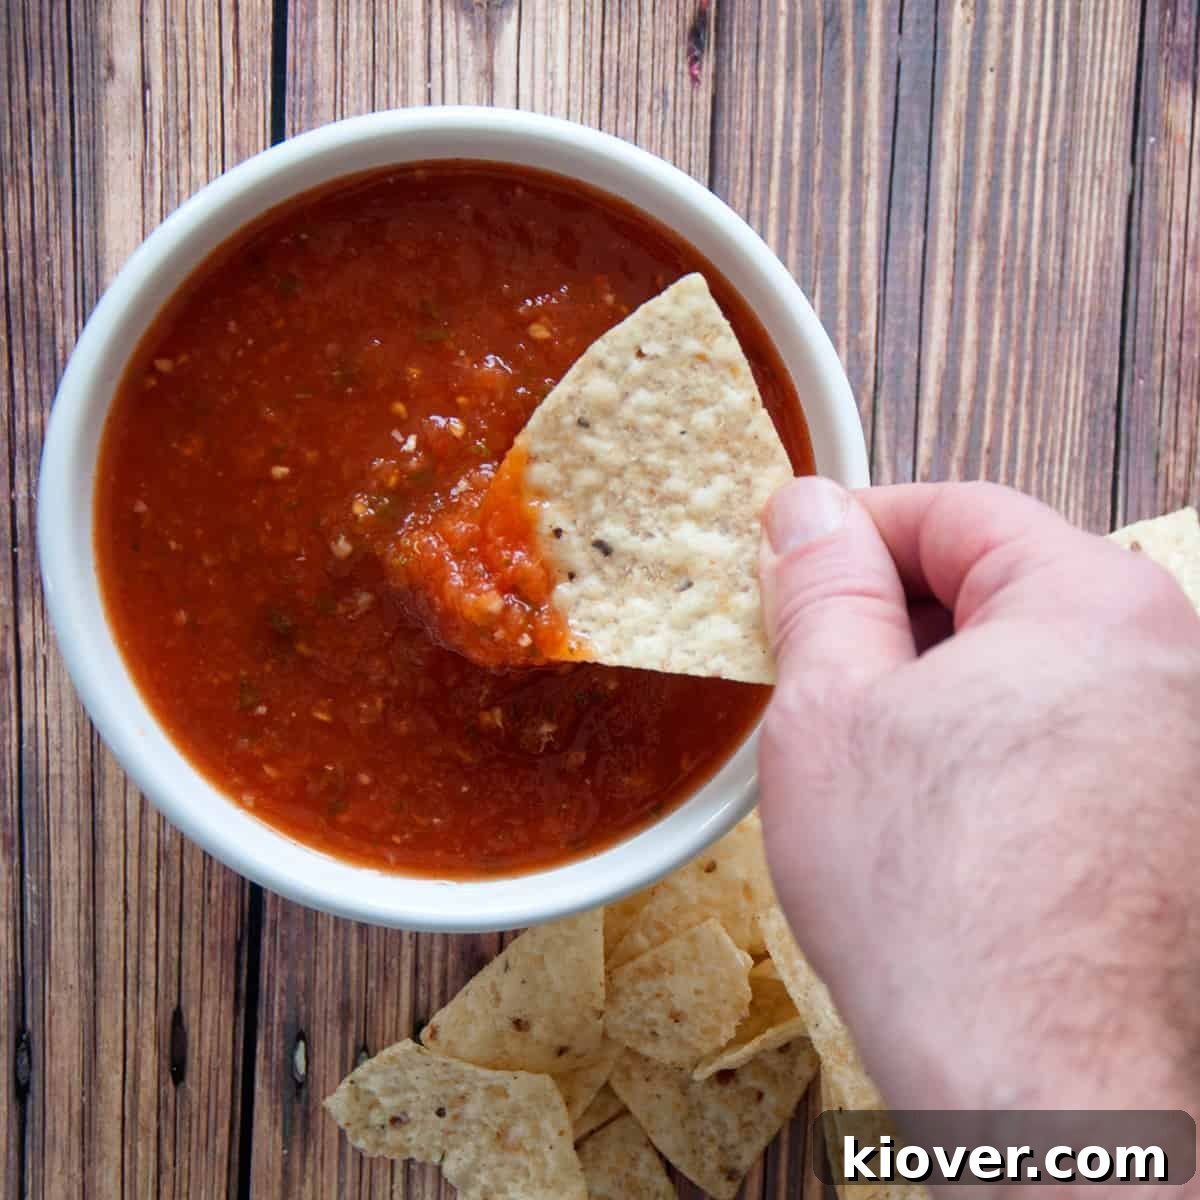
Welcome to the ultimate guide for creating the most flavorful Homemade Salsa Recipe you’ll ever taste! This incredible recipe brings the vibrant, fresh taste of your favorite Mexican restaurant salsa right into your home, perfect for a cozy dining room dinner, an exciting game day party, or any gathering where a truly delicious dip is needed. Our simple salsa recipe, crafted from ripe, fresh tomatoes, is remarkably easy to make and promises a burst of authentic flavor. If you’re searching for the best restaurant-style salsa from scratch, you’ve found your new go-to. Prepare to impress your family and friends with this irresistible dip – you truly must try it today!
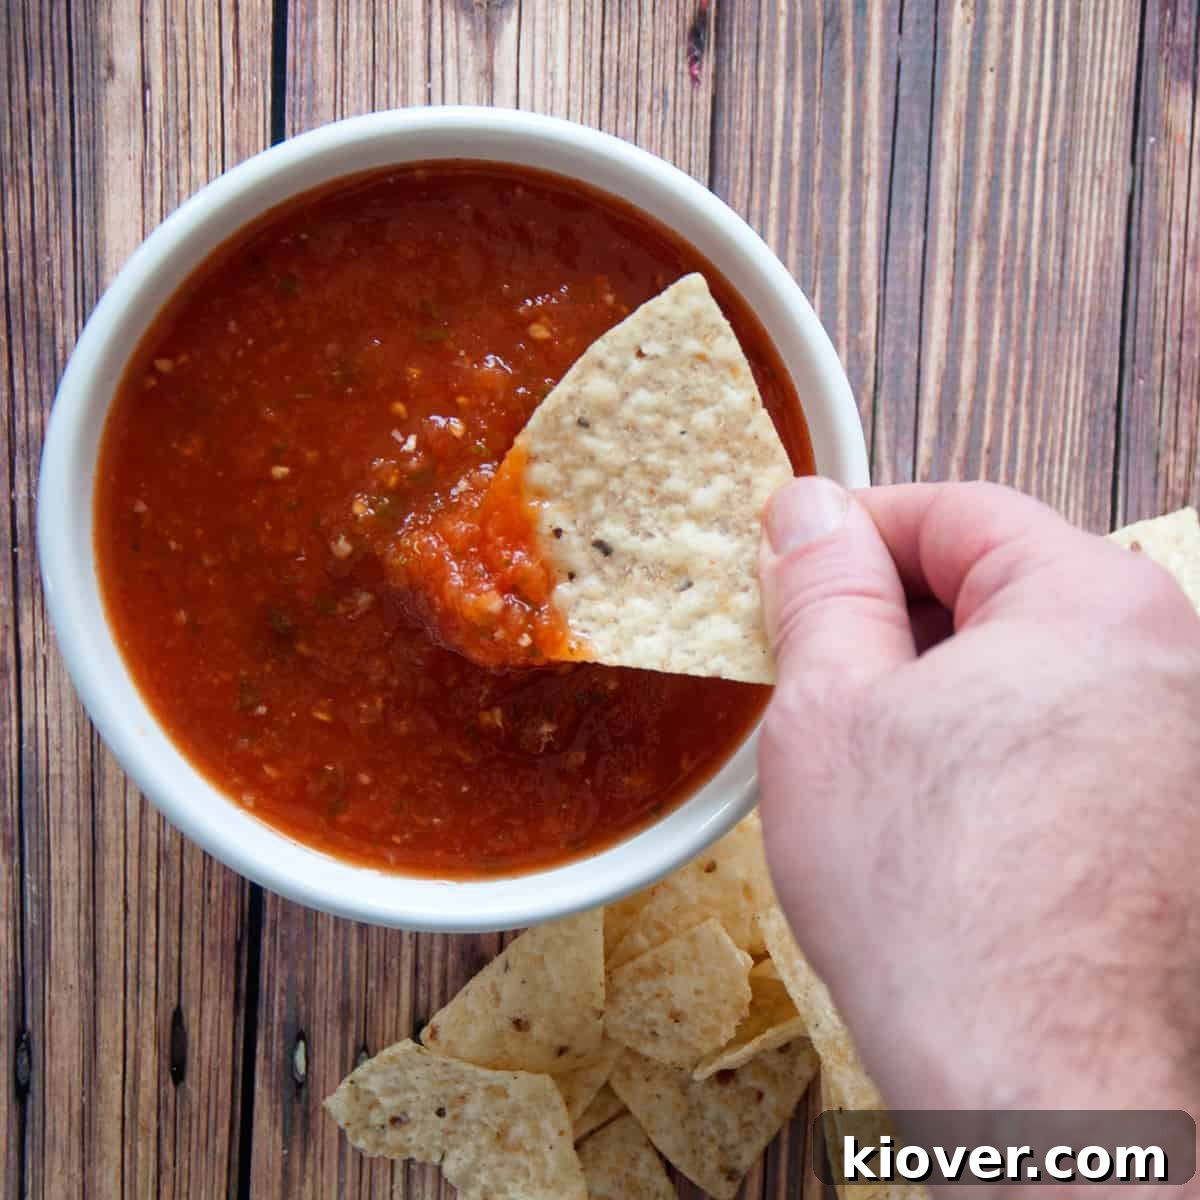
🌮 Why This Homemade Salsa Recipe Stands Out
This isn’t just another salsa recipe; it’s a celebration of fresh, vibrant ingredients transformed into a dip that rivals any restaurant. If you’re lucky enough to cultivate your own tomatoes or have access to a bounty of fresh garden tomatoes from a local market, this fresh tomato salsa recipe is the perfect way to utilize them. It’s not only incredibly tasty but also wonderfully versatile, serving as a fantastic snack, a flavorful accompaniment, or even a robust sauce for your next taco night. The beauty of crafting your own salsa lies in the control you have over its freshness, spice level, and overall flavor profile, ensuring a truly personalized culinary experience.
Beyond being a delightful dip, this salsa can elevate numerous dishes. Imagine it spooned over grilled chicken or fish, stirred into scrambled eggs for a zesty breakfast, or even as a vibrant addition to burritos and quesadillas. Its robust flavor profile makes it a star ingredient that adds depth and excitement to almost any meal. Plus, making it at home means you avoid the preservatives and artificial flavors often found in store-bought options, resulting in a healthier and more authentic taste.
If you enjoy this recipe, you might also love exploring our other delicious dips and dishes. Be sure to check out our Simple and Fast Homemade Queso Dip recipe, our rich Choriqueso recipe, or these absolutely scrumptious Honduran Enchiladas for a full spread of Mexican-inspired flavors!
Table of Contents
- 🌮 Why This Homemade Salsa Recipe Stands Out
- 🍅 The Essential Ingredients for Perfect Salsa
- Choosing the Best Tomatoes for Salsa
- The Role of Onion and Garlic
- Peppers and the Heat Factor
- The Freshness of Cilantro and Balancing Spices
- Prioritizing Freshness: A General Note on Vegetable Selection
- 🍲 Step-by-Step Homemade Salsa Instructions
- 🤷 Customizing Your Salsa: Substitutions and Variations
- Quick 10-Minute No-Cook Salsa Version
- 📦 Storing Your Homemade Salsa
- Serving Suggestions and Perfect Pairings
- 🎓 A Brief History of Salsa
- ❓ Frequently Asked Questions About Homemade Salsa
- 📝 Expert Tips and Tricks for the Best Salsa
- 🛠 Recommended Products for Salsa Making
- 😋 Share Your Salsa Success!
- Best Homemade Salsa – Restaurant Style Recipe
🍅 The Essential Ingredients for Perfect Salsa
Crafting exceptional salsa begins with selecting the right ingredients. Our recipe calls for many of the usual suspects you’d expect, but it’s the specific selection and how we process them that truly elevates this salsa, making it a dead ringer for that beloved restaurant-style dip. Each component plays a crucial role in building the layered flavors that make this salsa so irresistible.
Choosing the Best Tomatoes for Salsa
The foundation of any great salsa is, without a doubt, the tomatoes. During the vibrant summer months, when our garden is overflowing, selecting tomatoes is a joyously simple task: we just pick whatever is ripe and ready. There’s nothing quite like the flavor of sun-kissed, homegrown tomatoes. However, salsa cravings don’t disappear when the growing season ends. Throughout the long winter, especially in the chilly tundra of North Dakota where our garden lies dormant, we turn to the grocery store to find the best available options.
When shopping for tomatoes, look for ones that are firm, deeply colored, and feel heavy for their size. Avoid any with soft spots or blemishes. The quality of your tomatoes directly impacts the flavor and texture of your final salsa, so choose wisely!
Big vs. Small and Tomato Varieties
For this recipe, we deliberately combine different tomato varieties to achieve the perfect balance of texture, sweetness, and acidity. We find that a blend offers a more complex and satisfying salsa than relying on a single type.
We specifically call for approximately 4 ½ pounds of tomatoes, recommending about half of them be Roma tomatoes. Roma tomatoes are widely available, often quite economical, and are prized for their meaty flesh and low water content. They contribute significantly to the salsa’s thickness and body, making it less watery and giving it that satisfying, hearty texture. Their natural sweetness also adds a lovely dimension to the overall flavor.
However, using only Roma tomatoes can sometimes lead to a salsa that tastes a bit “dry” or lacks the juicy brightness we associate with fresh salsa. To counteract this, we incorporate larger, juicier varieties such as Big Boy or Celebrity tomatoes for the other half of our tomato blend. These larger, more succulent tomatoes provide the necessary moisture and a burst of fresh, tangy flavor, preventing the salsa from becoming overly dense. The combination ensures a well-rounded salsa that is both rich in texture and vibrant in taste. The only minor drawback of Roma tomatoes is their smaller size, which means a bit more effort when it comes to peeling them after blanching.
The Role of Onion and Garlic
No salsa is complete without the aromatic foundation of onion and garlic. We recommend using a yellow or white onion for its classic sharp yet sweet flavor when cooked, contributing essential depth to the salsa. Fresh garlic cloves are non-negotiable here; their pungent, earthy notes are critical for achieving that signature restaurant-style taste. Avoid pre-minced garlic if possible, as fresh cloves offer a far superior flavor. Finely chopped, they meld seamlessly into the blend, providing a consistent savory undertone.
Peppers and the Heat Factor
Jalapeños are our pepper of choice for this recipe, offering a moderate heat that most palates can enjoy. However, the beauty of homemade salsa lies in customization! If you crave more heat, don’t hesitate to add extra jalapeños, or even venture into the realm of spicier peppers like serranos, habaneros, or even a daring Carolina Reaper if you’re truly adventurous. Just be mindful of their potency and handle them with care! For a milder salsa, you can remove the seeds and membranes from the jalapeños, as this is where much of the capsaicin (heat) resides. Alternatively, consider adding a bell pepper for a sweet, mild crunch and vibrant color.
The Freshness of Cilantro and Balancing Spices
Fresh cilantro provides a bright, herbaceous lift that is characteristic of authentic Mexican salsa. However, we understand that cilantro isn’t for everyone due to the “cilantro soap gene.” If you’re not a fan, feel free to omit it or substitute with a small amount of fresh parsley or oregano. For spices, a touch of salt enhances all the flavors, while a hint of sugar helps to balance the acidity of the tomatoes, creating a harmonious taste. Cumin adds a warm, earthy depth that completes the restaurant-style profile. Feel free to adjust these to your personal preference; a little pinch of smoked paprika or a dash of chili powder can also add interesting nuances.
Prioritizing Freshness: A General Note on Vegetable Selection
A golden rule for any exceptional salsa is simple: the fresher your vegetables, the better your salsa will taste. This recipe truly shines when made with peak-season produce. While you can certainly make a good salsa with store-bought ingredients, if your garden is currently overflowing with ripe tomatoes, onions, and peppers, seize the opportunity to use them! The difference in flavor is palpable and will elevate your homemade salsa from good to absolutely outstanding. Freshness isn’t just a buzzword; it’s the secret ingredient to a truly vibrant and delicious salsa.
🍲 Step-by-Step Homemade Salsa Instructions
Making homemade salsa from scratch is a rewarding process, and while it involves a few steps, each one contributes to the incredible depth of flavor and perfect texture. Let’s walk through it:
Blanching the Tomatoes: The First Essential Step
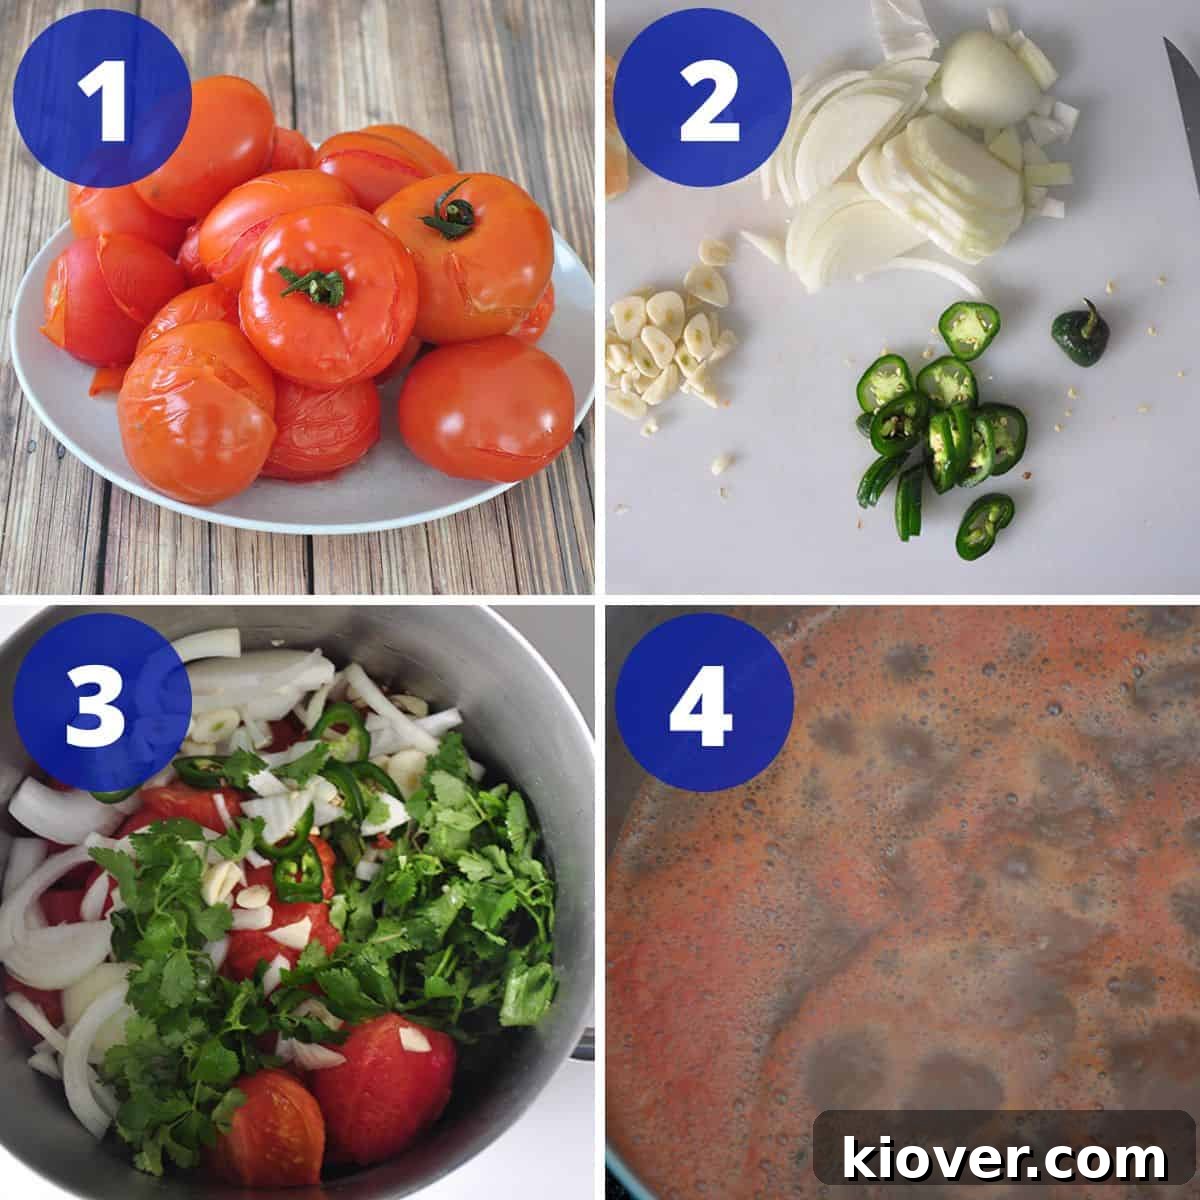
Perhaps the most involved part of this recipe is blanching the tomatoes. While it’s not particularly difficult, it does require a little time and can be a bit messy. The primary purpose of blanching tomatoes for this homemade salsa recipe is to easily remove their skins. Tomato skins can become tough and chewy in salsa, so peeling them ensures a smoother, more refined texture.
To blanch, simply make a small ‘X’ incision on the bottom of each tomato, then submerge them in boiling water for a brief period—typically 30 seconds to one minute. You’ll notice the skin starting to crinkle and pull away at the edges of the ‘X’. This indicates they’re ready. Immediately remove them from the boiling water. For many recipes, the next step would be to plunge them into an ice bath to halt the cooking process. However, for this particular salsa, we are going to skip the ice bath. We’ll be chopping and returning them to a pot for further cooking, so a rapid cool-down isn’t strictly necessary. If you’re accustomed to using an ice bath and feel more comfortable doing so, go right ahead; it won’t harm the recipe. Handling hot tomatoes right after blanching can be a tad uncomfortable, but I find they cool down quickly enough to manage.
Preparing and Simmering for Flavor
Once your tomatoes are blanched, peeled, and cored, you’ll quarter them and add them to a large pot with all the other ingredients – chopped onion, garlic cloves, jalapeño, cilantro, salt, sugar, and cumin. The magic truly begins as these fresh ingredients come together. Bring the mixture to a gentle simmer over medium-low heat and let it cook for about 15 minutes. This simmering stage is crucial; it allows the flavors to meld beautifully, softening the vegetables and intensifying their individual essences into a harmonious blend.
Blending to Perfection
After the initial simmer, it’s time to achieve your desired salsa consistency. This is where a hand blender (also known as an immersion blender) becomes your best friend. Submerge the hand blender directly into the pot and blend until the salsa reaches your preferred texture. If you like a chunky, rustic salsa, blend for just a few pulses. For a smoother, more refined restaurant-style salsa, blend for a bit longer until it’s perfectly smooth. If you don’t have a hand blender, you can carefully transfer batches of the mixture to a traditional blender or food processor, blending until smooth, then returning it to the pot.
Final Simmer and Cooling
After blending, return the pot to the stove and simmer for another 15 minutes. This second simmer helps to further deepen the flavors, allowing the newly combined ingredients to fully integrate. It also helps to cook off any excess liquid, resulting in a richer, more concentrated salsa. Once this final simmer is complete, remove the pot from the heat and allow the salsa to cool completely. Cooling is vital not only for safety but also for the flavors to fully develop and settle. As it cools, the salsa thickens slightly and its taste becomes even more robust. Once cooled, your incredible homemade salsa is ready to be served and enjoyed!
🤷 Customizing Your Salsa: Substitutions and Variations
One of the most enjoyable aspects of making salsa at home is the freedom to customize it to your exact preferences. This recipe is incredibly forgiving and encourages experimentation. Don’t like a particular ingredient? Simply leave it out! Prefer more of something? Add an extra dash! The key is to keep within the realm of “salsa flavors,” and you’re good to go.
Here are some ideas for how you can play with the flavors and heat:
- Peppers: The world of peppers offers endless possibilities. While we use jalapeños for a balanced heat, you can easily dial it up or down. For those who crave an intense fiery kick, consider experimenting with spicier varieties like serrano peppers, habaneros, or even the notorious Carolina Reaper peppers. Just make sure you understand the heat level you’re signing up for with some of the hotter options! For a milder salsa, simply remove the seeds and white membranes from the jalapeños before chopping, as these parts contain most of the capsaicin. You could also add a sweet bell pepper (red, yellow, or orange) for color and a mild, sweet crunch. For an extra layer of smoky flavor, try roasting your peppers before adding them to the pot.
- Spices: Your spice cabinet is your playground! While cumin, salt, and sugar provide a solid foundation, feel free to adjust them or introduce new ones. A pinch of smoked paprika can add a delightful smoky nuance, while a dash of chili powder can deepen the savory notes. A tiny bit of dried oregano (Mexican oregano is fantastic if you can find it) can also enhance the authentic flavor. Taste as you go and adjust until it’s perfect for your palate.
- Cilantro: We know cilantro is a polarizing herb. If you belong to the group that finds it tastes like soap, absolutely do not use it! This recipe will still be delicious without it. Alternatively, you can substitute it with fresh parsley for a touch of green freshness, or even a very small amount of fresh oregano for an herbaceous note.
- Acidity: A squeeze of fresh lime juice at the end can brighten the entire salsa, adding a zesty tang that cuts through the richness of the tomatoes and spices. Start with a tablespoon and add more to taste. A splash of apple cider vinegar can also provide a similar bright lift.
- Onions: While yellow or white onions are standard, a small amount of red onion can be used for a slightly sharper, more pungent flavor and a beautiful pink hue, especially if you’re not cooking it down extensively.
Remember, this is your salsa, so have fun experimenting and don’t be afraid to make it your own!
Quick 10-Minute No-Cook Salsa Version
Life gets busy, and not everyone has 45 minutes to dedicate to making a super fresh, stewed salsa. For those days when time is of the essence but you still crave delicious homemade flavor, we offer a fantastic, super quick substitute: a 10-minute no-cook version.
Instead of fresh tomatoes, you’ll use four (14.5-ounce) cans of high-quality diced or crushed tomatoes. Be sure to drain the tomatoes, but importantly, reserve some of the liquid. You might need it later to adjust the consistency. If you can find roasted versions of canned tomatoes, those would work wonderfully too, adding an extra layer of smoky depth.
Here’s how to whip it up:
- Add all your ingredients—the drained canned tomatoes, chopped onion, peeled garlic cloves, jalapeño, cilantro, salt, sugar, and cumin—to a food processor or a powerful blender.
- Give it several short pulses. The goal is to achieve your desired consistency, whether you prefer it slightly chunky or perfectly smooth. Avoid over-blending, which can make the salsa watery and foamy.
- Once blended to your liking, it’s ready to serve! If you find the salsa is too thick, gradually add a bit of the reserved tomato juice, pulsing briefly after each addition, until you reach the perfect consistency.
This version takes about 5 minutes for prep and another 5 minutes for blending, making it incredibly efficient for impromptu gatherings or busy weeknights. While it doesn’t quite replicate the deep, slow-cooked flavor of our main recipe, it’s a fantastic, flavorful alternative that still far surpasses any store-bought jarred salsa. Of course, when the garden is thriving, we still absolutely adore using our homegrown, sun-ripened tomatoes for the ultimate fresh taste!
📦 Storing Your Homemade Salsa
Proper storage is key to enjoying your delicious homemade salsa for as long as possible. Once prepared and cooled, transfer your salsa to an airtight container. It will keep beautifully in the refrigerator for about a week. The flavors often deepen and meld even further after a day or two in the fridge, making it even more delicious.
If you’ve made a large batch and want to extend its shelf life, this recipe freezes exceptionally well. Simply portion the cooled salsa into freezer-safe containers or heavy-duty freezer bags, leaving a little headspace for expansion. When you’re ready to enjoy it again, just thaw it in the refrigerator overnight or on the counter for a few hours. Freezing is a fantastic way to preserve the fresh taste of summer tomatoes to enjoy year-round, especially if you’re working with a garden surplus.
Serving Suggestions and Perfect Pairings
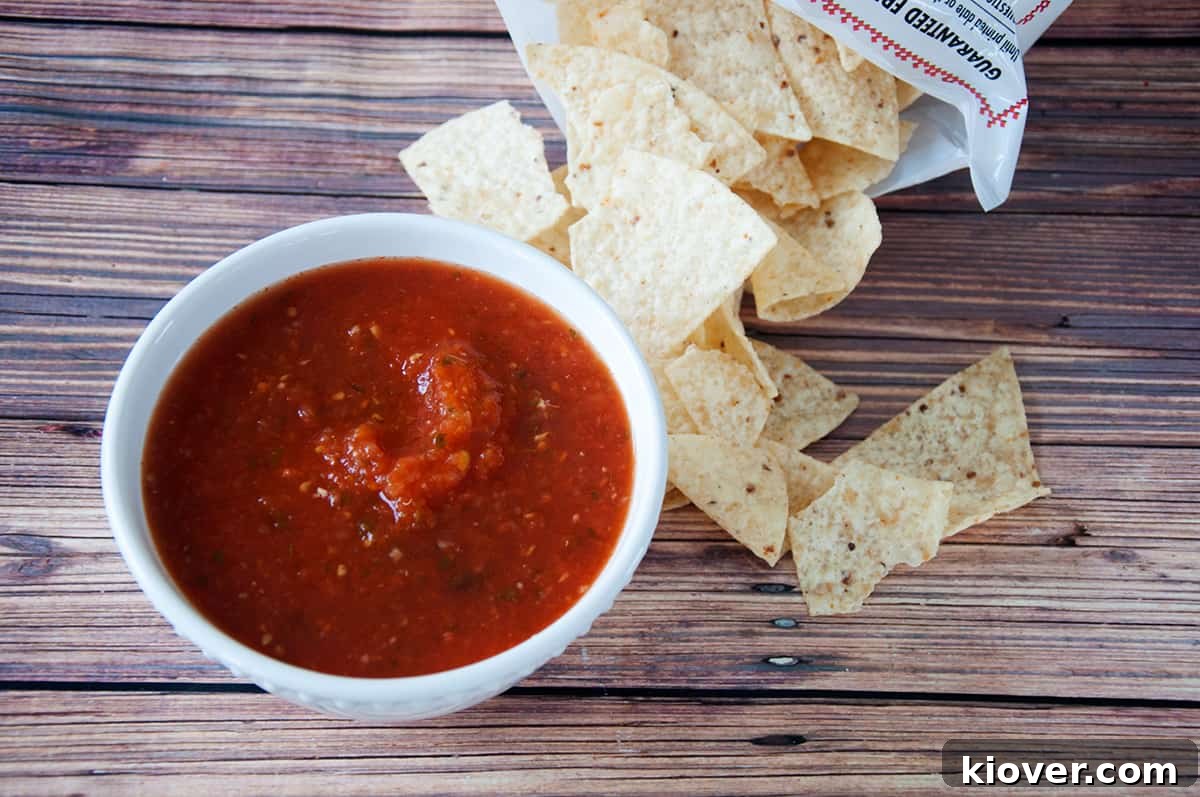
This versatile homemade salsa is destined to be a star at any meal or gathering. While it’s famously perfect with a bowl of crisp tortilla chips, its utility extends far beyond just dipping. Here are some inspiring ideas to make the most of your fresh, restaurant-style salsa:
- Classic Dip: Serve it alongside your favorite corn or tortilla chips for an unbeatable snack or appetizer. The crunch of the chip with the vibrant salsa is a match made in heaven.
- Taco & Burrito Topping: Elevate any taco night by using this salsa as a fresh, flavorful topping. It’s also fantastic inside burritos, enchiladas, or quesadillas, adding moisture and a burst of zesty flavor.
- Breakfast Enhancer: Spoon generous amounts over scrambled eggs, omelets, or breakfast burritos for a lively and satisfying start to your day. It pairs wonderfully with a sprinkle of cheese and avocado.
- Grilled Meats & Fish: Use it as a fresh accompaniment for grilled chicken, steak, pork chops, or any white fish. The acidity and freshness of the salsa cut through the richness of the meat, creating a balanced and flavorful bite.
- Nachos & Loaded Fries: Drizzle over a plate of loaded nachos or cheesy fries for an instant upgrade.
- Stirred into Grains: Mix a spoonful into plain rice, quinoa, or couscous for an easy way to add flavor to a simple side dish.
- Healthy Snack: Enjoy it as a low-calorie, flavorful topping for baked potatoes or sweet potatoes, or alongside sliced cucumbers and bell peppers for a healthy crunch.
Don’t be afraid to get creative! This homemade salsa is a culinary chameleon, ready to enhance almost any dish with its fresh, bold flavors.
🎓 A Brief History of Salsa
Salsa, meaning “sauce” in Spanish, has a rich and ancient history. Its origins can be traced back to the Aztec, Mayan, and Inca civilizations, who were already combining tomatoes with chili peppers, ground squash seeds, and other spices as early as the 16th century. These early versions were a staple of their diets and culinary practices, serving as a flavorful condiment for various foods.
When the Spanish conquistadors arrived in the Americas, they encountered these vibrant sauces and were quick to adopt them into their own cuisine, eventually introducing them to Europe. The modern concept of salsa as we know it today truly began to take shape, evolving with regional variations and available ingredients. It has since become synonymous with Mexican cuisine and is one of the most popular condiments globally.
The journey of salsa from ancient staple to global favorite is fascinating, much like the story of its perfect culinary partner. I’ve delved into the captivating history of the taco in a separate article, which provides wonderful context to the cultural significance of these beloved dishes. Be sure to check it out for more intriguing insights!
❓ Frequently Asked Questions About Homemade Salsa
Yes! Absolutely. Homemade salsa freezes wonderfully, which is excellent for making large batches or preserving summer’s bounty. Just transfer the cooled salsa into freezer-safe containers or bags, leaving a small amount of headspace. Thaw it in the refrigerator overnight before you plan to use it for the best results.
Yes, homemade salsa must always be refrigerated. Due to its fresh ingredients and lack of artificial preservatives, it’s essential to store it in an airtight container in the fridge to prevent spoilage and maintain its freshness and safety. It will typically last for about a week when properly stored.
Yes, you certainly can! While fresh garden tomatoes provide the ultimate flavor, canned tomatoes are a fantastic shortcut, especially when fresh options aren’t in season or when you’re short on time. If you want to cut down on some preparation time but still follow the essence of our recipe, consider using four (14.5-ounce) cans of crushed or drained diced tomatoes. Remember to reserve some of the liquid from the cans in case your salsa ends up being too thick; you can add it back in gradually to achieve your desired consistency.
This specific recipe, as written, is not suitable for safe home canning. For proper home canning, salsa requires a precise level of acidity to prevent the growth of harmful bacteria, and we cannot guarantee that this recipe meets those safety standards without specific acidification. If you are interested in canning salsa for shelf-stable storage, it is crucial to use a tested and approved canning recipe. Here is a reliable canned salsa recipe from a trusted source that ensures proper acidity and safety.
📝 Expert Tips and Tricks for the Best Salsa
Achieving restaurant-quality homemade salsa is within reach with a few clever tips and tricks:
- Mastering Tomato Blanching: For perfectly peeled tomatoes, score a small ‘X’ on the bottom of each tomato before dipping them into boiling water. Keep them submerged for just 30 seconds to one minute, or until the skin begins to loosen. Remove them promptly with a metal spoon and allow them to cool slightly. The skin should then be incredibly easy to peel away, ensuring a smooth salsa texture.
- Tomato Variety Matters: While we recommend a blend of about ½ Roma Tomatoes for body and ½ larger varieties like Big Boy or Celebrity for juiciness, don’t feel strictly bound by this. The type of tomato is quite lenient; use what you have readily available, what’s in season, or simply what you prefer in terms of flavor and sweetness. Ripe, fresh tomatoes are always key, regardless of variety.
- Adjusting the Heat: If you love a fiery kick, feel free to use more jalapeños than suggested, or swap them out for a hotter pepper. Serranos will offer a noticeably spicier profile, while a Habanero can bring intense heat and a fruity undertone, perfect for a robust hot sauce-like salsa. Always taste as you go, and remember that removing seeds and membranes from peppers will significantly reduce their heat.
- The Power of Fresh Lime Juice: A squeeze of fresh lime juice at the very end of the cooking process can brighten all the flavors in your salsa, adding a zesty tang that makes it truly pop. Start with a tablespoon and add more to taste.
- Freezing for Future Enjoyment: Our homemade salsa freezes exceptionally well! This is fantastic for meal prepping or making large batches when garden tomatoes are abundant. Simply cool the salsa completely, then transfer it to freezer-safe containers or bags. Thaw in the refrigerator when you’re ready to serve, and you’ll have delicious salsa ready in minutes.
- Speedy Salsa with Canned Tomatoes: For those busy days or when fresh tomatoes are out of season, a quick and delicious alternative is to use canned tomatoes. Substitute 4 (14.5 oz) cans of crushed tomatoes or drained diced tomatoes for the fresh ones. If using drained diced tomatoes, always reserve some of the liquid. You can add it back in gradually while blending to achieve your desired consistency, preventing the salsa from becoming too thick or too thin.
- Don’t Skip the Cooling: Allowing the salsa to cool completely before serving is not just about temperature; it’s vital for flavor development. As the salsa cools, the flavors continue to meld and deepen, resulting in a more harmonious and robust taste.
🛠 Recommended Products for Salsa Making
Having the right tools can make your salsa-making experience even smoother and more enjoyable. While many items are standard kitchen staples, a few key pieces of equipment can truly make a difference in preparing this recipe:
- Hand Blender (Immersion Blender): This is arguably the most valuable tool for achieving the perfect salsa consistency. It allows you to blend directly in the pot, minimizing mess and making it easy to control how chunky or smooth your salsa becomes with just a few pulses.
- Large Pot: A sturdy, generously sized pot is essential for blanching your tomatoes and then simmering all the ingredients together. Choose one with enough capacity to comfortably hold all the tomatoes and other vegetables without overflowing.
- Strainer (Colander) and Slotted Spoon: A good quality strainer or colander is necessary for quickly draining your blanched tomatoes, while a slotted spoon will help you safely remove them from the boiling water.
- Sharp Knife and Cutting Board: Essential for efficiently chopping your onions, garlic, and peppers. A sharp knife ensures clean cuts and speeds up prep time.
Investing in these quality tools will not only make preparing this homemade salsa a breeze but will also serve you well for countless other recipes!
😋 Share Your Salsa Success!
That is absolutely fantastic! We are so thrilled and grateful that you decided to give this Homemade Salsa Recipe a try. We pour our passion into creating recipes that bring joy and deliciousness to your kitchen, and hearing about your experiences is what truly makes it all worthwhile.
If you loved this restaurant-style salsa as much as we do, we would be incredibly appreciative if you could take a moment to leave a rating and share your thoughts in the comment section below. Your feedback is invaluable; it not only lets us know how we’re doing but also helps other home cooks decide if this is the perfect recipe for them. Your ratings and comments are a huge part of what helps our community grow and thrive!
Furthermore, if you enjoyed making this recipe and want to stay updated with more delicious creations, consider signing up for our email newsletter. You’ll receive fresh recipe ideas, cooking tips, and much more, delivered right to your inbox. And don’t forget to spread the salsa love by sharing this recipe on Pinterest with your friends and family!
Most of all, thank you for visiting Ramshackle Pantry. We hope to see you back for more culinary adventures soon!
Print
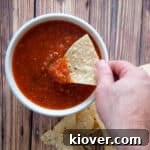
Best Homemade Salsa – Restaurant Style
5 Stars 4 Stars 3 Stars 2 Stars 1 Star
5 from 4 reviews
Author: Homemade Salsa Recipe
Prep Time: 15 minutes
Cook Time: 30 minutes
Total Time: 45 minutes
Yield: 2 quarts
Category: Dip
Method: Stewed
Cuisine: Mexican
Description
This vibrant, restaurant-style Homemade Salsa Recipe is an absolute game-changer for your kitchen. It’s incredibly easy to prepare and delivers an unparalleled burst of fresh, delicious flavor. This salsa has become a cherished go-to in our home, and we’re confident it will quickly become the same in yours!
Ingredients
Units
Scale
- 4 1/2 pounds Peeled, cored, and quartered Tomatoes (ideally a mix of 1/2 Roma for thickness and 1/2 Celebrity or Big Boy for juiciness)*
- 3/4 cup Onion, Chopped (yellow or white)
- 4 Garlic Cloves, peeled and finely minced
- 1/4 cup Jalapeño, chopped (adjust to taste for desired heat)
- 1/4 cup fresh Cilantro, chopped (optional, omit if disliked)
- 1/2 teaspoon Salt (or to taste)
- 1/2 teaspoon Sugar (helps balance acidity)
- 1/2 teaspoon Cumin (adds earthy depth)
- 1-2 tablespoons fresh Lime Juice (for brightness, adjust to taste)
Instructions
- Prepare Tomatoes: First, blanch your tomatoes by scoring a small ‘X’ on the bottom of each and dipping them in boiling water for 30 seconds to one minute, until the skins loosen. Remove and allow to cool slightly, then peel, core, and quarter them. Add the prepared tomatoes along with the chopped onion, peeled garlic cloves, chopped jalapeño, fresh cilantro, salt, sugar, cumin, and lime juice to a large pot.
- Initial Simmer: Bring all ingredients in the pot to a gentle simmer over medium-low heat. Cook for 15 minutes, stirring occasionally, to allow the flavors to meld and the vegetables to soften.
- Blend to Desired Consistency: Carefully use a hand blender (immersion blender) directly in the pot to blend the salsa to your desired consistency. For a chunky salsa, blend for just a few pulses. For a smoother, restaurant-style texture, blend for a bit longer until smooth. (Alternatively, you can carefully transfer batches to a regular blender and return to the pot.)
- Final Simmer: After blending, continue to simmer the salsa for another 15 minutes. This step further deepens the flavors and allows any excess liquid to cook off, resulting in a richer, more concentrated salsa.
- Cool and Serve: Remove the pot from the heat and allow the salsa to cool completely before serving. The flavors will continue to develop as it cools. Once chilled, serve with your favorite tortilla chips or as an accompaniment to any Mexican-inspired dish. Enjoy!
Notes
- For easy peeling, blanch tomatoes by dipping them in boiling water for 30 seconds to one minute. Remove with a metal spoon and let them cool until the skin is loose and easily peelable.
- We recommend using about ½ Roma Tomatoes for body and ½ larger, juicier varieties like Big Boy or Celebrity for the best balance, but feel free to use what you have or prefer!
- To make your salsa spicier, simply add more jalapeños or opt for hotter peppers like serranos or habaneros.
- This salsa freezes beautifully, making it perfect for meal prep or preserving a bountiful harvest.
- For a faster version, substitute 4 (14.5 oz) cans of crushed tomatoes or drained diced tomatoes. If using drained tomatoes, reserve some liquid and add back in for your desired consistency.